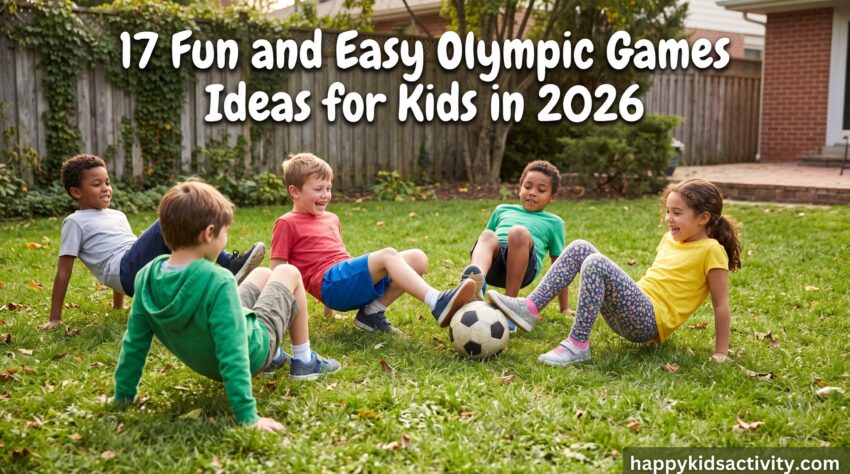
It was day three of summer break, and someone was lying face down on the rug announcing with real conviction that there was nothing to do in this entire house. We ran our first family Olympics at the cottage that week. Two pool noodles, a roll of painter’s tape, and no plan past the first event.
The first ten minutes were rough. No kid wants to put down a screen for a game a parent invented thirty seconds ago. What turned it around was not the games. It was the stopwatch and the clipboard. The moment I started writing scores down like they counted, they wanted a brand new event every evening.
One note on timing, since you are reading this in the 2026 to 2027 school year: the Milano Cortina Winter Games wrapped up back in February, and the next Summer Games are in Los Angeles in 2028. You do not have to wait for either. These events work for a fall field day, a birthday party, a long weekend, or a Tuesday when everyone is feral.
Below you will find all 17 events with the ages each one honestly works for, a realistic time estimate including cleanup, how messy it gets, how much supervision it needs, and what tends to go sideways the first time you try it.
Why You Will Love These Olympic Games
Kids will run for twenty minutes straight if you put a stopwatch on it. That is the entire trick. Frame the same running as “exercise” and you get complaints, frame it as the 30 meter final and you get three volunteers.
Nothing here needs real athletic equipment. Pool noodles, plastic cups, paper plates, spoons, an old pair of pantyhose, and sidewalk chalk cover almost every event on this list.
The other reason I keep coming back to a backyard Olympics is that it stretches. A 4 year old and a 10 year old can compete in the same event if you move the start lines, which is not true of most organized sports.
Being honest about who this is not for: if your kid melts down over losing, run the team or personal best scoring in the next section before you set out a single cone. And if you have one kid who is sensory sensitive, the whistle, the shouting, and the cold water balloons can be too much all at once. Pick the three quietest events (balance beam, straw javelin, ring toss) and skip the rest.
How to Run a Backyard Olympics for Kids Without Losing Your Whole Saturday
This is the part most lists skip, and it is the part that decides whether the afternoon works.
How many events you actually need
- Ages 3 to 5: three or four events, about 45 minutes total. They are finished long before you are.
- Ages 6 to 9: five or six events, about 90 minutes with breaks.
- Ages 10 and up: seven events, and they will lobby for more if there are medals involved.
More events is the classic first-timer mistake. I have set up nine and used five.
A 2 hour block that works: opening ceremony (5 minutes), two events (12 minutes each), water break (5 minutes), two events (12 minutes each), water break, one last event, medal ceremony (10 minutes). That leaves slack, and you will need it.
Scoring so the day does not end in tears
Pick one of these before you start, not halfway through:
- Team scoring. Two mixed-age teams, points per event, running total on a clipboard. Best for six or more kids because no single child is ever the one who lost.
- Personal best. Every kid competes against their own first attempt. This is the only fair option when the age gap is wide, and it is the one I use with siblings.
- Everyone medals. Gold for first, plus a named award for everyone else (Most Determined, Best Cheering, Most Improved). Sounds cheesy. Works perfectly under age 7.
Practical note: The arguments are almost never about the games. They are about the scoring. Announce the rules out loud before the first event, write them on the clipboard, and refuse to renegotiate mid-meet.
Mixed ages, handled properly
Move the line, not the rules. Older kids throw from further back, run the longer lane, or do the hard variation (backward on the balance beam, one hand behind the back). Younger kids get a head start measured in steps, not seconds, because a 5 year old cannot picture three seconds.
Past roughly a three year age gap, stop running head-to-head races. Pair a big kid with a little kid as a team instead. It ends the crying and the older ones take the coaching role seriously.
If you only have two or three kids
Skip head-to-head entirely and run it as a record meet. Write each kid’s distance or time on paper, tape it to the fridge, and let them try to beat it the next day. Parents competing helps more than you would think, mostly because kids love watching an adult lose at pantyhose bowling.
Master supply list, and what it costs
Buy for the whole day at once:
- 4 to 6 pool noodles (around $1.25 each at Dollar Tree in season)
- 1 hula hoop per kid
- A pack of plastic cups and a pack of paper plates
- Sidewalk chalk, painter’s tape, one Sharpie
- Spoons and plastic eggs (after-Easter clearance is the cheap moment)
- Water balloons, or a pack of kitchen sponges instead
- A soccer ball or beach ball, a few beach towels
- A stopwatch (your phone) and a clipboard
Free version: shoes for cones, socks rolled into balls, cereal boxes as bowling targets, chalk lines instead of anything you build. Everything below lists its own swap.
Olympic Games Ideas for Kids at a Glance
Scan this, pick five, close the tab. Times include setup and cleanup.
| Event | Best ages | Mess level | Space needed | Total time |
| 1. Crab Soccer | 5 to 12 | Low (grass stains) | Medium yard | 20 min |
| 2. Javelin Throw | 4 to 12 | None | Long clear lane | 15 min |
| 3. Pantyhose Bowling | 6 to 12 | Low | Patio or driveway | 15 min |
| 4. Cookie Face Race | 4 and up | Crumbs only | Anywhere | 10 min |
| 5. Tunnel Relay | 5 to 12 (needs 8 kids) | Low (knees) | Medium yard | 15 min |
| 6. Egg and Spoon Race | 3 to 10 | None with plastic eggs | Small | 15 min |
| 7. Frisbee Bowling | 5 to 13 | Low | Driveway | 15 min |
| 8. Backyard Target Shooting | 6 to 13 | Soaked if water | Small | 20 min |
| 9. DIY Balance Beam | 3 to 8 | None | Small flat grass | 20 min |
| 10. Straw Javelin | 4 to 10 | None | Indoors works | 15 min |
| 11. Hula Hoop Marathon | 7 to 13 | None | Medium yard | 15 min |
| 12. Sprint 100m Dash | 3 and up | None | Longest lane you have | 20 min |
| 13. Water Balloon Volleyball | 6 to 13 | Soaked | Medium yard | 40 min plus filling |
| 14. Olympic Hoop Ring Toss | 3 to 10 | None | Small | 20 min |
| 15. Equestrian Events | 4 to 10 | Low | Medium yard | 30 min |
| 16. Olympic Rings Ball Toss | 2 to 8 | Medium if you paint | Small | 40 min (paint drying) |
| 17. Hurdle Run | 4 to 12 | None | Long lane | 25 min |
If you are planning ahead for a party or a field day, save this table now. You will want the mess column at 8am on the morning of, not tonight.
Safety Rules for Backyard Olympic Games That Are Not Optional
Every one of these games is safe when it is set up properly. Several of them are not safe when they are set up the obvious way, which is why this section exists.
- Never run rope, string, or cord across a finish line. Use crepe paper streamers or toilet paper, which snap on contact. A taut line at chest height in a sprint lane can cause a serious neck injury.
- Nothing pointed goes into the ground in a play area. Wooden skewers and stakes snap and leave sharp stubs at shin height, right where kids fall and run barefoot. Rest crossbars on upturned buckets or flower pots instead.
- Nothing tight goes around a neck. Pantyhose sits on the crown of the head only. Keep hanging strings short so they cannot form a loop.
- Adults do the cutting, hammering, and boiling. Kids do the throwing, running, and decorating. Box cutters and scissors on cardboard are an adult job, every time.
- Balloons carry a warning label for a reason. Broken and uninflated latex pieces are a choking and suffocation risk for children under 8. Sweep every scrap before the dogs and toddlers get to the grass, and ask about latex allergies before you fill a single balloon.
- Foam dart blasters need eye protection. The packaging tells you not to aim at eyes or faces, and kids will absolutely aim at each other within three minutes if nobody is standing there.
- Food games mean allergy checks. Ask parents before a party, read the actual label, and have a non-food version ready.
- Heat is the hazard nobody plans for. Shade, a water break every two events, sunscreen reapplied after the water events, and an early exit if anyone gets a headache or stops sweating.
- Check the lawn first. Sprinkler heads, hose bibs, dog holes, and sticks cause more injuries at these things than any of the games do.
17 Backyard Olympic Games for Kids
Below are 17 exciting events to include in your backyard Olympics. Every single game is structured with the necessary materials, clear setup instructions, and simple playing rules to ensure your event runs smoothly.
1. Crab Soccer
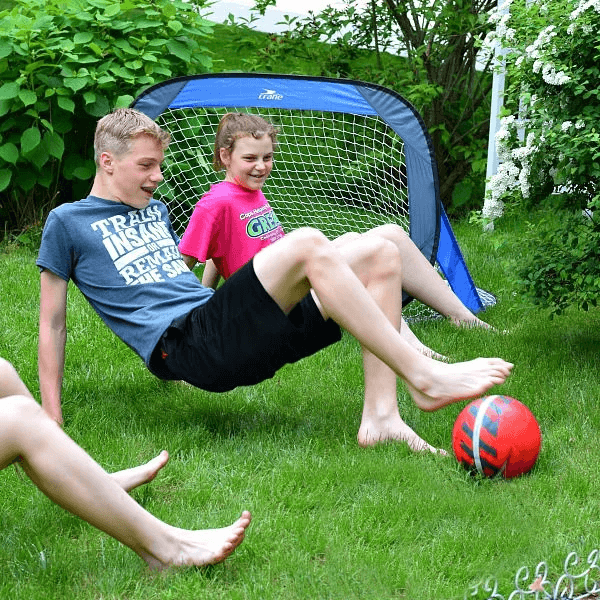
Ages: 5 to 12 (sweet spot 7 to 11) · Time: 5 min setup, 12 min play, 2 min cleanup · Mess: Low, grass stains on palms and shorts · Supervision: Referee the whole time
Modified soccer played entirely in the crab position. It is funnier to watch than it is to play, and it works well as a game for kids at birthday parties and youth groups.
Materials Needed:
- Two goals. Cones work, so do two water bottles per post, so do four shoes (free).
- One soft kickball or beach ball. For kids under 7, use the beach ball. It moves slowly enough that they can actually reach it from the crab position.
Setting Up for Crab Soccer:
- Mark two goal areas at either end of the yard, about 15 to 20 feet on each side of the center line.
- Walk the field first and pull out sticks, rocks, and anything sharp. Palms take the whole game.
- Mark the sidelines with chalk, rope, or a garden hose.
- Split the kids into two even teams, mixing ages if you can.
Playing Crab Soccer:
- Teams start on their own side of the center line.
- Players sit down, bend their knees, lift their hips, and move on hands and feet only.
- Anyone touching, chasing, or defending the ball has to be in crab position.
- Feet only for kicking, blocking, and passing.
- First team to five goals wins, or play two short halves.
Heads up: Wrists and shoulders give out long before the kids get bored, so run three minute halves with real breaks. Every kid will stand up within the first thirty seconds. Make standing a turnover instead of a disqualification or the game stops constantly. Grass only, never pavement, because palms shred and hot asphalt burns. Skip it for any kid with a wrist injury.
2. Javelin Throw
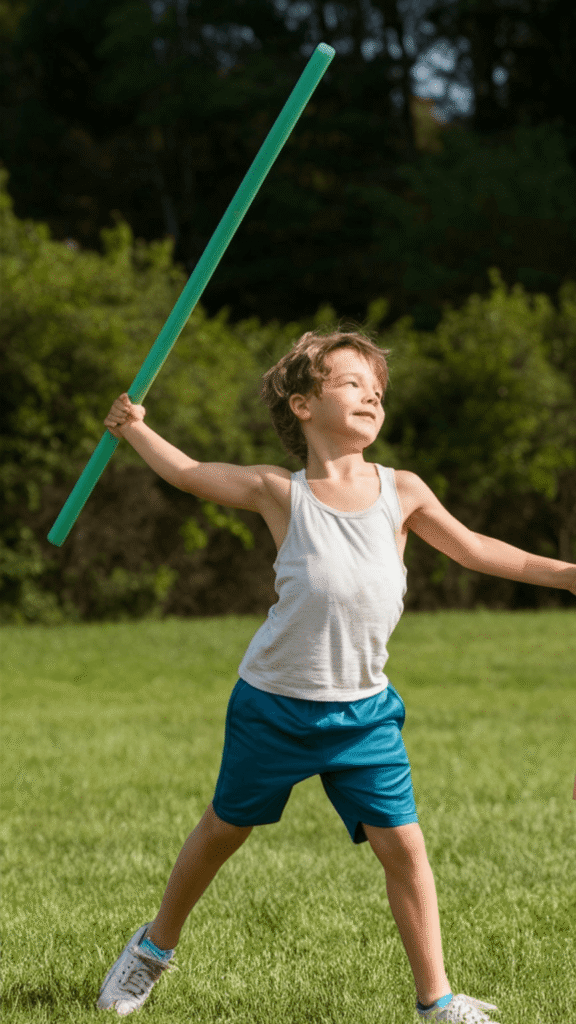
Ages: 4 to 12 · Time: 5 min setup, 10 min play, 1 min cleanup · Mess: None · Supervision: Hands-on, one thrower at a time
Pool noodle javelins, thrown for distance. This is the event little kids ask to repeat, because a noodle is light enough that a 4 year old gets a real throw.
Materials Needed:
- 3 or 4 long pool noodles (around $1.25 each at Dollar Tree during summer, and they last for years of pool noodle games). Free swap: roll a newspaper or magazine tight and tape it into a tube.
- Chalk or painter’s tape for distance markers.
- Skip the broom handle. See the safety note below.
Setting Up for Javelin Throw:
- Pick a long clear lane with no windows, cars, or spectators anywhere in the throwing path.
- Chalk a firm start line nobody crosses.
- Mark distances every 5 feet and write the numbers big enough that kids can score their own throws. They love this part more than the throwing.
Playing Javelin Throw:
- One thrower at a time, everyone else behind the start line.
- A short run-up is fine, but the noodle leaves the hand before the foot crosses the line.
- Throw overhand.
- Measure to the point where the tip first hits the ground. Longest throw takes gold.
Tip: A bare pool noodle tumbles end over end and lands about six feet away, which deflates everyone. Push a tennis ball into the front end or tape a wad of duct tape inside the tip so it flies nose-first. Distances roughly double.
Safety: Do not slide a broom handle inside the noodle for kids. That turns a foam toy into a weighted spear with a hard core, and it can break a tooth or an eye socket if a throw goes wrong.
3. Pantyhose Bowling

Ages: 6 to 12, not younger · Time: 5 min setup, 10 min play · Mess: Low · Supervision: Hands-on, an adult within arm’s reach of the swinging kid
A tennis ball in the leg of a pair of pantyhose, worn on the head, swung at bottles. This is the event the grandparents film.
Materials Needed:
- One clean pair of pantyhose (an old pair, or a thrift store pair for a dollar).
- One tennis ball. A tennis ball, not a baseball.
- 5 or 6 small empty plastic bottles straight out of the recycling bin (free).
Setting Up for Pantyhose Bowling:
- Set the bottles in a triangle on flat ground, a patio or driveway rather than grass.
- Drop the tennis ball all the way into the toe of one leg.
- Cut the elastic waistband so it cannot cinch, then rest it on the crown of the child’s head, well above the eyebrows and nowhere near the neck.
- Clear a six foot circle around them. That ball swings much wider than parents expect.
Playing Pantyhose Bowling:
- The player stands a few feet back from the bottles, hands behind their back.
- They swing their head and torso to build momentum in the hanging leg.
- Knock over as many bottles as possible.
- One minute on the clock. Most bottles down wins.
Safety: Two hard rules. Nothing tight goes around a child’s neck, so the hose sits on top of the head and an adult stays right there. And nothing heavier than a tennis ball goes in the leg, because a baseball swinging at head height around other kids is a trip to urgent care waiting to happen. Take glasses off first. If the hose slides over their eyes they will keep swinging blind, so stop them and reset.
Gentler version: For younger or nervous kids, tie a tube sock with a tennis ball inside to a belt loop and let them knock the bottles down with hip swings. Same laughs, nothing near the face.
4. Cookie Face Race
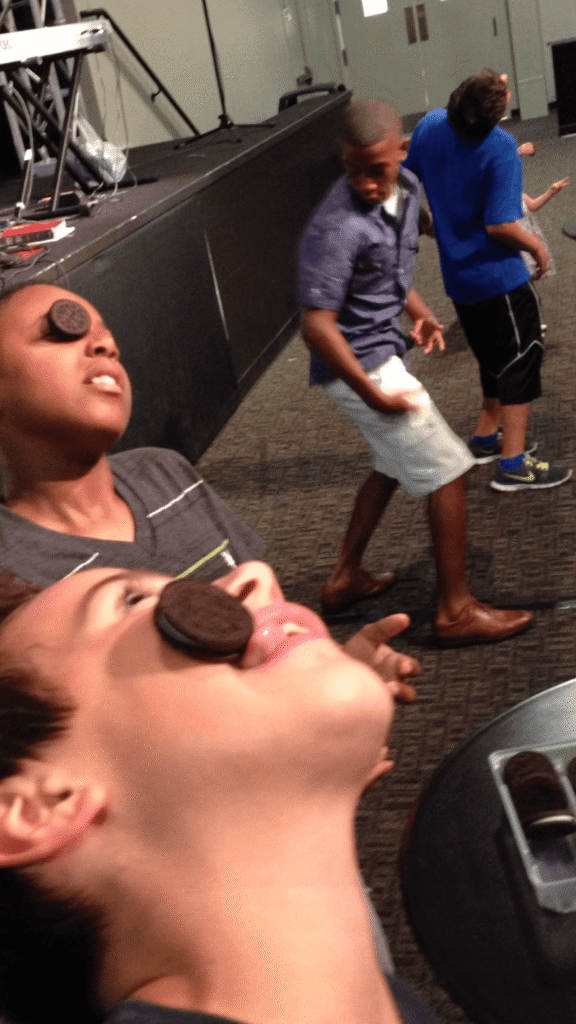
Ages: 4 and up with an adult watching.Time: 2 min setup, 5 min play · Mess: Crumbs
Supervision: Hands-on the entire time, food is involved
A cookie on the forehead, moved to the mouth using only face muscles. It is a stationary event, which makes it a good breather between two running events. Also a reliable party game at reunions.
Materials Needed:
- A box of flat round cookies. Oreos hold together best. Chips Ahoy break at the eyebrow.
- Non-food alternative: a clean plastic bottle cap or a poker chip, moved to the chin instead of the mouth.
- Wet wipes and a cup of water within reach.
Setting Up for Cookie Face Race:
- Check allergies first, out loud, with the actual box in your hand. Read the label for wheat, soy, dairy, and nut cross-contamination warnings.
- Wipe every forehead. Sunscreen makes the cookie skate straight off, which nobody figures out until the third round.
- Kids sit or stand in a line, tilt their heads back, and place the cookie flat in the middle of the forehead.
Playing Cookie Face Race:
- On three, they use eyebrows, nose scrunches, and cheek stretches to walk the cookie down toward the mouth.
- No hands. Hands means starting over.
- If it falls, it goes back on the forehead from the top.
- First kid to get it into their mouth and take a bite wins the event.
Safety: Laughing hard with food in the mouth and the head tipped back is a real choking setup. One adult watches mouths and nothing else, no phone in hand. Skip whole cookies for kids under 4, break them in half instead. A cookie that lands in the grass gets thrown out, not eaten, no matter how loudly they argue. Use the bottle cap version for any kid with a food allergy so they are still in the event rather than watching it.
5. Tunnel Relay
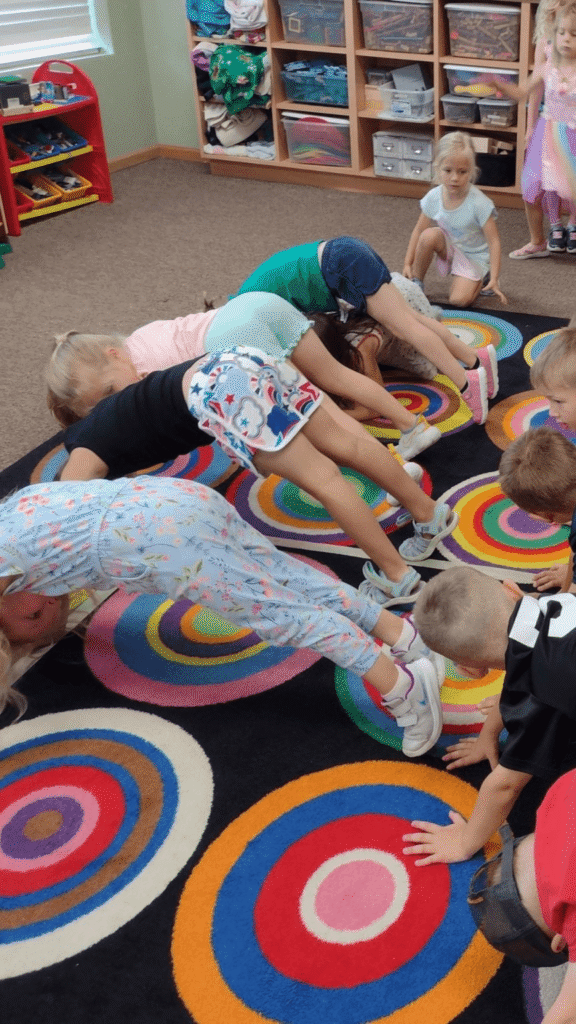
Ages: 5 to 12 · Time: 3 min setup, 12 min play · Mess: Low, grass stains on knees · Supervision: Moderate, watch for hands getting stepped on
Kids crawl through a tunnel of their teammates’ legs, sprint to a cone, and take their place at the front. It wears them out faster than anything else on this list.
Materials Needed:
- Two cones or landmarks. Upside-down buckets, backpacks, or shoes all work (free).
- Painter’s tape and a Sharpie for numbering shirts. Worth it.
Setting Up for Tunnel Relay:
- You need at least eight kids, four per team. With three per side the tunnel is two legs long and the whole thing falls flat.
- Line each team up single file, legs spread wide to form the tunnel.
- Put a turning cone about 20 feet in front of each line.
- Tape a number on each kid’s shirt in crawl order. This ends the “it was my turn” argument before it starts.
Playing Tunnel Relay:
- On the whistle, the kid at the back drops down and crawls through the tunnel.
- They pop out at the front, sprint to the cone, go around it, and run back.
- They take the front spot, legs apart, and yell “Go!” for the next kid.
- First team to cycle everyone through wins.
Heads up: Kids sit down mid-crawl, every single time, usually because they are laughing. Remind the tunnel to stay standing. Long pants or leggings save knees, and grass or a soft surface is non-negotiable, because gravel and hot pavement end this event immediately. Skip it if you have fewer than eight kids and run the record meet version of the sprint instead.
6. Egg and Spoon Race
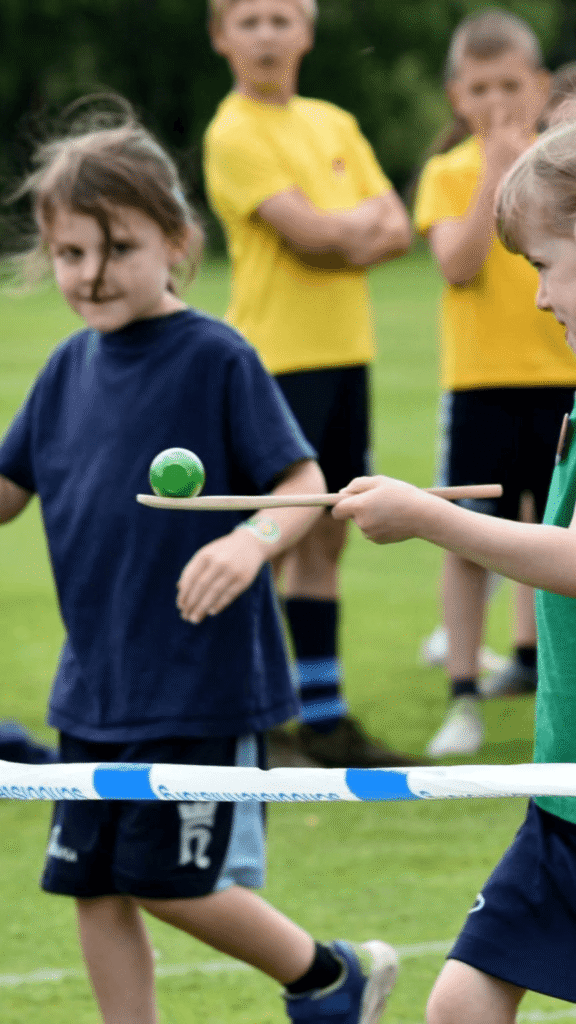
Ages: 3 to 10 · Time: 3 min setup, 12 min play · Mess: None with plastic eggs, significant with raw · Supervision: Low, check in every couple of minutes
The old classic, and the one event where the fastest kid does not automatically win. That alone makes it worth including.
Materials Needed:
- One spoon per kid. A serving spoon for 3 and 4 year olds, a tablespoon for everyone else.
- Plastic Easter eggs (after-Easter clearance is when to buy them). Free swap: a lime, a small potato, or a golf ball.
- Chalk or a hose for the start and finish lines.
Setting Up for Egg and Spoon Race:
- Mark start and finish about 30 feet apart on flat grass.
- Hand out one spoon and one egg each.
- Line everyone up holding the spoon by the handle, one hand only.
Playing Egg and Spoon Race:
- Egg goes in the bowl of the spoon, free hand behind the back.
- On the signal, walk fast toward the finish. Running usually loses.
- Drop it and you return to the start line and go again.
- No fingers on the egg, no second hand for balance.
- First across with the egg still on the spoon wins.
Tip: Hollow plastic eggs are so light that any breeze rolls them off the spoon, and the race turns into a restart loop. A lime or a small potato sits in the spoon beautifully and still rolls off if a kid gets sloppy. This is the single best swap in the whole article.
Safety: Use plastic or hard-boiled, and if you go hard-boiled do not let anyone eat them afterwards. Eggs that sat in the sun in a spoon for an hour are not food anymore. Raw eggs mean salmonella on hands plus a slick patch on the grass that the next event slips on. And never run the version where kids hold the spoon in their mouth, which shows up in a lot of party lists and is a straight choking hazard.
7. Frisbee Bowling
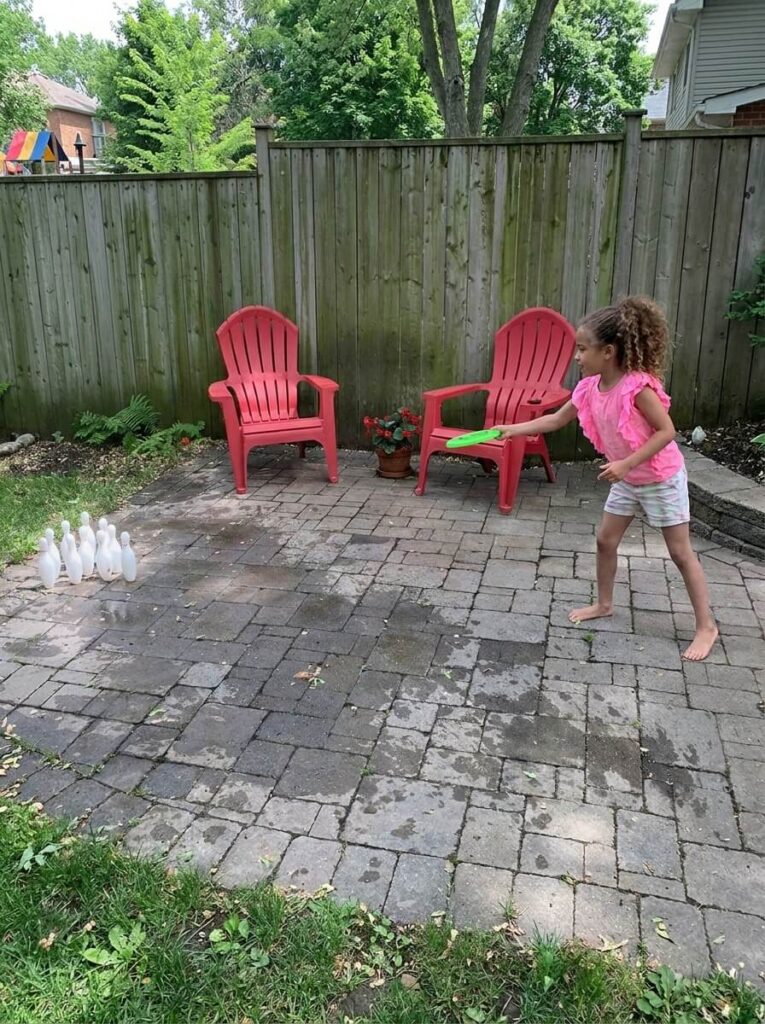
Ages: 5 to 13 · Time: 5 min setup, 12 min play · Mess: Low · Supervision: Moderate, discs fly sideways
Disc golf accuracy plus the satisfying crash of bowling. Best played on a driveway where a stack of cups makes a proper racket when it goes down.
Materials Needed:
- One or two frisbees. A soft foam disc is easier for small hands and much kinder to faces than a hard plastic Wham-O.
- 10 plastic cups, or empty cereal boxes, or cardboard tubes (free from the recycling).
- Tape or chalk for the throwing line.
Setting Up for Frisbee Bowling:
- Mark a throwing line, then build a pyramid 15 to 20 feet away (four cups, three, two, one).
- On any kind of breezy day, swap the cups for small empty water bottles with about an inch of water in each. They stay standing in wind and still tip when hit.
- Keep everyone waiting behind the thrower, never off to the side.
Playing Frisbee Bowling:
- Each player gets two throws per turn, like two attempts at a frame.
- Count cups knocked completely out of position.
- Reset the pyramid, next player up.
- Highest total after three rounds wins.
Heads up: Frisbees curve hard left or right for kids under about 7, so half their throws will not go near the pyramid. Let the little ones roll the disc along the ground like a wheel instead, which is still satisfying and knocks plenty of cups down. The pyramid also takes longer to rebuild than the turn takes to play, so give one kid the job of “pin setter” and rotate it.
8. Backyard Target Shooting
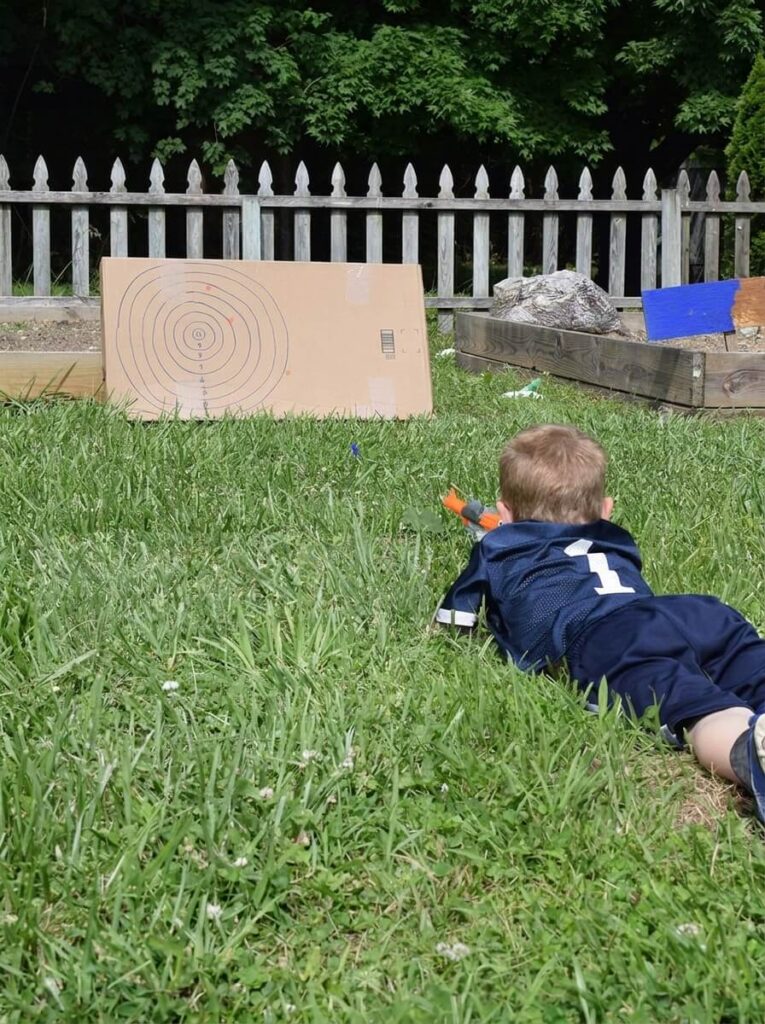
Ages: 6 to 13 with foam blasters, 4 and up with water squirters · Time: 10 min setup, 10 min play · Mess: Soaked if you use water · Supervision: Hands-on, no exceptions
Hanging paper plate targets with point values. Kids love this one and it is also the event most likely to go off the rails, so read the setup notes.
Materials Needed:
- Foam dart blasters, or squirt guns from Dollar Tree for younger kids and hot days.
- Safety glasses if you are using dart blasters.
- 5 paper plates, a Sharpie, and string.
- A low branch, fence, or clothesline to hang from.
Setting Up for Backyard Target Shooting:
- Draw a bullseye on each plate and write point values on them (10, 20, 30, 40, 50).
- Hang the plates at different heights and distances. Keep the strings short so no long loops form.
- Chalk a firm shooting line, and set it up so the targets face away from the house, the road, and any spectators.
- Load one blaster, not five. Hand it off between kids instead of arming everyone.
Playing Backyard Target Shooting:
- Each player gets a set number of darts or one tank of water.
- Shoot from behind the line at the swinging targets.
- Darts count as hits where they stick. With water, a hit is a plate that visibly spins or darkens.
- Add up the point values. Highest score wins.
Safety: Foam dart packaging says not to aim at eyes or faces for a reason, so safety glasses go on and the rule is stated out loud before the first shot. Kids will aim at each other within three minutes if an adult is not standing right there, which is exactly why only one blaster is loaded and the rest of the kids have jobs as scorekeepers. Collect every dart afterwards. Loose foam darts are a choking hazard for toddlers and dogs swallow them. With squirt guns, no face shots at close range.
9. DIY Balance Beam
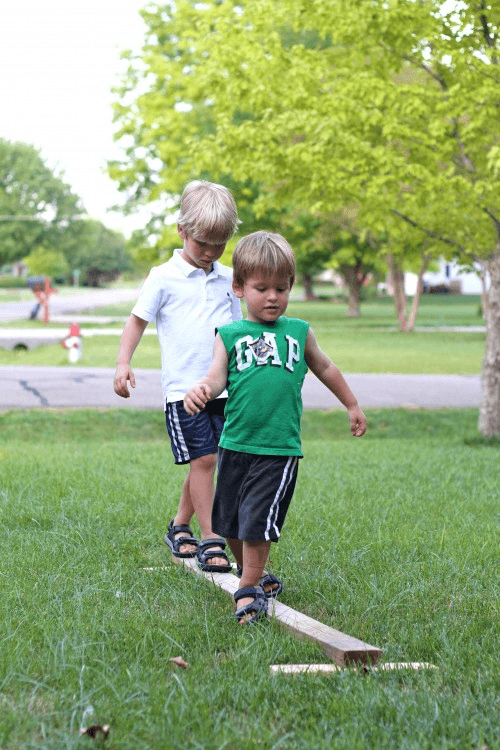
9. DIY Balance Beam
Ages: 3 to 8 · Time: 10 min setup, 10 min play · Mess: None · Supervision: Hold a hand for under 5, check in for older kids
No back handsprings in the yard, but a beam a few inches off the ground gives you real gymnastics scoring and it is the best event on this list for preschoolers.
Materials Needed:
- One 8 foot 2×4 (a few dollars at any home center, or a leftover offcut).
- Three bricks or scrap wood blocks as risers.
- Duct tape or Gorilla Tape to wrap the top if the wood is rough.
Setting Up for DIY Balance Beam:
- Find flat, level grass. Never set this up over concrete or patio stone.
- Put a riser under each end and, this is the part everyone misses, a third one under the middle. An 8 foot 2×4 on two supports bounces in the center, kids feel the wobble, and they quit.
- Keep the beam no more than three or four inches off the ground.
- Stand on it yourself first with your full weight. If it shifts, rebuild it.
- Wrap the walking surface in tape if the lumber is splintery. Bare feet find every splinter.
Playing DIY Balance Beam:
- Start at one end and walk to the other without stepping off.
- Shoes off for grip, or grippy socks. Slick sneaker soles are worse than bare feet.
- Harder versions for older kids: walk backward, sidestep, hop on one foot, add a slow spin in the middle.
- Parents judge out of 10 for balance and creativity. Hand the scorecard to a kid and let them announce it.
Safety: Keep the landing area clear on both sides, and stay within arm’s reach of anyone under 5. Watch fingers when kids help you move the beam, because a 2×4 landing on a hand across a brick is a pinch injury. Free version: a chalk line on the driveway, a strip of painter’s tape on the floor indoors, or the curb out front. For 3 year olds the tape line is honestly just as fun.
10. Straw Javelin
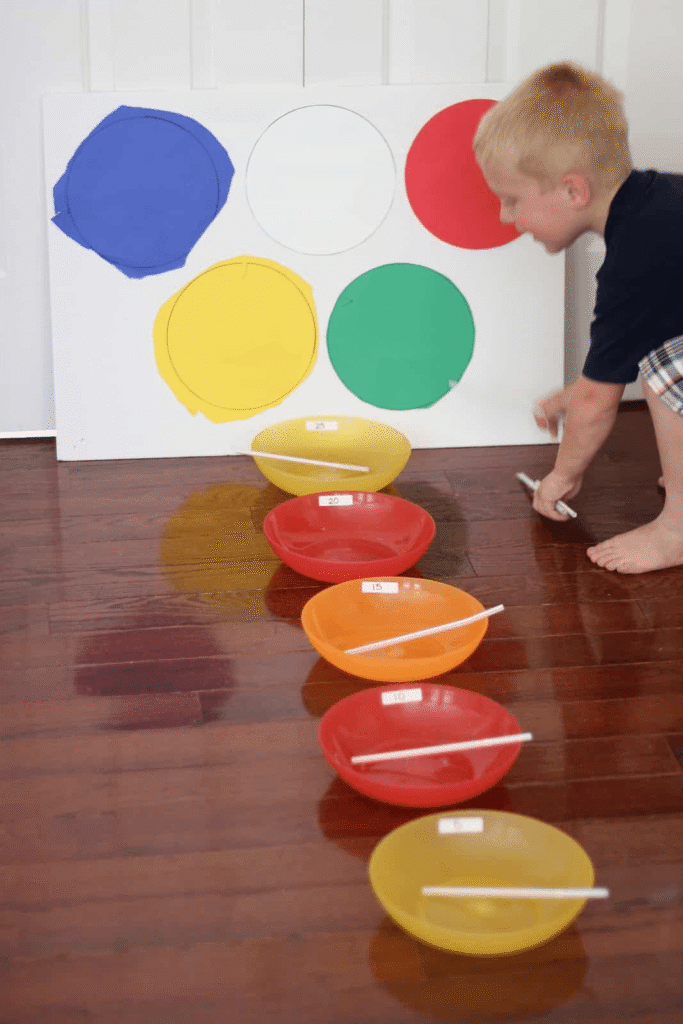
10. Straw Javelin
Ages: 4 to 10 · Time: 5 min setup, 10 min play · Mess: None · Supervision: Moderate
A tiny version of the javelin using drinking straws and bowls as scoring zones. It doubles as addition practice, which is why it stays in our rotation.
Materials Needed:
- Plastic or thick paper straws, one per kid with their name written on it.
- 5 bowls. Free swap: pots, pans, a laundry basket, or squares taped on the floor.
- Painter’s tape for the throwing marks.
Setting Up for Straw Javelin:
- Line the bowls up in a row, about 2 feet apart, moving away from the throwing spot.
- Assign points: 5 for the nearest, then 10, 15, 20, 25 for the furthest.
- Weight each bowl with a rock or a splash of water. Empty plastic bowls skate across grass and blow away.
- Tape a close throwing mark for little kids and a further one for older kids and adults.
Playing Straw Javelin:
- Stand on your own tape mark.
- Throw the straw like a small dart, or blow it out of a wider tube.
- Five straws per turn.
- Add up where they land. Let kids total their own scores out loud.
Heads up: Straws are so light that the smallest breeze makes this event pointless outdoors. That is a feature, not a bug, because it means this is your rainy day event. A garage, hallway, or basement is the better venue. Never blow a straw toward another person, since a straw at eye level from a few feet away can scratch a cornea, and keep straws single-user for hygiene. Relevant related activity or guide on happykidsactivity.com, ideally an indoor rainy day activities roundup.
11. Hula Hoop Marathon

Ages: 7 to 13 realistically · Time: 3 min setup, 12 min play · Mess: None · Supervision: Low
Keep the hoop spinning while walking to the finish line. Endurance, rhythm, and core strength, and a lot of dropped hoops.
Materials Needed:
- One hula hoop per kid, ideally a larger, heavier hoop rather than the thinnest dollar-store one.
- Cones or chalk for the course.
Setting Up for Hula Hoop Marathon:
- Pick a wide open area clear of trees and lawn furniture.
- Mark a start and a finish about 40 feet apart.
- Lay the hoops out at the start line.
Playing Hula Hoop Marathon:
- Everyone steps inside their hoop at the line.
- On the signal, start the hoop spinning at the waist.
- Once it is stable, walk forward while keeping it up.
- Drop it and you freeze, restart the spin where you stand, then keep going.
- First across the line with the hoop still spinning wins.
Heads up: Be honest with yourself about this one. Most kids under 7 cannot keep a hoop up at all, and thirty seconds of failing in front of everyone is not fun. The reason is usually the hoop, not the kid, because cheap thin hoops spin too fast to control. A bigger, heavier hoop rotates slowly and is far easier for beginners. You can also pull the plastic connector out of a cheap hoop, pour in a half cup of dry rice, and tape it shut with Gorilla Tape, an adult-only step with a small part that has to go straight back in.
Adapt down: little kids roll the hoop to the finish line like a wheel, spin it on one arm, or hop through hoops laid flat on the ground.
12. Sprint 100m Dash

Ages: 3 and up · Time: 10 min setup, 10 min play · Mess: None · Supervision: Moderate
The headline event. Almost no equipment, and the one every kid understands without an explanation.
Materials Needed:
- Chalk, tape, or a rope laid flat on the ground for lane lines.
- Crepe paper streamers or toilet paper for the finish line tape.
- A phone stopwatch.
Setting Up for Sprint 100m Dash:
- Measure the longest straight line you have. Most backyards give you 20 to 30 meters, so call it the 30 meter final and nobody minds.
- Mark the start clearly and set out lanes with chalk or cones so kids do not drift into each other.
- Leave at least 15 feet of open run-out room past the finish, pointed away from the road, the driveway, and the fence. Kids cannot stop on a line.
- Two adults hold the crepe paper across the finish.
Playing Sprint 100m Dash:
- Assign lanes and tell them to stay in them.
- “On your marks, get set, go.”
- Run through the finish, not to it.
- First to break the tape takes gold. Mixed ages: give younger kids a head start measured in steps rather than seconds.
Safety: Use crepe paper or toilet paper for the tape, never string, rope, or cord, because a taut line at chest height on a sprinting child can cause a serious neck injury. Walk the lane first for sprinkler heads, hose bibs, and dog holes, all of which roll ankles. Shoes stay on, since bare feet on grass at full speed is how toenails get torn.
13. Water Balloon Volleyball
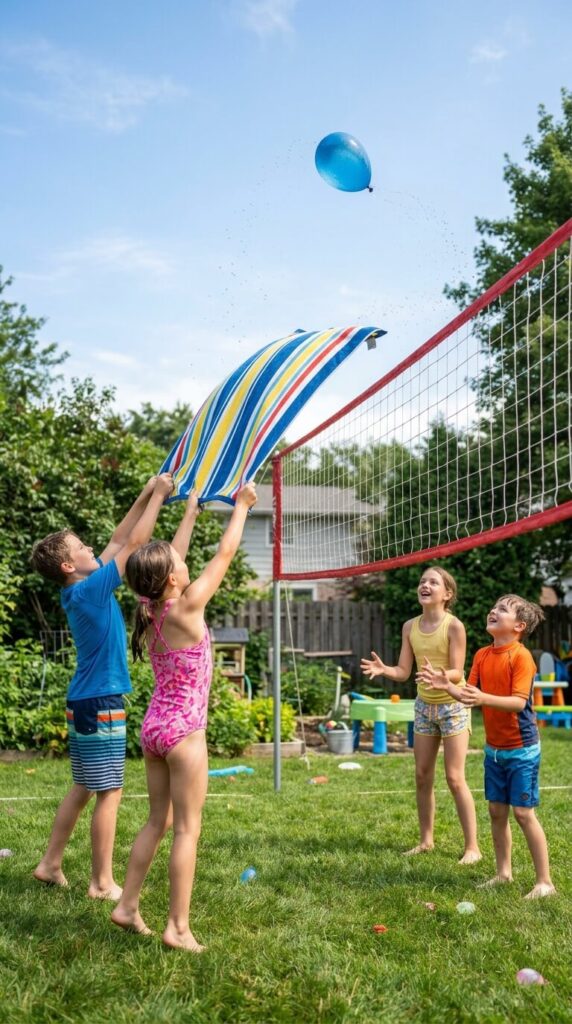
13. Water Balloon Volleyball
Ages: 6 to 13 · Time: 25 to 40 min filling balloons, 15 min play, 10 min cleanup · Mess: Everyone soaked · Supervision: Moderate, plus a mandatory scrap sweep
Pairs launch a water balloon over a net using a beach towel as a trampoline. It is the best event on this list for a hot summer day, and the one with the longest prep time by far.
Materials Needed:
- A volleyball or badminton net. Free swap: a rope between two trees with an old bedsheet pegged over it.
- One beach towel per pair.
- A lot of filled water balloons. Bunch O Balloons fills dozens at once and saves your fingers.
- Two buckets to hold them.
- Sponge swap: cut kitchen sponges into strips, soak them in a bucket, and use those instead. They never pop, there is nothing to clean up, and you can reuse them next weekend.
Setting Up for Water Balloon Volleyball:
- Set the net up in the middle of the yard, away from anything hard a running kid could hit.
- Mark the sidelines with hoses or chalk.
- Split into teams, then pair kids off within each team, matching heights. A tall kid and a short kid cannot keep a towel level.
- Fill the balloons only about two thirds full. Full balloons burst on the first launch, and two thirds bounce.
Playing Water Balloon Volleyball:
- Each pair holds the four corners of their towel tight.
- To serve, put a balloon in the middle, dip the towel, then pull it taut together to launch it over the net.
- The receiving pair runs to get their towel underneath and catch it without popping it.
- Catch it, launch it straight back.
- A point goes to the serving team if the balloon pops on the other side or lands in bounds untouched. Out of bounds hands the serve over. Play to 15.
Practical note: Filling the balloons takes longer than the game lasts. Fill them the night before into a cooler, or recruit the kids to fill them as their own pre-event, otherwise you will spend forty minutes at the tap while everyone loses interest. Then before anyone goes inside, run a scrap patrol with a bucket. Broken latex pieces are a choking and suffocation risk for children under 8, which is exactly why balloon bags carry that warning label, and dogs will eat them off the lawn.
Safety: Ask about latex allergies before you fill anything, and use the sponge version if there is any doubt. Wet grass gets slick fast, so no shoes with hard soles and no running behind the net line.
14. Olympic Hoop Ring Toss

Ages: 3 to 10 · Time: 10 min setup, 10 min play · Mess: None · Supervision: Low to moderate
Carnival ring toss with Olympic point values. Quiet, easy, and it works for a 3 year old and a 10 year old at the same time, which few of these do.
Materials Needed:
- 4 or 5 rings. Small plastic hoops work, but paper plates with the centers cut out are the right size for kids and they are free.
- 4 or 5 uprights: tall cones, PVC pipe stood in a bucket of sand, or 2 liter bottles with a few inches of sand in the bottom.
- A Sharpie for point values.
Setting Up for Olympic Hoop Ring Toss:
- Stand the uprights at different distances from the throwing line, spread out sideways as well as forward.
- Write point values on each: 10 for the closest, up to 50 for the furthest.
- Set two throwing lines, one close for little kids and one further back for older ones.
Playing Olympic Hoop Ring Toss:
- Stand behind your line with all the rings.
- Toss them one at a time, aiming to drop a ring over an upright.
- It only counts if the ring settles flat with the upright inside it.
- Add up the points. Highest score wins.
Safety: Do not hammer pointed wooden stakes into a lawn where kids are running and playing barefoot. Weighted bottles or cones do the same job with no puncture risk, and there is nothing left in the grass afterwards to find with a foot or a lawnmower. Full-size hula hoops also make this too easy to be interesting, so cut down to plate-sized rings and move the lines back instead.
15. Equestrian Events

Ages: 4 to 10 · Time: 15 min setup including horse building, 15 min play · Mess: Low · Supervision: Moderate
Show jumping on pool noodle horses. The horse building is half the fun and the kids should do that part themselves.
Materials Needed:
- One pool noodle per kid.
- Gorilla Tape or duct tape, plus string for reins. Not scotch tape, which lasts about three riders.
- Soft hurdles: pool noodles resting on cups, rolled towels, sofa cushions, or empty boxes.
Setting Up for Equestrian Events:
- Fold the top 10 inches of a noodle down against itself and tape it tight to make a head. Add string reins.
- Build the course with hurdles at or below knee height for the youngest rider in the group.
- Mark a clear route with a start and finish.
- Re-tape the horse heads between riders. They unfold, and it is faster to fix it than to hear about it.
Playing Equestrian Events:
- Riders “mount” by putting the straight end of the noodle between their legs.
- On the whistle, gallop the course.
- Jump every hurdle while keeping the horse between the legs.
- Knock a hurdle over and take a 3 second penalty.
- Fastest time after penalties is the champion.
Safety: No step stools, buckets, or anything rigid as a hurdle. Kids clip hurdles constantly and a hard edge means a bruised shin at best. Soft crossbars only, and grass rather than pavement, because they will trip while holding a noodle between their knees. Adapt down: for 4 and 5 year olds, drop the jumping entirely and weave around cones instead. They still get the horse and the stopwatch, which is all they wanted.
Playing Equestrian Events:
-
The children must “mount” their noodle horses by placing the straight end between their legs.
-
On the whistle, the riders gallop through the designated course.
-
They must physically jump over every hurdle on the track while keeping their horse between their legs.
-
If a rider knocks over a hurdle, a time penalty of 3 seconds is added to their final time.
-
Use a stopwatch to time each competitor. The rider who completes the course with the fastest time (after penalties) is the equestrian champion.
16. Olympic Rings Ball Toss
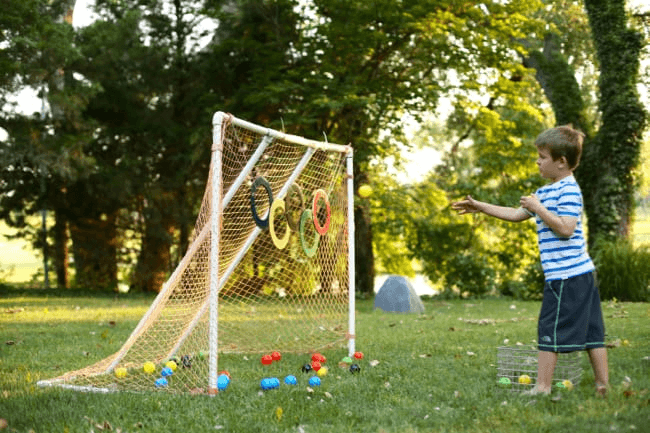
Ages: 2 to 8 · Time: 20 to 30 min setup with paint drying, 10 min play · Mess: Medium if you paint · Supervision: Moderate
Five hanging rings in the Olympic colors and a bucket of balls. This is the toddler event, and older kids stay interested if you call out colors.
Materials Needed:
- Cardboard from a delivery box, cut into five 10 inch rings.
- Crayola washable paint in blue, yellow, black, green, and red. Faster swap: colored duct tape or wide markers, which skips the drying time entirely.
- String or zip ties.
- A soccer net, fence, or sturdy branch to hang from.
- Ball pit balls, or rolled up socks (free, and socks do not roll into the neighbor’s yard).
Setting Up for Olympic Rings Ball Toss:
- An adult cuts the cardboard. Box cutters and thick cardboard are not a kid job.
- Kids paint or tape the rings in the five colors. If you paint, do this the morning of, since damp paint plus a thrown ball equals a red streak on someone’s shirt.
- Hang each ring with two short strings rather than one, so it hangs flat instead of spinning sideways.
- Keep every string short. Long hanging loops near small children are a strangulation risk.
- Set a close throwing line and a far one.
Playing Olympic Rings Ball Toss:
- Throw the balls through the ring openings.
- For toddlers, any ring counts, and honestly hitting the cardboard counts.
- For older kids, call a color and only that ring scores.
- Ten throws each, count the makes.
Heads up: Cardboard turns to mush in dew or rain, so bring the rings inside overnight or you are rebuilding them. If you have kids under 3 around, use ball pit balls or socks rather than small bouncy balls, which are a choking hazard.
17. Hurdle Run
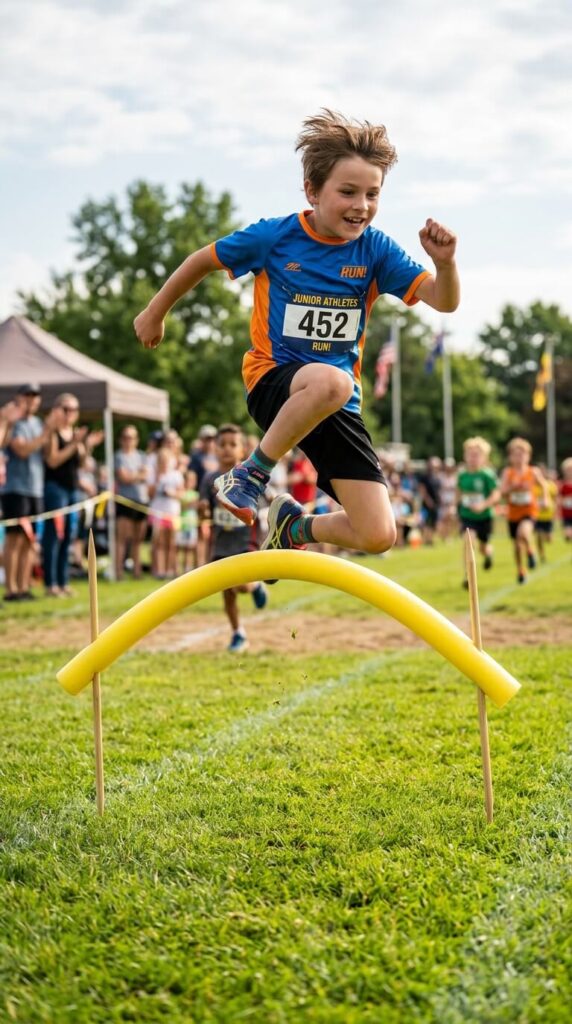
Ages: 4 to 12 · Time: 15 min setup, 10 min play · Mess: None · Supervision: Moderate
Foam hurdles you can set at any height. Built the right way this is one of the safest events here. Built the way most tutorials describe it, it is the most dangerous.
Materials Needed:
- 3 or 4 pool noodles.
- Two upturned buckets, flower pots, or stacks of plastic cups per hurdle. Anything that holds a noodle at knee height without being anchored.
- Chalk for the lane.
Setting Up for Hurdle Run:
- Plan a straight lane with at least 10 feet of clear run-up before the first hurdle.
- Rest a noodle across two upturned buckets. Nothing gets driven into the ground.
- Space the hurdles 4 to 6 feet apart for little kids and further for older ones. Too close together and they cannot get a stride in between.
- Start at mid-shin height and raise it only if they clear it easily.
- Push the crossbar with one hand. If it does not fall off instantly, rebuild it.
Playing Hurdle Run:
- Runner takes their mark.
- On the signal they sprint the lane and leap each hurdle.
- If they clip a noodle it falls harmlessly. No penalty for young kids, 2 seconds for older ones.
- Time each runner. Fastest clean run wins.
Practical note: A lot of DIY hurdle instructions tell you to hammer wooden skewers into the lawn and slide the noodle over them. Do not do that. The noodle pops off exactly as promised, and what it leaves behind is two pointed sticks at shin height in the middle of a running lane, with kids sprinting at them and barefoot kids walking the yard for the rest of the day. Buckets cost nothing and there is nothing left in the grass afterwards.
Common Mistakes at Your First Backyard Olympics
- Setting everything up before the kids come outside. They watch you build for forty minutes, and by the first whistle the novelty is gone. Set up two events, then let them help build the rest between rounds. The building is part of the activity.
- Planning nine events. You will use five. Have two spares in your back pocket and stop when the energy drops rather than pushing through the schedule.
- Announcing the scoring after event one. By then somebody has already decided the rules are unfair. Say it out loud, write it on the clipboard, and stick to it.
- Saving all the medals for the end. Hand them out event by event. Half the little kids will have drifted off to the sandbox by the closing ceremony, and the medal means more thirty seconds after they win than an hour later.
- Filling water balloons the morning of. It takes longer than every other setup task combined. Fill the night before into a cooler, or use the sponge version.
- Putting the 4 year old on the same start line as the 9 year old. It is not a close race and both kids know it. Move the line, or pair them up as a team.
FAQs
What ages are these backyard Olympic games appropriate for?Ages 3 to 13, with the lineup changing a lot across that range. Toddlers and preschoolers do best with the Balance Beam, Olympic Rings Ball Toss, Egg and Spoon Race, and Ring Toss, while Water Balloon Volleyball, Crab Soccer, the Sprint, and the Hurdle Run suit kids 7 and up. Move the start lines rather than changing the rules and one lineup can cover a wide age spread.
Do I need a large backyard to host these games?No. Only the sprint and the hurdle run really want length, and you can shorten both and rename the event. Straw Javelin, Balance Beam, Cookie Face Race, Ring Toss, and Frisbee Bowling all work in a driveway, a courtyard, a garage, or a basement.
How can I make the games feel more like the real Olympics?The ceremony matters more than the events. Have the kids march in with a homemade cardboard torch, play stadium music off a speaker, let each kid pick a country and make a paper flag, and finish with a real medal ceremony using plastic medals, gold foil chocolate coins, or painted paper plates on ribbon. The stopwatch and a clipboard with visible scores do more work than any decoration.
Are these DIY equipment setups safe for young children?Mostly yes, and the swaps in this article are the reason. Foam replaces wood, buckets replace stakes in the ground, and crepe paper replaces anything stretched across a finish line. The real exceptions: Pantyhose Bowling is not for kids under 6 and needs an adult right there, the Cookie Face Race needs one adult watching mouths the whole time, foam dart blasters need eye protection, and no pointed skewers or stakes belong in a lawn where kids run barefoot.
Is this safe for a 3 year old?Some of it. A 3 year old can do the Balance Beam with a hand to hold, the Ring Toss, the Olympic Rings Ball Toss, the Egg and Spoon Race with a serving spoon, and a short dash. Keep them out of Pantyhose Bowling, the Cookie Face Race, foam dart events, Crab Soccer, and anything involving balloons, since broken latex is a choking and suffocation risk under 8.
What do I do if it rains?Move indoors and run the four events that need no space: Straw Javelin (which actually works better with no wind), Cookie Face Race, Balance Beam using a strip of painter’s tape on the floor, and Ring Toss with paper plate rings. That is a legitimate 45 minute meet in a hallway, and it is the version I reach for most often.
Read Next
If the forecast turns on you, or you need to fill the last twenty minutes indoors, minute to win it games for kids runs on the same clipboard and stopwatch trick with almost no setup.
Conclusion
Pick five events off the table, grab four pool noodles and a pack of paper plates, and put a date on the calendar. That is the whole prep.
The thing I did not expect the first year is that the events themselves barely mattered. The stopwatch mattered. The clipboard mattered. A medal handed over thirty seconds after a kid won mattered most of all, which is why they kept asking what tomorrow’s event was.
Hand the medals out as you go, keep one back for whoever cheered loudest, and set your five events in this order: something loud first, something calm in the middle, something wet at the end. Then let the yard be wrecked for ten minutes while everyone drinks water.