
It rained for four days straight last spring, and by day two I had run out of ideas. My 3 year old had dumped every basket in the playroom, asked for a snack eleven times before 10am, and was standing at the window narrating the weather like a tiny meteorologist. That was the week I started keeping a list of rainy day indoor activities for kids that actually hold up, the ones I can set up in five minutes with what is already in my kitchen.
Everything here has been through the real test: a toddler who wants to dump it, a preschooler who wants to change the rules, and a parent who does not want to mop.
Some of these will buy you 30 quiet minutes. Some will buy you eight, and eight is sometimes exactly what you need.
The best rainy day indoor activities for kids use what you already own: a muffin tin, a roll of painter’s tape, couch cushions, a laundry basket, a cardboard box, and a bin of dry rice. Plan on three activities per rainy day, one that burns energy, one sensory, one quiet, and rotate before boredom hits instead of after. Every idea below sets up in under 10 minutes, works for ages 18 months to 6 years with simple adaptations, and lists its real mess level so you can match the activity to how much patience you have left.
Practical note: Pick the activity based on your energy, not just your kid’s. A bubble foam sink at 8am is fun. The same activity at 5pm, when you still have dinner to make, is how a rainy day turns into a bad evening.
Pick One Fast: Rainy Day Indoor Activities at a Glance
Scan this, pick one, and go. Time is prep plus play plus cleanup.
| # | Activity | Best ages | Mess | Total time | Supervision |
| 1 | Toddler Pouring Station | 18 mo to 4 | High (wet) | 30 to 45 min | Arm’s reach |
| 2 | Squishy Toy Calm Corner | 18 mo to 6 | None | Ongoing | Check in |
| 3 | Muffin Tin Color Sort | 2 to 4 | Low | 15 to 25 min | Close for small parts |
| 4 | Cardboard Box Ball Drop | 12 mo to 3 | None | 25 to 40 min | Check in |
| 5 | Sensory Rescue Bin | 2 to 6 | High (dry) | 40 to 60 min | Close |
| 6 | Bubble Foam Sink Play | 2 to 5 | High (wet) | 30 to 45 min | Arm’s reach |
| 7 | Couch Cushion Path | 18 mo to 5 | None | 20 to 35 min | Eyes on |
| 8 | Rainy Day Reset Basket | 1 to 6 | Low | 30 to 60 min | Check in |
| 9 | Cotton Ball Rain Cloud | 2 to 4 | Low | 15 to 20 min | Close under 3 |
| 10 | Sticky Wall Shape Match | 18 mo to 4 | Low | 25 to 40 min | Check in |
| 11 | Painter’s Tape Road City | 2 to 7 | None | 45 min plus | Check in |
| 12 | DIY Busy Board Tray | 18 mo to 4 | None | 20 to 30 min | Close |
| 13 | Sticker Rescue Tape Tray | 18 mo to 4 | Low | 10 to 20 min | Check in |
| 14 | Indoor Picnic | 1 to 7 | Medium (crumbs) | 30 to 40 min | Eyes on with food |
| 15 | Window Rain Painting | 2 to 6 | Low | 25 to 35 min | Close |
| 16 | Story Basket Surprise | 1 to 5 | None | 15 to 20 min | With you |
| 17 | Soft Toy Hide and Seek | 18 mo to 5 | None | 15 to 25 min | Check in |
| 18 | Edible Paint Snack Art | 18 mo to 5 | High (stains) | 30 to 40 min | Eyes on |
| 19 | Laundry Basket Boat Ride | 12 mo to 4 | None | 10 to 15 min | Hands on |
| 20 | Freeze Card Dance Party | 18 mo to 7 | None | 15 to 20 min | Eyes on |
Save this one to your rainy day board now, while you are thinking about it. You will not want to be searching for it at 4pm with a bored kid hanging off your leg.
Why Rainy Days Fall Apart Around 3pm
The morning is usually fine. Everyone is rested, the novelty of the weather is still fun, and the toys still look interesting.
The wall hits mid afternoon, and it is almost always the same three things: not enough big movement, not enough new input, and a kid who has been asked to keep it down for four hours.
So the fix is not one perfect craft. It is a rotation. One activity that moves the body, one that gives the hands something new to feel, and one calm thing to land on before dinner. That is the whole system, and it works from about 18 months all the way up to early elementary.
The American Academy of Pediatrics recommends no screen media for children under 18 months (video chat excepted) and about one hour a day of high quality programming for ages 2 to 5, which is why this list leans on hands and bodies instead of tablets. That said, if you put a show on during a four day stretch of rain, you are still a good parent.
Rainy Days Indoor Activities
Fifteen of these twenty use only what is already in a normal house. If you want to buy anything at all, get a roll of blue painter’s tape, a roll of clear contact paper, and a bag of cotton balls. That is under $10 and it covers four activities.
Each one below lists the ages it really works for, the total time including cleanup, how messy it gets, and how closely you need to hover.
1. Toddler Pouring Station
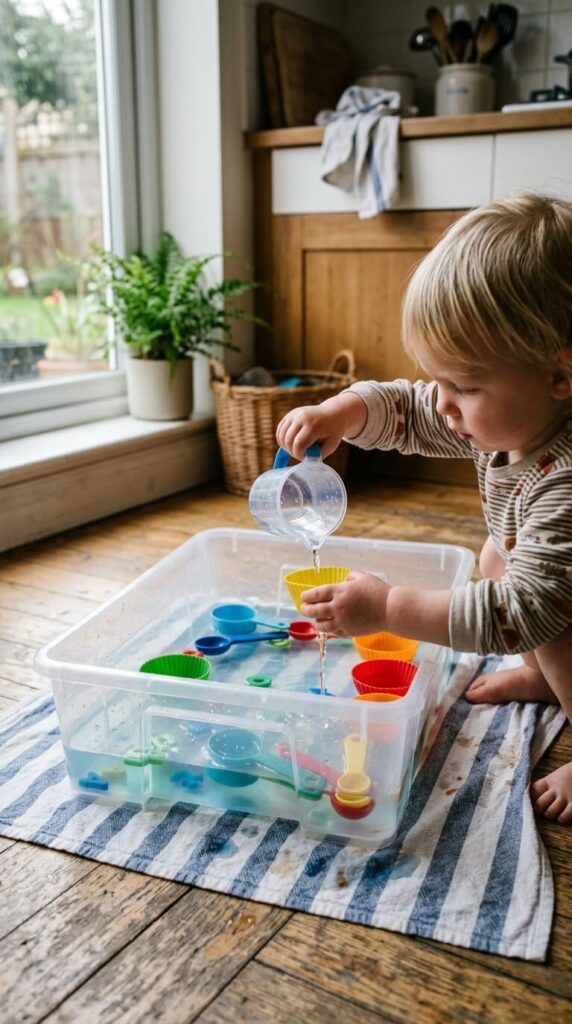 Nothing holds a toddler like moving water from one container to another. Mine will pour, dump, and refill for half an hour, and it never once looked like an activity I “made.”
Ages: 18 months to 4, sweet spot right around 2. Time: 5 min prep, 15 to 30 min play, 5 to 10 min cleanup. Mess: High, and wet. Supervision: Stay within arm’s reach the entire time.
What you need
- A shallow plastic bin (a roasting pan or the biggest mixing bowl you own works)
- Measuring cups, a small pitcher, a funnel, a turkey baster (Dollar Tree sells all of these, or raid your own drawer)
- Two bath towels, one under the bin, one for the inevitable
- Warm water, about one inch deep
How to Set It Up
- Fold a bath towel in half and set the bin in the middle of it, on a floor you can wipe.
- Fill the bin with about an inch of warm water. Not cold. Cold water ends the activity in four minutes.
- Put out three or four tools, not ten. Too many choices and they just sweep everything into the bin.
- Sit down nearby with your coffee and stay out of it unless they ask.
Tip: Keep a second pitcher of water behind you. Being the one who controls refills is how you stretch this to 30 minutes.
Developmental Benefits
Pouring builds hand and eye coordination, grip control, and a real feel for volume and cause and effect. Strip them to a diaper or undies and it becomes a bath and an activity at the same time.
If you cannot face water, swap in dry material: large wooden beads, dry pasta, or pom poms for kids over 3.
What goes wrong the first time: Around minute 12, they will tip the whole bin. Every kid does. Use one inch of water so the tip is a wipe, not a flood.
Safety: Never leave a child alone with standing water, not even an inch, and dry the floor right away because wet tile plus toddler socks is a fall. The dry version is a choking risk for anyone still mouthing things, so skip beads and pom poms under 3.
Skip it if: Your child hates wet sleeves. Roll them up first, or go dry.
2. Squishy Toy Calm Corner

By late afternoon indoors, my kids are not naughty, they are fried. A corner they can take themselves to fixes more meltdowns than anything I say.
Ages: 18 months to 6, useful well past that. Time: 10 min to build once, then it lives there. Mess: None. Supervision: Check in every few minutes.
What you need
- A floor basket or laundry hamper you already have
- Two or three squishy or textured toys (Dollar Tree stress balls, a spiky massage ball, pop tubes)
- A weighted or fleece blanket and one favorite stuffed animal
- Optional: a battery tea light or a small book stack
How to Set It Up
- Pick a low traffic corner, ideally with a wall on two sides. Behind an armchair is perfect.
- Fill the basket. Four or five items, not fifteen.
- Introduce it on a calm day, not mid tantrum, and let them try everything with you sitting there.
- Name it something that is theirs, like “the cozy spot,” and never send them there as a punishment.
Developmental Benefits
Squeezing and deep pressure genuinely help kids downshift, and giving them a place to go builds the early self regulation habit of noticing they need a break.
For older kids, add a notebook and pencil. For toddlers, add one thing that makes a quiet sound.
What goes wrong the first time: Pop tubes are loud, so your calm corner becomes the loudest place in the house. Buy one, not four.
Safety: Check squishies weekly for splits. The cheap gel filled ones leak, and the gel should not go anywhere near a mouth. Do not put water beads in the basket at all. The CPSC has warned about serious injuries when kids swallow them, and they expand inside the body.
Skip it if: Your child reads any designated spot as a timeout. Then just keep the basket portable and bring it to them.
3. Muffin Tin Color Sort

A muffin tin is the cheapest sorting tray ever made. The cups give the task visible edges, which is exactly why toddlers stick with it.
Ages: 2 to 4. Under 2, they will fill and dump, which counts. Time: 3 min prep, 10 to 20 min play, 2 min cleanup. Mess: Low. Supervision: Stay close if you are using anything small.
What you need
- A muffin tin (use a 6 cup for younger toddlers, 12 feels endless to them)
- Sorting objects in 4 to 6 colors: milk jug lids, Duplo bricks, felt circles, bottle caps
- Free swap: cut circles from a cereal box and color them in
- Optional: toddler tongs or a small ice cream scoop
How to Set It Up
- Drop one “starter” object of each color into its own cup.
- Put the rest in a small basket or bowl beside the tin, mixed up.
- Show them once, slowly, then hand it over and stop talking.
- When they lose interest, offer the tongs. It usually buys another ten minutes.
Tip: Milk jug lids are the best free sorting set going. Wash them, keep them in a ziplock, and you have a supply you did not pay for.
Developmental Benefits
Sorting is early math: matching, grouping, and noticing what is the same. The tongs version adds serious pincer strength, which is the same muscle set they need later for holding a pencil.
For older kids, sort by shape or count each cup out loud. For 18 month olds, forget matching and let them fill and empty.
What goes wrong the first time: They will sort three cups perfectly and then dump the whole tin with real joy. Do not correct it. The dumping is part of the fun, and correcting it ends the activity.
Safety: Bottle caps, pom poms, and beads are choking hazards for under 3s. Rule of thumb: if it fits through a toilet paper tube, it is too small. Use Duplo size pieces instead.
Skip it if: Your child still puts everything in their mouth. Go with large blocks only.
4. Cardboard Box Ball Drop

This one costs nothing and has the best return of anything on this list for a one year old. It is a box with holes in it, and it is riveting.
Ages: 12 months to 3. Time: 10 min prep (adult), 20 to 30 min play, no cleanup. Mess: None. Supervision: Check in every few minutes.
What you need
- Any sturdy cardboard box (the Amazon box in your hallway is fine)
- Soft balls, sock balls, or large pom poms for over 3s
- A craft knife or heavy scissors, adult only
- Packing tape to seal the seams and cover any staples
How to Set It Up
- Tape the box shut and tape over any staples or sharp cardboard edges.
- Cut 4 or 5 holes on the top and sides, each about an inch wider than your balls. Adult job, done away from the kids.
- Show them one drop, then let them figure out the rest.
- Leave the bottom flaps loose so they can open it up and retrieve everything themselves.
Developmental Benefits
Object permanence is the hook: gone, then found, over and over. It also builds aim, wrist control, and the patience to finish a small task.
Make it harder for a 3 year old by taping a paper towel tube into one hole as a chute, or calling out which color goes in which hole.
What goes wrong the first time: Cutting the holes too small. If the ball needs a shove, they quit. Wider is better.
Safety: Tennis balls are loud and roll under furniture, which turns into frustration. Rolled socks are quieter and easier for small hands. Keep the craft knife put away, not on the counter.
Skip it if: Nothing, honestly. This is the most reliable activity here for under 2s.
5. Rainy Day Sensory Rescue Bin
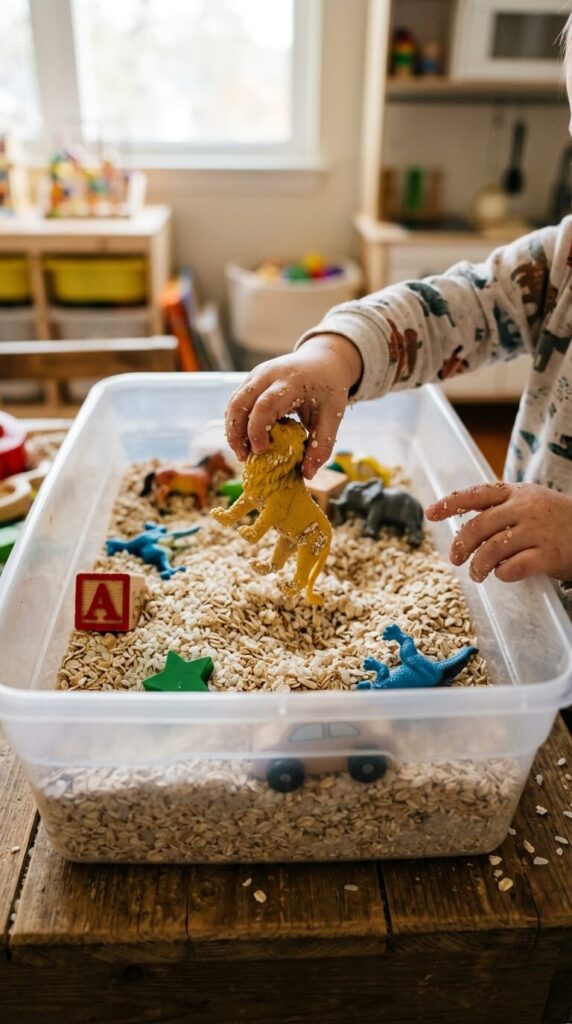
The difference between a sensory bin that lasts five minutes and one that lasts 40 is a job. Give them a mission and they will dig until you make them stop.
Ages: 2 to 6. Time: 5 min prep, 30 to 45 min play, 10 min cleanup. Mess: High, but dry. Supervision: Stay close, especially under 3.
What you need
- A big shallow bin (a Sterilite under bed box is ideal, a baking tray works for a smaller version)
- A dry base: rice, dry oats, dried beans, or shredded paper for the youngest
- 8 to 10 small toys to rescue: animals, cars, foam letters
- A flat sheet or cheap plastic tablecloth underneath, plus scoops and a cup
How to Set It Up
- Spread the sheet on the floor and set the bin in the middle of it.
- Fill the bin no more than half way. A full bin overflows within a minute.
- Bury the toys while they are out of the room, so the reveal is a surprise.
- Give the mission out loud: “Ten animals are stuck in the storm, can you rescue them all?” Count them together at the end.
Tip: Add a “rescue truck” (any toy dump truck) as the place the animals go once saved. It doubles the play time on its own.
Developmental Benefits
Digging, scooping, and pinching build fine motor control, and the counting and naming turn it into language practice without a worksheet.
Older kids can hide the toys for you and give the clues. Younger ones do better with a bigger base material and fewer toys.
What goes wrong the first time: Rice travels. I still find grains in the floor vent months later. Play on a sheet, and vacuum before the rice gets walked through the whole house.
Safety: Dry rice and beans are choking and inhalation hazards, and toddlers do put them up their noses. Stay in the room. Oats and wheat pasta are out if anyone in the house has a gluten issue, and for kids who still taste everything, use plain oats or shredded paper instead of hard beans.
Skip it if: Your child is sensory avoidant and hates the feel of dry grains. Try shredded paper or cooked and cooled pasta, both are softer.
Practical note: Gather the sheet by the corners and funnel the spilled rice straight back into the bin. That trick turns a 20 minute cleanup into a 2 minute one, and it is the only reason I still do sensory bins on a weekday.
6. Bubble Foam Kitchen Sink Play
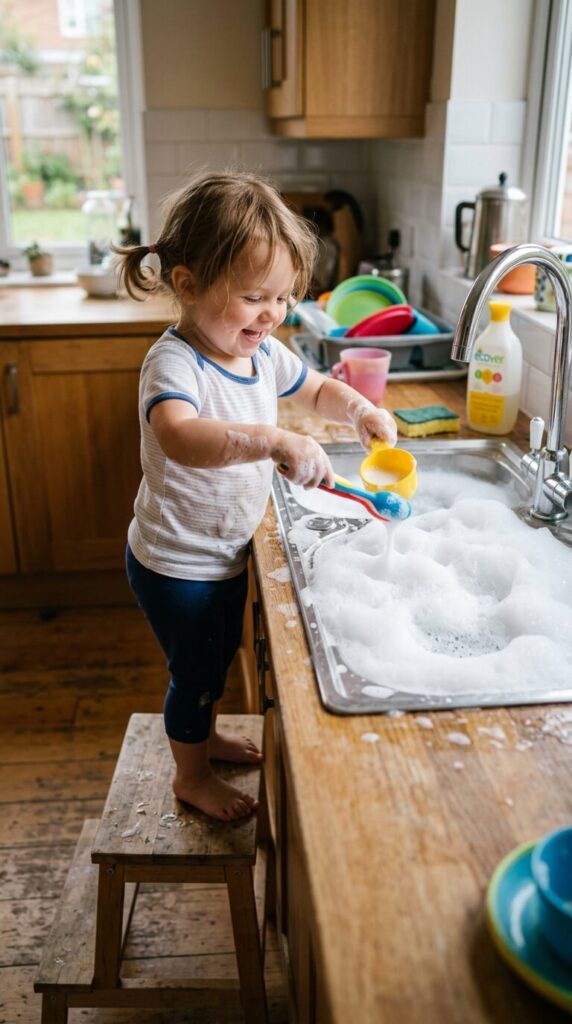
Foam looks like something you bought, and it costs about 40 cents. My kids talk about this one for days afterwards.
Ages: 2 to 5. Time: 5 min prep, 20 to 30 min play, 10 min cleanup. Mess: High, wet, and slippery. Supervision: Arm’s reach the whole time.
What you need
- Tear free baby wash (Johnson’s Head to Toe or Aveeno Baby, about 2 tablespoons)
- 1 cup water, and a hand mixer or immersion blender
- A clean kitchen sink or a big bin on a towel
- Scoops, plastic cups, toy animals, a whisk
How to Set It Up
- Put the soap and water in a bowl and mix on high for 1 to 2 minutes, until it holds a peak like meringue.
- Scoop the foam into the sink or bin. Make it right before you call them over, not an hour ahead.
- Add the tools and toys and let them get on with it.
- Rinse everything down with warm water, and dry the floor immediately.
Tip: A hand mixer beats a blender here. A blender jug full of slippery foam is a dropped jug waiting to happen.
Developmental Benefits
Foam invites scooping, stirring, and pretend play, usually a car wash or an ice cream shop within about 90 seconds. The unfamiliar texture is what holds their attention, since it feels nothing like the bath.
Add a few drops of food coloring for older kids, or freeze small toys into ice cubes and hide them in the foam.
What goes wrong the first time: The foam collapses after about 20 minutes and gets watery, and kids read that as “it broke.” Make a second batch or call it done.
Safety: Tear free still stings, so keep it away from eyes and have a dry towel within reach. If they are at the sink, use a stable step stool with a wide base, not a wobbly kitchen chair, and never a bar stool. Do not substitute dish soap, it dries out skin and stings much worse.
Skip it if: Your child has eczema or reactive skin. Do a patch test first, or use the dry version of the pouring station instead.
7. Couch Cushion Adventure Path

When a kid has been inside for six hours, they do not need a craft. They need to climb something. This is the reset button.
Ages: 18 months to 5. Time: 5 min setup (do it with them), 15 to 30 min play, 5 min cleanup. Mess: None, unless you count the living room. Supervision: Eyes on, in the room.
What you need
- Couch cushions, throw pillows, folded blankets
- A couple of sturdy boxes or laundry baskets
- Optional: painter’s tape on the floor as a “tightrope” between stations
- Free swap: nothing to buy here at all
How to Set It Up
- Move the coffee table out of the space first. Do this before anything else.
- Lay a path: cushion, gap, blanket “tunnel,” box to step over, cushion.
- Build it with them, not for them. They stay interested twice as long when they placed the pillows.
- Add the story: the floor is flooded, the cushions are the only dry islands.
Developmental Benefits
Climbing, balancing, and crawling are the gross motor work their bodies are demanding, and the pretend layer keeps their brain in it too.
Older kids want a timer and a lap count. Toddlers want the same three steps over and over, which is fine.
What goes wrong the first time: On hardwood, cushions slide out from under them. Build it on carpet or a rug, or push the path up against the couch so pieces cannot skate away.
Safety: No jumping from furniture onto cushions, that is where the split lip happens. Clear the path of table corners, lamps, and anything glass, and keep the run away from stairs and the TV stand.
Skip it if: You live above a neighbor and it is nap hour. Save it for the morning.
8. Rainy Day Reset Routine Basket

This is the one that changed our rainy days most, and it takes no creativity in the moment, which is the whole point.
Ages: 1 to 6. Time: 20 min to assemble once, on a dry day. 30 to 60 min of play each time it comes out. Mess: Low. Supervision: Check in.
What you need
- A lidded basket or bin that lives out of sight
- 5 or 6 items reserved only for rainy days: a glitter bottle, a new sticker sheet, a chunky puzzle, a flashlight, a deck of matching cards
- Budget version: rotate toys they already own but have not seen in two months. Free and just as effective
- Dollar store sticker sheets and a $1 flashlight cover most of it
How to Set It Up
- Build it on a sunny day. Trying to assemble it during the rain defeats the purpose.
- Store it high up, in a closet, out of sight and out of reach.
- Bring it out only when it rains, and make a small ceremony of it.
- Swap two or three items every couple of months so it keeps its shine.
Tip: Hot glue the lid of the glitter bottle shut, adult job, before it ever goes in the basket. A dropped glitter bottle full of loose glitter and water is a genuinely bad afternoon.
Developmental Benefits
The value here is emotional, not academic. Kids who have something to look forward to when it rains stop reading a rainy day as a loss, and the predictable routine takes the edge off the whole day.
For older kids, add a card game or a page of mazes. For toddlers, one new board book is plenty.
What goes wrong the first time: You cave and hand something over on a sunny Tuesday. The moment the basket becomes ordinary, it stops working.
Safety: Check anything sealed in a bottle for leaks before it goes in, and keep small game pieces away from under 3s.
Skip it if: Nothing. This is the highest value 20 minutes of prep on this list.
9. Rain Cloud Cotton Ball Transfer
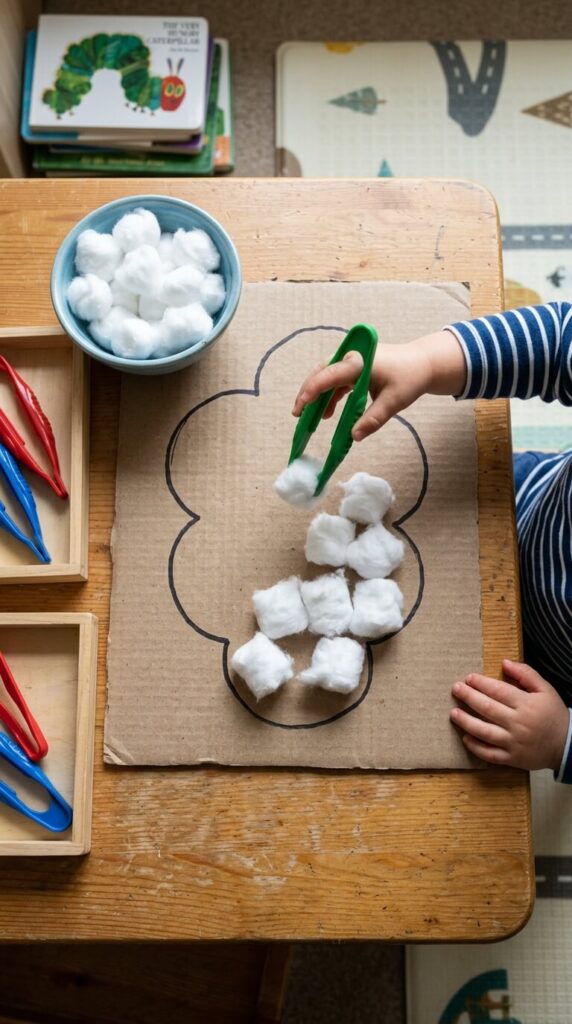
Quiet, cheap, and weather themed, which makes it feel connected to the day instead of random.
Ages: 2 to 4. Time: 3 min prep, 10 to 15 min play, 2 min cleanup. Mess: Low. Supervision: Stay close if they are under 3.
What you need
- A sheet of paper or a cut open cereal box
- A marker to draw the cloud
- A bag of cotton balls (Dollar Tree, under a dollar)
- Toddler tongs, a spoon, or wooden clothespins
- Free swap: torn up scraps of white paper instead of cotton balls
How to Set It Up
- Draw one big cloud outline. Bad drawing is fine, they do not care.
- Tape the paper to the table so it does not slide around when they press down.
- Put the cotton balls in a bowl on one side and the tongs beside it.
- When the cloud is full, hand them a blue marker for raindrops underneath.
Developmental Benefits
Tongs and clothespins build the exact hand strength kids need before they can hold a pencil properly, and it doubles as early weather vocabulary if you talk while they work.
Older kids can count as they go or fill the cloud with a set number. Younger ones can just use fingers.
What goes wrong the first time: Handing over the glue. Glue turns a 15 minute calm activity into a 40 minute sticky one. Do the loose version first and only add glue if they ask.
Safety: Cotton balls are a real choking and gagging hazard, and kids do mouth them. If your child is still tasting things, use the paper scrap version and stay at the table.
Skip it if: Your child has no interest in fine detail work. Pair it with something physical first so they arrive at the table already tired out.
10. Sticky Wall Shape Match

It looks like nothing. Then they touch it, feel the resistance, and stay there for half an hour.
Ages: 18 months to 4. Time: 5 min prep, 20 to 30 min play, 2 min cleanup. Mess: Low. Supervision: Check in every few minutes.
What you need
- Clear contact paper, the sticky backed shelf liner sold in the kitchen aisle (about $5, and one roll lasts a year)
- Strong tape for the edges, packing tape or masking tape
- Craft foam shapes, felt pieces, ribbon scraps, tissue paper squares
- Free swap: a long strip of packing tape stretched sticky side out between two chair backs
How to Set It Up
- Test your wall first. Press a small piece of tape on, leave it a minute, peel it off. Fresh paint and wallpaper can lift.
- Cut a piece of contact paper roughly two feet square, peel the backing, and tape it to the wall sticky side out at your child’s eye level.
- Tape all four edges, not just the corners. Painter’s tape alone will not survive toddler pressure.
- Put the shapes in a basket on the floor so they have to bend down and reach up. That is the movement built in.
Developmental Benefits
Working on a vertical surface builds shoulder and core strength, which occupational therapists care about because it comes before handwriting control. The peel and press action is pure pincer practice.
For older kids, call out patterns or ask them to build a scene. Toddlers are happy just pressing and peeling.
What goes wrong the first time: Contact paper loses its tack after about 30 to 45 minutes of little hands, and once it is covered in carpet lint it is done. Cut two pieces at the start.
Safety: Keep the offcuts and the peeled backing away from babies, plastic sheeting and small children do not mix. Use foam shapes big enough that they cannot be swallowed.
Skip it if: Your child dislikes sticky textures. Some sensory sensitive kids find this awful, and that is worth respecting.
11. Painter’s Tape Road City

If I could keep one supply in the house for rainy days, it would be a roll of ScotchBlue painter’s tape. This is the activity with the longest tail on the entire list.
Ages: 2 to 7, and older siblings will join in. Time: 10 min to lay down, 45 min plus of play, and it can stay up for days. Mess: None. Supervision: Check in.
What you need
- One roll of blue painter’s tape (ScotchBlue Original, about $6, or a dollar store roll for a shorter session)
- Toy cars, wooden blocks, animal figures
- Optional: a marker and index cards for stop signs
- Free swap: chalk on a garage floor if you have covered outdoor space
How to Set It Up
- Clear the floor and test one strip in a corner first, especially on hardwood or vinyl. Leave it a minute, then peel.
- Lay long roads first, then add parking squares, a roundabout, and crosswalks.
- Hand them the roll and let them add a road of their own. Wonky roads are better roads.
- Bring out the cars only when the tape is finished, so the reveal lands.
Tip: Leave it down. Ours stayed for four days and got played with every single morning, which is the best value any activity on this list has given me.
Developmental Benefits
Structured space makes familiar toys feel new, and it builds spatial reasoning, planning, and cooperative play if you have more than one kid.
Older kids will build shops and traffic rules around it. Toddlers just want to drive and make engine noises.
What goes wrong the first time: Using masking tape instead of painter’s tape. Masking tape leaves residue and can pull the finish off wood or painted trim. Painter’s tape is the low tack one, and it still comes off low pile carpet cleanly.
Safety: Keep the tape roll itself away from babies, and pull the tape up before anyone runs across a bare floor in socks, since loose strips are slippery.
Skip it if: You have deep shag carpet. The tape will not stick, and you will spend ten minutes fighting it.
12. DIY Busy Board Tray

My kid has ignored an entire shelf of light up toys to spend twenty minutes on a zipper. Real hardware wins every time.
Ages: 18 months to 4. Time: 10 min prep, 15 to 25 min play, 1 min cleanup. Mess: None. Supervision: Stay close, this one is not a walk away activity.
What you need
- A baking sheet or a plastic serving tray
- An old zip front hoodie, a belt with a buckle, Velcro strips, a snap pouch
- Junk drawer hardware: a barrel bolt, a hook and eye, a large carabiner
- Free swap: everything here should already be in your house. Do not buy a wooden busy board
How to Set It Up
- Lay the tray flat and tape or hot glue the items down so they cannot be carried off. Hot glue is an adult only step, done well before play.
- Keep it to five or six things. A crowded tray gets ignored.
- Sit beside them the first time and show each one once.
- Store it assembled so you can hand it over instantly next time.
Developmental Benefits
Zippers, snaps, and latches are real world fine motor practice, and they lead directly to independent dressing, which is worth more than any craft.
For older toddlers, add a combination of two steps, like unbuckle then unzip. For younger ones, Velcro and big buckles only.
What goes wrong the first time: Gluing things down too tight to operate. Test every fastener yourself before handing it over.
Safety: No cords, ribbons, or strings long enough to wrap around a neck. Keep any string under about six inches, skip small loose buttons entirely for under 3s, and check that hardware has no sharp edges or pinch points. File down anything rough before it goes on the tray.
Skip it if: Your child is still very orally focused. Choose zippers and Velcro only, and stay right there.
13. Sticker Rescue Tape Tray

Kids want to pick at things. This gives them something they are allowed to pick at.
Ages: 18 months to 4. Time: 3 min prep, 10 to 15 min play, 2 min cleanup. Mess: Low. Supervision: Check in.
What you need
- A plastic tray or a cookie sheet
- Painter’s tape (easier to peel than packing tape, which is too strong for small hands)
- Large stickers, foam shapes, or printed photos of family members
- Free swap: bottle caps or cardboard shapes instead of stickers
How to Set It Up
- Place 3 to 5 items on the tray, spaced apart.
- Tape over each one with a single strip, and fold a small tab at one end of every strip.
- Tell them the items need rescuing and let them work at it.
- Peel the leftover tape off the tray yourself, or it becomes your job later anyway.
Tip: Three to five strips is the limit. Ten strips is where the crying starts, and I found that out the hard way.
Developmental Benefits
Finding the edge, pinching it, and pulling with the right amount of force takes real concentration, and it builds the hand strength that comes before writing.
For older kids, use smaller pieces of tape or add a second layer. For younger ones, fold a bigger tab.
What goes wrong the first time: Using packing tape. It is too strong, they cannot start the peel, and the whole thing collapses into frustration in about 30 seconds.
Safety: Balled up tape is a choking hazard, so collect the used strips as you go rather than letting them pile on the floor. Never let a child put tape on their own face.
Skip it if: Your child chews on tape or paper. This one needs a kid who peels rather than tastes.
14. Indoor Picnic Pretend Play

Same snack, different floor, completely different mood. This has saved more 4pm stretches for us than any craft.
Ages: 1 to 7. Time: 5 min setup, 25 to 30 min, 5 min cleanup. Mess: Medium, mostly crumbs. Supervision: Eyes on whenever there is food.
What you need
- A blanket or beach towel, plus a flat sheet or shower curtain underneath to catch crumbs
- A basket with the snack you were going to serve anyway
- Stuffed animal guests and a few plates and cups
- Free swap: play food and empty cups work just as well as real food
How to Set It Up
- Push the coffee table aside and lay the sheet, then the blanket on top of it.
- Let them choose which animals get invited. That is half the fun and it takes them five minutes.
- Put the food in the basket rather than on plates, so serving becomes their job.
- Lift the sheet by the corners at the end and shake it out over the bin.
Developmental Benefits
Serving, passing, and hosting are real social skills, and pretend hosting is one of the few ways toddlers get to be the competent one in a situation.
Older kids can make menus or place cards. Toddlers just want to hand out crackers, one at a time, to a bear.
What goes wrong the first time: Skipping the sheet. Crumbs go into the rug and stay there. The sheet under the blanket is the difference between a 30 second cleanup and getting the vacuum out.
Safety: Sitting down to eat, not crawling around with food in their mouth. Cut grapes lengthwise, skip whole nuts and popcorn for under 4s, and cut everything into strips rather than coins. If a friend is over, check allergies before you pack the basket, and wash the stuffed animals afterwards because fur and yogurt is a combination you only meet once.
Skip it if: Your child is at the throwing stage with food. Use play food this round.
15. Window Rain Painting
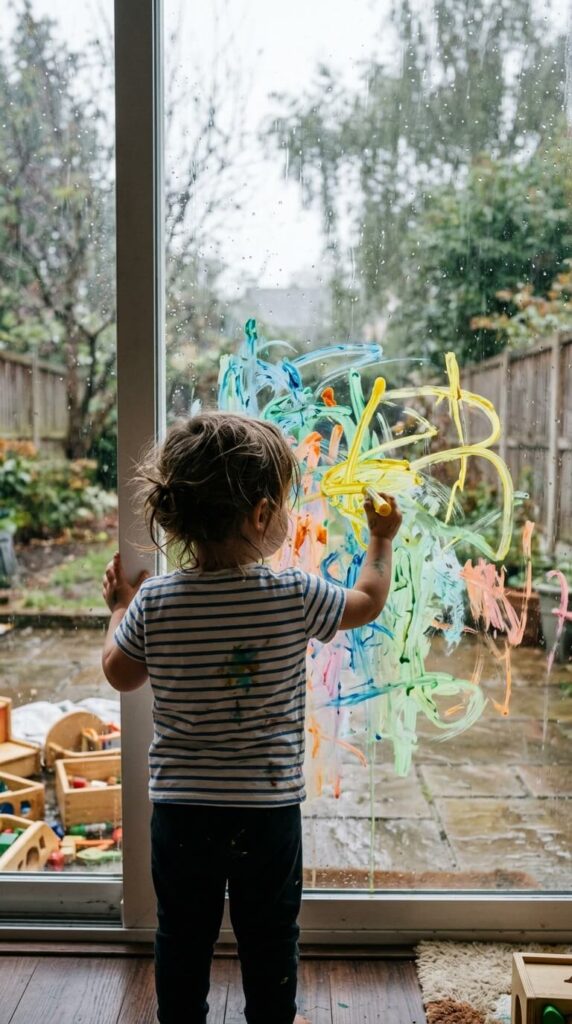
They are already at the window watching the rain. This just gives them something to do there.
Ages: 2 to 6. Time: 3 min prep, 20 to 30 min play, 5 min cleanup. Mess: Low, if you use the right markers. Supervision: Stay close, this one is about the window, not the paint.
What you need
- Crayola Window Crayons or washable window markers (they wipe off glass with a damp cloth)
- Or, for the youngest, a paintbrush and a cup of plain water. Free, and just as absorbing
- A microfiber cloth and a towel for the sill
- Optional: a squeegee, which kids love more than the painting
How to Set It Up
- Test the marker on a low corner of the glass first, and keep it off the frame, vinyl trim, and grout, which do stain.
- Wipe the glass so it is clean and dry before they start.
- Let them trace the real raindrops running down the outside of the glass. That is the part they remember.
- Hand over the damp cloth at the end and let the wiping be part of the activity.
Developmental Benefits
Drawing on a vertical surface builds shoulder stability and core strength, the same reason therapists like easels over tables. Tracing moving raindrops also sharpens visual tracking.
Older kids can label a weather scene or copy the cloud shapes they can actually see. Toddlers do better with water and a brush.
What goes wrong the first time: Using regular washable markers. On glass they smear onto hands and then onto the couch. Window specific crayons or markers are worth the few dollars.
Safety: This is the one with a serious hazard, so read it properly. Insect screens will not hold a child’s weight, and children fall from windows every year leaning on them. Only use a window that stays closed and locked while they paint, keep chairs and stools away from windows entirely, and stay in the room the whole time. A sliding glass door is the safest surface for this activity.
Skip it if: The only window at kid height is one that opens easily or has no lock. Use a mirror or the shower door instead.
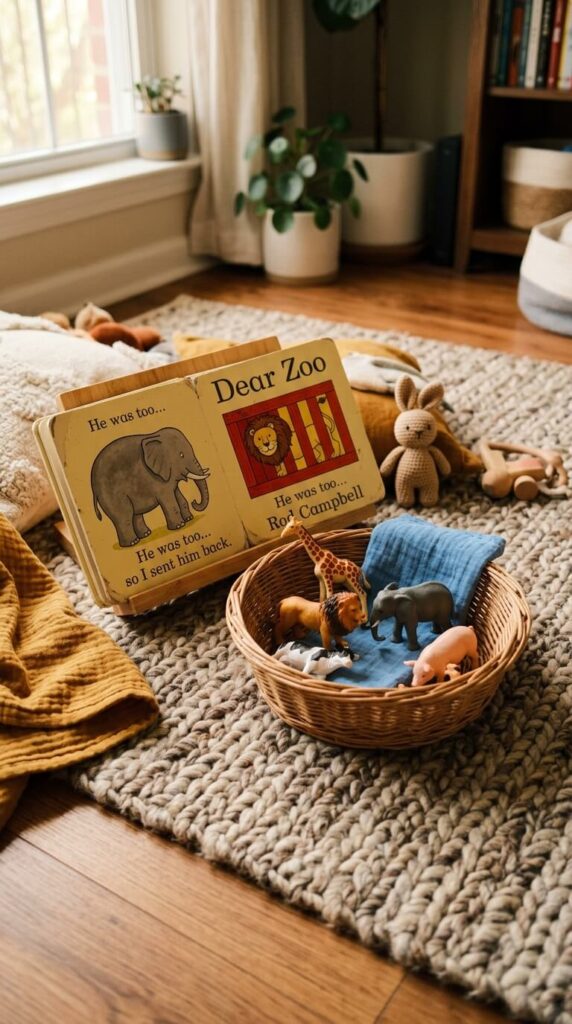
16. Story Basket Surprise
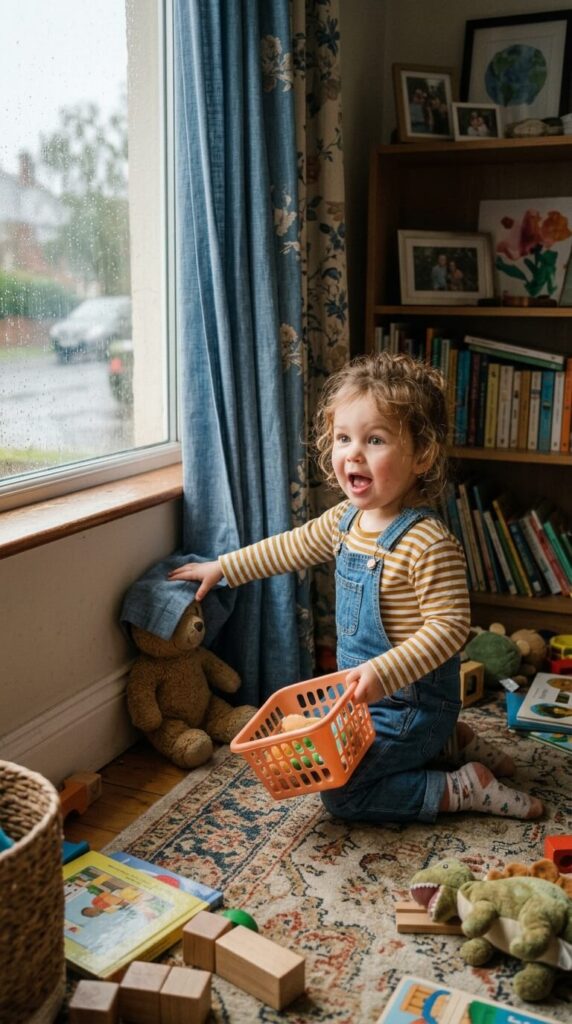
This is how I get an active 3 year old to sit through a whole book without me chasing them around the room.
Ages: 1 to 5. Time: 5 min prep, 15 min, 2 min cleanup. Mess: None. Supervision: You are in it, this one is together time.
What you need
- A board book they already know by heart
- 4 or 5 objects from the story: farm animals, a toy umbrella, cotton balls, a flashlight
- A small basket or cloth bag to hide them in
- Free swap: printed pictures cut from a magazine work if you do not have the objects
How to Set It Up
- Choose a familiar book, not a new one. A new book plus new objects is too much at once.
- Gather matching objects and hide them in the basket, covered with a cloth.
- Read as normal, and pull out each object as it appears on the page.
- Read it again straight after, and let them hold the objects and prompt you this time.
Tip: Pull the object out just after you read the word, not before. Before, and they stop listening to the story.
Developmental Benefits
Linking a spoken word to something they can hold builds vocabulary faster than reading alone, and it turns listening into participation for kids who cannot sit still yet.
Older kids can retell the story using the objects. Babies just want to hold the animal and chew it.
What goes wrong the first time: Leaving all the objects out from the start. They will play with them and ignore you completely. Keep them hidden under the cloth.
Safety: Check every object against the toilet paper tube test for under 3s, and keep the flashlight batteries in a compartment that needs a screwdriver. Button batteries are a serious ingestion emergency, so no loose battery lids in the basket.
Skip it if: Your child is deep in a “no books” phase. Try it with a song they know instead.
17. Soft Toy Hide-and-Seek Hunt
Movement without running, which matters if you have neighbors below you or a baby asleep down the hall.
Ages: 18 months to 5. Time: 3 min to hide, 10 to 20 min to find, no cleanup beyond putting them back. Mess: None. Supervision: Check in.
What you need
- 5 to 10 stuffed animals
- A laundry basket or tote bag as the collection basket
- Free swap: any toys at all, this needs nothing bought
- Optional: a flashlight, which makes it ten times better
How to Set It Up
- Choose one room, close the other doors, and toddler check it first.
- Count the animals out loud with your child before you hide them, so you both know when you are done.
- Hide them with an ear or a leg showing for toddlers. Obvious is the point at this age.
- Send them off with the basket and stay out of the way.
Developmental Benefits
Visual scanning, memory, and spatial language (“behind,” “under,” “on top of”) all get a workout, and they will happily walk laps of the room doing it.
Older kids want hard hiding spots and hot or cold clues. Under 2s want you to point.
What goes wrong the first time: Hiding them too well. One will genuinely disappear, and you will find it under the couch a week later. Count them out at the start so you know the total.
Safety: No hiding places that involve climbing, and nothing on top of a dresser or bookshelf. A child pulling furniture over to reach a toy is a real risk, so keep every hiding spot at floor level.
Skip it if: Your child gets anxious about not finding things. Hide three, not ten.
18. Edible Paint Snack Art
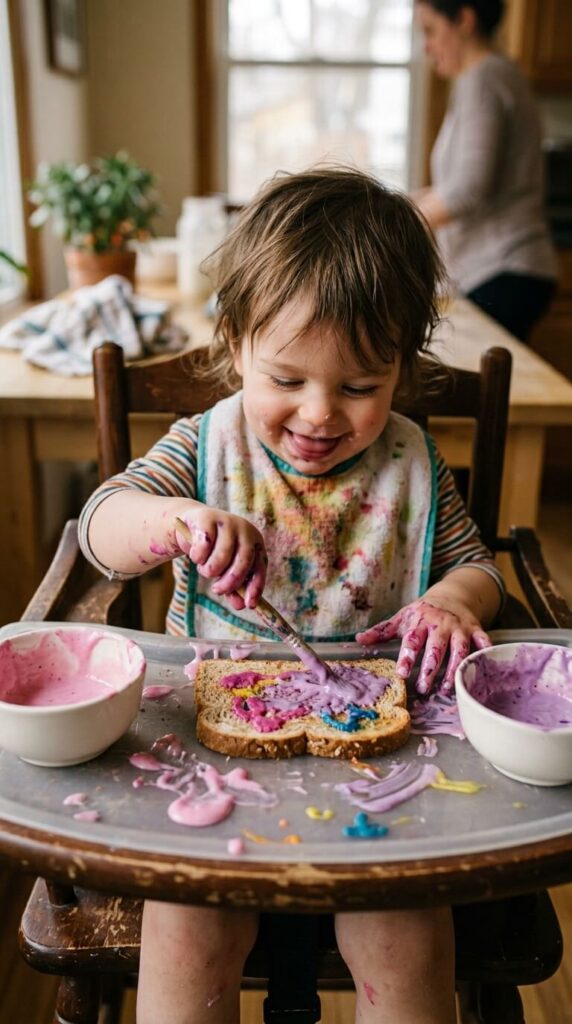
For the kid who still tastes everything, this takes the stress out of art entirely.
Ages: 18 months to 5. Time: 10 min prep, 15 to 20 min, 10 min cleanup. Mess: High, and it stains. Supervision: Eyes on, it is food.
What you need
- Plain yogurt as the base, divided into small bowls
- Natural color: mashed blueberries for purple, strawberry puree for pink, a spoon of pumpkin for orange
- A “canvas”: toast, a rice cake, a large plain cracker, or banana slices
- A clean paintbrush per color, plus a bib and a wipeable surface
How to Set It Up
- Mix each color in its own small bowl. Three colors is plenty, six is a mess with no extra payoff.
- Put the canvas on a plate, hand over one brush at a time.
- Let them eat as they go. That is not cheating, that is the activity.
- Wipe hands before they leave the table, or the berry juice goes on the wall.
Tip: Skip the blended spinach green. It works as a color and my kids refused every bite. Use pumpkin or mashed avocado instead if you want a savory shade.
Developmental Benefits
Brush control, color mixing, and total autonomy over their own snack, which is a bigger deal to a 2 year old than it sounds.
Older kids will paint a real picture. Toddlers will paint their own arm, and that is a full success.
What goes wrong the first time: Blueberry and beet stain. Fingers stay purple for a day, and it does not come out of a light shirt easily. Old clothes, every time.
Safety: This is a food based activity, so treat allergens seriously. Dairy yogurt is out if there is a milk allergy, use a coconut or oat alternative. Never use a play activity to introduce a food your child has not eaten before, especially with any family history of allergy, and talk to your pediatrician about first exposures. Cut toast into strips rather than squares, keep them seated, and never leave a toddler eating alone.
Skip it if: Your child has an oral aversion or a restrictive eating pattern where mixing play and food adds pressure. Paint on paper instead.
19. Laundry Basket Boat Ride

Ten minutes of this and my kid is calm for the next hour. It is also the only activity on this list where you are the equipment.
Ages: 12 months to 4, until they outgrow the basket. Time: 2 min setup, 10 min ride, no cleanup. Mess: None. Supervision: Hands on the entire time, this is a you and them activity.
What you need
- A sturdy rigid plastic laundry basket, checked for cracks at the handles
- A folded blanket in the bottom so it is not ridged and uncomfortable
- A stuffed animal passenger
- Free swap: a large cardboard box works and slides even better on carpet
How to Set It Up
- Check the basket for cracks, especially around the handles, before anyone sits in it.
- Put the blanket in and have them sit down, legs inside, holding the sides.
- Pull slowly across carpet or a smooth floor. Slow is what they actually want.
- Add the story: a rescue boat in a storm, a sled, a submarine.
Developmental Benefits
The pulling and gliding gives strong vestibular input, which is the movement and balance system, and it is deeply regulating for a kid who has not been outside all day. It is often the fastest way to turn a wound up child around.
Older kids can pull the basket with a stuffed animal in it, which gives them the heavy work instead.
What goes wrong the first time: Your back. Push from a squat rather than bending over, and cap it at ten minutes so you are not the one who needs the calm corner.
Safety: Kid sits, never stands. Stay far away from stairs, and never let an older sibling do the pulling, that is how baskets tip. Flexible pop up hampers collapse under weight, so use a rigid one, and stop if the plastic creaks.
Skip it if: You have a bad back or your basket is the flexible mesh kind. Use a big cardboard box instead.
20. Mini Dance Party with Freeze Cards

When everyone is climbing the walls, including you, this clears the air in about four minutes.
Ages: 18 months to 7, and it works with mixed ages at once. Time: 5 min to make the cards, 10 to 15 min of dancing. Mess: None. Supervision: Eyes on for the space, not the kids.
What you need
- A speaker or your phone, and any upbeat playlist
- Index cards and a marker for the freeze cards
- Free swap: no cards at all, just shout the action
- Grippy socks or bare feet
How to Set It Up
- Move the coffee table and anything breakable out of the space. Do this first, always.
- Write or draw one action per card: Jump, Spin, Crawl, Wiggle, Stomp, Tiptoe, Freeze.
- Play music, stop it randomly, hold up a card, and they do that action until the music comes back.
- Finish on purpose with one slow song, so you are not walking straight into dinner with a wired kid.
Tip: Four to six songs is the ceiling. Past that it stops being a game and becomes chaos, and the ending gets much harder.
Developmental Benefits
Stopping on cue is real self control practice, plus listening, gross motor coordination, and body awareness. Mixed ages can all play at the same level, which is rare.
Older kids can be the DJ and hold the cards. Toddlers need you to demonstrate every action.
What goes wrong the first time: Socks on hardwood. It looks funny for about two seconds. Bare feet or grippy socks only.
Safety: Clear a real perimeter, watch for the coffee table corner, and keep the volume at a level where you can still hear each other. Little ears are sensitive to sustained loud sound.
Skip it if: Your child is sound sensitive. Try it with the music low and no sudden stops, or swap in the cushion path instead.
How to Build a Rainy Day Rhythm That Holds
Twenty ideas is useless if you try to do twenty things. Here is the shape of a rainy day that actually works in our house.
Morning, high energy. Cushion path, freeze dance, or the laundry basket boat. Get the movement out before 11am and the whole day goes better.
Late morning, hands and focus. Sensory bin, tape city, or the pouring station. This is your longest window, so spend your best activity here.
After lunch, quiet. Story basket, calm corner, sticky wall. Low stimulation, low noise, and it holds until the afternoon slump.
Mid afternoon, the reset. This is the hard hour. Bring out the rainy day basket, or do the messy one now if you have the patience for it.
Before dinner, wind down. Window painting or the indoor picnic. Something that ends cleanly and does not need you to be fun.
Practical note: Two activities that they actually finish beat six that you set up and they abandon. If something is going well, do not interrupt it to move on to the next idea on the list.
Safety Notes for Indoor Activities With Kids
Every activity on this list is for children, so this section is not filler. Read it once and you can stop worrying for the rest of the day.
Choking is the main risk. Pom poms, bottle caps, beads, cotton balls, dry beans, and small foam shapes all fit in a windpipe. The quick test: if an object fits through a toilet paper tube, it is too small for a child under 3. Choose Duplo sized pieces instead, and stay in the room.
Water beads are not on this list on purpose. The CPSC has warned about serious injuries when children swallow them, and they expand once inside the body. There are better sensory bases, so skip them entirely with young kids.
Food based play has allergen risk. Yogurt paint, oat sensory bases, and wheat pasta all count. Never use an activity to introduce a food your child has not eaten before, check with any visiting child’s parent first, and speak to your pediatrician about first exposures if there is family allergy history.
Adults do the cutting and the gluing. Craft knives for the cardboard box, scissors for contact paper, and any hot glue are adult only steps, done out of reach and well before play starts.
Water needs you in arm’s reach. Even an inch. Small children can drown in very little water, and a wet floor plus socks is a fall waiting to happen. Dry the floor as soon as you finish.
Windows and furniture. Screens do not hold a child’s weight, so window painting only happens on a closed and locked window with no climbable furniture next to it, and only with you in the room. Anchor bookshelves and dressers, and never hide toys anywhere that requires climbing.
Button batteries. If you use a flashlight or a light up toy, check the battery compartment closes with a screw. Swallowed button batteries are a medical emergency, not a wait and see.
Common Mistakes Parents Make on Rainy Days
These are the ones I have made, most of them more than once.
Setting the whole thing up while they watch. By the time it is ready, the interesting part is over. Prep in the kitchen, or hand them a job in the setup.
Choosing the messy activity at 5pm. Match the activity to your own patience, not just their energy. Bubble foam at 8am is fun. Bubble foam while dinner burns is a fight.
Putting out everything at once. All the toys on the floor means nothing looks interesting. Two activities, in sequence, with a real gap between them.
Filling the sensory bin to the top. Half full spills less and plays exactly the same.
Cold water in the pouring station. They lose interest in four minutes and you never work out why. Warm water, every time.
Correcting how they play. The second you say “not like that,” it is over. If they want to dump the muffin tin instead of sorting it, that is still the activity working.
Waiting for the rain to build the basket. Assemble the reset basket on a dry day when nobody needs it. Trying to build it during a downpour with a bored kid next to you is not the same thing.
Laying the sheet down after the mess starts. Two minutes of prep saves you the vacuum. Sheet first, then the bin.
Expecting 45 minutes from a 2 year old. Fifteen focused minutes is a good result at that age. Plan three short activities rather than one long one.
FAQs
Is a rice or bean sensory bin safe for a 2 year old?It can be, with you in the room the whole time. Dry rice and beans are choking and inhalation hazards, and toddlers do try to put them up their noses, so if your child still mouths everything, use a base of plain oats, shredded paper, or cooked and cooled pasta instead and stay at the bin.
How do I get yogurt paint, marker, or slime out of the carpet?Scrape off what you can with a spoon first, never rub. Blot with cold water and a drop of dish soap, working from the outside in, then use an enzyme cleaner for anything dairy based so it does not smell later. For glitter, press packing tape onto the fibers before you vacuum.
How can I keep my toddler engaged in an activity for more than five minutes?Give them a job, not a material. “Rescue ten animals” holds twice as long as “here is a bin of rice,” because toddlers abandon activities when they do not know what comes next. Then keep the rest of the toys out of sight, since novelty is doing most of the work.
Are sensory bins worth the cleanup on a rainy day?Yes, if you set them up on a flat sheet or a cheap plastic tablecloth. When play is done, lift the corners and funnel the spilled rice back into the bin. That takes about two minutes, which is what makes it a weekday activity rather than a weekend project.
What do I do with a 1 year old and a 5 year old at the same time?Pick the activities with a wide age range and split the roles. On the tape city, the 5 year old designs the roads while the baby drives cars on the finished part. In hide and seek, the older one hides the animals and the little one finds them. The freeze dance and the indoor picnic both work as is.
What if my child gets frustrated and gives up straight away?Quietly make the task easier instead of encouraging them through it. Fold a bigger tab on the tape, widen the holes in the box, take away half the sorting colors. Frustration on a rainy day is usually a sign the activity is a step too hard, or that they need to move their body before they can sit and focus.
Read Next
If today’s rain has you thinking about the wider problem of a kid who is bored indoors, these two are the natural next step:
- Best screen free toddler activities indoors, for the days when the rain lasts all week and you need a longer list than one afternoon’s worth.
- Fine motor activities that build hand strength and coordination, if the tongs and tape activities were the ones that held your child’s attention longest. That is a strong signal about what their hands are ready to work on next.
And when the weather finally turns, garden activities for kids and rainbow crafts ideas for kids pick up right where this leaves off.
One Last Thing Before the Next Rainy Day
Go put a basket together this week, while it is dry. Six things, out of sight, on a high shelf. That single bit of prep is worth more than knowing twenty activities by heart, because the problem on a rainy day is never a shortage of ideas, it is that you are being asked to have one at 3pm with a kid hanging off your arm.
We are heading into the wet stretch of autumn 2026, so you will get plenty of chances to test the list. Start with the cardboard box. It costs nothing, and it is the one that has never once failed me.