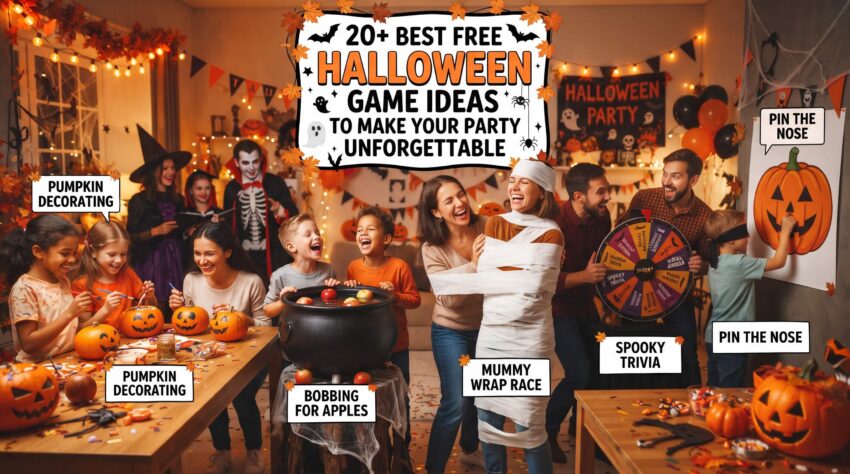
The best free Halloween game ideas for a kids’ party are simple toss, knock down, and hunt games made from recycling and dollar store supplies. A bean bag ghost board, a soup can knock down, a milk jug ring toss, and a straw bale prize dig are the easiest wins. Pick 3 to 5 games that match your guests’ ages, put one adult at each booth, and use battery lights (never real candles) if the party runs past dark.
It was 4:40 on a Saturday last October. Fourteen kids in costume were in our backyard, the pumpkin decorating table I’d planned to fill an hour was finished in eleven minutes, and a very small dinosaur was trying to climb the fence.
What saved the afternoon wasn’t the decorations. It was four cardboard games I’d built the weekend before out of a moving box, some soup cans, a bag of rice, and a pack of dollar store balloons.
Kids lined up. They cheered for each other. Nobody climbed anything.
That’s the real secret behind these free Halloween game ideas. You don’t need rented carnival gear. You need a few booths a kid understands in two seconds, a prize at the end, and a grown up standing nearby.
Below are 21 Halloween party games for kids, from toddler friendly toss games to a glass bottle ring toss that’s strictly for teens and adults. For each one you’ll get honest age ranges, build and cleanup time, mess level, how much supervision it really needs, cheap or free swaps for the supplies, and what tends to go wrong the first time.
One seasonal note: Halloween lands on a Saturday in 2026, so plenty of us are hosting afternoon parties before trick or treating. Daylight washes out every glow effect, so I’ve flagged which games work at 2 p.m. and which ones only shine after dark.
How to Pick Free Halloween Game Ideas for Your Crowd
Before you cut a single box, answer three questions. How old are the kids? How many adults can help? Will it be dark?
Ages decide almost everything. Kids under 5 want games they win nearly every time, with nothing loud. Kids 6 to 10 want a real challenge and a prize tier worth bragging about. Tweens and teens will roll their eyes at a bean bag toss unless there’s a scoreboard or something a little gross involved.
Match the number of games to your helpers. For 10 to 15 kids, 3 to 5 games is plenty. A school festival or block party can handle 8 to 10, but only if you have the volunteers.
Practical note: Every booth needs a grown up (or a responsible teen) standing at it. The minute a booth is left alone, kids start helping themselves to prizes and the balloon board turns into a free for all.
Sort your prizes before the party. Bag them by tier (small, medium, top) in three bins that stay behind the booth, not on a table in front of it. Nonfood prizes like stickers, pencils, and mini bubbles keep things fair for kids with food allergies. The Teal Pumpkin Project from FARE (Food Allergy Research & Education) is a good source of ideas.
Safety basics that apply to every game on this list:
- Battery lights only. No real candles in cups, jugs, or cauldrons. Capes and tulle catch fire fast.
- Check the battery doors. Most tea lights and LED puck lights run on coin (button) batteries, which can cause serious internal burns within a couple of hours if a child swallows one. Tape loose compartments shut and keep spares up high.
- Watch small parts around kids under 3. A good rule at home: if it fits through a toilet paper tube, it’s a choking hazard for toddlers.
- Ask about allergies on the invite. Latex (balloons), foods (candy prizes), and hay or straw (hay fever, asthma) are the big three for this list.
- Masks up for throwing and running. Kids see very little through most masks. Have them push masks onto their heads while they play.
Free Halloween Game Ideas at a Glance
Scan this chart, shortlist 3 to 5 games, then jump to the ones you picked.
| Game | Best ages | Build time | Mess | Supervision | Best time of day |
|---|---|---|---|---|---|
| Candy Corn Bowling | 2 and up | 20 min to 1 hr | Low | Light | Anytime |
| BOO-Loon Pop | 5 and up | 1 hr plus drying | Low (balloon scraps) | Hands on, always | After dark |
| Witches’ Brew Toss | 2 and up | 10 min | None | Light | Anytime |
| Glowing Ghost Ring Toss | 3 and up | 30 min | Low | Check in | After dark |
| Needle in a Haystack | 3 and up | 20 min | High | Hands on for under 5s | Daytime |
| Mummy Wrap Relay | 5 and up | 2 min | Medium (paper) | Check in | Anytime |
| Monster Can Knock Down | 3 to 8 | 20 min | Low | Check in | Anytime |
| Ping Pong Pumpkin | 4 and up | 30 min | Low to medium (water) | Check in often | After dark |
| Face Painting & Tattoos | All ages | 20 min | Medium | One dedicated adult | Daytime |
| Spider’s Web Toss | 6 and up | 30 to 45 min | Low | Check in | Anytime |
| Mini Pumpkin Bean Bag Toss | 2 to 5 | 30 min | None | Light | Anytime |
| Jumping Spiders | 5 and up | 1 to 2 hrs | Low | Hands on, always | After dark |
| Fall Festival Lollipop Pull | 4 and up (candy) | 20 min | Low to medium | Check in | Anytime |
| Frightful Fish Bowl Toss | 4 and up | 20 min | Medium (water, dye) | Check in | Anytime |
| Quacky Pumpkin Duck Pond | Toddlers to 5 | 30 min | Medium (wet) | Arm’s reach, always | Daytime |
| Spin-a-Prize Wheel | All ages | 30 min | None | One adult | Anytime |
| Glowing Tonic Toss | 12 and up (glass) | 45 min plus saving bottles | Low | Adult at booth | After dark |
| Giant DIY Pumpkin Bean Bag Toss | 3 and up | 2 to 3 hrs plus drying | Low | Check in | Anytime |
| DIY Disc Drop | 3 and up | 1 to 2 hrs | None | Light | Anytime |
| Pumpkin Sack Races | 5 and up | 10 min | Low | Check in | Daytime |
| Ghost Tag | 5 and up | 5 min | None | Watch the whole time | Daytime or well lit yard |
Best Free Halloween Game Ideas
1. Candy Corn Bowling
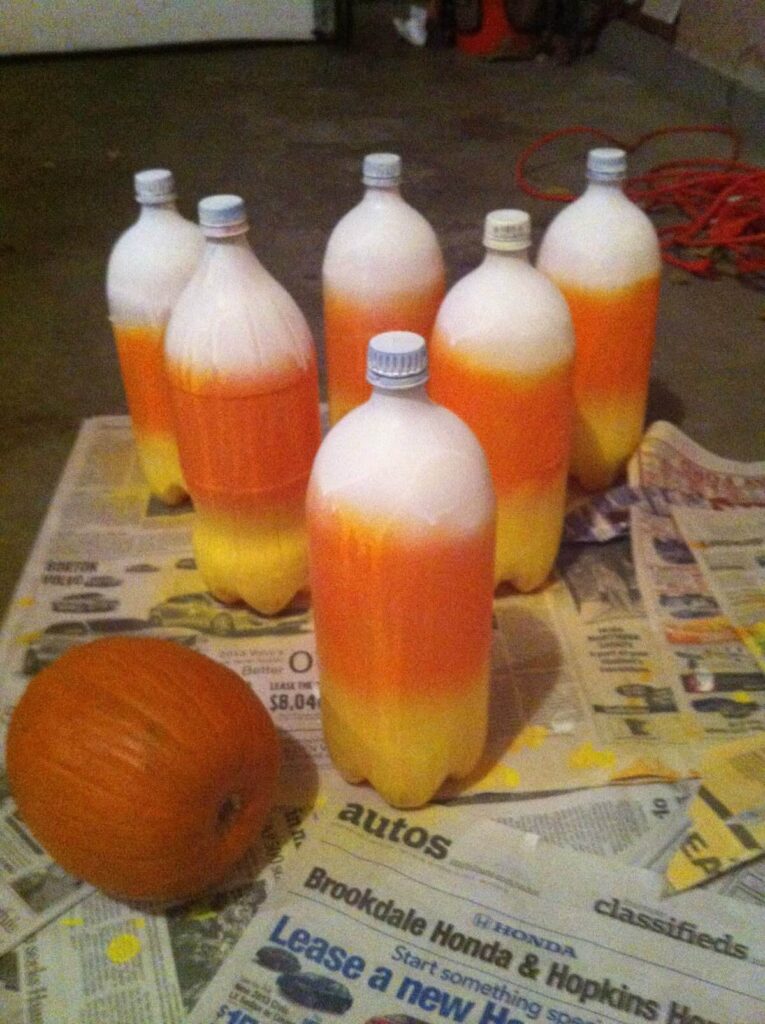
Ten striped pins, one ball, and a lot of satisfying crashes. Kids understand it at a glance, so the line never stalls.
It works from age 2 up, and toddlers adore it. Building takes about 20 minutes with paper or an hour with paint (plus drying). Turns take 1 to 2 minutes and cleanup takes 5. There’s almost no mess, and a helper can supervise loosely.
Supplies
- 10 empty 2 liter bottles (ask in your neighborhood group if your house doesn’t drink soda)
- Orange, yellow, and white paint, or free: construction paper bands and tape
- A lightweight playground ball (dollar store)
- Sidewalk chalk (a big Crayola sidewalk chalk bucket lasts for years) or painter’s tape for indoors
- Sand or water for weight
The paint problem: Regular acrylic craft paint tends to flake off smooth plastic bottles once kids start handling them. Scuff the bottles lightly with sandpaper first, use a paint labeled for plastic, or skip paint and use paper bands.
The wind problem: Empty bottles fall over on their own outside. Pour a cup of sand or water into each one. Use less for toddlers so the pins still go down easily.
Build and Set up
- Paint or wrap each bottle in candy corn stripes: orange on the bottom, yellow in the middle, white on top.
- Add the weight and cap tightly.
- Arrange the pins in a bowling triangle on a flat driveway or sidewalk.
- Trace a chalk circle around each base so resetting takes seconds.
Play: 2 or 3 rolls per turn. Knocking down every pin earns the top prize.
Adjusting for age: For toddlers, lay two pool noodles along the sides as bumpers and let them roll from a few feet away. For older kids, move the line well back and use a smaller ball.
Tip: Have each player reset the pins on the chalk circles. It keeps things moving and saves your back.
2. BOO-Loon Pop
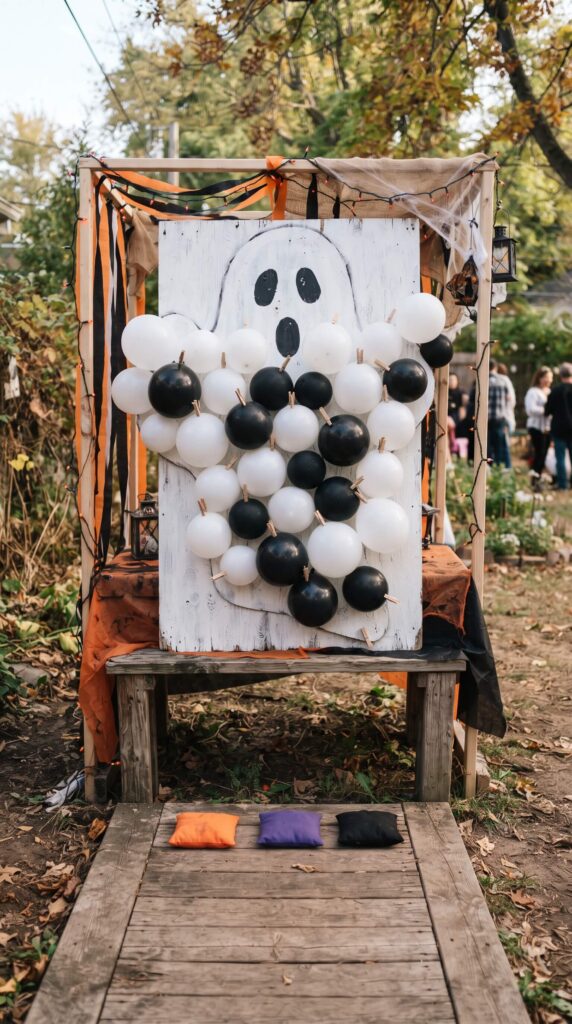
This is the booth kids hear before they see it. A big painted ghost covered in balloons, three bean bags, and a small crowd shrieking every time something bursts. No darts anywhere near the kids, just bean bags.
It’s also the game on this list that needs the most adult attention, so read the safety note before you buy balloons.
Ages: 5 and up | Players: one at a time | Mess: low, but balloon scraps land everywhere | Supervision: hands on, the whole time
Realistic time: about 1 hour to build plus overnight drying, 20 minutes to blow up balloons on party day, 1 to 2 minutes per player, 15 minutes to clean up.
What you’ll need (and cheaper swaps)
- A large flat board: plywood, or free, a flattened appliance or moving box
- White and black paint: leftover house paint or a sample pot works (free swap: black marker on a white box)
- Wooden clothespins (dollar store pack)
- Thumbtacks or push pins
- A hot glue gun (adult use only)
- Bean bags. Free swap: fill a zip top bag with rice, seal it, push it into an old sock, and knot the sock. The inner bag keeps rice off your lawn when a sock tears.
- White and black latex balloons (dollar store)
How to make it
- Sketch a big ghost on the board and paint it white with black eyes and a mouth. Let it dry overnight.
- Glue clothespins sideways across the board about 8 inches apart so every balloon has a clip.
- Adult only: hot glue a thumbtack just below each clothespin, point facing out and slightly off center, so a solid hit pushes the balloon onto it. Count the tacks and write the number down.
- Blow up the balloons and clip them on right before guests arrive. Fill them a little less than full, because tight balloons sitting in afternoon sun tend to pop on their own.
How to play: Each player gets 3 bean bags. Zero pops earns a small prize, one pop earns a medium prize, and two or more earns the top prize. Nobody walks away empty handed.
Practical note: The U.S. Consumer Product Safety Commission requires latex balloon packages to warn that children under 8 can choke or suffocate on uninflated or broken balloons. After every pop, an adult picks up the scraps before the next kid throws. When you pack up, count the thumbtacks against the number you wrote down.
Who it won’t work for: Many 3 and 4 year olds, and any noise sensitive kid, will hate this booth. Set it up well away from the toddler games.
Adapting it: For younger or anxious kids, skip balloons entirely (see the tip below) and let them stand closer. For kids 9 and up, move the throw line back and say only balloons on the ghost’s head count toward the top prize.
After dark upgrade: Zip tie battery powered warm white fairy lights around the ghost’s outline. It costs very little and makes the whole thing look like a real carnival booth.
Tip: If anyone on your guest list has a latex allergy, skip the balloons and cut eye and mouth holes in the ghost instead. Kids toss bean bags through the holes. Same cheering, zero allergy risk, no scraps to chase.
3. Witches’ Brew Toss
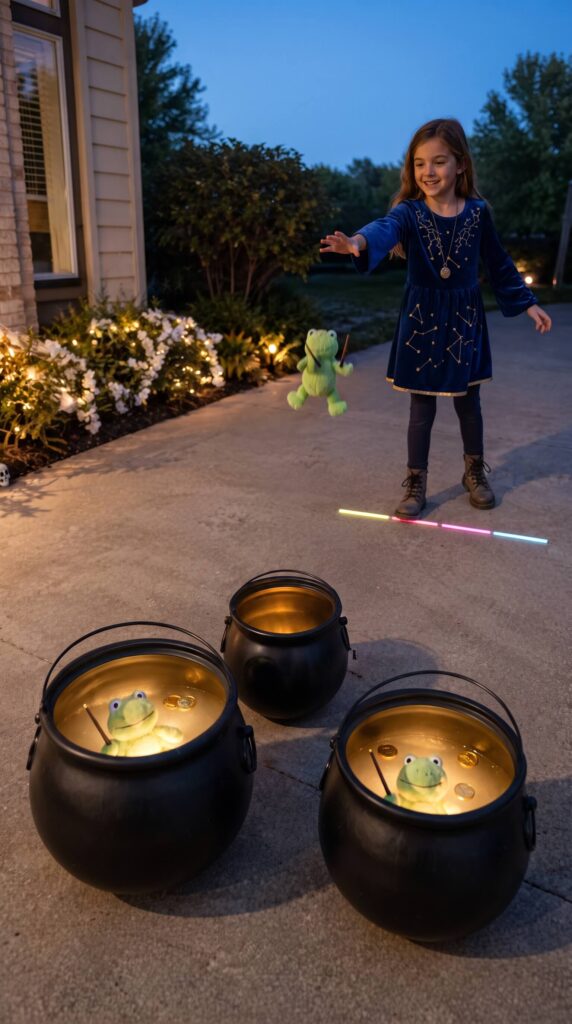
Short on time? This is your game. Three cauldrons, a few plush frogs, and about ten minutes of setup. It works for every age because all you change is where kids stand.
| Ages | Setup | Per turn | Cleanup | Mess | Supervision |
|---|---|---|---|---|---|
| 2 and up | 10 min | 1 to 2 min | 5 min | None | Light; a teen helper can run it |
You’ll need
- 3 black buckets or pots in different sizes. Dollar store plastic cauldrons are the classic, but black buckets or dark laundry baskets work too.
- 3 to 6 plush frogs or bats. Thrift store stuffed animals are fine, or use rice sock bean bags.
- Something to mark the throw line: small pumpkins, chalk, or a strip of tape
Setup
- Line up the cauldrons with the biggest in front and the smallest in back.
- Drop a folded hand towel into each one. Hard plastic cauldrons spit plush toys right back out, and the towel kills the bounce.
- Mark your throw line a few feet back.
Scoring kids can follow: 3 frogs per turn. One frog in each of the three cauldrons wins the top prize. Two frogs in two different cauldrons wins a middle prize. Anything else gets a small prize.
Scaling it: Toddlers stand right next to the big cauldron, and any frog that lands inside counts. Older kids have to land them in order, biggest to smallest.
After dark upgrade: Set a battery LED puck light (the push “tap lights” from the dollar store) on top of each towel. Green or purple lights make three plastic buckets look like they’re bubbling. Keep the lights in the cauldrons and out of little hands, since they use coin batteries.
4. Glowing Ghost Ring Toss
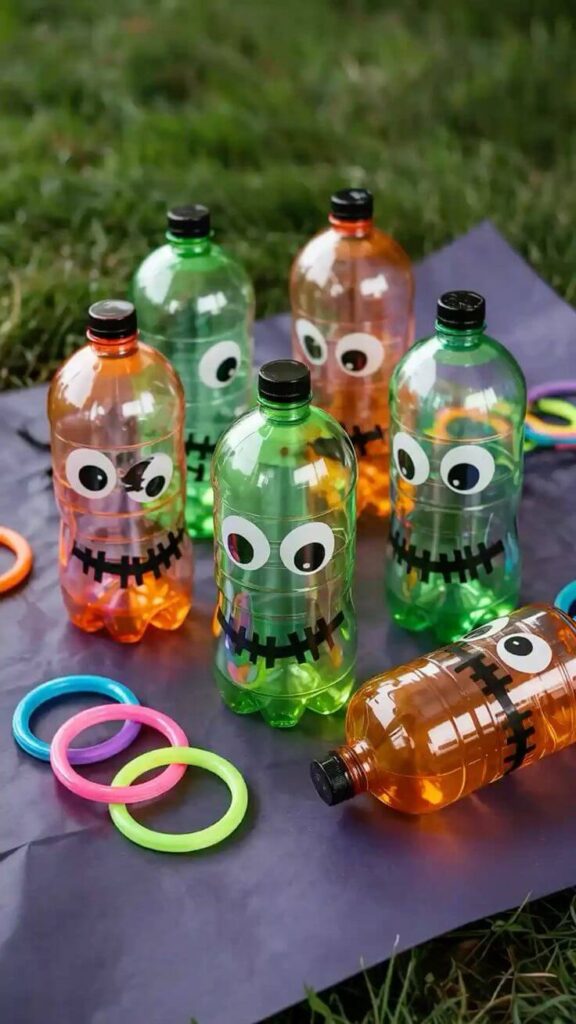
This is the cheapest game on the list, because it’s made almost entirely from trash.
What it actually costs
- 4 milk jugs: free (start saving two weeks out)
- A black permanent marker: probably already in your junk drawer
- 4 glow sticks or battery tea lights: a dollar or two
- Rings: a hula hoop you already own, or free rings cut from the centers of paper plates
- Clear packing tape: already in the house
The step nobody mentions: Milk jugs that only get a quick rinse will smell sour by party day. Wash them with warm water and a spoonful of baking soda, shake, rinse again, and let them dry upside down.
Make it
- Draw a friendly ghost face on each jug.
- Pour in a cup or two of water so the jugs don’t blow over.
- Crack a glow stick and drop it through the opening (it glows fine in water), or tape a tea light to the outside of the jug so it shines inward.
- Line the jugs up 1.5 to 2 feet apart, moving away from the throw line.
Play: 4 rings per player, aiming at the closest ghost first and working back. Ringing all four wins the top prize, 2 or 3 wins a middle prize, and 1 or none wins a small prize.
Ages, time, and effort: Works for 3 and up. A hula hoop over a milk jug is easy enough for preschoolers; for kids 7 and up, switch to smaller rope rings. Figure 30 minutes to prep, 1 to 2 minutes per turn, and 5 minutes to clean up. The mess is low, and a quick check in every few minutes is enough.
What I’d change next time: Paper plate rings are so light they wobble in any breeze. Save them for garage or indoor parties.
After dark upgrade: Lay a dark sheet on the ground under the jugs. The glow looks twice as strong against it.
5. Needle in a Haystack
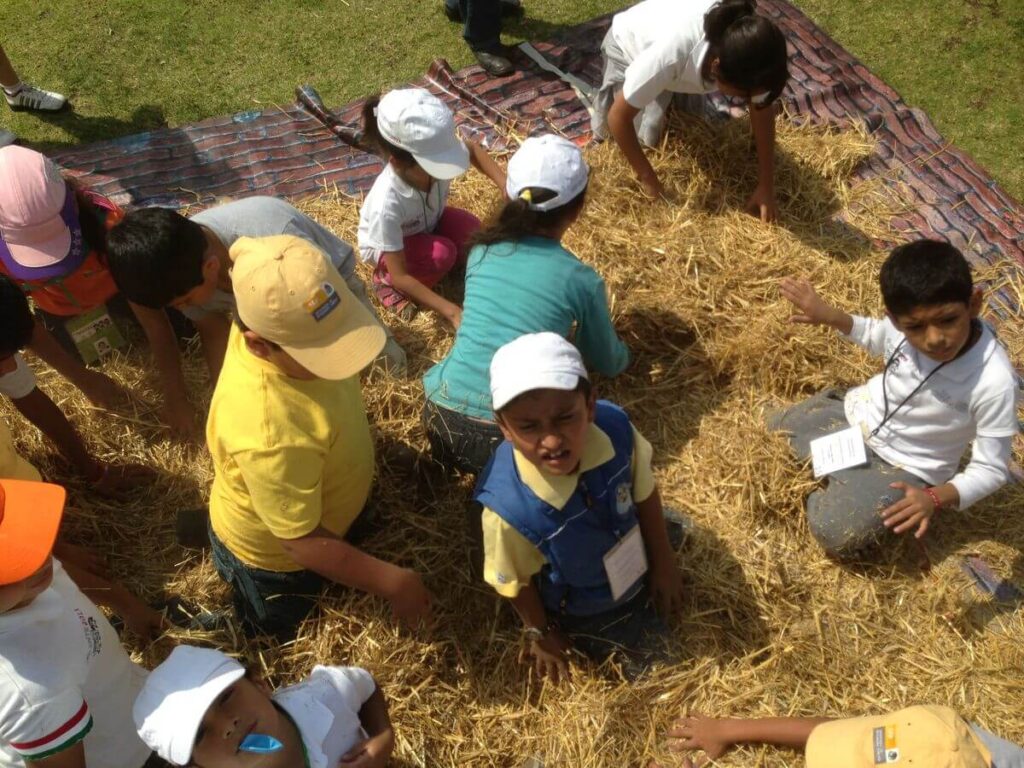
Let’s start with the mess, because it’s the whole story here. This is the messiest booth on the list. Straw ends up in shoes, pockets, hair, and every layer of a tulle costume. Put a tarp down first and accept that some of it is coming inside with you.
Kids dig through a low pile of straw hunting for hidden prizes. It’s hands on, it’s calmer than the toss games, and it costs almost nothing to run.
Ages: 3 and up (under 3 only with a parent and only with large prizes).
Group size: 3 or 4 kids at a time.
Time: 20 minutes to set up, 2 to 3 minutes per group, 30 minutes or more to rake up.
Supervision: hands on for under 5s, since things go in mouths; check in for older kids.
Hay or straw? Straw is usually less dusty and cheaper for decorating. Feed stores and garden centers stock bales in the fall, and some farms will give away a broken bale. Either one can set off hay fever or asthma, so check your guest list.
The free, allergy friendly swap: Fill a kiddie pool or big bin with paper from your home shredder (pull out any staples first), or rake up a pile of dry leaves and pick out sticks and bugs.
Choosing prizes
- Individually wrapped only
- Nothing small enough to fit through a toilet paper tube if toddlers are digging
- Nut free candy, or nonfood prizes like stickers, mini notebooks, and bubbles, so kids with food allergies can play too
How to run it
- Spread the straw into a low, wide pile on the tarp, no taller than a child’s knee.
- Hide prizes at mixed depths so some are easy and some take real digging.
- Tell kids the take home limit (1 to 3 prizes) before they start, not after.
- Restock every 30 to 45 minutes so late arrivals still find good stuff.
The cleanup step people forget: Rake through the pile for leftover treats before you bag it up. Dogs will find every wrapper you miss, and chocolate is toxic to dogs.
6. Mummy Wrap Relay
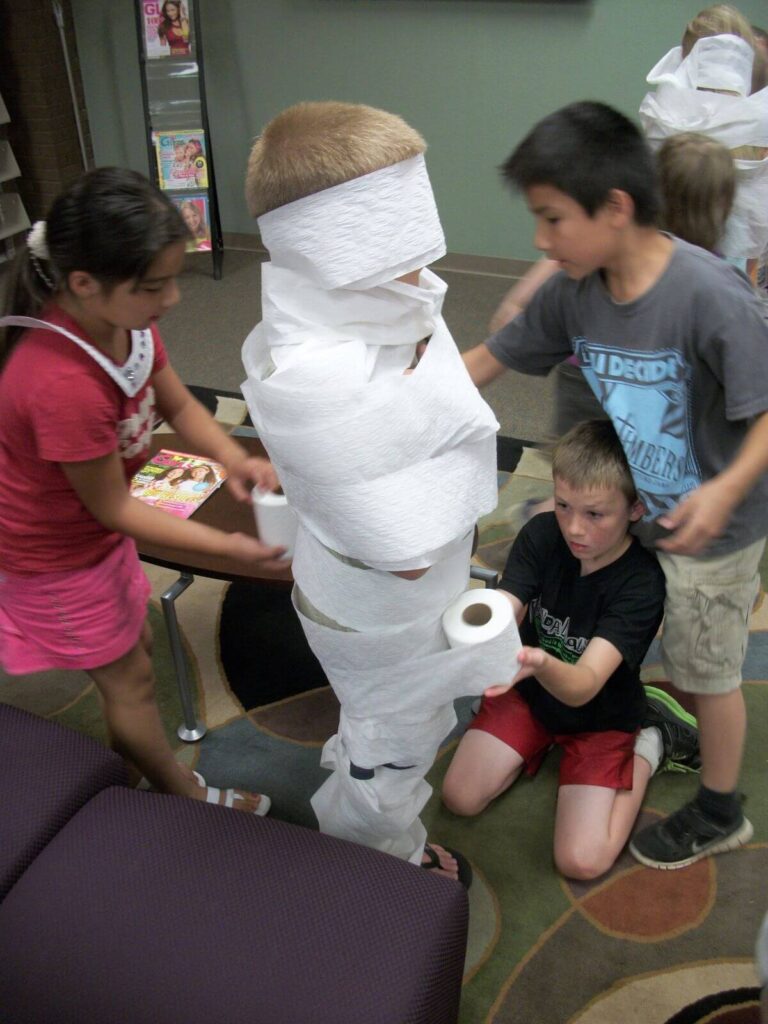
Teams of two. One person wraps, one person becomes the mummy, and the first team with a fully wrapped mummy wins. It reliably produces the funniest photo of the night.
Ages: 5 and up, and a huge hit with tweens and teens.
Time: 2 minutes to set up, 2 minutes per round, 10 minutes to clean up.
Mess: medium, and much worse on a windy day.
Supervision: check in, watching for one specific thing (below).
You’ll need: one roll of toilet paper per team and a phone timer. Buy the cheapest 1 ply roll you can find. It rips constantly, which makes the race harder and much funnier. For younger kids, white crepe paper streamers from the dollar store tear less. Stick with white, since colored streamers can bleed dye onto sweaty skin.
The one rule to enforce: Wrap from ankles to shoulders only. Nothing goes over the face, nose, or mouth. And once a mummy’s legs are wrapped, they stand still, because wrapped legs plus hopping equals a fall.
How to play
- Set a 2 minute timer.
- Teams race to wrap the mummy from ankles to shoulders.
- When time’s up, judge on coverage and the fewest rips.
- Bonus round: the first team to stuff all their paper into a trash bag wins. Your cleanup just became a game.
For younger kids: Kids under 5 love being the wrapper while a parent plays the mummy. For some of them, it’s the best part of the whole party.
7. Monster Can Knock Down
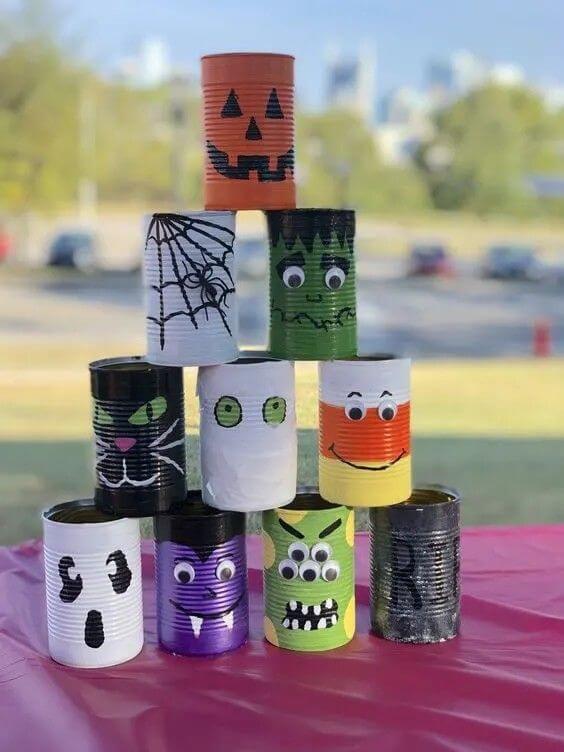
Stack six cans, hand over three bean bags, done.
If you only build one game for kids under 6, make it this one. It’s fast, it’s loud in a satisfying way (without the balloon bang), and little kids knock something over almost every time.
At a glance: ages 3 to 8, about 20 minutes to build, under a minute per turn, 5 minutes to clean up, low mess, check in every few minutes.
Grab these
- 6 empty cans, rinsed. Soda cans for toddlers (light, easy wins); soup cans for older kids (heavier, harder).
- Halloween wrapping paper, or free: brown paper grocery bags colored with markers
- Tape
- A small table, or an upside down storage bin
- Bean bags, or the rice sock version from the balloon ghost game above
- Sidewalk chalk or painter’s tape for a throw line
Before you wrap anything, check the rims. A can opened with a regular can opener has a sharp inner edge. Run a strip of duct tape around the rim, or open your cans with a smooth edge can opener that cuts the side seam instead. Soda cans with pull tabs don’t have this problem.
Build and play
- Wrap or decorate each can. Spiders, bats, and pumpkin faces are easy with a black marker on orange paper.
- Stack a pyramid: 3 on the bottom, 2 in the middle, 1 on top.
- Mark a throw line 4 to 6 feet back (closer for toddlers).
- Give each player 3 bean bags. Knocking all six off wins the top prize; everyone else gets a smaller one.
Scaling it: For 3 year olds, let them stand a couple of steps away and count any can that falls as a win. For kids 8 and up, stack 10 cans and give them only 2 bags.
After dark upgrade: Wrap the cans in black paper and add glow in the dark eyeball stickers for a stack of “monster eyes” that pops under string lights.
Tip: Ask each player to restack the cans after their turn. Kids like being trusted with it, the line moves faster, and your helper isn’t bending over 200 times an afternoon.
8. Ping Pong Pumpkin
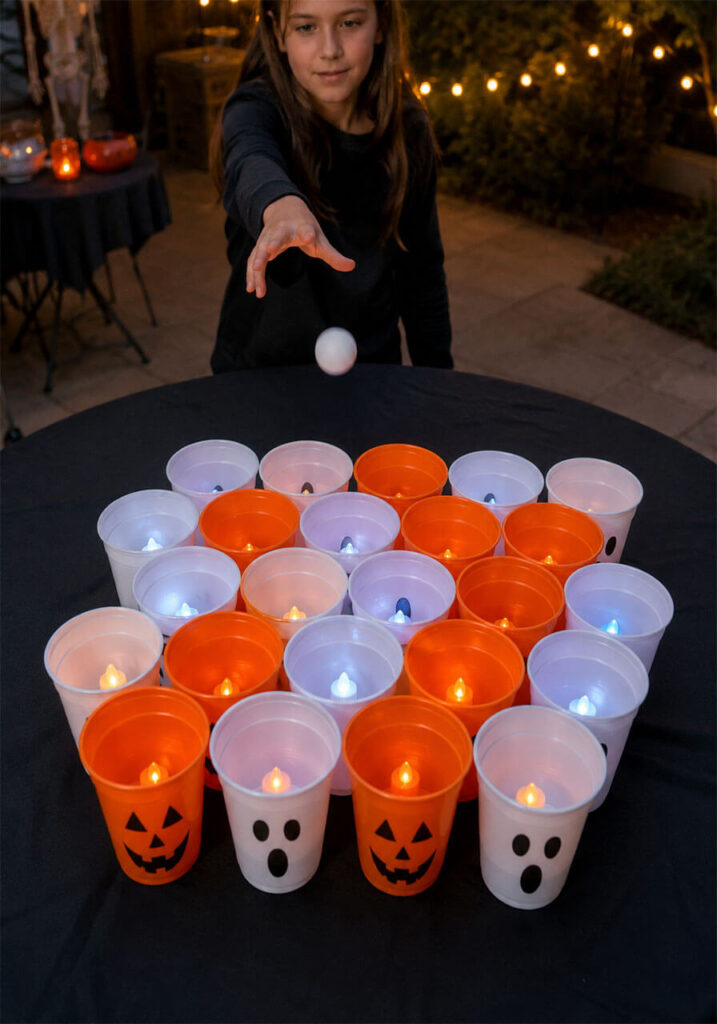
This one looks far more expensive than it is. A cluster of glowing cups on a dark tablecloth, and players try to land a ping pong ball in a lit cup.
What surprised me the first time: ping pong balls bounce straight back out of dry cups. The water filled ghost cups caught almost everything, and the dry pumpkin cups caught almost nothing until I folded a paper towel into the bottom of each one.
| Quick facts | |
|---|---|
| Ages | 4 and up (4 year olds stand closer) |
| Players | One at a time |
| Time | 30 min setup, about 1 min per player, 10 min cleanup |
| Mess | Low to medium; expect some spilled water |
| Supervision | Check in every few minutes; an adult handles all the lights |
Supplies and swaps
- Orange and white plastic cups. Skip the pricey printed ones and draw faces with a Sharpie. Give the ink 10 minutes to dry or little hands will smear it.
- Battery tea lights for the pumpkin cups (dollar store)
- Submersible LED lights for the ghost cups. Free swap: a crack and shake glow stick glows just fine underwater.
- Ping pong balls (dollar store)
- A black plastic tablecloth, or an old dark bedsheet
- Packing tape
Setup
- Draw pumpkin faces on half the cups and ghost faces on the rest.
- Cluster the cups 1 to 2 inches apart and tape the bottoms to the table.
- Pour about 2 inches of water into the ghost cups and drop in a sealed LED light or glow stick.
- Fold a paper towel into the bottom of each pumpkin cup, then set a tea light on top in about half of them.
Rules that don’t start arguments: 3 balls per player. A ball in any lit cup wins the top prize. A ball in a dark cup wins a medium prize. Three misses still earns a small prize.
Easier or harder: Little kids can toss a crumpled ball of aluminum foil instead. It doesn’t bounce, so it stays where it lands. Older kids have to bounce the ball off the table once before it counts.
Safety check: Tea lights and submersible LEDs usually run on coin batteries. An adult switches the lights on and off, and any battery door that pops open easily gets taped shut. Keep this table out of reach of wandering toddlers.
Watch the weather: Even a light breeze sends ping pong balls rolling across the yard. Set this table against a wall, on the porch, or in the garage.
After dark upgrade: Swap in color changing LEDs. Purple and green cups against a black cloth look properly eerie and photograph well for your party recap.
9. Halloween Face Painting & Temporary Tattoos
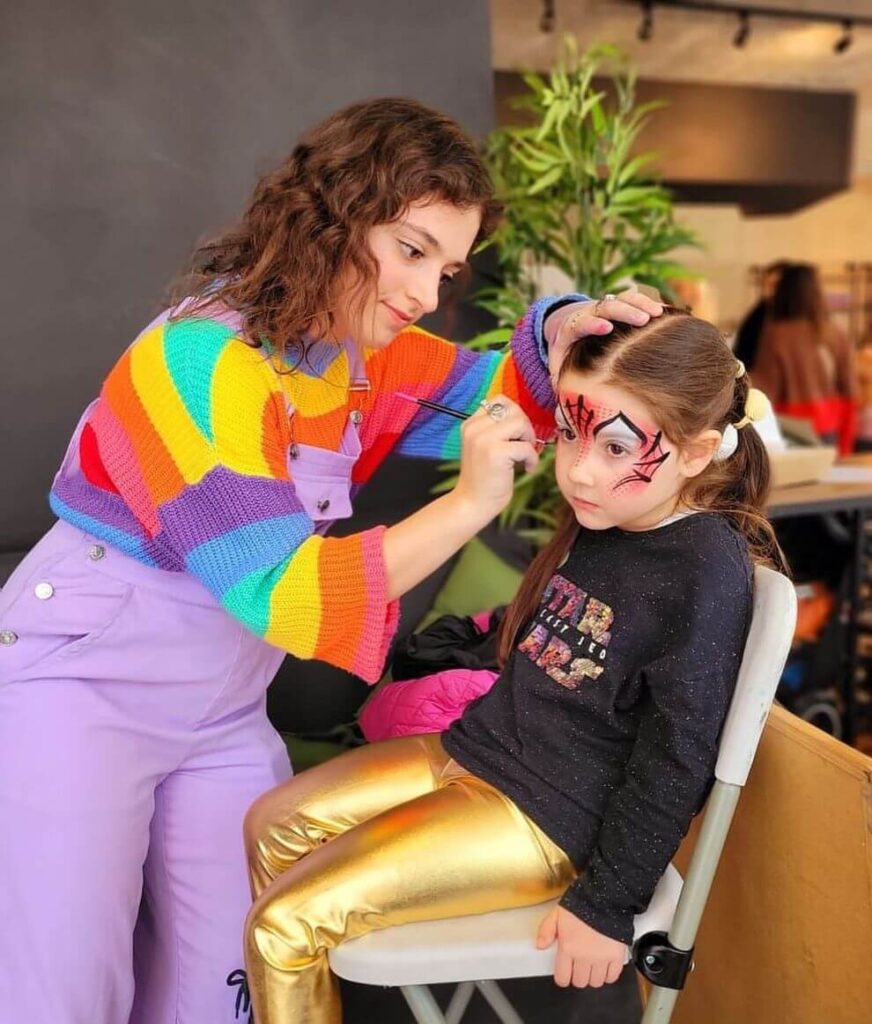
Kids will skip three toss games to walk away with a bat on their cheek. Expect the longest line of the party here, and staff it with your most patient adult or a teen who can draw.
At a glance
- Ages: all, though toddlers rarely sit still long enough for paint (try a tattoo on the back of the hand)
- Time: 20 minutes to set up, 2 to 4 minutes per simple face design, about 1 minute per tattoo, 15 minutes of cleanup
- Mess: medium; paint ends up on collars and sleeves
- Supervision: one dedicated adult, the entire time
What you’ll need
- Cosmetic grade face paint made for skin. Snazaroo is easy to find at craft and big box stores, and a small starter palette covers a whole party. Never use craft acrylics or markers on skin.
- Soft brushes and makeup sponges (one sponge per child; cut sponges into small pieces to stretch them)
- Temporary tattoos (dollar store Halloween packs are fine)
- Unscented baby wipes, cut in half and kept damp in a lidded container
- Cups of clean water, changed often
- A design board: 6 to 8 simple designs drawn on poster board so kids can point instead of describing
Budget route: Tattoos only. A couple of dollar store packs cover a big party, and there’s no brush washing.
Safety before you start
- Try a small dab on the inner arm first for kids with sensitive skin, and skip paint on any child with broken skin, a rash, or an eczema flare.
- Keep paint away from the eye area.
- Rinse brushes between kids, and never share sponges.
- Kids with sensory sensitivities often hate the cold, wet brush. Offer a tattoo or a sticker instead, no pressure.
Tattoos, step by step
- Clean and dry the skin. Smooth, hairless spots hold best.
- Peel off the clear plastic cover.
- Press the design face down onto the skin.
- Hold a damp wipe firmly over the back for 30 to 45 seconds.
- Slide the paper off slowly.
Tip: To remove a tattoo later without scrubbing, press a piece of regular household tape onto it and peel. Most of it lifts right off, and a little baby oil takes care of the rest.
10. Spider’s Web Toss
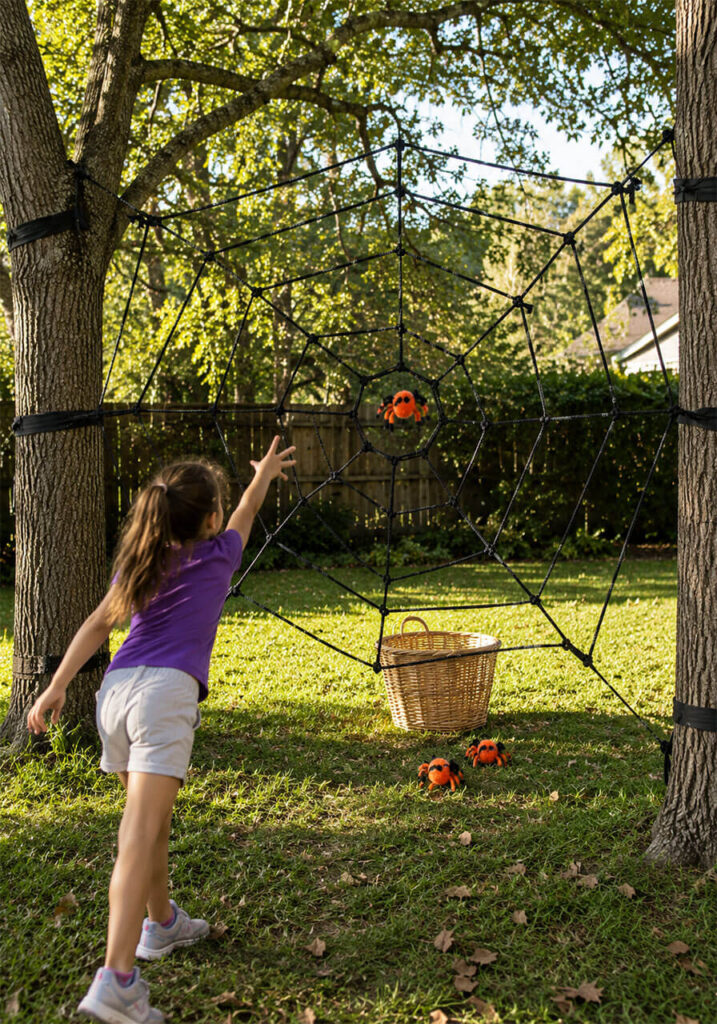
Hang a big web between two trees, set a basket behind it, and ask kids to toss plush bugs through the gaps.
Sounds easy. It isn’t, and that’s exactly why 8 year olds keep coming back.
Ages: 6 and up.
Time: 30 to 45 minutes to build a yarn web, 1 to 2 minutes per turn, about 15 minutes to take it down.
Mess: low.
Supervision: check in every few minutes, plus one firm rule about where kids can run.
Supplies (budget route in parentheses)
- A rope spiderweb decoration (or black yarn and two stakes; yarn is cheaper, rope is faster)
- Plush bugs, spiders, or bean bags
- 1 or 2 baskets or laundry bins
- Two trees, porch posts, or sturdy stakes
Skip the stretchy fake cobweb. It ends up in kids’ hair, toddlers put it in their mouths, and wildlife groups ask people not to use it outdoors because birds and small animals get tangled in it.
Build it
- Tie a yarn or rope square between your two supports, then add spokes from the center and a loose spiral. Leave gaps a bean bag fits through with room to spare.
- Pull everything tight. A saggy web catches every single toss.
- Place the basket 3 to 4 feet behind the web, centered.
- Mark a throw line 2 to 4 feet in front.
Play: 3 bugs each. None in the basket gets a small prize, one or two gets a middle prize, and all three gets the top prize.
Where this goes wrong: Kids playing tag cut behind booths, and a rope strung across their path at neck height is a real hazard for a running child. Put this booth far from any running games, keep the web taut, and flag any stakes so nobody trips. When you take it down, cut the yarn instead of trying to untangle it. Trust me on that one.
Adapting it: For kids under 6, move the basket right behind the web and let them stand close. For tweens, tighten the gaps and add a second, farther basket worth more.
After dark upgrade: Light up or glow in the dark bugs, plus a black light, look great in photos.
11. Mini Pumpkin Bean Bag Toss
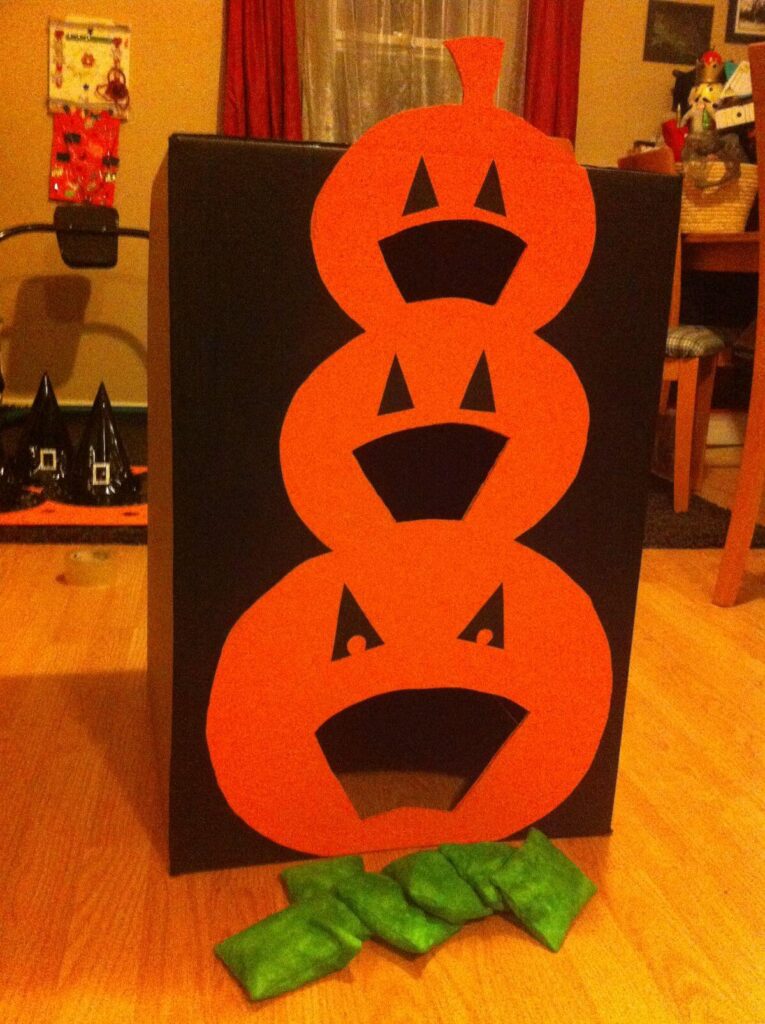
For the littlest guests, this box is all you need. It fits on a patio or in a living room, and it takes about 20 minutes to make, plus paint drying time.
It works best for ages 2 to 5, one at a time, about a minute per turn. There’s no mess once the paint dries, and a helper can watch it from a few feet away.
Supplies: a sturdy cardboard box, orange and black paint (or orange construction paper glued on, or a plain brown box with a marker face), bean bags or rice socks, and something heavy to steady the box.
Steps
- Adult job: cut a big grinning mouth into the front of the box with a craft knife. Make the mouth wider than you think you need.
- Paint the box orange and add black features. Let it dry completely.
- Prop the box so it leans back slightly, and set a heavy book or full water jug inside against the back wall so the box doesn’t slide when a bag hits it.
- Mark a throw line just a few steps away.
How to play: 3 to 5 bags per turn.
Here’s what I learned with this age group: prize tiers cause tears. For toddlers, I skip “small, medium, top” and give every kid the same prize, with a big cheer for any bag that goes in. Save the tiered version (none in the hole earns a small prize, 1 or 2 earns a top prize, all of them earns a grand prize) for 5 year olds.
For bigger kids: Cut a smaller mouth, move the line back, and add a second box farther away that’s worth a better prize.
12. Jumping Spiders
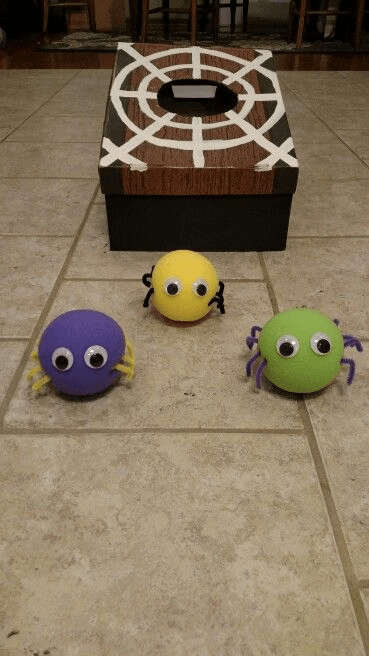
This is the easiest booth on the list to build for an indoor party. A shoebox becomes a spider’s web, three squishy foam spiders wait on the floor in front of it, and kids try to make each spider jump into the hole in the middle of the web.
The catch: Soft foam spiders bounce. Plenty of tosses hit the web, hop off the lid, and roll away, especially on tile or wood floors. That’s part of the fun, but set the box on a rug or lay a towel behind it so strays don’t end up under the couch.
Ages and timing
Ages 3 and up. Plan about 45 minutes to build (plus drying time if you paint), about a minute per player, and 5 minutes to pack up. There’s no mess during play, and supervision is light, with one important job: check the spiders between turns for loose eyes and legs.
For 3 and 4 year olds, let them stand a step or two from the box and count any spider that lands on the web as a win. For kids 8 and up, move the throw line back, or make them bounce the spider off the floor once before it goes in.
What you’ll need
- A shoebox with a lid (free; a boot box is even better because the target is bigger)
- Brown wood grain contact paper for the lid. Free swap: a brown paper grocery bag glued on, or brown paint.
- Black paint or black construction paper for the box sides
- White masking tape or white duct tape for the web. Swap: a white paint pen.
- 3 soft foam balls, roughly tennis ball size. Get the squishy sponge kind from the dollar store or craft store, not hard white craft foam balls, which dent, crumble, and shed little bits.
- Large googly eyes (the big ones are harder for little fingers to pick off)
- Pipe cleaners in a color that stands out against each ball, like yellow legs on a purple spider, black on yellow, and purple on green
- A hot glue gun and a craft knife (adult use only)
- Two full soup cans to weigh the box down
- Painter’s tape for the throw line (it peels off tile and wood floors without leaving marks)
Build it
- Cover the lid with wood grain contact paper, then paint or paper the box sides black.
- Adult job: Trace a square in the center of the lid, a little wider than your biggest spider with its legs on, and cut it out with a craft knife. Measure with the legs, not just the ball. Legs snag on a tight edge and the spider just sits there.
- Make the web. Run strips of white tape from the edge of the hole out to each corner and to the middle of each side. Then add short strips between those spokes in two rings around the hole. Slightly uneven lines look more like a real web anyway.
- Make the spiders. Cut each pipe cleaner into short pieces, bend a small knee into each one, and fold the cut tips back so no wire pokes out. Push 3 or 4 legs into each side of a ball with a dab of hot glue, then glue on two googly eyes.
- Stand the soup cans in the back corners inside the box, put the lid on, and stick down a painter’s tape throw line 3 to 4 feet away.
How to play: 3 spiders per turn, tossed underhand. A spider in the hole wins the top prize. A spider that stays on the web wins a middle prize. Three misses still earns a small prize.
Tip: Cut a small flap in the back of the box so your helper can reach in and grab the spiders without lifting the lid every turn. The line moves much faster.
What goes wrong the first time: Toddler siblings wander over and start picking at the googly eyes. Googly eyes and pipe cleaner pieces are choking hazards for kids under 3, and soft foam gets chewed too, so keep the spiders out of their reach and count eyes and legs when you pack up. If lots of toddlers are coming, draw the eyes on with a permanent marker and use felt strips glued flat along the sides for legs. The game works just as well.
After dark upgrade: Swap the white tape for glow in the dark tape (most hardware and craft stores carry it) and set a battery puck light inside the box so the hole glows. Keep the lid on over the light so little hands can’t reach its coin battery.
13. Pick A Pop Game
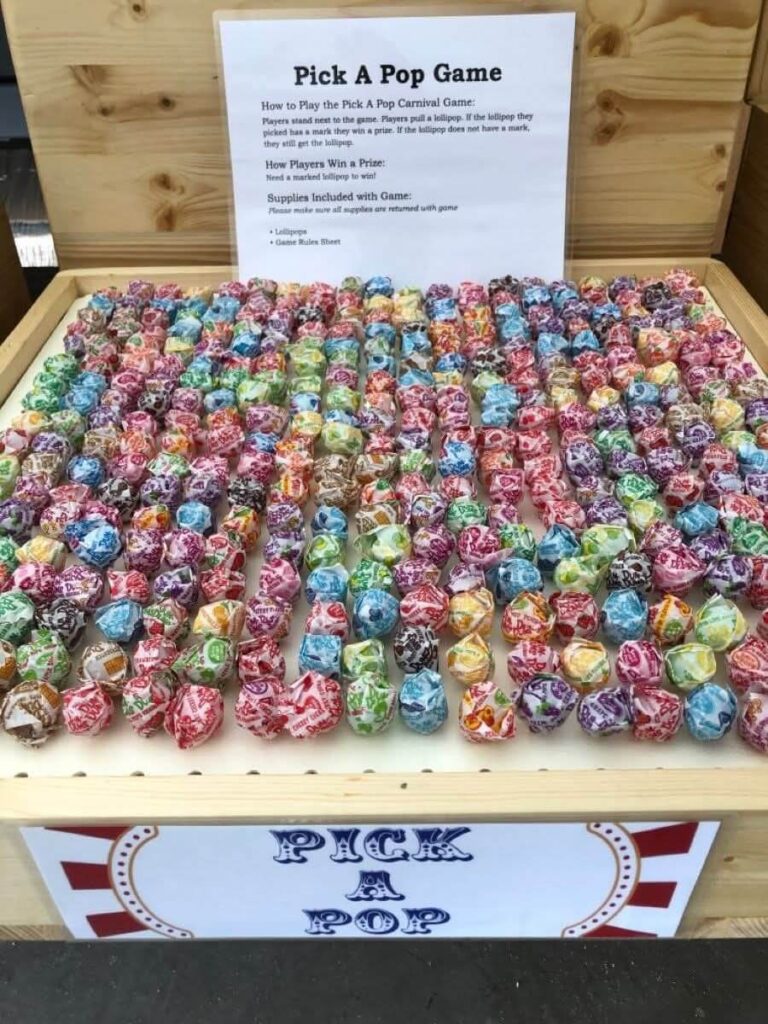
Every kid walks away with a lollipop, and a few secretly marked sticks win a bonus prize. It’s one of the easiest booths to run.
Two safety points before you buy candy. The American Academy of Pediatrics lists hard candy as a choking hazard for children under 4, so younger guests should get the nonfood version below. And ask kids to eat their lollipop sitting down, not while running to the next booth.
Ages: 4 and up for the candy version; any age for the nonfood version.
Time: 20 minutes to set up, under a minute per turn, 10 minutes to clean up.
Mess: low to medium (straw again).
Supervision: check in.
Supplies
- A straw bale, or free: a shoebox or cardboard box with holes poked in the lid
- Small lollipops, one per guest plus extras. Dum Dums are the usual pick because they’re small and cheap, but check the current package for allergen information.
- A permanent marker in 2 or 3 colors
Nonfood version: Push craft sticks into the bale instead, with colored tips that match prize bins (stickers, mini bubbles, small notebooks). Toddlers love pulling sticks every bit as much.
Setup
- Decide how many winners you want and mark the bottom tip of that many sticks with a colored dot.
- Push all the lollipops into the bale or box, spreading the marked ones evenly.
Play: Each kid pulls one lollipop and keeps it no matter what. A colored dot means a bonus prize too.
House rule that prevents arguments: Once you touch a stick, it’s yours. Otherwise kids pull, peek at the bottom, and push it back in.
Tip: If you aren’t using tickets, mark every stick with a color tied to a prize tier. Every kid gets a “winner,” and nobody digs around looking for one.
14. Frightful Fish Bowl Toss
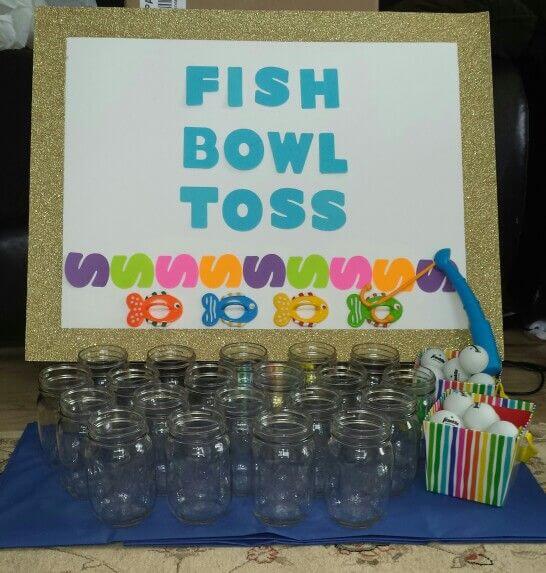
This is the Halloween version of the old carnival fishbowl game: clear cups of tinted water, some hiding a toy fish, and a ping pong ball that has to land in a fish cup.
It’s a close cousin of Ping Pong Pumpkin, so for a small party, pick one. For a big event, run both at opposite ends of the yard.
Ages: 4 and up.
Time: 20 minutes to set up, 1 to 2 minutes per turn, 15 minutes to empty and dry everything.
Mess: medium, since water splashes and food coloring stains fingers and sleeves.
Supervision: check in every few minutes.
Supplies (all dollar store or already at home)
- Small clear plastic cups (skip real glass fishbowls)
- Small rubber fish or bath squirt toys
- Green or purple food coloring (a few drops is plenty)
- Submersible LED lights or glow sticks, optional
- Ping pong balls
Free fish swap: Draw a fish on the bottom of some cups with permanent marker before you add water. It shows right through, and there’s nothing to fish out later.
Setup
- Squirt toy trick (adult job): put a dab of hot glue over the hole in each squirt toy first. They’ll float instead of sink, which looks better anyway, and they won’t grow mold inside.
- Fill the cups with water and tint a few.
- Drop a fish into about half the cups.
- Add lights to a few cups if the party runs past sunset.
- Tape the cup bottoms to the table.
Play: 3 balls. Any ball in a fish cup wins the top prize; everyone else gets a small one.
For little kids: Let them stand right at the table edge, or use the foil ball swap from Ping Pong Pumpkin. Rubber fish are small enough to be a choking risk for kids under 3, so steer toddlers to a different booth.
15. Quacky Pumpkin Duck Pond
Practical note: Toddlers can drown in just a few inches of water, quickly and often without a splash. This booth needs an adult within arm’s reach at all times, and the pool gets emptied the moment nobody is staffing it. No exceptions, not even for “just a minute.”
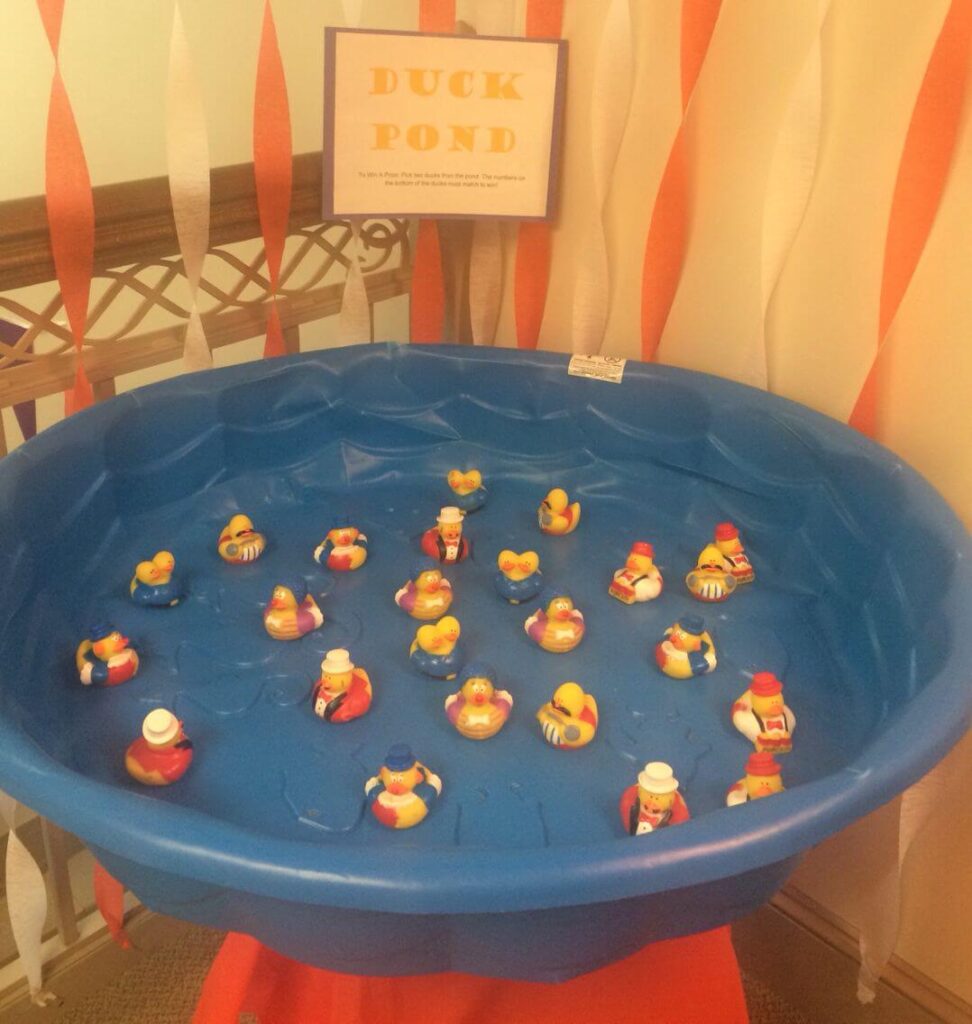
Now the fun part. A small pool of floating pumpkin ducks, each with a secret mark underneath. Kids pull two, and if the marks match, they win. It’s the preschool crowd’s favorite booth, every single year.
| Quick facts | |
|---|---|
| Best for | Toddlers and preschoolers (about 18 months to 5) |
| Players | One at a time |
| Time | 30 min prep, 1 to 2 min per turn, 10 min cleanup |
| Mess | Medium: wet sleeves and a soggy patch of grass |
| Supervision | Hands on, within arm’s reach, the whole time |
Supplies
- A small kiddie pool or a large plastic storage bin
- Rubber ducks (dollar store packs, or bulk packs from Oriental Trading)
- A pool noodle
- A permanent marker, or colored dot stickers
- A hot glue gun (adult use)
The fix for kids who can’t read yet: Most 3 year olds can’t read a word on the bottom of a duck. Use colored dots, simple shapes, or stickers instead, so kids can check their own match and feel proud of it.
Setup
- Adult job: slice the pool noodle into half inch rounds with a bread knife.
- Hot glue one duck to the center of each round so it floats upright and hides its bottom.
- Mark each duck’s underside, making every symbol twice so the ducks come in pairs.
- Add a few inches of lukewarm water right before the booth opens. October hose water is cold, and cold, wet sleeves end the fun fast.
Play: 3 tries to pick 2 matching ducks. A match wins a prize; everyone else gets a small consolation prize.
No water version: Fill the pool with ball pit balls instead and hide the ducks among them. There’s no drowning risk at all, and it’s what I’d choose for a party with lots of very young toddlers.
Tip: Push sleeves up before kids reach in, and keep a towel hanging on a chair right next to the pool.
16. Spin-a-Prize Wheel
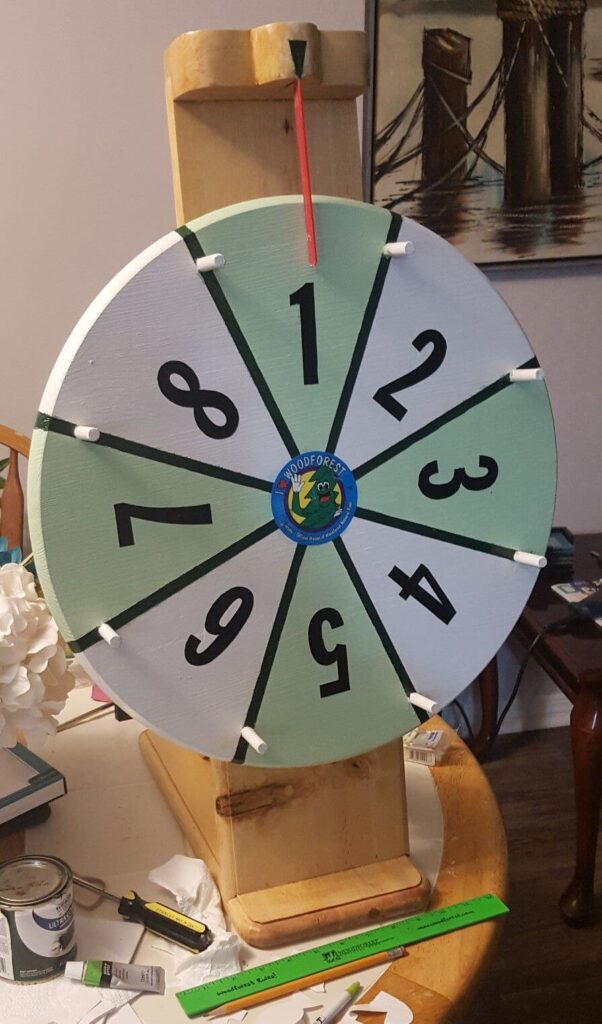
Numbers on the ground, kids standing on them, one spin, one winner. This booth has real carnival energy, and it’s the one I’d put near the snack table because it pulls people in.
It works for all ages (toddlers can stand on a number with a parent). Setup takes about 30 minutes, each round takes 2 to 3 minutes with several kids playing at once, and cleanup takes 5. There’s no mess. You will need one adult stationed here the entire time, mostly because this is where the prizes live.
Two ways to build the spinner
The free way: Draw numbered wedges on a sturdy paper plate. Hold a pencil point upright in the center with one end of a paper clip looped around it, and flick the clip. It’s perfect for a small group around a table.
The sturdier way: Cut a large cardboard circle, number the wedges, and attach a cardboard arrow in the center with a brass paper fastener. Widen the hole in the arrow a little so it spins freely. Or draw wedges on a thrift store lazy Susan and tape a fixed pointer beside it.
Setup: Write matching numbers on the ground with sidewalk chalk, or on paper plates taped to the floor if you’re indoors.
How to play
- Kids pick a number and stand on it, one kid per number.
- Once most numbers are taken, spin.
- The kid on the winning number chooses a prize. Everyone else gets a small treat for playing.
What goes wrong: Two kids want the same “lucky” number. Let kids choose in the order they lined up, and the argument is settled before it starts.
17. Glowing Tonic Toss
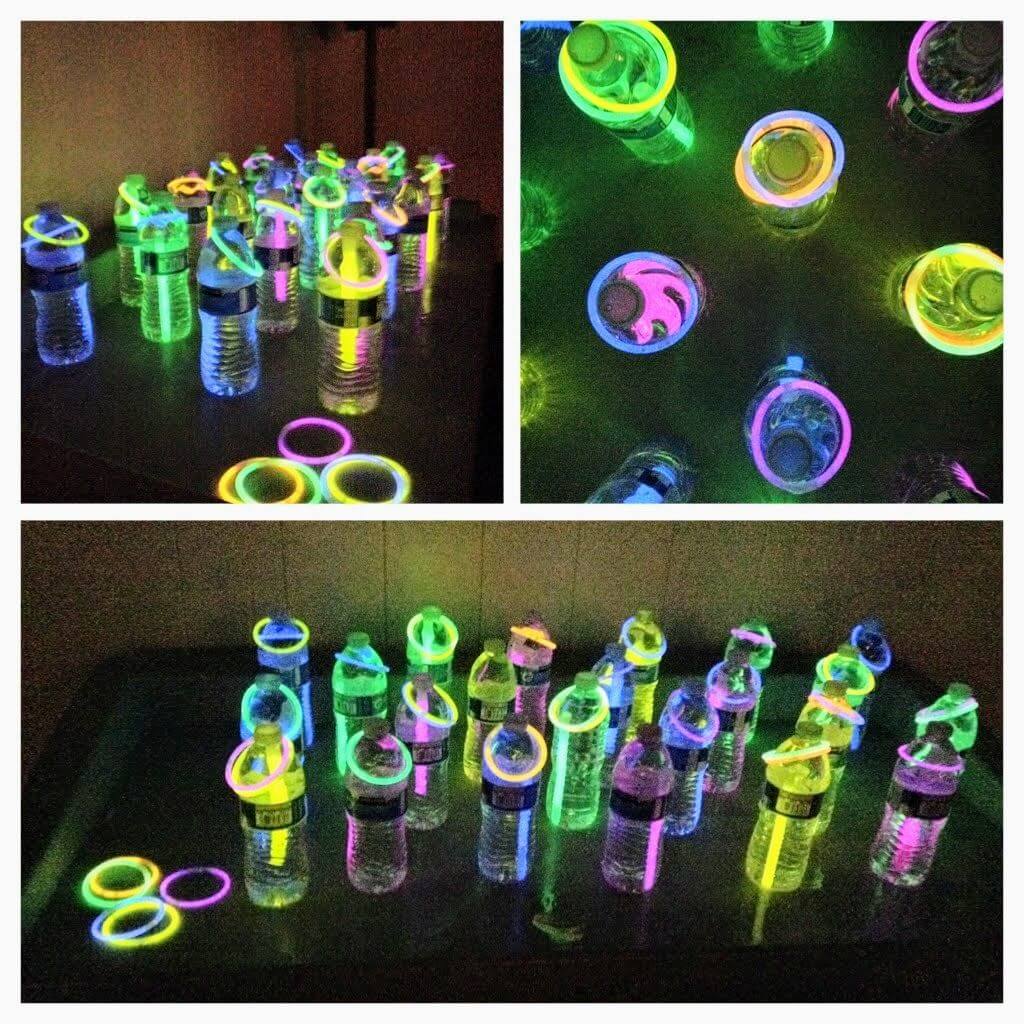
Who is this for? Teens and adults. It’s the moodiest booth on the list, and the only one I’d keep away from little kids entirely, because it uses glass bottles.
What’s the idea? A tight cluster of glowing “poison” and “potion” bottles sits on a table. Players toss glow bracelets and try to ring a bottle neck. It’s mostly luck, which makes it a nice equalizer for guests who aren’t sporty.
Can younger kids play? Yes, with a swap. Use plastic soda or water bottles with a few inches of colored water inside so they don’t tip, and let kids 6 and up stand closer. Trade the thin bracelets for bigger rings, like rope rings from an old ring toss set or embroidery hoops from the craft bin.
How long does it take? A few weeks of saving bottles, about 45 minutes to label and light them, 1 to 2 minutes per player, and 15 minutes to pack up.
How messy is it? Low, unless a bottle breaks. Set the table on grass rather than concrete, keep a broom and a small box nearby for glass, and have one adult stay at this booth.
Supplies
- 18 to 24 glass bottles (light colored glass glows best): soda, juice, or sparkling water
- Labels on printer paper: hand drawn skulls, “Witches’ Brew,” “Poison,” “Dried Frog Feet”
- Battery tea lights or mini flashlights, one per bottle
- Glow bracelets (dollar store tubes are cheap)
Setup
- Soak the bottles in warm water to peel off the old labels.
- Tape on your spooky labels.
- For colored “potions,” fill a few bottles with water and a few drops of food coloring.
- Cluster the bottles tightly on the table and tape a light behind each one, facing forward.
How to play: 5 bracelets per player, tossed from about 3 feet away. Any ringer wins a prize.
Two things worth knowing before the party: Glow bracelets look noticeably dimmer on a cold night, so crack fresh ones every hour instead of all at once. And little siblings will try to chew them. The liquid inside can sting skin, eyes, and mouths, so keep the spare tube up high. If a bracelet breaks open, rinse the area with water, and if a child swallows any, call Poison Control at 1 800 222 1222 (U.S.).
After dark upgrade: The colored water glows orange, green, and purple under the lights. It’s a tiny effort for a big visual payoff.
18. Giant DIY Pumpkin Bean Bag Toss
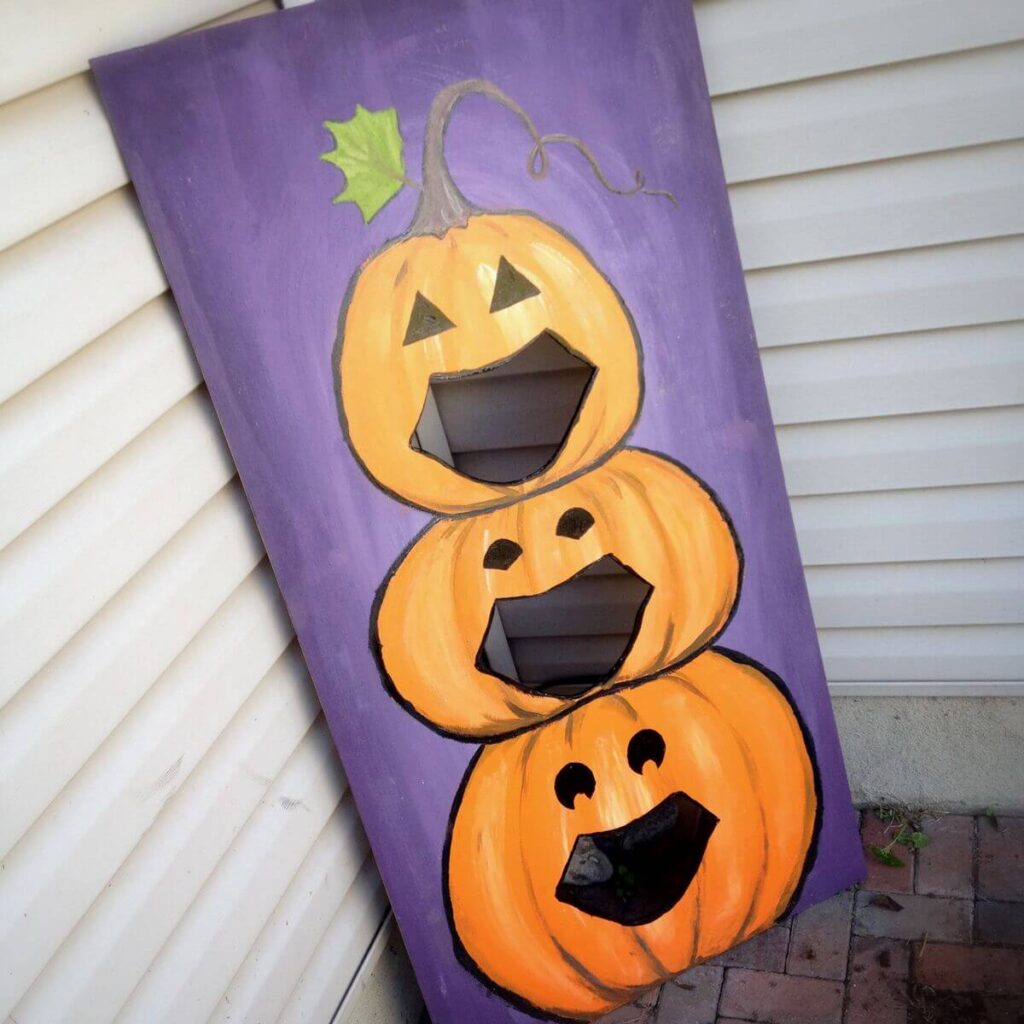
This is the big sibling of the Mini Pumpkin Bean Bag Toss: a large painted board with pumpkin shaped holes, leaned against a tree or wall. It makes a real statement at a block party or school festival.
It’s also a weekend project, not a weeknight one.
Ages: 3 and up, as long as you cut a few holes low for little kids.
Build time: 2 to 3 hours plus paint drying.
Per turn: 1 to 2 minutes.
Cleanup: 10 minutes, mostly moving the board.
Mess: paint during the build only.
Supervision: check in during play, and the board itself must be secured.
Supplies and swaps
| You could buy | Or use |
|---|---|
| A sheet of plywood | A large appliance box (many appliance stores will set one aside if you ask) |
| Fall colored acrylic paint | Leftover house paint or paint sample pots |
| Bean bags | Rice socks |
| Bungee cords | Rope or heavy zip ties |
Build it
- Sketch 3 to 5 pumpkin shaped holes. Tracing around a dinner plate gives a good size for kids.
- Adult job: cut the holes, with a jigsaw for plywood or a sturdy craft knife for cardboard.
- Paint a fall scene around the holes and let it dry fully.
- Secure the board to a tree, post, or wall so it can’t tip in the wind.
A word on bungee cords: They snap back hard if a hook slips, and they often sit right at a child’s eye level. Hook them with the open end facing away from the play area, or use rope or zip ties instead.
Play: 3 bags each. None through the holes earns a small prize, 1 or 2 earns a top prize, and all three (it’s rare) earns a grand prize.
Tip: The board stores flat in the garage and can be repainted for a spring fair. One build, years of use.
19. DIY Disc Drop
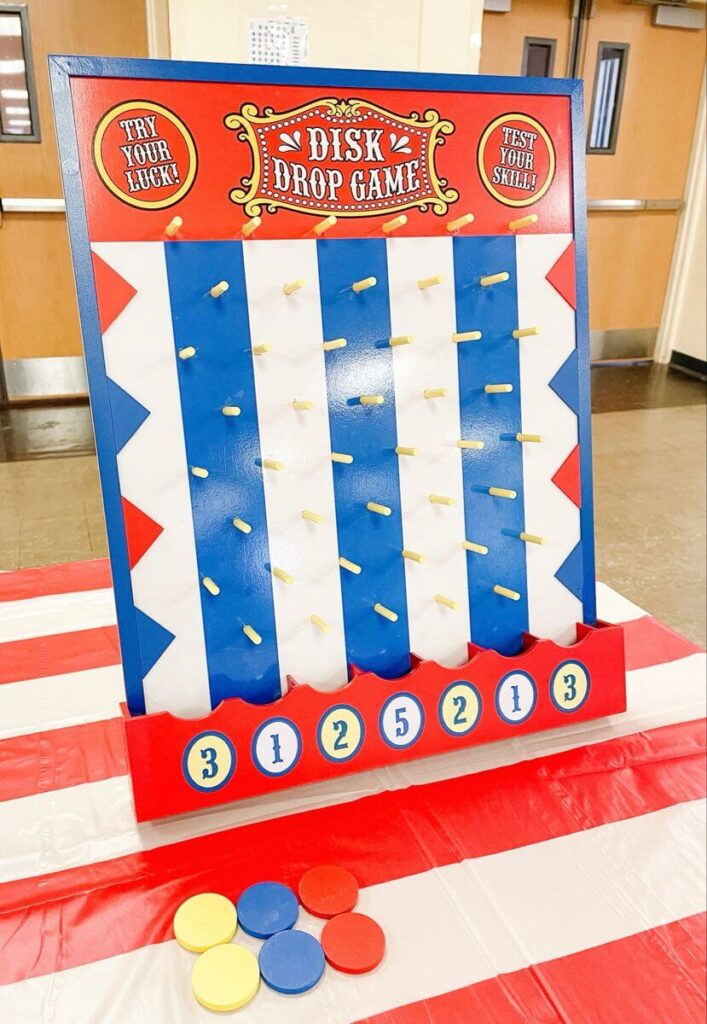
Not every kid wants to throw things in front of a crowd. This is the booth for them.
A disc drops from the top of a peg board, bounces its way down, and lands in a numbered slot. Watching it bounce is oddly calming, which makes it a good pick for shy or noise sensitive kids.
Quick facts: ages 3 and up, 1 to 2 hours to build, under a minute per turn, no mess, light supervision, works any time of day.
What you’ll need
- A flat board: plywood, an old picture frame backing, or free: two layers of cardboard glued together
- Golf tees (they push easily into thick cardboard or foam board) or short nails for wood (adult job)
- Craft sticks or cardboard strips for slot dividers
- A disc: a checker piece, a large bottle cap, or a big wooden coin
Choking check: Checkers, coins, and bottle caps all fit through a toilet paper tube, which makes them a choking hazard for kids under 3. If toddlers will be nearby, use a bigger disc, like the plastic lid from a food storage container, and space the pegs wider to match.
Build it
- Mark a staggered grid of dots across the board, like a brick wall pattern.
- Push in golf tees or hammer in nails at each dot, leaving gaps about one and a half times the width of your disc.
- Glue dividers along the bottom to make 5 to 7 slots, and number them.
- Prop the board at a slight backward lean.
Troubleshooting: If the disc zips straight to the bottom, lean the board back more. If it keeps getting stuck, your pegs are too close together.
Play: Each player drops the disc once from anywhere along the top. Assign a prize to each number, and make an edge slot the top prize, since the disc lands there least often.
20. Pumpkin Sack Races
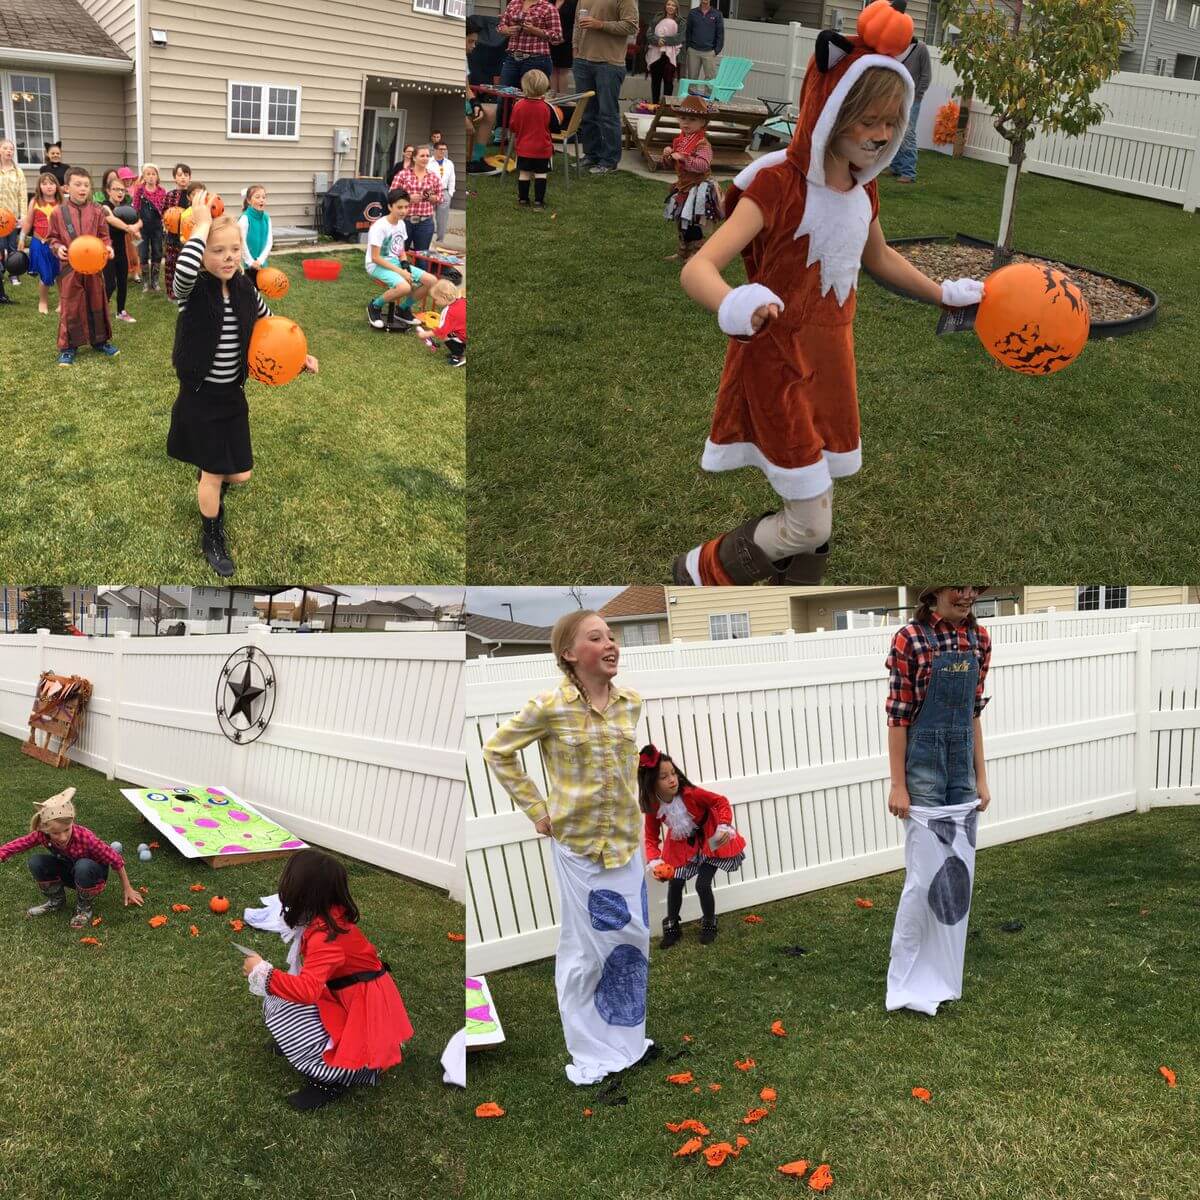
No building required, just grass and sacks. It gets kids moving, which helps after a long stretch of standing in lines.
The catch is costumes.
The costume problem: Long dresses, capes, and inflatable costumes turn a sack race into a faceplant waiting to happen. Before each heat, have kids push masks up, tuck capes in, and hold long skirts inside the sack. Kids in bulky inflatables can be the official starter instead.
Ages: 5 and up. Time: 10 minutes to set up, 1 to 2 minutes per heat, 5 minutes to pack away. Mess: low, apart from grass stains. Supervision: check in, with one adult posted at the turnaround.
What you’ll need
- 6 or more sacks. Pumpkin print burlap sacks look great. Free swaps: old pillowcases, or burlap coffee sacks (local coffee roasters often give these away).
- Cones, flags, or a pumpkin for the turnaround
- A wide, flat, grassy space away from concrete, curbs, and poles
Never use plastic bags of any kind for sack races, including trash bags.
Setup
- Mark a start line.
- Place a turnaround marker about 25 feet away.
- Walk the grass and check for stakes, holes, and sprinkler heads.
How to play: Run heats of 3 or 4 kids grouped by size. Racers hop to the turnaround and back. Everyone who finishes gets a small prize, and each heat winner gets a slightly better one.
Heads up: Burlap is itchy on bare legs. Kids in shorts or tights should race in pillowcases.
For younger or older kids: Kids 3 and 4 tend to tip forward in sacks, so give them a “monster stomp race” with no sack at all. For tweens and teens, make it a relay where teams pass one sack from runner to runner.
21. Ghost Tag
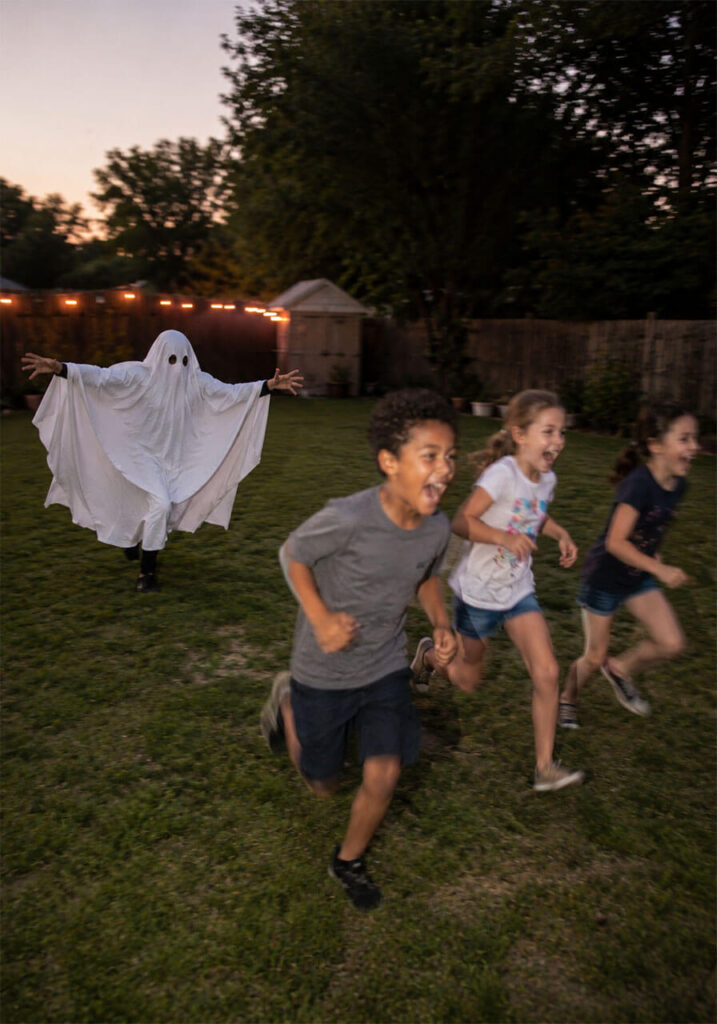
Tag with a twist. Whoever is “it” is the ghost, and anyone tagged becomes a ghost too, until one last human is left standing.
Ages: 5 and up. Time: 5 minutes to explain, 10 to 15 minutes of play. Mess: none. Supervision: an adult watching the whole time, because collisions happen fast in costumes.
Please skip the sheet over the head. A child running with fabric over their face can’t see curbs, trees, or other kids. Have the first ghost pull a white tee over their costume or carry a white pillowcase as a “ghost flag.” Avoid anything tied around the neck.
You’ll need: a big open yard and an old white tee or pillowcase.
Before you start: Walk the play area and move decorations, stakes, and any booth with ropes or glass. Play in daylight or in a well lit yard.
How to play
- One player starts as the ghost.
- Everyone else runs.
- Tagged players put a hand on their head to show they’re ghosts now, and join the chase.
- The last human standing is the first ghost next round.
Scaling it: For little kids, play “slow ghost,” where the ghost can only tiptoe. For tweens at dusk, try flashlight tag: the ghost tags someone by landing a flashlight beam on them.
Timing tip: Run this before the snacks and candy come out, not after. Twenty kids in costumes on a sugar high is when the scraped knees happen.
Common First Timer Mistakes With DIY Halloween Games
These are the ones I see (and made) most often.
- Building the week of the party. Paint on plywood and bottles needs a full day to dry, and milk jugs take two weeks to save up. Do your big builds the weekend before.
- Too many booths, too few helpers. Eight games and two adults means six unstaffed booths and a prize table that’s empty in ten minutes.
- No prize plan. Loose prizes on a table vanish. Bag them by tier ahead of time and keep the bins behind the booth.
- Glow games at a 2 p.m. party. They look flat in daylight. Save glow effects for after sunset, or schedule those booths last.
- A real candle “just for one booth.” Capes and tulle catch fire easily. Battery lights only, everywhere.
- Forgetting the throw line. Without a chalk or tape line, kids creep forward until they’re dropping bean bags straight into the target.
- Skipping the allergy question on the invite. Latex balloons, nut candy, and hay bales are three problems you can solve before anyone arrives.
- Running games straight after the candy. Put the active games first and the calm booths (disc drop, face painting) after the sugar.
- No cleanup sweep. Balloon scraps, wrappers, and tiny prizes left in the grass are a problem for crawling babies and pets the next morning.
FAQs
What Halloween games are safe for a 3 year old?
Witches’ Brew Toss, Mini Pumpkin Bean Bag Toss, Candy Corn Bowling, and Monster Can Knock Down (with soda cans) are the best fits. Skip balloons, hard candy, and small toy prizes, and keep an adult nearby.
How many games do I need for a kids Halloween party?
For 10 to 15 kids, 3 to 5 games is plenty, as long as each one has an adult or teen helper. Bigger block parties or school events usually need 8 to 10.
Are balloon pop games safe for kids?
They can work for school age kids if an adult picks up every scrap right away, but broken balloon pieces are a known choking and suffocation hazard for children under 8. For younger kids or anyone with a latex allergy, use the version where bean bags go through holes in the board.
What can I give as prizes instead of candy?
Stickers, pencils, mini bubbles, small notebooks, and glow bracelets (for older kids) all work well. Nonfood prizes keep the party safe for kids with food allergies.
Can I play these Halloween games indoors?
Yes. Candy Corn Bowling, DIY Disc Drop, Mini Pumpkin Bean Bag Toss, Witches’ Brew Toss, the prize wheel, and face painting all work inside. Keep the straw, water games, sack races, and Ghost Tag in the yard.
How do I get face paint out of a costume?
Most water based face paints, Snazaroo included, come out with cool water and a drop of dish soap if you treat the spot before it dries. Blot rather than rub, and check the costume’s care label before washing.
Read Next
If you want a calm table between games for the youngest guests, our easy Halloween crafts for kids, sorted by age, on are quick to set up. Hosting in a parking lot instead of a backyard? Our trunk or treat games and decorating ideas guide covers what fits in a car trunk.
So here’s the plan. Pick your games tonight, start saving milk jugs and cans tomorrow, and do the painting the weekend before. By the time the first small dinosaur walks through your gate, the paint will be dry, the prizes will be bagged, and you’ll get to enjoy the chaos instead of managing it.