
The best garden activities for kids are the ones that give a child one job they own, need almost no setup, and show a visible result within a few days. Start with a container or small raised bed that belongs to them, fast growers like radishes and sunflowers, and one hands-on science project such as a bug hotel or a worm farm. You need a patch of soil or a sunny balcony, a real metal trowel, a watering can, and about 20 minutes a day, not a landscaped yard.
Last June my 7 year old lasted eleven minutes outside before she was back at the door announcing there was nothing to do. Eleven minutes. I had sent her out there like the yard was a solved problem.
It wasn’t the yard. It was that I had handed her a space with no job in it.
What changed things was embarrassingly small: one plastic tote of soil that was hers, a $2 packet of radish seeds, and a tape measure. She checked that tote every single morning before breakfast for six weeks.
Below are 20 garden activities for kids that have actually run in my yard, with the ages they really fit, how messy they get, how long they take including cleanup, and where each one falls apart on the first try. Skip anything that doesn’t suit your kid. Nobody is doing all 20.
How Do You Turn a Backyard into a Fun Learning Garden for Kids?
You give one small piece of it away. That’s the whole trick.
A kid who has been told to “help in the garden” is doing your project. A kid with their own tote, pot, or corner of a bed is doing theirs, and they will check on it unprompted. The size genuinely does not matter. Mine started with a storage tote.
Then attach it to a number. Height in inches, days until sprouting, bugs found under the flat board, millimeters of rain. Numbers give a 5 year old a reason to come back tomorrow, which is the part most guides skip.
Give real tools, too. Plastic toy trowels bend on the first push into packed soil, the kid decides gardening is annoying, and you’ve lost them in four minutes.
Practical note: Do the first project in a container, not in the ground. If your kid loses interest in nine days (very normal), you’ve lost $5 and one afternoon instead of a weekend and a lumber run.
The Starter Kit for Garden Activities for Kids (and the Free Version)
This kit covers roughly 15 of the 20 activities below. Buy the trowel, improvise the rest.
| What you need | Roughly | Free or cheap swap |
| Metal hand trowel (Fiskars Ergo is about $8 and survives being left in the rain) | $8 | Any old kitchen spoon, a broken tent peg |
| Small watering can | $6 | Milk jug with 5 nail holes punched in the cap |
| Magnifying glass | $1.25 at Dollar Tree | Your phone camera zoom, a clear jar of water |
| Fitted garden gloves | $5 | Kid-size winter gloves you don’t love |
| Seed packets (Burpee, Ferry-Morse) | $2 to $3 each | Bird seed sunflower kernels, dried beans, grocery herb cuttings |
| Bucket or tote | $5 | Cat litter tub, laundry basket, cardboard box lined with a bag |
| Painter’s tape and a Sharpie for labels | $4 | Cut-up yogurt tub strips, paint stirrers (free at hardware desks) |
Where to source cheaply: garden centers clear out seeds and pots at 50 to 75 percent off in late summer and early fall, so early September is the single best week of the year to stock up for spring. Tree services will often drop wood chips for free. Local Buy Nothing groups are full of pots. Coffee shops hand over used grounds if you ask.
Quick Pick Table: Match the Activity to Your Kid and Your Patience
Scan this, pick one, close the tab. Total time includes prep and cleanup.
| # | Activity | Best ages | Mess | Total time | Supervision |
| 1 | Raised Beds | 4 to 10 | High | 60 to 90 min build | Hands on for build |
| 2 | Outdoor Easel | 2 to 9 | High | 45 min | Close under 5 |
| 3 | Garden Stations | 3 to 11 | Medium | 45 min | Check every few min |
| 4 | Garden Center | 3 to 7 | Medium | 45 min | Loose |
| 5 | Grow Your Own Sunflowers | 3 to 12 | Low | 25 min, then 1 min a day | Light |
| 6 | Nature Sorting | 18 mo to 6 | Low | 30 min | Constant under 3 |
| 7 | Build a Bug Hotel | 4 to 12 | Medium | 60 min | Hands on (tools) |
| 8 | Worm Farm | 4 to 12 | Medium | 40 min setup | Hands on for setup |
| 9 | Sensory Garden | 1 to 6 | High | 30 min setup, open play | Constant under 3 |
| 10 | Chalk Wall | 2 to 10 | Low | 30 min mount, then anytime | Loose |
| 11 | Sunprint Art in the Garden | 4 to 10 | Low | 20 min | Hands on |
| 12 | Grow a Salad Garden | 3 to 12 | Medium | 25 min, then 5 min a day | Light |
| 13 | Nature Table | 2 to 8 | Medium | 20 min setup, open play | Loose, close under 3 |
| 14 | Bug Hunt | 2 to 10 | Low | 30 min | Close under 5 |
| 15 | Wildlife Camera Watch | 5 to 12 | None | 20 min, then 10 min a morning | Light |
| 16 | Butterfly and Bee Count | 5 to 11 | None | 20 min | Stay nearby |
| 17 | Rain Gauge and Weather Tracking | 5 to 11 | None | 15 min, then 1 min a day | None after setup |
| 18 | Garden Obstacle Course | 2 to 12 | Low | 45 min | Close (falls) |
| 19 | Sunflower Seed Counting | 4 to 11 | Medium | 45 min | Close under 4 |
| 20 | Garden Night Walk | 3 to 12 | None | 30 min | Hands on throughout |
Best Garden Activities for Kids
One seasonal note before you start. It’s early September as I write this, so if you’re reading in the northern hemisphere right now, the fall-friendly picks are the bug hotel, worm farm, nature sorting, seed counting, and the night walk (dark comes early, which is handy). Sunflowers and salad greens want a spring sowing, so bookmark those two.
1. Raised Beds

Ages: 4 to 10, with 2s and 3s helping fill and pat | Time: 60 to 90 minutes to build, then 5 minutes a day | Mess: High, and it comes indoors on shoes | Supervision: Hands on for the build, loose after
A raised bed works because it draws a border. Inside the border is theirs, outside is yours, and that ends the argument about trampled plants before it starts. The height also means a 4 year old can dig without stepping on their own seedlings.
Build it 4 feet by 2 feet and 10 to 12 inches deep. That size lets a short arm reach the middle from either side, which is the difference between a kid weeding and a kid asking you to weed.
What you need
- Cedar or untreated pine boards, or a $30 kit. Swap: a plastic storage tote with drainage holes drilled in the base, a ring of cinder blocks, or plant straight into a slit-open bag of soil.
- Topsoil and compost, roughly half and half. Swap: municipal compost is often free or a few dollars a load, and coffee grounds plus shredded leaves bulk it out.
- Flattened cardboard for the bottom (blocks weeds, no need for landscape fabric).
- Paint stirrers as name markers. Free at most hardware desks if you ask.
Steps
- Pick the sunniest spot you have, ideally 6 or more hours of direct sun.
- Lay cardboard over the grass, overlapping the seams.
- Screw the frame together, then set it in place. Adult job, drill and screws.
- Fill with the soil and compost mix, stopping 2 inches below the rim.
- Hand your kid five seeds at a time and let them place them.
- Water until the soil is dark and damp, not puddled.
Tip: Give each kid their own labeled half. Shared beds turn into border disputes by week two.
First try, what went wrong for us: She planted an entire packet in one square foot, an inch deep. Radish seeds want about a quarter inch of cover and an inch of space. Five seeds at a time solved it.
Safety: Skip old railroad ties, creosote-soaked timber, and any wood treated before 2004 with CCA arsenic-based preservative. Cedar or plain untreated pine is the simple answer. Drilling and cutting is yours, not theirs.
2. Outdoor Easel
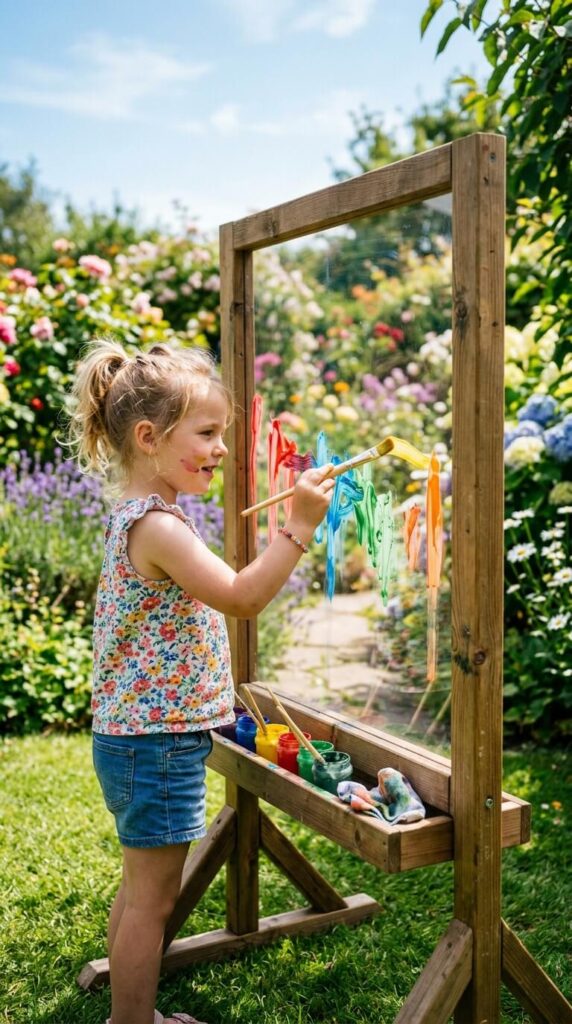
Ages: 2 to 9 | Time: 20 minutes to set up, 15 to 40 minutes painting, 5 minutes to hose down | Mess: High | Supervision: Close under 5, check-ins after
A clear panel changes what kids paint. Instead of the usual house, sun, and three stick people, they look through the acrylic at an actual flower and try to trace it. My son painted the same hydrangea four times in a week and got noticeably closer each time.
Put it in shade. On a sunny 85 degree afternoon, tempera skins over in about three minutes and the brush drags, which frustrates them fast.
What you need
- A clear acrylic or polycarbonate sheet in a wooden frame. Swap: a clear plastic storage bin lid zip-tied to a fence, or a length of clear shower curtain stapled between two garden stakes.
- Washable tempera. Crayola Washable Kids Paint is the one I keep buying because it actually rinses off the panel with a hose.
- Chunky brushes, a cup of water, and an old towel on a hook.
Tip: Squeeze one drop of dish soap into each paint color. It releases from plastic and skin far more easily, and it costs nothing.
Trade-off: “Washable” is not “stain-free” on cotton. Red and purple tempera has permanently marked two of my kids’ shirts. Play clothes only.
Skip it if: Your child hates having anything on their hands. Offer a long brush and a damp rag within reach, and let them stop after two minutes without comment.
3. Garden Stations
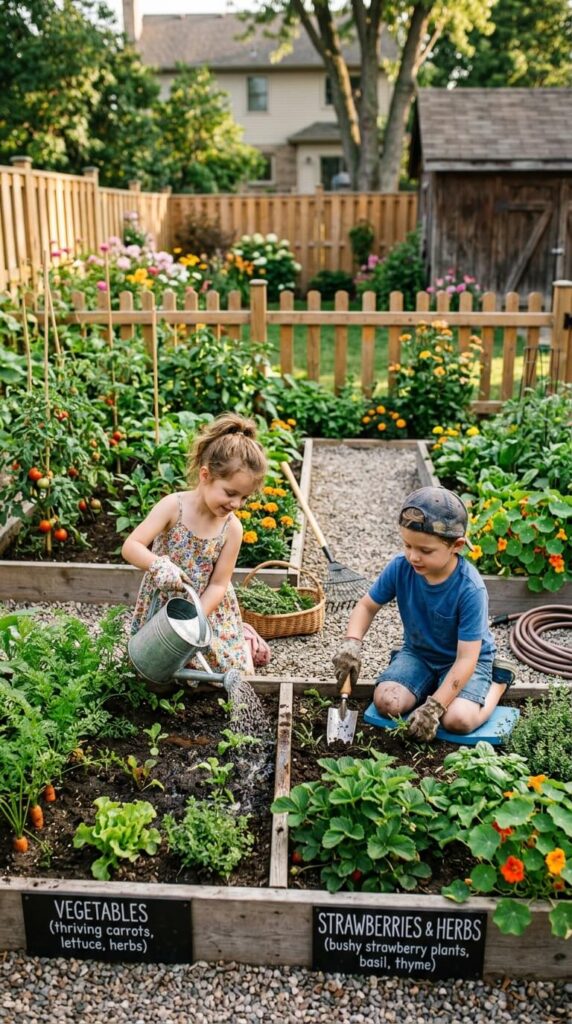
Ages: 3 to 11, best with two or more kids | Time: 15 minutes to set up, 30 minutes of play | Mess: Medium | Supervision: Check in every few minutes | Cost: Free if you own a watering can
This one is for playdates and siblings. Four zones (watering, planting, weeding, compost), one job each, and a 10 minute timer for rotations. Chaos drops noticeably because nobody is standing in anybody’s dirt.
Label the zones with paint stirrers or chalk. Kids take made-up job titles seriously, so let them name theirs.
What you need: Child-size metal trowel, a small watering can, a bucket for weeds, and a compost spot. Swap: a yogurt tub with nail holes in the bottom is a genuinely good sprinkler, and an old measuring cup becomes the scoop.
What actually goes wrong: Everybody wants the hose. Every time. Either the hose is a grown-up-only tool, or the hose is the final rotation and the timer decides, not you.
Skip it if: You have one child. This activity’s whole engine is division of labor, and solo it just feels like a chore list.
4. Garden Center
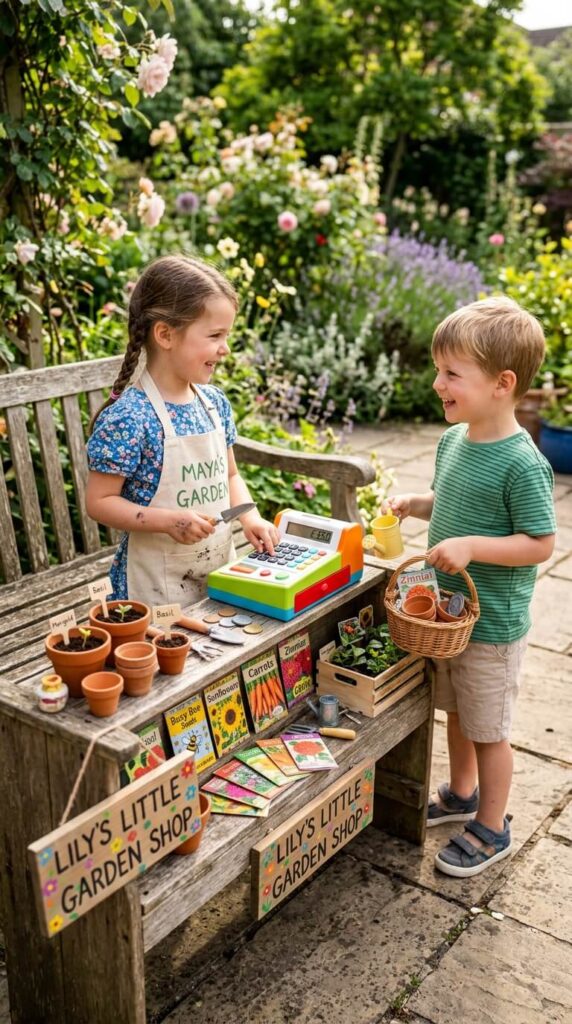
Ages: 3 to 7 | Time: 15 minutes to set up, 30 to 45 minutes of play | Mess: Medium | Supervision: Loose, but constant for under 3s because of seeds
Pretend shop, real materials. The reason this holds attention longer than a plastic play kitchen is smell and texture: real potting soil, real dried rosemary and mint, real terracotta. Dollar Tree sells small terracotta pots for about $1.25, and that’s the entire props budget.
Set it up on a patio table with a boot tray or a baking sheet underneath. Soil will go everywhere otherwise, and then you resent the activity.
What you need
- Small pots, seed packets, a scoop of potting soil, dried herbs, masking tape price tags.
- A toy register. Swap: an egg carton for coins and hand-drawn paper money, which my kids preferred anyway because they got to design it.
Tip: Write the prices in whole dollars for 3s and 4s, and add coins for 6s and 7s so it doubles as change practice.
What goes wrong: Within 20 minutes someone adds water to the soil and starts making “smoothies.” Put out a separate mud bowl from the start and the shop survives.
Safety: Loose seeds are a choking hazard for under 3s, and big seeds like corn, beans, and peas are the worst offenders. If a toddler is in the mix, use dried herbs and soil only, and keep seed packets sealed.
5. Grow Your Own Sunflowers
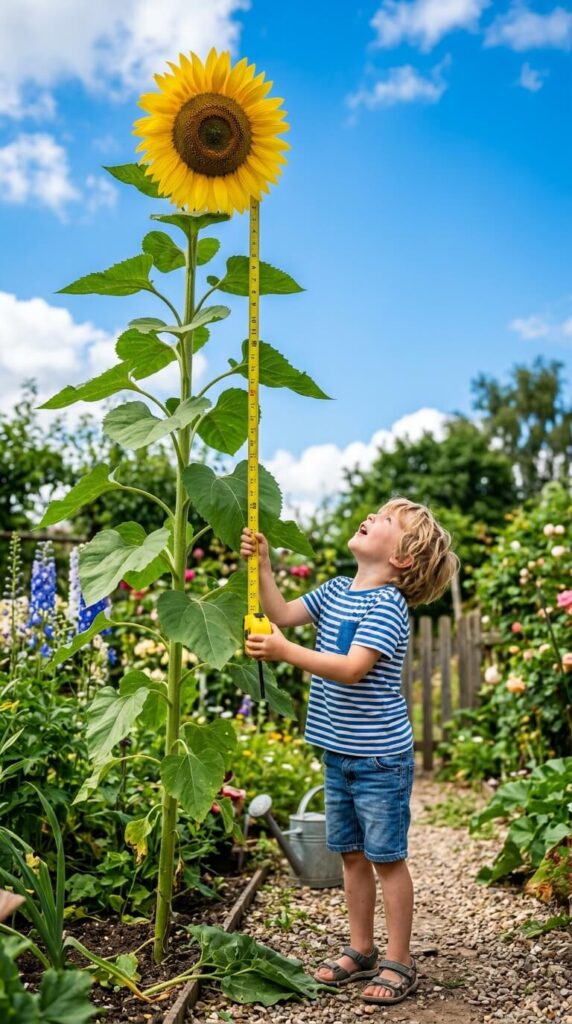
Ages: 3 to 12 | Time: 25 minutes to plant, 1 minute a day, 80 to 100 days to bloom | Mess: Low | Supervision: Light
Sunflowers are the best first crop because the growth is visible weekly, not daily-imperceptible like carrots. Mammoth Grey Stripe hits 8 to 12 feet, which is the version kids want. If you’re in pots or a small yard, Teddy Bear or Sunspot stay around 2 feet and still make a real flower head.
Here’s the trick that made it click for my kids: stick a bamboo cane next to each plant, and every Sunday wrap a strip of painter’s tape at the exact height of the plant. By August you have a striped pole showing the whole summer, and they can see the growth speeding up in June.
What you need
- One seed packet, $2 to $3 (Burpee and Ferry-Morse are both in most hardware stores). Free swap: raw black oil sunflower kernels from a bag of bird seed sprout perfectly well.
- A bamboo cane and painter’s tape, or a permanent marker line on a fence post.
- Small pots for starting. Swap: yogurt cups with a hole poked in the bottom.
Steps
- Wait until night temperatures stay above 50 F. Cold soil rots the seed and nothing comes up, which is the classic first-year disappointment.
- Sow an inch deep, one seed per pot, or 6 inches apart in the bed.
- Move seedlings outside once they’re about 6 inches tall.
- Cut the top and bottom off a plastic bottle and slide the collar around each stem. Slugs and squirrels take unprotected seedlings overnight.
- Stake once the plant passes 3 feet, before it needs it.
- Water at the soil around the base, never onto the stem from above.
Practical note: Kids aim the watering can at the plant itself. A 2 foot sunflower will faceplant under a full can poured on its head, and there’s no rescuing a snapped stem. Teach “water the dirt, not the plant” on day one.
6. Nature Sorting

Ages: 18 months to 6, and 7 and up if you turn it into a classification challenge | Time: 10 minutes collecting, 20 minutes sorting | Mess: Low | Supervision: Constant for under 3s
Use a muffin tin or an ice cube tray instead of buckets. The compartments create the categories for you, and a 2 year old instantly understands one thing per hole without being told. An egg carton is the free version and works just as well.
Better prompts than “sort by texture,” which most kids find abstract: which of these would a bird use for a nest? Which ones came off a tree and which came off the ground? Which would float?
What you need: A muffin tin or egg carton, one cup-size container to cap the collection, and a shaded spot to work.
Tip: Hand them a single cup and say “fill this.” Without a limit you get 60 identical pebbles and no sorting.
Safety, and this one is not optional: If an item fits through a toilet paper tube, it’s a choking hazard for a child under 3. That rules out acorns, small pebbles, and berries. Skip feathers with little kids too (they can carry mites and bacteria), or handle them with tongs. No mushrooms, no berries, no animal droppings, and soap-and-water handwashing at the end every time.
7. Build a Bug Hotel
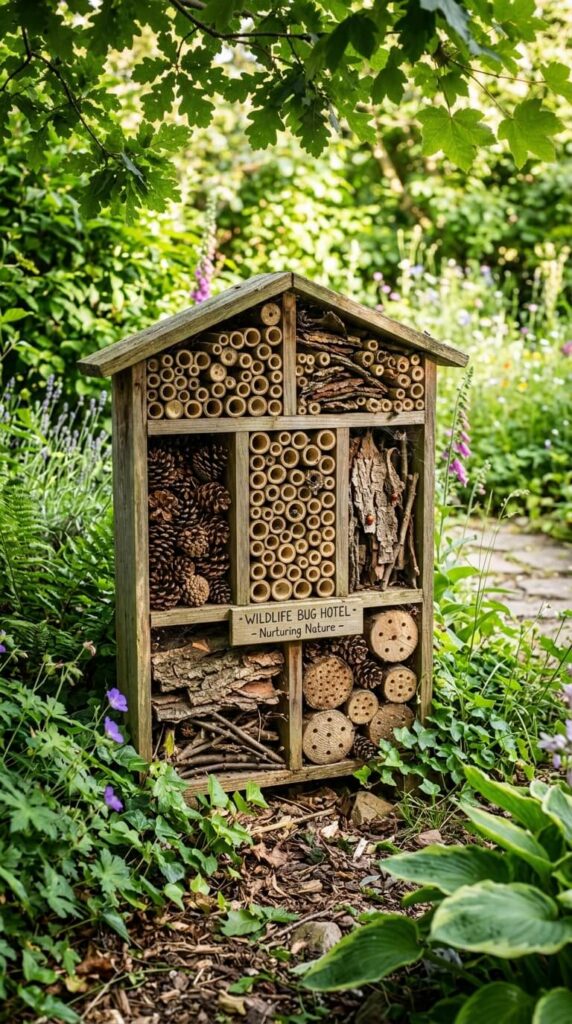
Ages: 4 to 12 | Time: 45 to 60 minutes | Mess: Medium | Supervision: Hands on, adult does all cutting and drilling
This is the activity that keeps paying out. Ours took an afternoon in April and by June had a solitary bee sealing tubes with mud, which my daughter checked on like it was a package delivery.
Detail that most guides get wrong: cut each bamboo tube just past a node so the back end is closed. Open-ended tubes stay empty. Aim for 4 to 8 mm internal diameter for mason and leafcutter bees, and 4 to 6 inches deep.
What you need
- Bamboo canes, about $5 for a bundle at a garden center. Free swaps: hollow raspberry or last year’s sunflower stems, drilled scrap hardwood, pinecones, straw, and rolled cardboard tubes (replace those yearly, they go soggy).
- A wooden box, an old birdhouse, or a stack of offcuts.
Steps
- Cut tubes to length, closed end at the back. Adult only, because pruning shears and split bamboo are both sharp.
- Pack them tightly into the box so nothing rattles loose.
- Mount it 3 to 5 feet off the ground, facing south or southeast.
- Put it somewhere with an overhang or a sloped roof. Rain-soaked tubes grow mold and kill the larvae inside.
- Check it once a week, from about three feet back.
Trade-off: Kids want to inspect it daily, and daily inspections drive nesting bees off. One check a week, and no poking.
Safety: Solitary bees are about as aggressive as a butterfly, but woodpiles and cavity boxes also attract wasps and, in parts of the US, black widow spiders. Site the hotel away from the back door and the play area, and check it yourself before your kid puts hands near it. If a wasp colony moves in, that’s an adult problem to deal with in the evening when they’re inactive, not a lesson.
8. Worm Farm
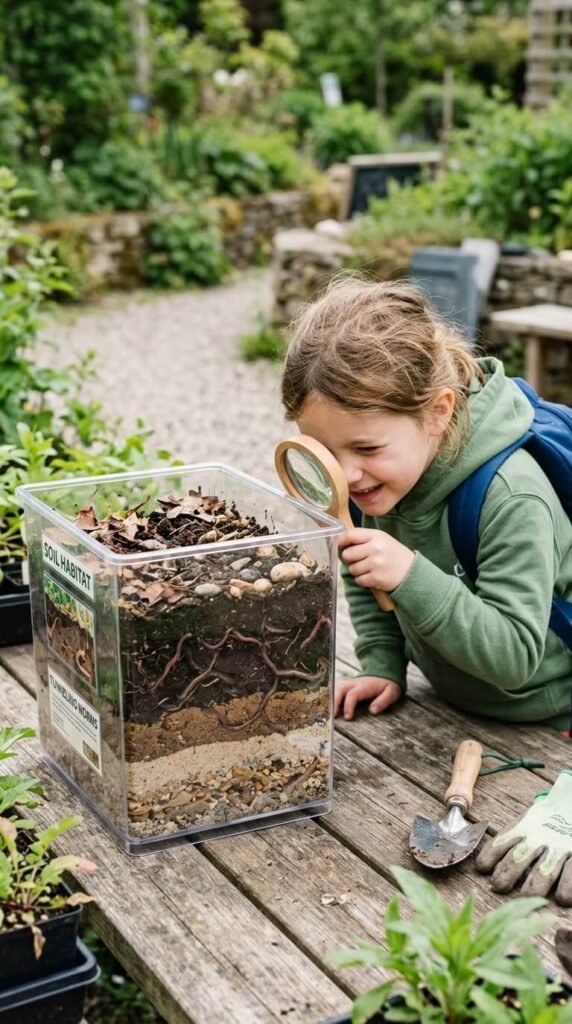
Ages: 4 to 12 | Time: 40 minutes to set up, 5 minutes every few days, compost in 2 to 3 months | Mess: Medium | Supervision: Hands on for setup, light after
The single most common mistake here, and I made it: we dug worms out of the lawn. They died within a week. Lawn earthworms are deep burrowers and can’t live in a shallow bin. You want red wigglers (Eisenia fetida), which you can buy as a cup of bait worms at a bait shop for a few dollars or order online.
Skip the sand layers you see in a lot of instructions. Sand is for a two-week observation jar, not a working farm.
What you need
- Red wigglers, roughly $8 to $15 for a starter portion. Free swap: ask a neighbor with a bin, worm populations double fast and most people are happy to hand over a scoop.
- A tote with a lid and air holes drilled in the sides. Swap: two stacked buckets, holes in the top one.
- Shredded newspaper (no glossy inserts) plus a handful of garden soil for grit.
Steps
- Fill the bin two thirds with damp shredded paper. Damp means wrung-out-sponge damp, not wet.
- Add a handful of soil, then the worms, then put the lid on.
- Bury about one cup of chopped vegetable scraps in one corner.
- Feed once a week, always burying it, always in a different corner.
- Keep the bin in deep shade, between roughly 55 and 80 F.
- Tape cardboard over the clear sides and lift it to view. Worms move away from light, so they’ll only tunnel visibly where it’s dark.
Yes to: Vegetable peel, apple cores, coffee grounds, crushed eggshell, torn cardboard. No to: meat, dairy, oil, citrus, onion, garlic, and anything cooked in butter.
What goes wrong: Overfeeding. A smelly bin with fruit flies is always too much food, not too many worms. Pull the excess out, add dry shredded paper, and bury the next feed deeper.
Safety: Hands washed with soap afterwards, every single time, before snacks. Soil and compost carry bacteria, and little kids touch their faces constantly. A sunny bin cooks the worms, which is a genuinely sad morning, so shade matters.
9. Sensory Garden
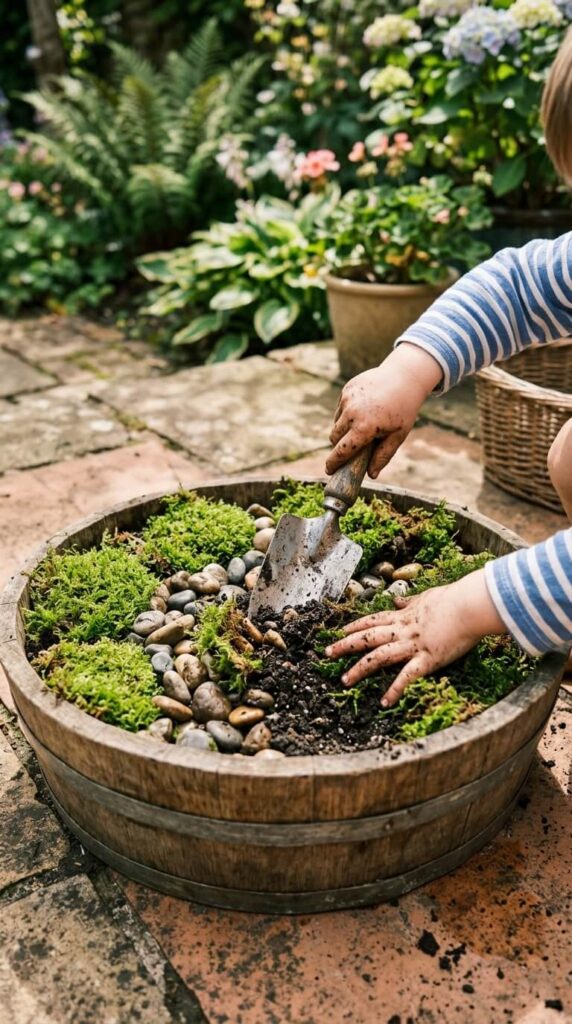
Ages: 1 to 6 | Time: 30 minutes to set up, then open-ended | Mess: High | Supervision: Constant for under 3s
Textures side by side: moss, wood chips, loose soil, smooth river stones, and plants that survive being touched hard. Lamb’s ear is the one toddlers stroke. Chocolate mint and lemon balm are the ones mine rub between their fingers and then sniff for ten minutes.
Site it right next to your own beds. Little kids want to be where you are, and a play zone at the far end of the yard gets abandoned.
What you need: A bag of river stones ($5 to $8), wood chips, and a shallow tub. Free swaps: rinsed driveway gravel, free wood chips from a tree crew, pinecones, and dried leaves in fall.
Safety, the big one: A few inches of standing water is a drowning risk for a toddler, and it happens silently. Never leave a filled water tub unattended, and tip it out at the end of every session. Left standing, it also becomes a mosquito nursery inside about a week. Use marble-size stones or larger, nothing polished and small enough to swallow.
Sensory-sensitive kids: Don’t make bare feet or hands-in-the-soil part of the deal. Offer a dry station (big pinecones, wood chips, a paintbrush for dusting stones), keep a towel within arm’s reach, and let them watch for as long as they need to.
10. Chalk Wall

Ages: 2 to 10 | Time: 30 minutes to mount, then available any time | Mess: Low to medium (chalk dust, and rain turns it to paste) | Supervision: Loose
Vertical drawing space is the highest-use thing in our yard per dollar spent. It gets used for plant sketches, bird tallies, obstacle course times, and a running scoreboard for a game I still don’t understand.
Learn from my mistake: chalkboard paint applied straight onto fence boards bled through the grain and looked terrible after two rains. Paint a piece of plywood or hardboard instead (Rust-Oleum Chalkboard paint), frame it with a small lip at the bottom to catch dust, and screw it through into the fence rails rather than the boards, or a kid leaning on it will pull it off.
What you need: A plywood offcut and chalkboard paint (about $12 a can), thick sidewalk chalk, and a lidded bin to keep it dry. Free swaps: draw directly on the patio or a paving slab, or paint an old vinyl tablecloth black and hang it.
Tip: Dip the chalk in water first. Wet chalk on a dark board gives the bright, saturated color kids are hoping for, and it wipes off just as easily once dry.
Position it near the beds. That proximity is the whole point. Kids sketch the beetle they just found while it’s still in front of them, which is when the observation actually sinks in.
11. Sunprint Art in the Garden

Ages: 4 to 10 | Time: 5 minutes prep, 1 to 5 minutes exposure, 5 minutes rinsing and drying | Mess: Low | Supervision: Hands on, it’s timing-critical and mildly chemical
Cyanotype paper turns garden objects into deep blue silhouettes, and it feels like magic to a 6 year old because the sun does the work. SunPrint kits from the Lawrence Hall of Science run about $10 for a dozen sheets.
Two things nobody tells you. First, open the packet indoors or in shade, because the paper starts reacting the second light hits it. Second, you pull it when the blue paper looks bleached out and pale, not when it looks blue. That feels wrong every time.
What you need
- SunPrint or any cyanotype paper. There’s no true free swap for the paper, so if the budget is zero, do a sun-fade experiment instead: leave dark construction paper in a sunny window under a leaf for a week, or chalk-trace the shadow of a plant three times across one day.
- A piece of clear acrylic or a glass picture frame to press objects flat. This is the difference between a crisp fern and a blurry smear when the breeze picks up.
- A shallow tray of cold water.
Steps
- Lay the paper blue side up, arrange leaves and petals, press the acrylic on top.
- Carry it out into direct sun and start counting. One to five minutes, until the paper goes pale.
- Lift the objects off, rinse in cold water for about a minute.
- Press it flat under a heavy book to dry. The blue deepens dramatically as it dries.
First try, what surprised us: My daughter was convinced she’d ruined hers because it came out of the water looking washed-out gray-blue. Twenty minutes later it was the darkest print of the batch. Tell them in advance or you’ll have tears over a print that’s actually fine.
Safety: Cyanotype chemicals are low toxicity, but keep the paper out of mouths and away from eyes, keep it away from under 4s entirely, rinse hands afterwards, and pour the rinse water down the drain rather than onto the vegetable bed.
12. Grow a Salad Garden
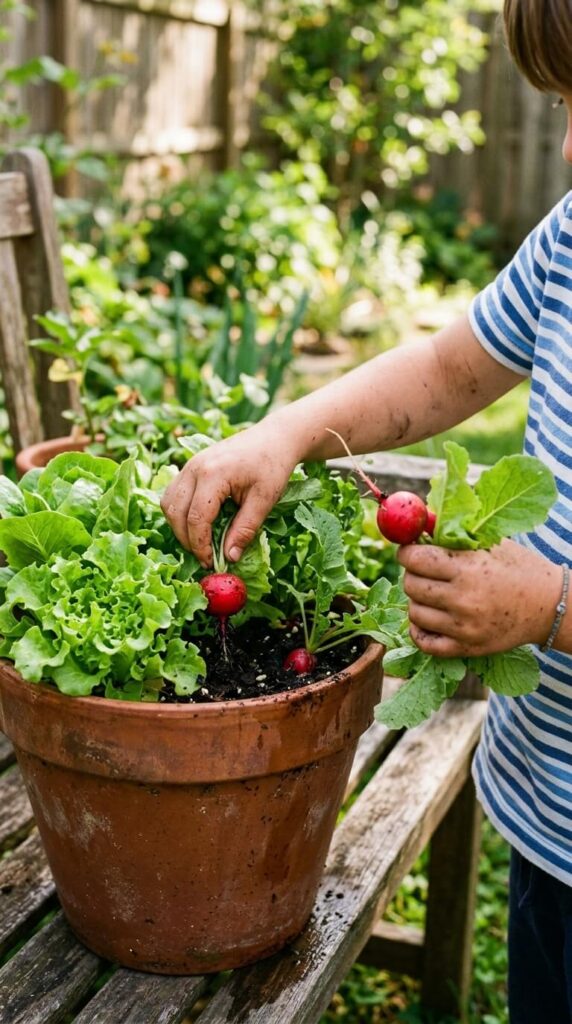
Ages: 3 to 12 | Time: 25 minutes to plant, 5 minutes a day, 25 to 45 days to harvest | Mess: Medium | Supervision: Light
Kids eat vegetables they grew. Not all of them, and not forever, but my radish-refusing 4 year old ate three of her own radishes standing in the yard with dirt still on them. Cherry Belle radishes are ready in about 25 days, which is fast enough to hold a preschooler’s interest.
Go with loose-leaf lettuce (Buttercrunch or Black Seeded Simpson) rather than head lettuce, and harvest the outer leaves so the plant keeps producing for weeks instead of ending in one cut.
What you need
- Lettuce, spinach, and radish seed, about $6 total. Free swap: regrow romaine bases and green onion ends in a glass on the windowsill first to test their interest for nothing.
- Two or three medium pots or a corner of the bed. Swap: a 5 gallon bucket with drainage holes, a cut-down bagged soil sack.
Tip: Sow a short “checking row” you don’t care about. Kids will pull a radish at day 10 to see what’s happening, and this gives them something to sacrifice.
Trade-off: Lettuce turns bitter and bolts once it’s consistently above about 80 F, so summer sowings do better in a pot you can move into afternoon shade. Slugs will find it. Check under the leaves at dusk, which kids weirdly enjoy.
Safety, non-negotiable: Teach one rule before the first seed goes in. Nothing goes in a mouth until an adult says the plant’s name out loud. Kids who learn “garden plants are food” will happily test the same theory on a foxglove or a nightshade berry. Don’t grow edibles in a bed that’s been sprayed with weed killer this season, or where the dog goes, and rinse everything before eating.
13. Nature Table
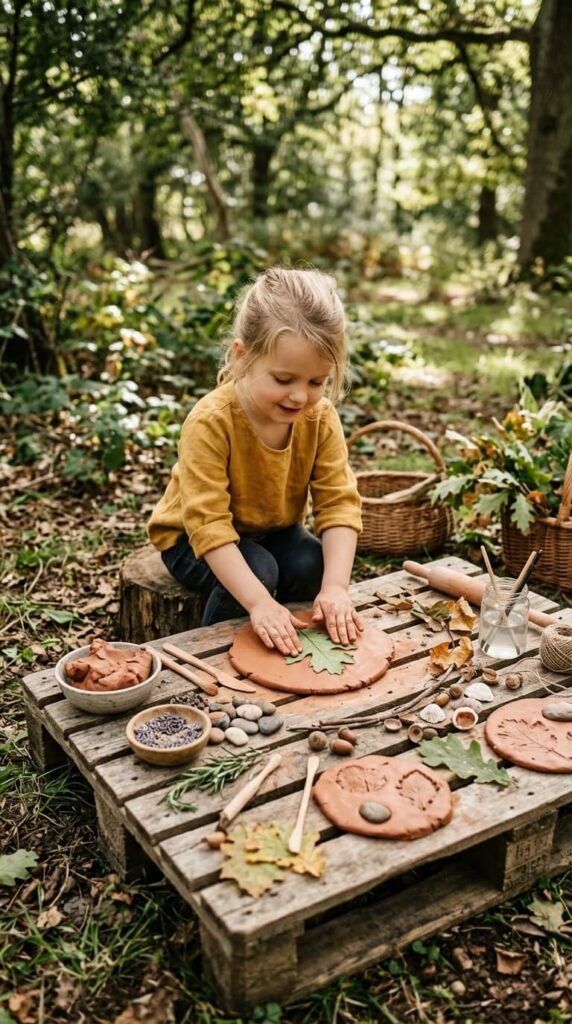
Ages: 2 to 8 | Time: 20 minutes to set up, then open-ended | Mess: Medium | Supervision: Loose, close for under 3s with clay and small parts
A low table with loose natural parts and no instructions. That last bit is the hard part for us as parents, because the urge to say “why don’t you make a face out of it” is strong and it ends the play.
Air-dry clay takes the best leaf impressions, and there’s a trick: press the leaf vein side down. The veins give you the crisp fossil look kids are after. Crayola Air-Dry Clay is about $10 for 2.5 pounds and lasts months if you keep it bagged with a damp paper towel.
What you need: A low table (the IKEA FLISAT is popular for a reason, or use a sanded pallet on two cinder blocks), clay or play dough, stones, twigs, herbs, and leaves. Free swaps: homemade play dough (2 cups flour, 1 cup salt, 2 tablespoons oil, 1 cup warm water), or straight mud and sand.
Allergy and safety notes: Standard play dough contains wheat, so use a cornstarch-based dough for a wheat-allergic child. Salt dough is toxic to dogs if eaten, so bring it in. Skip small beads and dried beans with under 3s.
Seasonal swap: Change the materials with the season, and the same table gets used all year. Seed pods and pinecones in fall, evergreen sprigs and frozen ice discs in winter, blossom in spring.
14. Bug Hunt
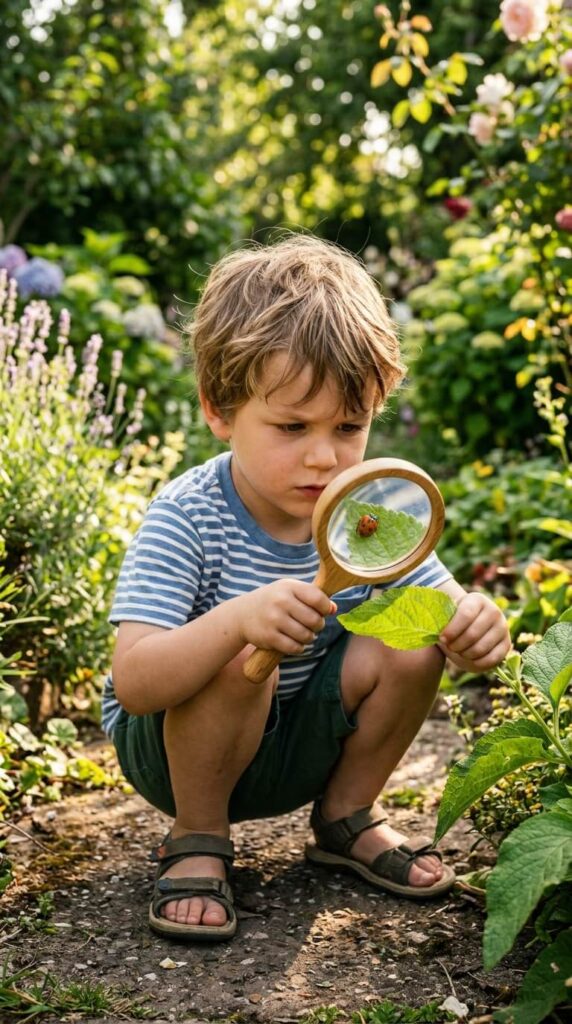
Ages: 2 to 10 | Time: 20 to 30 minutes | Mess: Low | Supervision: Close under 5
Random rock flipping gets you two woodlice and a disappointed kid. Do this instead: lay a plain board or an old paving slab flat on bare soil and leave it for a week. Lift it together and you’ll have a whole colony underneath, reliably, every time. We call it the bug board and it’s the highest hit rate of anything we’ve tried.
Set a rule before you start: look with eyes, move with a spoon or a leaf, never with fingers. Then count legs. Six means insect, eight means spider, lots and lots means millipede or centipede.
What you need: A $1.25 Dollar Tree magnifying glass, or a bug viewer jar with a magnifier lid for about $5. Free swap: a clean jar with plastic wrap over the top and pin holes in it, plus your phone camera zoom, which honestly beats a cheap plastic lens.
Tip: Ten minutes in the jar, then release where you found it. Kids get attached, and a jar of dead insects on the porch is a bad memory, not a lesson.
Put the rock back the way it was. Say it out loud each time. That’s somebody’s roof.
Safety, by region: Fire ants in the southern US (do not let a toddler stand on a mound), ground wasp nests, ticks in long grass (socks over pant cuffs, a check at bath time), and black widow or brown recluse spiders in woodpiles and under stacked wood in parts of North America. Centipedes bite. Never reach into a gap you can’t see into.
15. Wildlife Camera Watch
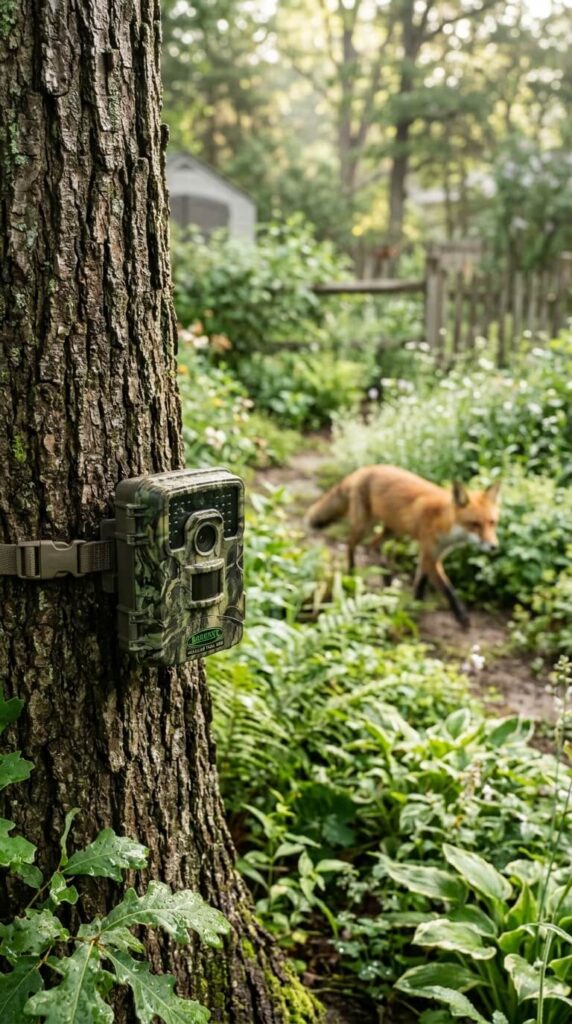
Ages: 5 to 12 | Time: 20 minutes to mount, 10 minutes over breakfast | Mess: None | Supervision: Light
Reviewing the night’s footage became a breakfast ritual for us faster than anything else on this list. We’ve had raccoons, an opossum, three neighborhood cats, and one skunk that ended the ritual for a week.
The mistake almost everyone makes is mounting the camera at adult eye level pointed at the open lawn. You get 300 clips of moving grass. Mount it at knee height, aimed at a gap in the fence line or a worn path, and set motion sensitivity to medium.
What you need: A budget trail camera (Campark and similar models run $40 to $70, or a Wyze Cam Outdoor if you have wifi reach). Free swaps: rake a patch of soil smooth or sprinkle a thin layer of flour and read the tracks in the morning, or set a phone recording on a windowsill. The free iNaturalist and Seek apps will help you identify what shows up.
Tip: Keep a paper species log taped inside a kitchen cupboard. The list growing is the thing that keeps them checking.
Safety: Do not bait with food. It habituates raccoons, skunks, and rats to the space your kids play in, and it can bring animals over a fence they’d otherwise ignore. Also point the camera into your own yard, not toward a neighbor’s windows, and mention it to them so it’s never a surprise.
16. Butterfly and Bee Count

Ages: 5 to 11 | Time: 20 minutes | Mess: None | Supervision: Stay nearby
Real citizen science, and there are established projects that take the data: the Great Sunflower Project takes timed pollinator counts, Bumble Bee Watch takes photo submissions, and in the UK the Big Butterfly Count runs in high summer. Check the current year’s dates on the project’s own site before you promise your kid their numbers are going somewhere.
Sit about three feet back and stay still. Bees ignore a motionless person completely. Record the plant, not just the insect, because which flower they choose is the interesting part.
What actually happens in our yard: The flowering oregano out-draws every showy annual we’ve planted, by a lot. Catmint is second. The big bright dahlias get almost nothing. Kids find that genuinely surprising, and it’s a better lesson than any label.
What you need: A clipboard and tally sheet. Free swap: cardboard and a binder clip, and a phone timer.
Safety: Know whether your child has a sting allergy, and if they carry an epinephrine autoinjector, it comes outside with you. No bare feet in flowering clover, which is where most kids actually get stung. Teach still hands over swatting, because swatting is what turns a passing bee into a sting.
17. Rain Gauge and Weather Tracking

Ages: 5 to 11 | Time: 15 minutes to install, 1 minute a day | Mess: None | Supervision: None after installation
The cheapest long-running project here, and the one most likely to quietly die. It dies on day four, always for the same reason: nobody remembers to check it. Attach it to something that already happens, like the walk to the bus stop or right after teeth brushing, and it survives.
Placement matters more than the gauge. Mount it in the open on a post 1 to 3 feet up, well away from the house and trees, roughly twice as far from any obstacle as that obstacle is tall. Under the eaves you’ll record numbers that mean nothing.
What you need: The AcuRite 5 inch Easy Read gauge is about $12 and has numbers a 6 year old can read from standing height. Free swap: a straight-sided jar (an olive jar is ideal) with a paper ruler taped to the outside, or a 2 liter bottle with the top cut off and inverted as a funnel.
Steps
- Zip-tie the gauge to a stake so wind can’t tip it, then push the stake in firmly.
- Check and empty it at the same time every day.
- Log the number in a notebook with one line on cloud, wind, and temperature.
- At the end of the month, add up the total and compare it to a weather app.
For 9s and up: That last comparison is the good part. Their number will differ from the app’s, and talking through why (their reading is one spot, the app’s is a regional average or an airport station miles away) is a real lesson in how data gets made.
18. Garden Obstacle Course

Ages: 2 to 12 | Time: 15 minutes to build, 20 to 40 minutes of running | Mess: Low | Supervision: Close, this is where falls happen
Five or six stations, no more. And this is the bit that matters: let your kid design one of them. The station they invented is the reason they run the course twenty times instead of twice.
Uneven ground, slopes, and a stump to step on make it more interesting than any flat gym floor. Write the times on the chalk wall and they’ll try to beat themselves all afternoon.
What you need: All things you already own. A hose as a balance line, pool noodles as low hurdles, a hula hoop, chalk hopscotch, a laundry basket to throw beanbags into, a low stump. Total cost: nothing.
Safety: Nothing to crawl under that can tip (skip patio chairs and tables), no balancing on stacked cinder blocks or anything above knee height, and walk the route first to clear sprinkler heads, hose bibs, dog mess, and rakes. Shoes on. Dark patio stone at 3pm in July burns bare feet, and that ends the day.
Skip it if: Your kid is competitive to the point of melting down over times. Run it untimed as a “how many laps can we do before the song ends” version instead.
Also good for burning off energy fast: backyard water games and summer activities.
19. Sunflower Seed Counting
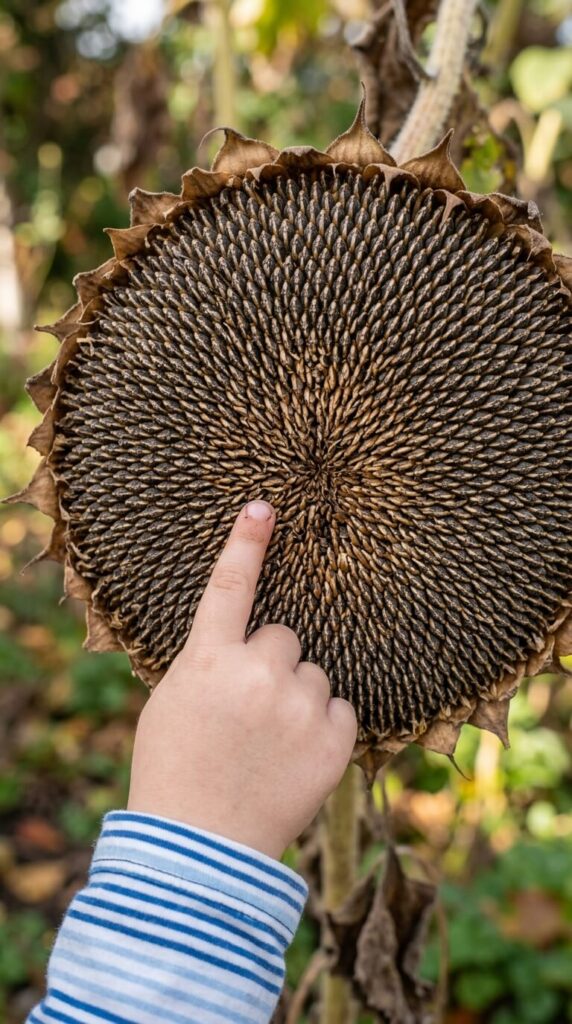
Ages: 4 to 11 | Time: 30 to 45 minutes | Mess: Medium, seed chaff travels | Supervision: Close for under 4s
This is what you do in September with the ugly dying sunflower, and it’s better than the growing part for math-minded kids.
The thing that catches everyone out: birds strip the head before you get there. Once the petals drop and the back of the head turns yellow-brown, tie a paper bag or an old pillowcase over it. Then cut it with about a foot of stem and hang it somewhere dry and airy for one to two weeks.
Steps
- Rub two dry heads against each other over a tray. The seeds come out far faster than picking.
- Count into an egg carton in groups of ten, then count the tens.
- Find the spirals. Trace one clockwise curve with a finger, then a counterclockwise one.
- Count how many spirals run each way. You’ll usually land on 34 and 55, sometimes 55 and 89, which are consecutive Fibonacci numbers.
Tip: A big Mammoth head holds several hundred to a couple of thousand seeds. That’s a genuinely useful number for practicing place value, and it’s more motivating than a worksheet.
Safety: Whole seeds are a choking hazard for under 4s, so they get the counting job with supervision or the tracing job instead. Only roast and eat seeds from a head that was never sprayed.
20. Garden Night Walk
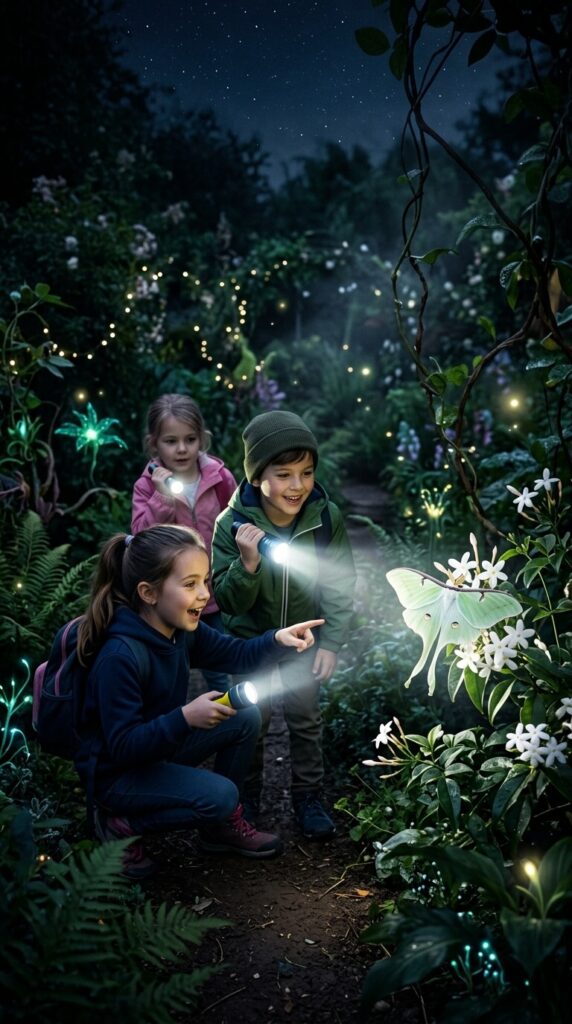
Ages: 3 to 12 | Time: 20 to 30 minutes | Mess: None | Supervision: Hands on the whole time, one adult per two young kids
Same yard, completely different place. The first time we did this my 4 year old held my hand so tightly it went numb, and by the third time he was leading.
Two things make it work. Start at dusk rather than full dark for the first walk, and tape a square of red cellophane over the flashlight lens. Red light keeps their night vision intact and, more usefully, makes the whole thing feel like a mission.
What to look for: Moths at pale flowers (evening primrose and nicotiana are the reliable ones), slug trails, spider webs catching the beam, and whatever is rustling in the hedge. Damp, still nights are best.
Tip: Everyone turns their lights off and stays silent for 30 seconds. Count the different sounds afterwards. That silent half minute is the part my kids ask to repeat.
What you need: One flashlight per kid, red cellophane or red tissue paper, closed shoes. Free swap: phone flashlights work, and a red sweet wrapper over the lens does the same job as cellophane.
Safety: Know your local wildlife and go straight in if you see or smell a skunk, or hear coyotes. Repellent for mosquitoes and ticks per the label instructions, and for little ones who put hands in their mouths, apply it to clothing rather than hands, or use a picaridin product. Clear the route in daylight first, because a coiled hose or a step down is a different hazard in the dark.
Skip it if: Your child is already anxious about the dark. Do a porch light version first, five minutes, back door open behind you. Pushing this one backfires.
Practical note: if you only ever do one activity off this list, make it the night walk. It costs nothing, takes 20 minutes, needs no prep, and it’s the one my kids still bring up months later.
Safety Basics for Garden Activities for Kids
None of this is filler. Every hazard listed here has actually happened to somebody, and a couple have happened to us.
Choking and small parts
If an object passes through a toilet paper tube, it’s a choking risk for a child under 3. That covers acorns, pebbles, most seeds, and dried beans. Big smooth seeds like corn and beans are the worst because they look edible. Keep seed packets closed and out of reach when toddlers are in the mix.
Food, allergens, and the “ask before you taste” rule
Teach it before the first activity: nothing goes in your mouth until a grown-up says the plant’s name out loud. Standard play dough and salt dough contain wheat, so swap to cornstarch dough for a wheat allergy. If your child has a sting allergy and carries an epinephrine autoinjector, it comes outside with you, in your pocket, not in the kitchen drawer.
Tools an adult uses, not a child
Drills, saws, pruning shears, craft knives, and hot glue guns are yours. Kids can absolutely handle a metal hand trowel, a watering can, blunt scissors, and a hand fork from around age 4. That line matters more than the age, because a real trowel builds competence and a real blade builds a scar.
Water, heat, and sun
A tub with a few inches of water in it is a drowning risk for a toddler, and drowning is silent. Never leave a filled water tub unattended, and tip it out every single time you finish. Add sunscreen, a hat, and a water bottle to the routine, and move activities to before 11am or after 4pm in hot months. Dark patio stone and metal slides get hot enough to burn bare feet.
Plants, soil, and hygiene
Learn the poisonous plants you already have. Foxglove, monkshood, oleander, lily of the valley, castor bean, and yew are all common in gardens, along with rhubarb leaves and the foliage of tomatoes and potatoes. No wild mushrooms, ever, and no foraged berries without an adult. Wash hands with soap after any soil, compost, or worm handling, keep sandboxes covered against cat feces, and make sure tetanus vaccinations are current, which is standard advice for anyone digging.
Bugs, stings, and things under wood
Check for wasp nests before kids go near a woodpile or a bug hotel. Fire ants, ground-nesting wasps, ticks in long grass, and black widow or brown recluse spiders under stacked timber are all real, region-dependent risks. The rule that covers most of it: no hands into gaps you cannot see into.
Common Mistakes Parents Make on the First Try
- Building the setup before you know they care. I know two parents who built beautiful cedar beds that are now storing bicycles. Spend $3 on a radish packet and a yogurt cup first. Upgrade in month two if it sticks.
- Buying plastic toy tools. They flex and snap on the first push into real soil, and the kid concludes that gardening is frustrating rather than that the trowel is bad. One $8 metal trowel beats a $20 plastic set.
- Doing the satisfying part yourself. Crooked rows and uneven spacing bother us far more than they bother the plants. If you straighten their row while they watch, it stops being theirs.
- Starting with slow crops. Carrots take 70 days and look like nothing for three weeks. Radishes take 25. Sunflowers grow visibly. Match the crop to the attention span you actually have in the house.
- One big garden day instead of five minutes daily. The daily check is the habit that matters. A four hour Saturday project usually ends in everyone being annoyed by hour two.
- Watering on a schedule. Kids will happily drown a seedling twice a day. Teach the knuckle test instead: push a finger in to the first knuckle, and only water if it’s dry down there.
- Narrating the science out loud. The moment it sounds like a lesson, the shutters come down. Answer questions, name things when asked, and otherwise let them look.
- No mess exit plan. A bucket of water, a nail brush, and an old towel by the back door before you start. Without it, you end the activity early because you’re dreading the hallway.
FAQs
What age group are these garden activities best suited for?Most of them work best between ages 4 and 10. Under 3s get the most out of the Sensory Garden, Nature Sorting, and Nature Table with constant supervision, while 8 to 12 year olds usually prefer the data-driven ones: the Rain Gauge, Wildlife Camera Watch, Butterfly and Bee Count, and the Fibonacci spirals in Sunflower Seed Counting.
How can we do these activities if we do not have a large backyard?A balcony or a patio is enough for at least twelve of them. The Outdoor Easel, Sunprint Art, Worm Farm, Nature Table, Nature Sorting, and Salad Garden all work in containers with no ground soil at all, and a 5 gallon bucket grows a full crop of lettuce or a dwarf sunflower like Sunspot.
What are the best tools to buy for kids in the garden?Buy small versions of real tools, not toys: one metal hand trowel (a Fiskars Ergo runs about $8), a lightweight watering can, a magnifying glass, and gloves that actually fit their hands. That’s about $20 total and it covers nearly everything on this list.
Is a worm farm safe for a 3 year old?Yes, with supervision and firm handwashing rules. Worms don’t bite or sting, but compost and soil carry bacteria, so soap and water afterwards is non-negotiable, and a 3 year old should not be left alone with the bin because they will squeeze the worms.
How do I get mud and grass stains out of kids’ clothes?Let mud dry completely, then brush it off before it touches water, because wet mud spreads into the fibers. For grass and plant stains, rub in a little liquid detergent or an enzyme stain remover, leave it 15 minutes, then wash warm. Tempera paint needs cold water and a rinse before it dries.
What do I do if my kid loses interest after two days?Assume it will happen and don’t take it personally. Shrink the job to something that takes 30 seconds (one measurement, one check of the bug board), skip a few days, and try a different activity type: a builder who lost interest in watering may be all in on the bug hotel.
Conclusion
You don’t need the yard, the budget, or the plan. You need one container, one packet of fast seeds, and one job that belongs to your kid and not to you. Do this before the week is out: hand them a pot, five radish seeds, and a marker for the label. Then leave it alone and let them check it every morning. That daily walk out to look is the whole thing, and everything else on this list grows out of it.
If it’s early fall where you are, lay a flat board on the soil today and lift it with them next weekend. That one costs nothing and it works every time.