
Day three of summer break, around 11 in the morning. Both kids had already done the sprinkler, eaten the last of the popsicles, and told me they were bored. I dragged a cracked terra cotta pot out of the garage, dumped in the half bag of potting soil that had been sitting there since May, and told them the fairies were moving in and their house was not ready.
That was our first fairy garden. They stayed out there until dinner.
It was not beautiful. It was a lopsided mound of dirt with a marble pond and a plastic triceratops standing guard at the front door. But they made every single decision, and that is the part that held their attention for four hours.
How To Make A Fairy Garden With Kids
To make a fairy garden, fill a shallow container that has drainage holes with potting soil, set one small house in it (an upside down painted flowerpot, a craft store birdhouse, or a stack of bark all work), then let your child build the world around it with pebble paths, moss, and a few small figures. A simple version takes about 30 minutes start to finish and costs under $15 if you shop the dollar store and use what is already in your yard. Kids from roughly 3 to 10 can do most of the work themselves, as long as an adult handles any drilling, cutting, or hot glue.
What you actually need (and what you can skip)
You can spend $60 on a boxed fairy garden kit. You can also spend about $8. Here is the base kit with a cheap or free swap for every line, because kids do not notice the difference.
| What it’s for | What I buy | Free or cheaper swap | Rough cost |
| Container | Wide plastic planter or a Dollar Tree bowl | Takeout tray, chipped mug, bottom half of a milk jug, old baking pan | $1.25 to $5 |
| Soil | Cheapest bag of potting mix at the hardware store | Yard dirt sifted through an old colander (mix in a scoop of sand so it doesn’t set like concrete) | $5 or free |
| Lawn | Preserved sheet moss from Michaels or Hobby Lobby | Real moss lifted from a shady spot in your yard with a butter knife | $5 or free |
| The house | Unfinished wooden birdhouse from a craft store | Upside down flowerpot, milk carton, stack of bark, popsicle sticks | $3 or free |
| Paths | Aquarium gravel or polished pebbles | Driveway pebbles, sunflower seed shells, buttons, wood slices from a fallen branch | $3 or free |
| Pond | Blue glass vase filler gems from Dollar Tree | A jar lid or old compact mirror pressed into the soil | $1.25 or free |
| Residents | Safari Ltd Toob minis (the detail really is better) | Happy Meal toys, LEGO minifigures, painted rocks with faces | $10 or free |
| Paint | Apple Barrel or FolkArt acrylic, or DecoArt Patio Paint for outdoors | Whatever half dry bottles are in the craft drawer | $1 to $3 each |
| Glue | Aleene’s Original Tacky Glue | Elmer’s school glue works on paper and moss only, not twigs | $3 |
Probably already in your house: bottle caps (fairy tables), a sliced wine cork (stools), popsicle sticks, twigs, acorn caps (bowls), scrap felt, seashells from that one vacation, a birthday candle for a lamppost.
Where to actually shop: Dollar Tree for vase filler gems, plastic bowls, craft sticks, and small terra cotta pots in spring. Michaels or Hobby Lobby for unfinished birdhouses and preserved moss, ideally with a coupon. The hardware store for a 50 pound bag of play sand, which costs less than a tiny craft store bag of it. Garden centers for four packs of annuals. Amazon only if you want the good minis.
If you are building this in early fall, the free supply run is as good as it gets right now: acorn caps, pinecones, seed pods, and moss are all dropping. Real plants are a different story this time of year, so check your first frost date before you buy anything living, or go with moss and pebbles and keep the whole thing on a windowsill through winter.
Practical note: That layer of gravel everyone tells you to put in the bottom of the pot does not improve drainage. Actual holes do. Use gravel only to stop soil from washing out of big holes, and drill or poke real drainage instead. A fairy garden with no drainage turns into soup the first time your kid gets enthusiastic with the watering can.
Make A Fairy Garden In 6 Steps
Every idea further down this page is a variation on these six steps. Learn this once and your kid can run the rest on their own.
- Pick the final spot first, then carry the empty container there. Wet soil is heavy. A filled storage bin or wagon is not moving again, and a black plastic container in full afternoon sun will cook moss and real plants within a day. Morning sun with afternoon shade is the sweet spot.
- Sort out drainage before soil goes in. Three to six holes in the bottom. An adult does this with a drill, or a metal skewer for thin plastic, with a scrap board underneath. Indoor gardens with no holes need dry or barely damp materials instead.
- Fill with soil to about an inch below the rim. Let your kid do this with a plastic cup as a scoop. Leaving that inch is the difference between watering it and flooding your patio.
- Place the house first. It anchors everything and gives your child a reason to plan the rest. Press it in far enough that it does not tip when a hand knocks it.
- Hand over the world building. Path, pond, lawn, fence, residents. This is the part where you sit on your hands. If the path leads nowhere and the pond is on a hill, leave it.
- Water it in with a spoon or a squeeze bottle, then walk away. A watering can in the hands of a four year old means the whole thing is a mud slick in ten seconds.
Tip: Give younger kids a tablespoon or an old squeeze bottle instead of a watering can. It is the single change that saves the most gardens.
No time today? The 15 minute version: dollar store bowl, decorative sand, three pebble clusters, and two figures. No soil, no drainage, no cleanup beyond shaking a placemat out the back door.
Safety and supervision, before you start
This is a kids’ craft with real hazards in it, so none of this is filler. Read the list, then hand over the parts that are actually safe to hand over.
- Small parts are the biggest risk. Glass gems, marbles, aquarium gravel, peg dolls, and tiny figures are all choking hazards. For under 3s, and for any older kid who still mouths things, swap to fist sized river rocks, wood slices, and large shells. That is not optional caution, it is the reason to skip several of the ideas below.
- Adult only jobs: drills, utility knives, tile nippers, hot glue guns, spray sealers, and strong outdoor adhesives like E6000, which needs open air and no kids nearby. Your child can hand you the tray, count the holes, and hold the flashlight.
- Plants: skip anything with thorns, milky sap, or berries. Euphorbia (pencil cactus, crown of thorns) has sap that burns skin and eyes, so keep it out entirely. Foxglove and lily of the valley are seriously toxic, not mildly. If you have a dog or cat who chews everything, check the ASPCA’s toxic plant list before planting.
- Soil hygiene: wash hands afterward, every time. Keep soil out of mouths and away from open cuts, and cover or raise outdoor gardens if neighborhood cats treat your beds as a litter box. Bagged mix is dusty, so dampen it before a kid with asthma starts digging.
- Food based bits are allergens. Oats as hay, seeds as gravel, cereal as anything. If a friend with a nut, wheat, or seed allergy is coming over, use pebbles instead. Food outdoors also invites ants and rodents within days.
- Play sand: buy bagged play sand and dampen it before pouring. Dry sand dust is a lung irritant, and it travels much further than you expect.
- Mold: a sealed container with no drainage grows mold in a week or two. For a kid with asthma or allergies, keep indoor versions dry or make sure they drain.
- Foraging rules: leaves of three, let it be. No picking mushrooms, nothing near animal droppings, and a tick check afterward if you have been in tall grass or leaf litter.
- Heat: dark containers and glass gems get hot enough on a sunny afternoon to sting bare hands. Touch it before they dig in.
All 20 ideas at a glance
Scan this, pick one, skip the rest. Times include prep and cleanup, based on how these actually go rather than how fast they could theoretically go.
| Idea | Best ages | Indoor or outdoor | Mess | Total time | Adult has to do |
| 1. Dinosaur theme | 3 to 8 | Either | Medium | 45 min | Nothing |
| 2. Beach theme | 2 to 7 | Outdoor | High | 45 min | Nothing |
| 3. Farm theme | 2 to 6 | Either | Medium | 40 min | Nothing |
| 4. Succulent ceramic dish | 5 to 12 | Indoor or shaded patio | Low | 40 min | Drainage hole |
| 5. Takeout plastic tray | 3 to 10 | Either | Medium | 30 min | Poke the holes |
| 6. Upcycled water table | 2 to 8 | Outdoor | High | 90 min, two sessions | Drill |
| 7. Dollar Tree glass bowl | 4 to 10 | Indoor | Low | 20 min | Nothing, but glass |
| 8. Terra cotta planter | 3 to 10 | Outdoor | Medium | 45 min | Nothing |
| 9. Rubbermaid storage bin | 4 to 12 | Outdoor | High | 60 min | Drill |
| 10. Radio Flyer wagon | 5 to 12 | Outdoor | High | 60 min | Drill, rust and old paint check |
| 11. Classic garden planter | 3 to 10 | Either | Medium | 40 min | Nothing |
| 12. Tupperware container | 2 to 6 | Indoor | Low | 25 min | Nothing |
| 13. Concrete block fortress | 4 to 12 | Outdoor | Low | 60 min plus dry time | Lift block, adhesive |
| 14. Birdhouse fairy home | 3 to 10 | Either | Medium | 40 min plus dry time | Sand rough edges |
| 15. Milk carton cottage | 4 to 9 | Indoor | Medium | 45 min | Cutting, glue gun |
| 16. Clay pot toadstool | 3 to 10 | Either | Medium | 30 min plus overnight | Glue the cap on |
| 17. All natural forest dwelling | 3 to 12 | Outdoor | Medium | 60 min with the hunt | Supervise foraging |
| 18. Paper mâché kingdom | 4 to 10 | Indoor | Low | 45 min | Nothing |
| 19. Painted pot house | 3 to 12 | Either | Medium | 30 min plus 24 hr cure | Spray sealer |
| 20. Popsicle stick cabin | 5 to 12 | Indoor | Low | Two sessions | Glue gun if used |
Save this table for the next rainy Saturday. You will want it at 10am when someone announces they are bored and you have not had coffee yet.
Creative Fairy Garden Themes for Kids
Here is the thing nobody tells you: plenty of kids do not care about fairies. Mine went through a solid year where everything had to involve dinosaurs. Picking a theme your kid is already obsessed with is the difference between a 40 minute project and a five minute one.
A theme also gives them a shopping list they can understand, which means they will happily dig through their own toy bins instead of asking you to buy things.
1. Dinosaur Theme Garden

This is the one that finally got my dinosaur kid interested. Same build, different residents, and suddenly the “fairy” garden is a Cretaceous swamp with a marble river running through it.
- Best for: Ages 3 to 8. Under 5s will bury every dinosaur and dig them up again, which is honestly the whole activity for them. Older kids will want a volcano, so let them build one out of a mound of soil with red gems in the crater.
- Time: 10 minutes prep, 25 minutes building, 10 minutes cleanup.
- Mess: Medium. Outside, or on a bath towel on the kitchen floor.
- Supervision: Hands on while the soil goes in, then check in every few minutes.
- Supplies: Lastic planter or bin (a takeout tray or the bottom of a milk jug works), dark potting soil (sifted yard dirt is fine here), plastic dinosaurs (the ones already under the couch), smooth river stones (free from a driveway or creek), blue glass gems from Dollar Tree (or a jar lid filled with actual water), a small fern or succulent (or any weedy sprig from the yard pushed into the soil).
- Fill the container with soil and leave the surface uneven, with a couple of hills and one shallow trench.
- Plant the fern or succulent toward the back as the prehistoric tree line.
- Line the trench with blue gems for the river, or press a jar lid in flush with the soil and fill it with water.
- Stack river stones into cliffs and a cave, then let your child position the dinosaurs like they are mid hunt.
Tip: Bury three or four gems and one small figure in the soil before your kid arrives. The garden becomes a dig site, which buys you another 20 minutes.
What goes wrong the first time: The playdough pond. It looks great for an hour, then dries out and crumbles into blue grit that gets tracked through the house. Use the jar lid of water or the gems instead.
Skip it if: Your child still puts things in their mouth. Marbles and small figures are choking hazards, full stop.
2. Beach Theme Fairy Garden

Best use I have found for the bag of shells that comes home from every beach trip and then lives in a drawer forever. The two texture thing, sand on one side and soil on the other, is weirdly satisfying for little kids.
- Best for: Ages 2 to 7. This is the most toddler friendly theme on the list because it is mostly scooping and pouring.
- Time: 10 minutes prep, 20 to 30 minutes building, 15 minutes cleanup, more if it happened indoors.
- Mess: High. Sand travels further than dirt and is much worse in carpet. Do this outside or on a bedsheet you can carry out and shake.
- Supervision: Hands on with under 4s, mostly for the shells.
- Supplies: Wide shallow container (an old baking pan is perfect), potting soil, play sand (a 50 pound bag at the hardware store costs less than a small craft store bag, and dampen it before pouring to cut the dust), blue glass gems or a small mirror, seashells you already have, aquarium gravel (or driveway pebbles), one mermaid or sea creature figure.
- Fill one half of the container with soil, the other half with damp sand, and pat down the ridge between them.
- Lay blue gems or the mirror along the border as the water line.
- Scatter gravel along the sand edge for a pebbly shore.
- Arrange shells as shelters and let your child place the mermaid last, which is always the ceremonial bit.
What goes wrong the first time: Within ten minutes the sand and soil are fully mixed and the whole thing is gray. It is not ruined, but if you want the two sided look to last, use a strip of cardboard sunk in as a divider.
Skip it if: Your kid has a sensory aversion to sand on their hands, or you only have broken shells. Sharp shell edges cut fingers, so check them first and toss the jagged ones.
3. Farm Theme Fairy Garden
If your kid has a bin of plastic cows and a tractor obsession, skip the fairies and build a farm. It is the same skills with familiar characters, which lowers the barrier for the youngest kids.
- Best for: Ages 2 to 6. Older kids tend to find it too simple unless you add a real challenge like a working gate.
- Time: 10 minutes prep, 20 minutes building, 10 minutes cleanup.
- Mess: Medium. Standard soil mess, no water needed.
- Supervision: Check in every few minutes. Fence building is the part they will ask for help with.
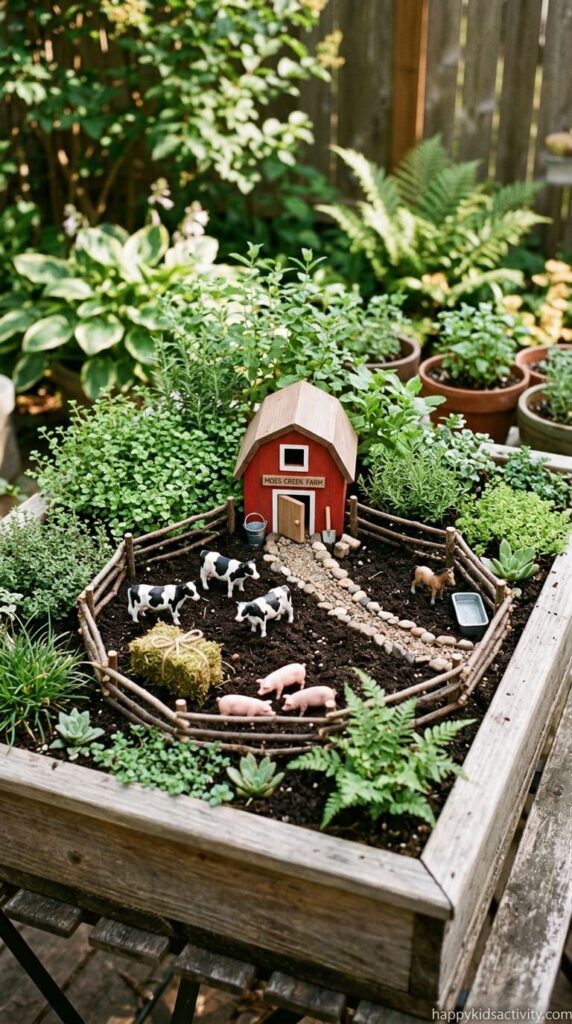
- Supplies: Wide container, potting soil, a toy barn or a small cardboard box painted red (a milk carton on its side works), plastic farm animals, dried moss or a small handful of straw or dried grass for the hay bale, low growing green plants (or moss).
- Fill the container and pack the soil down lightly so the fence posts will hold.
- Set the barn at the back as the focal point.
- Push short twigs in vertically for fence posts, then let your child wrap them with a single strand of garden twine.
- Position the animals and put the hay bale by the barn door.
What goes wrong the first time: The twig fence falls over constantly and it is maddening for a four year old. Two fixes: press the twigs into damp soil rather than dry, or hot glue the posts to a popsicle stick base first (adult job) so the whole fence goes in as one piece.
Skip it if: your child melts down when a build collapses. Do the flat pebble path version instead and leave fences out of it.
3. Farm Theme Fairy Garden

For children who love farm animals and tractor toys, a rural agricultural theme offers an adorable variation on the typical enchanted garden. It blends the whimsy of miniature landscaping with familiar backyard elements.
-
Materials Needed: A wide planting container, potting soil, a miniature toy barn or small wooden box painted red, small plastic farm animals (cows, pigs, chickens), a small block of dried moss to look like a hay bale, and low-growing green plants.
-
How to Create: Fill your chosen container with potting soil and pack it down lightly. Place the red toy barn near the back of the container to establish the focal point. Create small animal pens using small twigs pushed vertically into the soil like fence posts. Position the plastic farm animals around the yard, and place the small moss bale next to the barn door. Surround the layout with hardy green plants to complete the miniature farmyard scene.
Practical Fairy Garden Containers for Kids
The container decides how long this thing survives, and almost nobody thinks about it before they start. What matters is not how pretty it is, it is whether it tips, whether it drains, and whether your kid can reach into the middle of it without face planting. Wide and shallow beats tall and narrow every time. Kids build outward, not upward.
4. Succulent Ceramic Dish
Good option for hot climates and for anyone who wants a living garden that survives being forgotten for a week. Succulents want to be neglected, which suits this project perfectly.
- Best for: Ages 5 to 12. Younger kids overwater, and overwatered succulents rot fast.
- Time: 10 minutes prep, 25 minutes building, 5 minutes cleanup, plus paint dry time if you are decorating a birdhouse.
- Mess: Low. Cactus mix is gritty and drier than potting soil, so it sweeps up instead of smearing.
- Supervision: Light, once the plants are in. An adult should handle the plants coming out of their nursery pots.
- Supplies: Shallow ceramic dish with a drainage hole (a saucer with a hole drilled in it works), cactus and succulent mix (Espoma or Black Gold, or make your own by mixing regular potting soil half and half with sand), soft leaved succulents like hens and chicks, haworthia, or echeveria, a small wooden birdhouse, acrylic paint.
- Fill the dish with cactus mix to about half an inch below the rim.
- Plant three to five succulents around the outer edge, pressing the mix firmly around each root ball.
- Let your child paint the birdhouse and let it dry fully before it goes in.
- Set the painted house in the open center and top the soil with a thin layer of pebbles.
Practical note: Skip anything in the euphorbia family, including pencil cactus and crown of thorns. The milky sap burns skin and is dangerous in eyes. Also skip real cactus, no matter how tempting the tiny ones at the checkout look. Choose smooth, soft leaved succulents only.
What goes wrong the first time: Watering. Hand your kid a tablespoon, not a watering can, and water once every week or two at most. If the leaves go mushy and translucent, it is too much water, not too little.
Skip it if: You have a toddler who will pull the plants out by the leaves, or a cat that treats every dish of soil as an invitation.
5. Takeout Plastic Tray

My favorite trial run container. It costs nothing, and if the whole idea flops after ten minutes, you have lost a container that was headed for recycling anyway. It is also a low pressure way into gardening for a kid who is not sure they are interested.
- Best for: Ages 3 to 10. Great for siblings, since everyone gets their own tray and nobody has to share territory. Little kids do one tray, older kids link two or three into a village with twig bridges between them.
- Time: 5 minutes prep, 20 minutes building, 5 minutes cleanup.
- Mess: Medium, but contained. The tray catches most of it.
- Supervision: Adult does the holes, then check in occasionally.
- Supplies: Clean plastic takeout container, potting soil, small river rocks (driveway pebbles work), preserved or real moss, a small wooden craft house or a bark scrap.
- An adult pokes three small drainage holes in the bottom. A metal skewer or the tip of a screwdriver is safer than a utility knife on thin plastic, which cracks and leaves sharp edges. Do it on a scrap board.
- Fill with soil almost to the rim.
- Set the house in the center and pack moss around the base.
- Lay a winding path of river rocks from the door to the edge.
What goes wrong the first time: These trays are flimsy. Lift one by the rim when it is full of wet soil and it folds. Carry it from underneath, or slide it onto a plate and move the plate.
Skip it if: You want this to last the season. Realistically you get a few weeks before the plastic cracks or warps in the sun.
6. Upcycled Water Table

When my kids outgrew the water table it sat in the side yard collecting mosquito larvae for a year. Converting it was the best backyard decision we made, mostly because the height means little kids can play standing up instead of kneeling in mud. It works well alongside the rest of your outdoor play setup.
- Best for: Ages 2 to 8. One extra benefit: the standing height makes it accessible for a kid who uses a wheelchair or cannot easily get down to ground level.
- Time: 30 minutes of adult setup, then 45 minutes plus of building. Split it across two sessions.
- Mess: High, and permanently outdoors, which is exactly why it is fine.
- Supervision: Adult does all drilling. After that it is one of the most hands off options here.
- Supplies: Old plastic water table, drill, gravel, potting soil, child safe plants, accessories.
- Pull the drain plug out and drill extra holes at the lowest points of each basin. This matters. Holes drilled on a high spot leave standing water, which means mosquitoes.
- Add a thin layer of gravel over the holes only, to stop soil washing out.
- Fill with potting soil and press it down.
- Use the separate compartments as separate zones. Ours became a village, a forest, and a swamp, negotiated at length between two children.
Tip: Decide the final location before you fill it. A water table full of wet soil weighs more than you think and the legs flex when you try to drag it.
What goes wrong the first time: Thin plastic cracks around the drill holes if you push too hard or drill in cold weather. Go slow, use a smaller bit, and let the drill do the work.
Skip it if: You do not already own one. Buying a water table for this does not make sense when a $5 planter does the same job.
7. Dollar Tree Glass Bowl

The no dirt option. This is what we do in February when nobody is going outside and I still need something on the table for 30 minutes. [INTERNAL LINK: relevant related activity or guide on happykidsactivity.com, ideally an indoor rainy day activities roundup]
- Best for: Ages 4 to 10. Not for toddlers, because glass plus marbles is two hazards stacked.
- Time: 5 minutes prep, 15 minutes building, 5 minutes cleanup.
- Mess: Low. The lowest on this list.
- Supervision: Light, but stay in the room if you are using a real glass bowl.
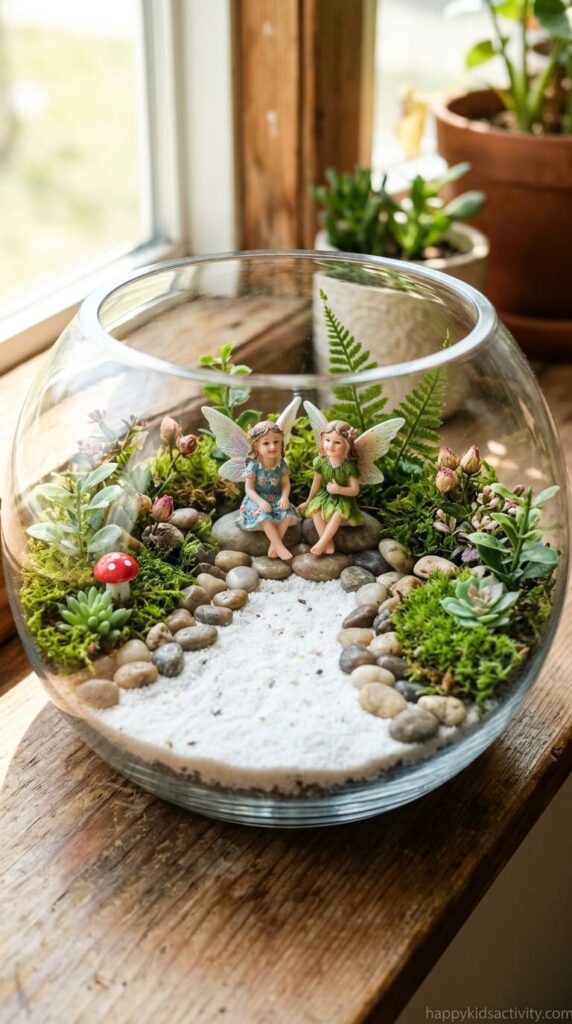
- Supplies: Wide mouthed glass or clear plastic bowl (Dollar Tree, usually a dollar and change), white decorative sand or fine gravel, polished river stones, miniature fairy figurines.
- Pour an even layer of sand or fine gravel into the bowl.
- Let your child arrange the stones into clusters, arches, and little seating circles.
- Set the figurines on the stones.
- Leave it out where they can rearrange it, because they will, daily.
What goes wrong the first time: White sand shows everything. Two days of hands in it and it goes gray. Just dump it, rinse it in a sieve, and refill. Also, if you have a dog or a tile floor, buy the plastic bowl version instead of glass.
Skip it if: You have a kid under 3 in the house at all, even if they are not the one building it.
8. Enchanted Terra Cotta Planter
The classic, and still the best version if you want real plants your kid tends themselves. A living garden gives them a reason to come back tomorrow, which the artificial ones do not.
- Best for: Ages 3 to 10. Three year olds do the digging and the patting down, and an older kid can own the watering schedule, which is the part that decides whether it lives.
- Time: 15 minutes prep, 30 minutes building, 10 minutes cleanup.
- Mess: Medium. Real soil, real water, do it outside.
- Supervision: Light. Kids can plant annuals themselves, roots and all, without much help.
- Supplies: Large terra cotta pot, potting soil, four pack of annuals (marigolds and alyssum handle rough handling best, plus violas and petunias), moss, a small house.
- Fill the pot with soil, leaving two inches below the rim.
- Press the house firmly into the center.
- Plant flowers around the sides, showing your child how to loosen the root ball before it goes in.
- Pat the soil down and lay moss patches as the lawn.
What goes wrong the first time: Terra cotta dries out much faster than plastic, especially in wind. In midsummer heat that means daily watering, and one skipped weekend is enough to wilt marigolds. Also, do not leave a soil filled terra cotta pot outside through a hard freeze. Water expands, the pot cracks, and you find it in pieces in spring.
Skip it if: It is late in the season where you live. Check your frost date. Right now, going into fall, use moss and pebbles instead of annuals, or plan the planted version for spring.
9. Rubbermaid Storage Bin

For the kid who wants a whole civilization, not a garden. My nine year old built a bin version with three neighborhoods and a road system, and it kept getting expanded for weeks.
- Best for: Ages 4 to 12. This is the best pick for older kids who think fairy gardens are babyish.
- Time: 20 minutes of adult prep, 40 minutes plus of building, and it never really ends.
- Mess: High. It holds a lot of soil.
- Supervision: Adult drills, then step back entirely.
- Supplies: Large plastic storage bin, drill, gravel, potting soil, sturdy twigs, whatever plastic toys are in rotation.
- Drill about a dozen holes across the bottom, from the outside, with a scrap board underneath. Snap off any sharp plastic burrs with pliers.
- Put the bin exactly where it will live, then fill it.
- Add a layer of gravel over the holes, then soil up to a few inches below the rim.
- Plant denser green plants at the back as a canopy, then hand it over for building.
What goes wrong the first time: Filling it before moving it. A large bin of damp soil is heavy enough that the sides bow out and you cannot get a grip on it. The other one: LEGO in soil is LEGO gone forever, and the small pieces end up in the vacuum. Use figures you can afford to lose.
Skip it if: You need this to be portable or tidy.
10. Antique Radio Flyer Wagon
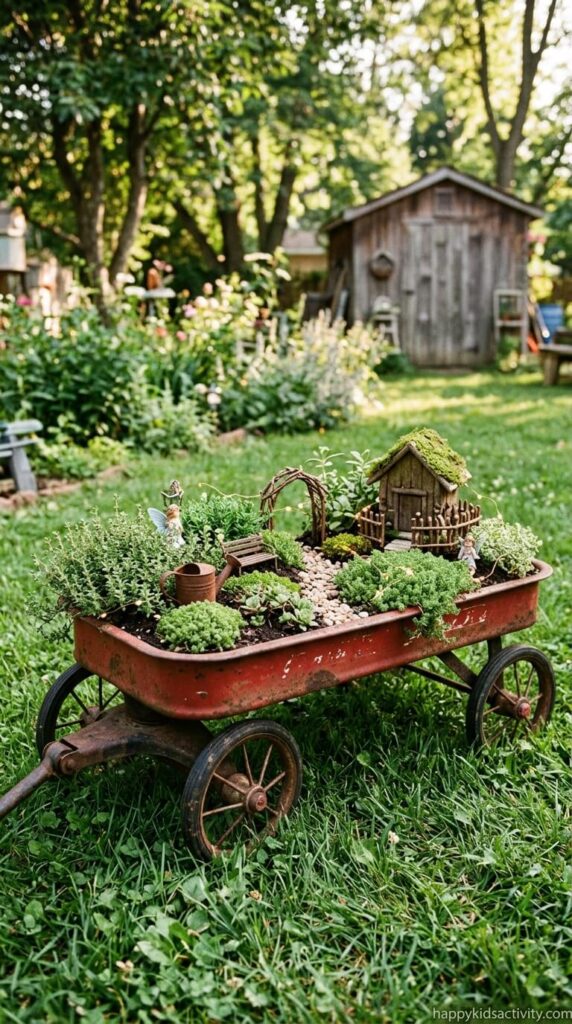
It looks incredible in photos. I want to be honest about the trade-offs before you go find one at a yard sale, because there are two real safety issues here.
- Best for: Ages 5 to 12, with the caveats below.
- Time: 30 minutes of adult prep, 40 minutes of building.
- Mess: High.
- Supervision: Adult handles the wagon itself, start to finish.
- Supplies: Old metal wagon, drill with a metal bit, gravel, landscape fabric (coffee filters or a few sheets of newspaper work), potting soil, creeping thyme or another tough ground cover.
- Check the wagon over first. File down rusty edges, and if the paint is old and flaking, do not sand it. Paint on pre 1978 metal toys can contain lead. Wipe it down, seal it with a clear coat, and wash hands after handling it.
- Drill drainage holes in the base and line it with gravel, then landscape fabric to hold the soil.
- Fill with soil and plant creeping thyme around the edges so it spills over the sides.
- Let your child build the village in the middle.
Tip: Creeping thyme smells wonderful when a hand brushes it, and it shrugs off being squashed. That combination is rare and kids notice the smell immediately.
What goes wrong the first time: Everyone pictures rolling it around to follow the sun. A wagon filled with damp soil is far too heavy for a child to pull, and the wheels leave ruts in a wet lawn. Treat it as furniture that moves twice a season, with an adult doing the moving.
Skip it if: The wagon is heavily rusted or the paint is flaking badly. Not worth it.
11. Classic Garden Planter
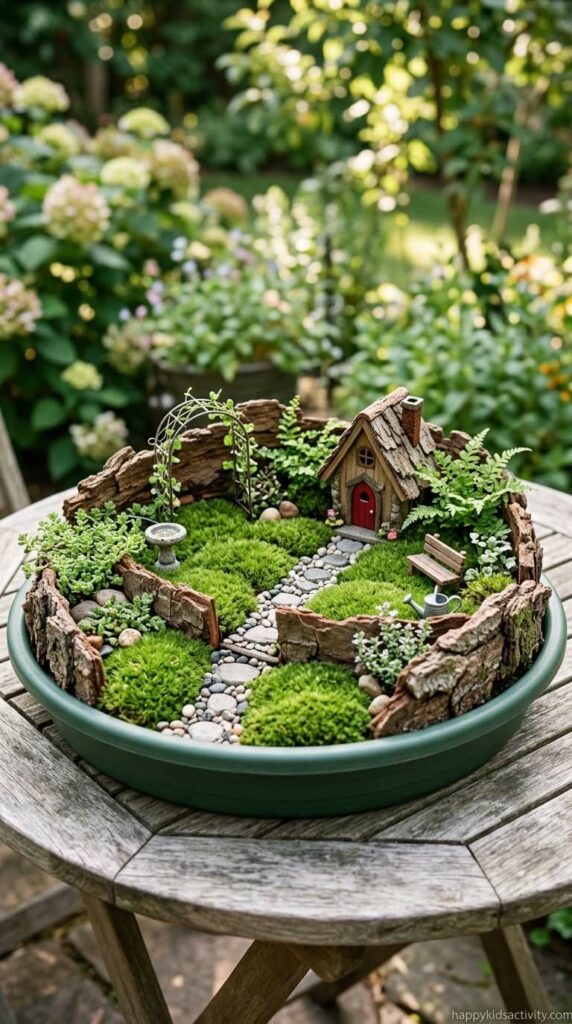
The boring answer is often the right one. A plain wide plastic planter is stable, drains, costs a few dollars, survives being knocked over, and puts all the attention on what your kid actually made.
- Best for: Ages 3 to 10. If you are choosing one container off this whole list, choose this.
- Time: 10 minutes prep, 30 minutes building, 10 minutes cleanup.
- Mess: Medium.
- Supervision: Light.
- Supplies: Wide plastic planter, potting soil, sheet moss, bark pieces, small accessories.
- Fill with potting soil to an inch below the rim.
- Lay sheet moss across the surface like carpet, pressing the edges down.
- Let your child stand bark pieces up as cliffs and retaining walls.
- Arrange the accessories on the moss lawn.
What goes wrong the first time: Preserved craft moss sheds green flecks over everything, and some of it is dyed, so wet hands come away green for a few minutes. It washes off, but tell your kid first so nobody panics. Real moss from the yard looks better and is free, but it browns within days in direct sun, so keep it shaded and damp.
Skip it if: Nothing, honestly. This is the safe default.
12. Tupperware Food Container
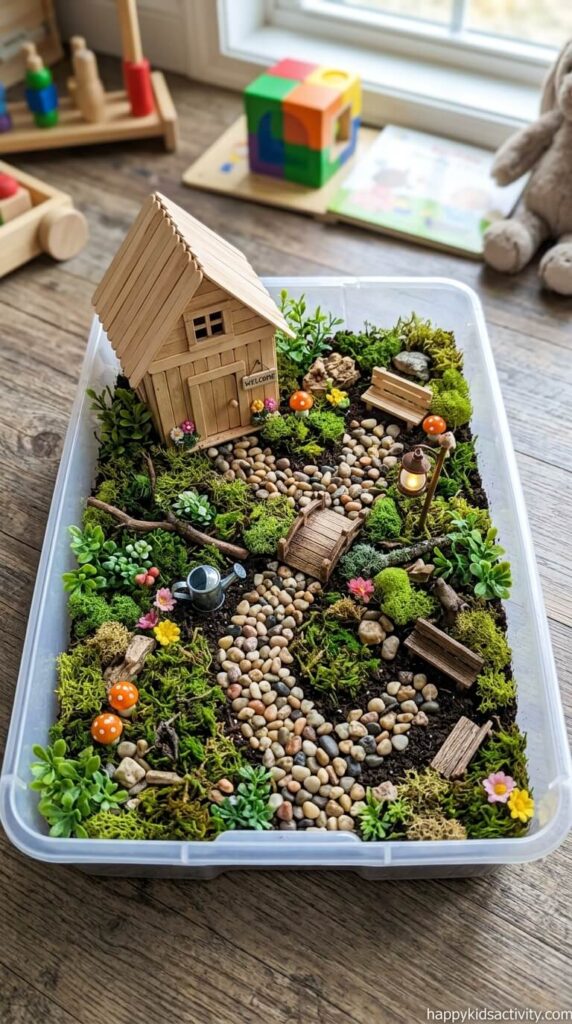
The indoor, tiny apartment, no yard option. Also good for a kid stuck inside recovering from something and going stir crazy.
- Best for: Ages 2 to 6. For a two year old, skip the soil and do pebbles and preserved moss only. Older kids will want one of the bigger outdoor builds instead.
- Time: 5 minutes prep, 15 to 20 minutes building, 5 minutes cleanup.
- Mess: Low.
- Supervision: Light, with a placemat under it.
- Supplies: Wide shallow food container, potting soil, pebbles, popsicle stick house, artificial or preserved moss.
- Fill with a shallow layer of barely damp soil and press it flat.
- Set the house on the surface.
- Make walking paths with pebbles.
- Fill in around the edges with preserved or artificial greenery.
Practical note: With no drainage holes, wet soil in a sealed plastic container grows mold within a week or two, and you will smell it before you see it. That is a real problem for a kid with asthma or allergies. Keep the soil barely damp, use dry sand or preserved moss instead of living plants, or poke a few holes and stand the container on a plate.
What goes wrong the first time: Someone snaps the lid on to protect it. A sealed damp container is a mold factory within days, so leave it open on a shelf instead.
Skip it if: Your child waters things enthusiastically and often. There is nowhere for the water to go.
Easy DIY Fairy House Ideas for Kids
The house is the part kids care about most and the part where store bought kits disappoint. A resin cottage looks finished, which quietly tells your child there is nothing left to do. A lopsided popsicle stick cabin they built themselves gets narrated for a week.
One rule that changed how these go for us: do not glue the house to the garden. Kids play by rearranging, and a house that cannot move kills the game.
13. Concrete Block Fairy Fortress
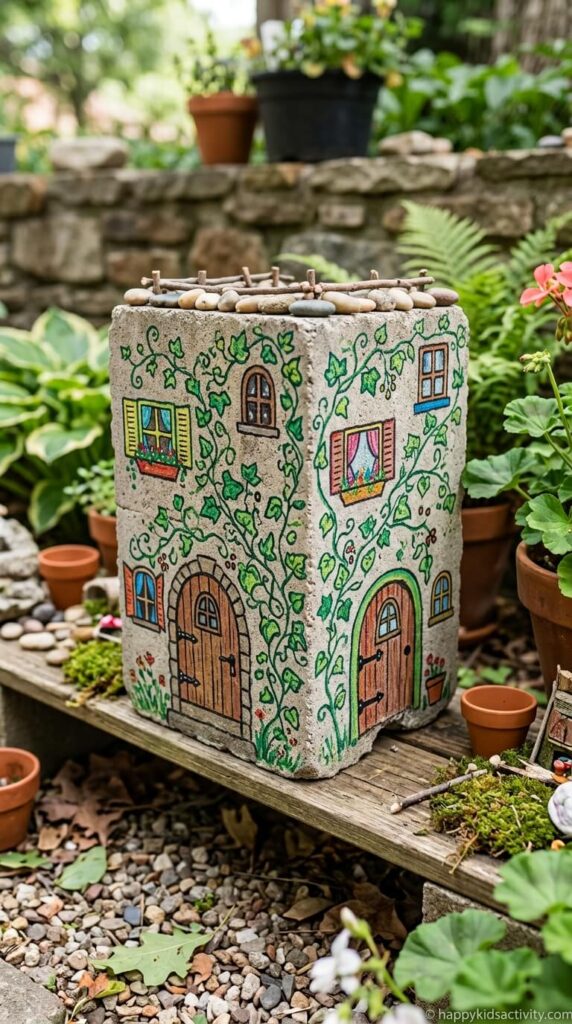
If you want something that is still standing next spring, this is it. Wind, rain, and a soccer ball will not move a concrete block.
- Best for: Ages 4 to 12. Paint pens make it accessible for younger kids who cannot manage a brush.
- Time: 10 minutes prep, 40 minutes decorating, plus dry time.
- Mess: Low, unless the paint pens find your patio.
- Supervision: An adult carries and places the block. Adhesive is adult only, outdoors.
- Supplies: Concrete block or standard brick (usually a couple of dollars at a hardware store, or free from a neighbor’s leftover pile), oil based paint markers (Sharpie Oil-Based Paint Markers hold up outdoors, regular Sharpies fade to nothing in a few weeks of sun), pebbles, outdoor adhesive.
- Brush the loose dust off the block and let it dry fully.
- Paint a base coat of white or light acrylic over the face you are decorating and let it dry. Paint pens skip and clog on raw concrete, and this one step is the difference between smooth lines and a frustrated kid.
- Let your child draw doors, windows, stone courses, and climbing ivy on the surface.
- An adult glues flat pebbles along the top edge as battlements.
What goes wrong the first time: Drawing straight onto bare concrete. The pen tip fills with grit and dies. Prime it first.
Skip it if: You have a toddler around and nowhere stable to put a heavy block. Dropped on a foot or a finger, it does real damage.
14. Easy Birdhouse Fairy Home

The unfinished wooden birdhouses at craft stores are the best value in this entire article. A few dollars, structurally sound, and a blank canvas.
- Best for: Ages 3 to 10. Preschoolers paint it one solid color and glue moss on top, and older kids can add shutters, a chimney, and a painted stone path up to the door.
- Time: 5 minutes prep, 30 minutes painting and decorating, 20 to 30 minutes of paint dry time.
- Mess: Medium. Acrylic paint on clothes is mostly permanent once dry, so old shirts.
- Supervision: Check the birdhouse first, then light supervision.
- Supplies: Unfinished wooden birdhouse, acrylic paint (Apple Barrel or FolkArt, around a dollar a bottle), faux moss, tacky glue, small silk flowers.
- Check the birdhouse before you hand it over. The cheap ones often arrive with a loose roof panel, an exposed staple, or splintery edges. Sand the rough spots and press the staple flat.
- Let your child paint the whole outside, roof included. Two thin coats look better than one thick one and dry faster.
- Once dry, spread tacky glue on the roof and press moss down firmly for a thatched look.
- Glue silk flowers around the entrance hole.
Tip: Plan a snack break between painting and gluing. Acrylic is dry to the touch in 20 to 30 minutes, and no amount of explaining makes a five year old willing to wait for it.
What goes wrong the first time: Using Elmer’s school glue for the moss. It holds while wet and peels off in a sheet the next morning. Tacky glue, or Mod Podge brushed on and pressed down, is what actually holds.
Skip it if: Your child hates having paint on their hands. Give them the paint pens from idea 13 instead.
15. Milk Carton Upcycled Cottage

A milk or juice carton already has the gable roof shape built in, which saves the hardest part of the build. Free, and it uses up the twigs your kid keeps bringing inside.
- Best for: Ages 4 to 9.
- Time: 10 minutes prep, 35 minutes building, plus overnight glue drying.
- Mess: Medium. Glue and dried leaf crumbs.
- Supervision: Adult does any cutting and runs the glue gun if you use one.
- Supplies: Clean empty carton, twigs, dried leaves, tacky glue, brown construction paper (or a cut up paper bag).
- Rinse the carton with hot soapy water and let it dry overnight. Do not rush this. A carton with milk residue in it will smell sour within a day, and outside in the sun it is awful.
- Wrap the sides in brown paper and glue it down.
- Spread tacky glue on the roof and press dried leaves on in overlapping rows like shingles.
- Glue twigs vertically along the walls for a log cabin look.
What goes wrong the first time: Rain. Cardboard turns to mush in one shower and the twigs slide off. This is an indoor house, or a covered porch house at best. If your kid wants it outside, take a photo of it first so they still have it after it collapses.
Skip it if: Your child wants a garden they can leave outdoors all season.
16. Toadstool Houses from Clay Pots

The one that looks the most like a real fairy house, and it is almost impossible to get wrong. This is the version to start with if you have never done any of this.
- Best for: Ages 3 to 10. Painting dots is the perfect job for a three year old.
- Time: 5 minutes prep, 25 minutes painting, overnight drying before assembly.
- Mess: Medium. Red paint on a white pot means red paint on a white shirt at some point.
- Supervision: Light for painting, adult for gluing the cap on.
- Supplies: Small terra cotta pot, matching saucer slightly wider than the pot base, red and white acrylic paint, craft glue or outdoor construction adhesive.
- Paint the outside of the pot white. Terra cotta drinks the first coat, so expect to do two.
- Paint the underside of the saucer red and let your child add big white dots. A pencil eraser dipped in paint makes perfect round dots, and a cotton swab works too.
- Let both dry overnight. Acrylic feels dry in half an hour but it is not cured, and cured paint is what the glue needs.
- An adult flips the pot upside down, glues the top, and presses the saucer on right side up as the cap.
Tip: A pot upside down has no doorway. Prop one edge on a flat stone so there is a real gap the fairies can use. Kids care about this detail more than any other.
What goes wrong the first time: Regular craft glue on an outdoor toadstool. The first heavy rain pops the cap off. Use outdoor construction adhesive if it is living outside, or accept that this is an indoor piece.
Skip it if: You need it finished today. The overnight cure is not skippable if it is going outdoors.
17. All-Natural Forest Dwelling
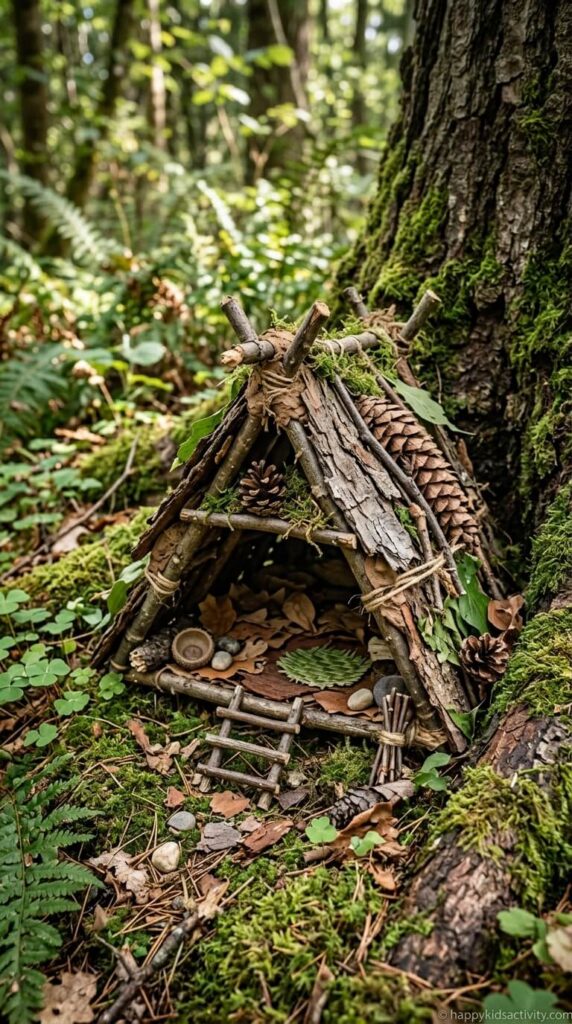
Free, and the one my kids have gone back to most often. The hunt for materials is half the activity, which means you get an hour outside instead of 20 minutes at a table.
- Best for: Ages 3 to 12. It scales up better than anything else here, because older kids start engineering the joins.
- Time: 30 minutes foraging, 30 minutes building.
- Mess: Medium, and all of it outside.
- Supervision: Stay with them for the foraging. That part is not optional.
- Supplies: Twigs, bark strips, pinecones, dried moss, river rocks, and damp clay soil as mortar. All free.
- Set the rules before you go out: leaves of three, let it be. No touching mushrooms. Nothing from near animal droppings. Only what is already on the ground, nothing pulled off a living tree.
- Pick a base, either a bare patch of dirt or a wide planter.
- Lean bark and sturdy twigs against each other into a teepee or a lean-to. Gravity holds it if the angle is right.
- Decorate the entrance with pinecones and rocks, then do a tick check when you come in, especially after tall grass or leaf litter.
What goes wrong the first time: Mud as mortar. It sticks beautifully while wet, then dries, shrinks, and crumbles, and the house falls down overnight. Heavier clay soil holds better, but the honest fix is to build a structure that stands without glue. Tie the top of the teepee with a strand of garden twine and it will last months.
Skip it if: you are in peak tick season and not up for the check, or your child has a bad reaction to poison ivy and cannot reliably identify it yet.
18. Paper Mâché Enchanted Kingdom

More dollhouse than garden, and that is the point. This is the storytelling version, for the kid who narrates constantly and wants characters more than landscaping.
- Best for: Ages 4 to 10. Younger kids stick with stickers and felt, older ones will write out a whole backstory for the peg doll residents and act it out.
- Time: 5 minutes prep, 40 minutes decorating.
- Mess: Low. Markers, felt, and glue only.
- Supervision: Light.
- Supplies: Blank paper mâché houses from a craft store, wooden peg dolls, markers, felt scraps, stickers, preserved moss.
- Let your child decorate the house with markers, stickers, and felt cut into doors and shutters.
- Glue moss along the base so it sits in a landscape.
- Draw faces and clothes on the peg dolls.
- Set it all on a tray so the whole kingdom can be carried from room to room.
What goes wrong the first time: Markers bleed and feather on raw paper mâché, and a kid pressing hard gets fuzzy blobs instead of windows. Acrylic paint or paint pens give cleaner results. And keep it indoors, permanently. One splash of water and it is done.
Skip it if: there is a toddler in the house. Peg dolls are exactly the wrong size and shape.
19. Painted Pot Fairy Houses

An upside down flowerpot is the sturdiest house on this list, and terra cotta takes paint well. This is the one that survives a full season outdoors.
- Best for: Ages 3 to 12. Little kids paint it a solid color, big kids add brick lines and window boxes.
- Time: 5 minutes prep, 25 minutes painting, then 24 hours before sealing.
- Mess: Medium.
- Supervision: Light for painting. Spray sealing is adult only, outdoors, with kids inside.
- Supplies: Small terra cotta pot, outdoor acrylic paint (DecoArt Patio Paint Outdoor holds up well), brushes, permanent marker, clear outdoor sealer.
- Turn the pot upside down so it sits on its wide rim.
- Paint the outside, two thin coats, and let it dry.
- Add doors, windows, and vines with a permanent marker.
- Wait a full 24 hours, then an adult applies clear sealer outdoors. Sealing over paint that is not cured gives you a cloudy, tacky finish that never quite hardens, and there is no fixing it afterward.
What goes wrong the first time: Painting a pot straight off the shelf. Old terra cotta carries a chalky white mineral crust, and paint over it flakes away within weeks, so scrub it with a dry brush first. Also warn your child that the first coat looks patchy, because the clay drinks it. Otherwise they will decide they have ruined it and stop.
Skip it if: You have no shaded outdoor spot to spray in, or nowhere the pot can sit untouched for a day.
20. Popsicle Stick Craft Cabin
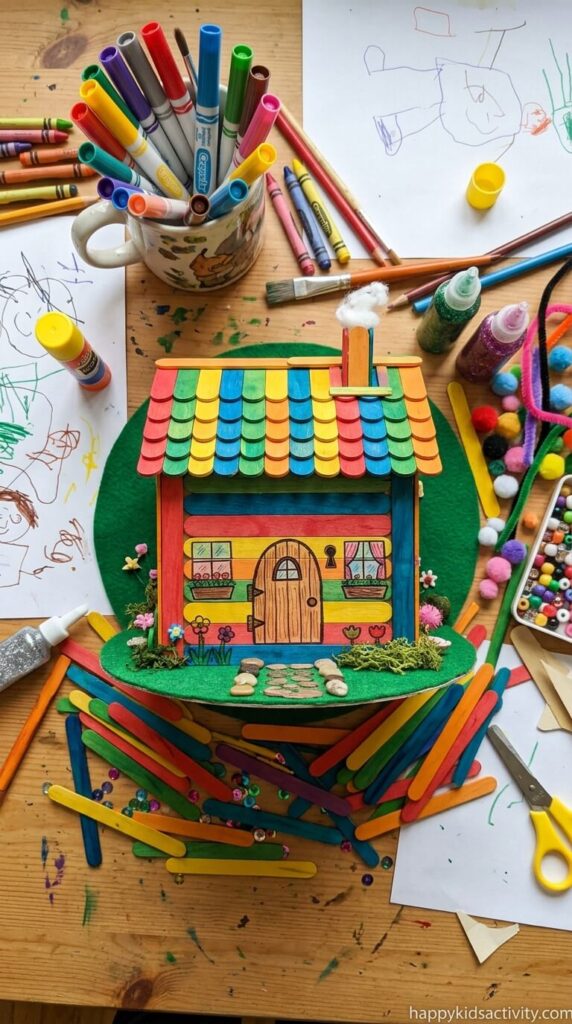
Real engineering practice, and the most satisfying result on the list when it works. I am also going to be straight with you about the timeline, because this is the one that goes sideways most often.
- Best for: Ages 5 to 12. Under 5s do not have the patience for glue setting time, and that is not a criticism of them, it is just how it goes.
- Time: 30 minutes to build panels, overnight to dry, then 20 minutes to assemble. Two sessions, not one.
- Mess: Low.
- Supervision: Close, if you use a glue gun. Low temp glue guns still burn, and the tip stays hot after you set it down.
- Supplies: wooden craft sticks (Dollar Tree has them), tacky glue or wood glue, cardboard backing, markers.
- Work on wax paper so nothing sticks to the table.
- Lay two sticks parallel, then glue a row of sticks across them to make a wall panel. Repeat for four walls and two roof panels.
- Weigh the panels down with a book and leave them overnight. Skipping this is why the walls slide apart at assembly.
- Glue the panels into a cabin, then let your child draw a door, windows, and curtains.
What goes wrong the first time: Promising it will be finished today. Tacky glue on wood needs real time, and a kid who was told it would be done in an hour will be upset at hour two. Say up front that it is a two day build. Or use a low temp glue gun with a 7 or older kid, hand over hand, and it sets in seconds.
Skip it if: Your child gets discouraged when their hands cannot do what their brain planned. Popsicle sticks demand a lot of fine motor precision.
Common Mistakes Parents Make The First Time
Most of these I have made myself, some more than once.
- Buying the kit to make it easier. A $30 boxed set arrives finished, so your child becomes a spectator, and then you find yourself saying do not touch that. Kits work best as an accessory source, not the main event.
- Gluing everything down. It photographs beautifully and it ends the play. Rearranging is the game. Leave the house, figures, and path loose.
- No drainage. The first big watering turns it into soup, the plants suffocate, and it is dead by Friday. Holes in the bottom, always, or dry materials only.
- Straight yard dirt. It sets like concrete when it dries, and your kid cannot dig or press anything into it. Mix in sand, or use bagged potting mix.
- Full afternoon sun. A dark container in direct sun bakes moss brown in a day and cooks real plant roots. Morning sun, afternoon shade.
- Starting at 5pm. Paint needs dry time, glue needs set time, and dinner is coming. Start these in the morning or right after lunch.
- Fixing their layout. The moment you straighten the path, it stops being theirs and their interest drops off a cliff. Sit on your hands.
- Building it and never returning. Without a reason to come back, it is a 40 minute craft, not a summer long thing. See the next section.
- Not checking the plant list. Every year someone plants something with berries or milky sap in a toddler’s garden. Two minutes of checking prevents it.
- Doing it on the good table with no cover. An old sheet, a plastic tablecloth from the dollar store, or the driveway. Acrylic paint and wet soil both stain.
How To Keep It Interesting After Week One
The build is the easy part. Keeping a kid coming back to it is what turns this from a one afternoon craft into something that occupies them for weeks.
What has worked at our house: moving one thing overnight so the fairies clearly visited, leaving a note the size of a postage stamp, adding a fairy door at the base of a tree so there is somewhere to travel from, and burying a few new gems every so often so there is something to find.
Seasonal swaps also help. Acorn caps and tiny pumpkins in fall, a pinecone in a scarf in December, a fresh flower in spring. It takes two minutes and it resets their interest completely.
Practical note: Do not overpromise on fairy mail. If you start leaving notes every night, you have signed up for leaving notes every night, and a missed night lands harder than you would expect. Once a week is plenty and much easier to sustain.
FAQs
Which plants are safest and best suited for a child’s fairy garden?Look for non-toxic, slow growing plants that survive handling: creeping thyme, Irish moss, hens and chicks, marigolds, alyssum, violas, and dwarf conifers all hold up well. Avoid thorns, milky sap, and berries, which rules out euphorbia (pencil cactus, crown of thorns), and never plant foxglove or lily of the valley near young children. If you have a cat or dog, check the ASPCA’s toxic plant list before you buy.
How do we prevent our outdoor fairy gardens from getting ruined by the weather?Use a heavy, wide, low container that wind cannot tip, and seal any painted pieces with a clear UV-resistant outdoor sealer once the paint has cured for 24 hours. Choose stone, resin, and treated wood accessories over thin plastic or paper, and bring terra cotta indoors before a hard freeze, because trapped water expands and cracks the pot.
What can we use as cheap, DIY fairy path materials instead of buying store kits?Aquarium gravel, driveway pebbles, sea glass, wood slices cut from a fallen branch, sanded pieces of a broken terra cotta pot, and buttons all work, and most cost nothing. Skip food based paths like seeds or oats if the garden lives outdoors, since they draw ants and rodents within days and are an allergy risk when friends visit.
Is a fairy garden safe for a 3 year old?Yes, with swaps. Take out the glass gems, marbles, aquarium gravel, and small figures, which are all choking hazards at that age, and use large river rocks, wood slices, and big shells instead. Stay hands on, keep soil out of mouths, and wash hands afterward.
How do I get potting soil out of the carpet?Let it dry completely first, then vacuum. Scrubbing wet soil grinds it deeper into the fibers and turns a small mess into a stain, so resist the urge to attack it right away. Once the loose dirt is up, blot any remaining mark with cool water and a drop of dish soap.
How much does a DIY fairy garden cost?A dollar store version runs about $5 to $8 total: bowl, sand, gems, and figures. A planted outdoor one with a bag of potting mix, a four pack of annuals, and a craft store birdhouse lands around $15 to $20, and everything after that is free if you use twigs, pebbles, and toys you already own.
Read next
If the fairy garden lands well, the natural next step is a fairy door at the base of a tree in your yard. Same materials, and it gives the garden somewhere to connect to, which extends the story for weeks. And if you are staring down a long stretch of unstructured days, our roundup of summer crafts for kids has more projects in this same low cost, low prep category.
Conclusion
Start with one container, one house, and one afternoon. That is the whole entry point, and it does not have to be the terra cotta version or the planted version or the one that photographs well.
Pick the idea that matches your kid’s age and how much patience you have today, put an old sheet down, and hand over the decisions. The lopsided ones with the pond on a hill are the ones they remember. If you only do one thing from this page, drill the drainage holes. Everything else is recoverable.