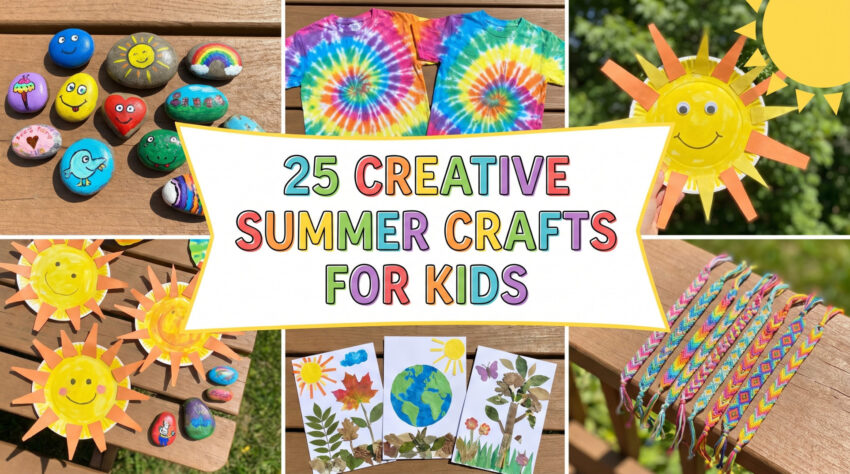
The 25 best summer crafts for kids are the ones that use cheap or free supplies, work across ages 3 to 12 with small tweaks, and produce something a child can keep, wear, or show off. For a fast pick, tie dye, a cardboard castle, a mini volcano, and painted kindness rocks are the four most reliable on any list. Most need under 30 minutes of your time, all are doable at a kitchen table or on a driveway, and you can build nearly every one from things already in the house or a dollar store run.
It was the third Saturday of summer break. I had a cold drink, a plan to read a whole novel, and a nine year old who had already declared, for the fourth time, that he was bored. The house was dry, the air conditioning was doing its thing, and somewhere under the couch was a half finished drawing he was determined to show me. So I stopped planning and pulled a cardboard box out of the hallway. By the time lunch was ready, we had a drawbridge, a moat, and a fight about who got to live in the tower. That is most of summer in a nutshell. The kids are home, the screens are a last resort you don’t want to reach, and you need projects that are easy to start, cheap to fix when they go wrong, and flexible enough to work when your kid has three days of patience left.
Summer is the season where a kid can unplug from devices and get their hands dirty for real. And the best part is that you do not need expensive kits or fancy tools. Some of the most memorable projects on this list lean on things you already own or can grab outdoors. From nature finds to messy science to pure art, these summer crafts for kids keep them busy while building the fine motor control, patience, and “I made that” pride that shows up in a lot of other areas of life.
To help you plan, here is how these 25 crafts break down by what they focus on:
| Craft Category | Primary Benefit | Best Setting |
| Nature & Outdoor | Encourages observation of the world around them | Parks, backyards, beaches |
| Keepsakes & Memories | Preserves the summer as it happens | Indoors, family tables |
| STEM & Building | Builds engineering and problem solving | Indoors, garages |
| Art & Design | Pure creative expression | Craft tables, patios |
Grab the glue sticks, the washable paint, the safety scissors, and whatever imagination is left in the tank. Here are 25 creative summer crafts that actually earned a spot on this list.
What You Actually Need Before You Start
Most of the list runs on a small handful of staples, so if you stock one craft drawer for the season you will cover the vast majority of projects. Here is what reaches into that drawer most, and the cheap or free swap for each when you are out.
| You’ll use | Where to get it | Free or low cost swap |
| Washable tempera paint (primary colors) | Craft or drug store | Leftover paint, or watercolor pan sets |
| Safety scissors | School supply aisle | A single pair is fine for the whole summer |
| Glue (liquid and sticks) | Dollar store | A dab of cornstarch paste for paper work |
| Cardstock and construction paper | Dollar store or office supply | Saved junk mail, cereal boxes, old calendars |
| Crayons, markers, fine tip pens | Dollar store | Crayons that have survived the school year |
| Popsicle sticks and dowels | Craft aisle | Flat bread sticks, coffee stirrers, pencil offcuts |
| Cardboard boxes and tubes | Delivery boxes, kitchen | Saved boxes beat any store purchase |
| Rubber bands, string, tape | Kitchen and hardware drawer | Shoe laces, yarn, the tape roll you always have |
| Beads, googly eyes, feathers | Dollar store | Buttons, bottle caps, feathers you find outside |
| A drop cloth or old tablecloth | Garage or thrift store | Flattened cardboard, or an old sheet from the laundry |
Save the clean cardboard boxes and paper towel rolls as they come. They quietly become the foundation for more crafts on this list than anything you can buy.
Safety Rules That Actually Matter
This is the part I would not skip, because kids’ crafts are mostly low risk but a few have real hazards worth naming. Read the notes tied to each craft, and hold to these overall.
Small parts and choking. Anything smaller than a toilet paper roll tube is a choking risk for a child still putting things in their mouth. That means loose beads, bottle caps, small shells, and unstrung charms need an adult to string or fix in place, not the child. Roughly, keep loose small pieces off the table for under 4s, and never for any child who still mouths objects.
Sharp and adult only tools. Box cutters, scissors for thick cardboard, the hot glue gun, and a stove for cooking are the ones adults handle. A standard hot glue gun runs around 380F, so a child’s job is to feed you the stick or the piece, not press it. Keep the blade of a box cutter angled away from the body, and cut in one clean push.
Fumes and ventilation. Tie dye, outdoor spray sealers, and any aerosol happen outdoors or in a garage with the door open. Do not seal painted rocks, shells, or pots in a closed room, and do not let a child hold a can that sprays.
Food and allergens. The mini volcano and a few others use baking soda, vinegar, and food coloring, which are taste safe but not for a child with relevant allergies, and the glue on the fairy garden and scrapbook can get near a face during play. Watch for latex if you use rubber bands or balloons near sensitive kids, and keep glue away from eyes.
Supervision levels. I mark each craft as “hands on the whole time,” “arm’s reach,” or “check in every few minutes.” Treat the label as a floor, not a ceiling. A tired, hungry, or too young kid steps up the supervision no matter what the label says.
Pick a Summer Craft in 30 Seconds
Not ready to read all 25? This table is the scan. Pick by age, by how much mess you will survive today, and by how long the project really takes (prep, play, and cleanup, not just the pretty part).
| # | Craft | Real ages | Time (prep + play + cleanup) | Mess | Supervision |
| 1 | Paint Kindness Rocks | 4 to 11 | 25 min | Low | Check in |
| 2 | Make a Nature Collage | 3 to 9 | 30 min | Low | Check in |
| 3 | DIY Friendship Bracelets | 6 to 11 | 45 min | Low | Check in |
| 4 | Design a Summer Scrapbook | 5 to 12 | 40 min | Low | Check in |
| 5 | Make Homemade Wind Chimes | 5 to 10 | 35 min | Low | Check in |
| 6 | Paint Flower Pots | 5 to 11 | 40 min (plus dry time) | Low | Check in |
| 7 | Create Handprint Art | 1 to 6 | 25 min | Medium | Hands on |
| 8 | Decorate a Birdhouse | 4 to 10 | 45 min (plus dry time) | Low | Check in |
| 9 | Build a Fairy Garden | 4 to 10 | 60 min | Medium | Check in |
| 10 | Create Tie Dye T Shirts | 5 to 12 | 90 min (plus 24 hr set) | Very high | Hands on |
| 11 | Make Sun Catchers | 3 to 9 | 30 min | Low | Check in |
| 12 | Paint Seashells | 5 to 11 | 40 min | Low | Check in |
| 13 | Make a Nature Journal | 5 to 12 | 30 min per outing | Low | Check in |
| 14 | Build a Mini Cardboard Castle | 4 to 12 | 90 min | Low | Hands on (box cutter) |
| 15 | Create a Butterfly Craft | 2 to 8 | 25 min | Low | Check in |
| 16 | Paint a Summer Mural | 3 to 11 | 60 min | High | Check in |
| 17 | Create Fingerprint Art | 2 to 8 | 25 min | Low | Check in |
| 18 | Decorate Reusable Water Bottles | 4 to 11 | 25 min | Low | Check in |
| 19 | Make DIY Puppets | 3 to 10 | 40 min | Low | Check in |
| 20 | Build a Popsicle Stick Bridge | 7 to 12 | 75 min | Low | Hands on (glue gun) |
| 21 | Design a Dream Catcher | 6 to 11 | 50 min | Low | Check in |
| 22 | Build a Mini Volcano | 5 to 11 | 70 min | High | Hands on |
| 23 | Make a DIY Kite | 6 to 12 | 75 min | Low | Hands on (dowel, string) |
| 24 | Create Recycled Robots | 3 to 10 | 45 min | Low | Check in |
| 25 | Build a Paper Airplane Collection | 5 to 12 | 35 min | None | Check in |
Best Creative Summer Crafts for Kids
1. Paint Kindness Rocks
Painted rocks are the craft that shows up on every summer list because they genuinely work. Kids find the stones, paint them, hide them, and then spend the next three weeks checking the neighborhood Facebook group to see if anyone found them. That loop is enough to keep a lot of kids going back.
Real ages: 4 to 11. Under 4 can do it with close supervision on small rocks.
Time: 10 minutes to find and wash the rocks, 10 minutes to paint, 5 minutes to seal. Plus dry time between coats.
Mess level: Low. This one stays at the table.
Supervision: Check in every few minutes. They do not need you standing over them, but you want to know when the sealer comes out.
You’ll need: Smooth river or field stones, washable craft paint (acrylic works but washable cleans up faster), paintbrushes, and a clear sealer. You can grab a pack of 12 smooth stones at a dollar store, or just pick them up from your yard if you have them.
Free or cheap swap: A walk around the block or a park is the sourcing step. Wash the rocks with dish soap and a scrub brush and let them dry fully before painting or the paint peels.
What goes wrong the first time: You skip the sealer. Unsealed acrylic on a rock that sits outside in rain and sun lasts about a week. A coat of clear acrylic sealer (the cheap spray kind from a hardware store) extends that to a full season. Do the sealer step even when the kid insists it is done.
Skip it if: Your child has zero interest in going outside to find the rocks, or if you live somewhere with only sharp gravel. The finding is half the fun, and the project falls flat without it.
How to do it:
- Collect 5 to 10 smooth, flat stones. Rinse and dry them completely.
- Set up a covered surface with paint, brushes, and a paper plate or palette.
- Paint a base coat and let it dry for 10 to 15 minutes.
- Add details: a simple animal face, a pattern, a motivational word, or whatever the kid has in mind.
- Let the detail layer dry, then apply one coat of clear sealer outdoors. Let it cure for 30 minutes before handling.
The Facebook group rock-hiding loop is the part of this craft that turns it from a 20 minute activity into a two week obsession. Some neighborhoods have active rock-hiding groups, some do not. Ask before you start, because it changes whether the hiding step feels meaningful.
Tip: Write the date on the back of each rock with a pencil before you seal it. Rocks that get found months later are better with context.
2. Make a Nature Collage
A nature collage turns an ordinary walk into an art project without the walk feeling like an obligation. You are going somewhere, but you are also looking for things. That framing holds a lot of kids through a walk that would otherwise lose them five minutes in.
Real ages: 3 to 9. Under 4 needs help identifying and handling fragile items.
Time: 10 minutes to collect, 15 minutes to arrange, 5 minutes to glue. Plus time to press flowers and leaves for 1 to 3 days if you want them flat.
Mess level: Low. Glue dots or a glue stick keeps this contained.
Supervision: Check in. Under 4s will eat a small leaf or a feather before you can stop them.
You’ll need: Cardstock or cardboard as the base, a glue stick or liquid craft glue, and whatever the walk turns up (leaves, petals, small twigs, grass, feathers).
Free or cheap swap: Save the backs of junk mail envelopes or cereal boxes as the base. A dollar store has cardstock for under a dollar a pack.
What goes wrong the first time: You collect fresh flowers and leaves, put them on the collage, and they curl and brown within two days. Press them between the pages of a heavy book for 24 to 48 hours before gluing. Books with weight work better than anything sold as a press.
Skip it if: Your child is not walking willingly. Forcing the collection walk means the whole thing starts on a bad note, and it will show in the collage.
How to do it:
- Decide your route. Even the backyard counts if you are in a small space.
- Give each child a paper bag or an envelope for collecting.
- Look for flat items: pressed flower petals, thin leaves, blades of grass, small feathers.
- At home, press fresh finds between book pages for 24 to 48 hours.
- Arrange items on the cardstock before gluing. This is where most kids spend the most time, and it is worth letting them.
- Glue everything down. Let it dry flat.
Tip: The dollar store sells small rolls of twine and mini wooden clothespins. A collage hung on a string with clips looks finished in a way that one left flat on a shelf does not.
3. Create DIY Friendship Bracelets
Friendship bracelets sit in the gap between a craft and a skill. The finished product is genuinely wearable, which matters to kids in a way that a painted rock does not, and the time investment is visible and meaningful. But the motor skills to tie consistent knots arrive unevenly, which means this craft has a real age floor.
Real ages: 6 to 11. Under 6 can do it with a clipboard or a tape anchor, but they will need help keeping tension on the thread and will not produce the tighter patterns without frustration. If you have a 4 or 5 year old who wants to make one for a friend, make it with them and call that a win.
Time: 30 to 45 minutes depending on the pattern and the age of the maker. One finished bracelet per session is realistic.
Mess level: Low. Thread does not make a mess.
Supervision: Check in. They mostly need you to hold the bracelet steady while they tie.
You’ll need: Embroidery floss in 4 to 6 colors, scissors, and a clipboard or a safety pin to anchor the bracelet while working.
Free or cheap swap: A dollar store usually stocks embroidery floss, and a clipboard from the dollar store or the school supply aisle works fine. An embroidery hoop is a free option if you have one.
What goes wrong the first time: You do not keep the thread tight while tying. A bracelet that is loose going on looks sloppy coming off, and a loose knot unravels within a week. The tension is the skill here, and it takes more focus than most kids expect.
Skip it if: Your child has no patience for repetitive hand work. This is not a 10 minute activity that then becomes boring. It is a slow, repetitive activity the entire time, and a kid who needs constant novelty will not finish it.
How to do it:
- Cut 4 strands of embroidery floss, each about 60 cm long.
- Tie them together at one end with a knot, leaving a 4 cm tail.
- Tape the knot to a clipboard or pin it to a pillow, keeping the strands taut.
- Pick two colors and follow a basic braiding pattern or a chevron tutorial online. The chevron is the most forgiving beginner pattern.
- Tie a final knot when the bracelet is long enough to fit the wrist with a little overlap.
- Trim the tails to 2 cm.
Must Read: Rainbow crafts ideas for kids
Tip: Tie the finished knot twice. Most first attempts unravel because the knot was tied once and the tail was too short to retie. Two knots and a 3 cm tail holds.
4. Design a Summer Scrapbook
A scrapbook is the one craft on this list that grows in value the longer you keep it. A finished page from this summer is a completely different object from a finished page from last summer, because the photos and the tickets and the drawings are irreplaceable. The pressure to start on June 1 is real, but the scrapbook works even as a mid-July project if you are honest about what you are capturing.
Real ages: 5 to 12. Under 6 needs significant adult help with cutting and gluing photos.
Time: 20 to 30 minutes per page depending on how much you are collecting. A session that fills 2 pages is a good target for a single sitting.
Mess level: Low. Glue sticks are the main tool and they are contained.
Supervision: Check in. Under 6s need help with scissors and photo placement.
You’ll need: A blank notebook or a photo album with sticky pages, scissors, a glue stick, photos, tickets, maps, or anything that documents the summer.
Free or cheap swap: A dollar store spiral notebook works as a base. The pages are thin but serviceable, and most kids do not care about the paper weight when they are gluing in a receipt from the beach. A cereal box cut into shapes works as a decorative element.
What goes wrong the first time: You put too much on every page. Scrapbook anxiety is real, and the blank page gets so overwhelming that some kids fill it with everything at once and then have nowhere to put the spontaneous trip you did not plan for. Leave at least 4 blank pages intentionally empty for whatever happens next.
Skip it if: Your child will not tolerate imperfection in the placement of a photo. Scrapbooks are not supposed to be neat. A tilted photo and a dried glue blob are part of the record. If that level of messy will cause a complete redo, start with fewer pages.
How to do it:
- Start with the easiest page: this week’s photos. Print them out or use ones that are already printed.
- Write the date and a short caption on each photo.
- Add one other item from the same week: a receipt, a leaf, a movie ticket, a postcard.
- Leave the rest of the spread open. You do not need to fill every page on the day it happened.
- Come back to it. The habit is the point.
Tip: Set the scrapbook somewhere visible, like the kitchen counter, rather than putting it away in a room. It gets touched and opened and added to more when it is in a shared space.
5. Make Homemade Wind Chimes
Wind chimes are the craft that keeps on giving after the afternoon is over. A finished chime hung on a porch hook becomes the soundtrack of July, and kids notice when it is not there. The making part is direct, but the sound is where the project either works or does not, and that part is easy to get wrong on the first try.
Real ages: 5 to 10. Under 5 can decorate the chime components with paint but will need help with the stringing and the knots.
Time: 15 minutes to prepare the chime pieces, 15 minutes to string and decorate, 5 minutes to hang. Plus dry time if you paint the pieces.
Mess level: Low. No paint or glue needed unless you decorate the pieces.
Supervision: Check in for the stringing step, where a knot tied wrong will unravel in the first breeze.
You’ll need: A wooden hoop or a strong branch as the frame, string or fishing line, and chime materials (shells, beads, metal keys, small smooth stones, metal bottle caps).
Free or cheap swap: A forked branch from the yard works as the frame and is more interesting than a store-bought hoop. Fishing line from the hardware aisle costs less than craft string and is stronger. Keys from a drawer of dead key copies are the best chime material and they are free.
What goes wrong the first time: The chime pieces are too light to make a sound, or they are all the same length so they hit each other and make a single dull clang instead of individual notes. Cut the strings to at least 3 different lengths, and use materials with some weight to them. Metal keys and shells with a bit of thickness work. Light beads on their own usually do not.
Skip it if: You live somewhere with no wind. A wind chime in a still apartment is decorative, and the craft part is still worth doing, but the payoff is different.
How to do it:
- Collect chime materials. Sort them by weight. Heavy pieces go on the longer strings, lighter pieces on shorter strings.
- Cut the string for each chime piece to a different length, ranging from about 15 cm to 40 cm.
- Tie each piece securely to the frame. Test each one by flicking it with your finger before you hang it. If it does not make a sound when flicked, add weight or change the material.
- Space the strings evenly around the frame.
- Hang from a hook on a porch, a tree branch, or a shepherd’s hook near a window.
Tip: Hang the chime before the end of the day so you can hear it in the evening breeze. First sound is the part kids remember most.
6. Paint Flower Pots
This one sits at the overlap between craft and gardening, which means it earns its place on two lists at once. A painted pot with a real plant inside gives a kid a reason to check on something every day, and the act of painting a container that will actually be used removes the guilt of making something that then sits in a box.
Real ages: 5 to 11. Under 5 can do big simple shapes but need supervision with small details.
Time: 10 minutes to prep and paint, 5 minutes to glue decorations, 10 minutes to pot the plant. Plus 24 hours for paint to cure before watering. Plan for that dry time.
Mess level: Low. Paint stays in the tray.
Supervision: Check in for the gluing step and when potting the plant if the soil is involved.
You’ll need: A plain terracotta pot (a 4 inch pot at the dollar store is the right size for a small herb or succulent), outdoor acrylic paint, paintbrushes, a clear outdoor sealer, potting soil, and a small plant or herb seeds.
Free or cheap swap: A dollar store terracotta pot costs under a dollar. Outdoor acrylic paint is not optional if the pot goes outside, but indoor acrylic works for a pot that stays indoors. A packet of basil or radish seeds costs less than a dollar and grows in two weeks.
What goes wrong the first time: You use indoor paint on a pot that goes outside. After two or three waterings, the paint peels off in strips. If the pot lives on a porch, spend the extra dollar on outdoor acrylic and a coat of clear sealer. It is not optional.
Skip it if: You do not have a spot to put the finished pot. A painted pot sitting on a shelf is still pretty, but the accountability of a plant inside it is what makes the project stick.
How to do it:
- Wipe the pot down with a damp cloth. Terracotta is porous and dusty straight from the bag, and paint adheres better to a clean surface.
- Paint a base coat in the background color of your choice. Let it dry for 15 minutes.
- Add details: polka dots, a stripe, the child’s name, a simple face, or a pattern. Keep it simple; the surface is curved and curves distort small detailed drawings.
- Let the paint dry for 30 minutes.
- Apply one coat of clear outdoor sealer if the pot will sit outside. Let it cure for 24 hours before potting.
- Add potting soil and a plant or seeds.
Read Must: best diy outdoor water play ideas kids under 6
Tip: A 4 inch terracotta pot and a small herb plant costs under $3 total and can live on a windowsill or a porch rail. Basil, mint, and radishes grow fast enough that a kid sees results in two to three weeks.
7. Create Handprint Art
Handprint art is the one craft on this list that parents care about more than kids do. The kid is doing a handprint because you asked, and the handprint is a record of how small they were, not a record of their artistic vision. That is fine. The craft still works, and it earns its place on every summer list for the same reason it has been on every summer list for 30 years.
Real ages: 1 to 6. Under 2 can do the handprint itself with help, but the decorating part is yours. Ages 3 to 6 can do both.
Time: 5 minutes to paint and stamp, 10 minutes to decorate, 5 minutes to clean up. Plan for 15 minutes of that being active.
Mess level: Medium. Tempera paint on hands does not wash off clothes easily if it sits for more than a minute. Have the wipes or a wet cloth ready before you start.
Supervision: Hands on the whole time. Kids move fast, and a hand with wet paint on it heading toward a face, a sibling, or a light switch is a four alarm problem.
You’ll need: Washable tempera paint (the kind that comes in jars), thick paper or cardstock, a brush or a sponge to apply the paint, and markers for the decoration layer.
Free or cheap swap: A dollar store washable paint set covers this and a dozen other activities. Thick paper can be any paper you have around, but cardstock holds up better when it is handled a lot.
What goes wrong the first time: You put too much paint on the hand. A thick layer spludges between the fingers and produces a blob instead of a handprint. A thin, even coat is what you want. Wipe most of it off the brush before you apply it.
Skip it if: Your child is mid-meltdown or tired. Handprint art with a distressed or uncooperative 2 year old ends with paint on the walls and a ruined print. Come back to it when the mood is better.
How to do it:
- Set up your surface with paper, paint, and a wet cloth within reach.
- Apply a thin, even coat of paint to the child’s palm and fingers. Wipe excess.
- Press the hand firmly onto the paper. Hold for 3 seconds. Lift straight up.
- Let the print dry for 5 minutes.
- Add a date and age label directly on the print in a fine tip pen while you can still read it from memory. This step takes 10 seconds and the information is completely gone from your head in six months.
Tip: Write the date and the child’s exact age on the print itself, not on a label or a separate note. The print and the date belong together, and a labeled envelope is not the same thing when you are looking at this in five years.
Practical note: A handprint from a 2 year old in June and a foot print from the same 2 year old in August, both dated, is a better project than a single handprint alone. If you want to do this more than once, make that the plan from the start.
8. Decorate a Birdhouse
This craft has a split personality. On the day you make it, it is art. For the weeks that follow, it is a science experiment. Kids who are not that interested in painting get reinvested the first time a bird lands on the porch rail and checks out their work.
Real ages: 4 to 10. Under 5 can paint broad strokes but need supervision with fine details.
Time: 15 minutes to paint, 15 minutes to decorate, 15 minutes to dry. Plus time to find the right spot to hang it.
Mess level: Low. Paint stays on the house.
Supervision: Check in. Outdoor paint is involved, which is less washable than indoor paint.
You’ll need: A pre-assembled wooden birdhouse, outdoor acrylic paint, brushes, and twine or cord for hanging.
Free or cheap swap: Dollar Tree sells small pre-primed wooden birdhouses. A hardware store has a better selection for a few dollars more. Use outdoor paint if the birdhouse will sit outside, even in a covered spot.
What goes wrong the first time: You paint the inside of the birdhouse. The hole and the interior chamber are functional. Paint inside blocks the ventilation the bird needs and may be toxic if a bird pecks at it. Paint only the exterior surfaces.
Skip it if: You do not have somewhere to hang it. A birdhouse sitting on a shelf is pretty but the project does not complete itself. If you hang it before the end of the day, birds will find it within a week in most suburban areas.
How to do it:
- Set up outdoors with newspaper or a drop cloth.
- Paint the exterior in the child’s chosen design. Bold colors and simple patterns read better from a distance than detailed drawings.
- Let it dry for 15 minutes.
- Hang it on a tree branch, a porch post, or a shepherd’s hook. Hang it at least 5 feet off the ground and out of direct afternoon sun if you can.
- Wait. Check it every few days. The first visitor might be a week away, or it might be tomorrow.
Tip: A birdhouse hung near a window is the best setup. Kids can watch from inside without scaring the bird away.
9. Build a Fairy Garden
A fairy garden is a container and a commitment. The container is simple, but the commitment is to adding to it over the season, and that part depends on whether your kid is the type to revisit a project or not. If they are, this one pays out all summer. If they are not, you will have a nice container that slowly goes brown in a corner.
Real ages: 4 to 10. Under 6 will need help placing the small pieces.
Time: 20 minutes to set up the container and plants, 20 minutes to arrange the accessories, 10 minutes to add the first elements. Ongoing additions happen over the season as you find things.
Mess level: Medium. Potting soil is involved.
Supervision: Check in for the plant and soil part. Hands off for the arrangement part.
You’ll need: A shallow, broad container with a drainage hole, potting soil, small plants (succulents and moss work best indoors), pebbles, and miniature accessories (tiny houses, bridges, figurines).
Free or cheap swap: A foil roasting pan from the dollar store works as a container and has built-in drainage if you punch holes. Succulents are the best plants for beginners because they survive missed waterings. Moss gathered from a shady lawn works if you do not want to buy it.
What goes wrong the first time: You use a deep pot instead of a shallow one. Deep pots hold more soil and more water, which means plants stay wet longer, which means roots rot. Go shallow, go broad, and put a layer of pebbles at the bottom for drainage.
Skip it if: You do not have a sunny windowsill or a covered porch. Most small succulents need light, and a fairy garden in a dark corner is a fairy garden that slowly dies.
How to do it:
- Punch drainage holes in your container if it does not have them.
- Add a 3 cm layer of pebbles for drainage, then fill to 2 cm from the top with potting soil.
- Place the largest plant first, toward the back.
- Arrange the accessories in front: the path, the house, the bridge. Think about scale relative to the plants.
- Add pebbles around the edges and between plants.
- Water lightly. Succulents need water every 7 to 10 days, not daily.
Tip: Leave the miniature accessories in their package until you need them. Small figurines left out before the project starts tend to get lost or broken.
10. Create Tie-Dye T-Shirts
Tie dye is the craft that parents either love or actively avoid, and the difference is mostly in whether you accepted the mess before you started. If you did, it is one of the most satisfying crafts on this list. If you did not, you will spend the whole afternoon apologising for the carpet.
Real ages: 5 to 12. Under 6 will need significant help with the rubber band twisting and the dye application.
Time: 30 minutes to prep and apply dye, 30 minutes to set (do not skip this, color depends on it), 20 minutes to rinse and wash. Plus 24 hours to cure before the first wash. This is a two day project.
Mess level: Very high. Dye gets on surfaces, floors, and clothes, including yours. This is an outdoor project or a garage project. There is no version of this that stays on the table.
Supervision: Hands on the whole time. Kids can apply the dye with supervision, but an adult needs to be present for the rubber banding step and for managing the dye bottles.
You’ll need: White or light colored cotton t-shirts, a tie dye kit (the Tulip brand at the dollar store covers the basics), rubber bands, plastic gloves, and ziplock bags for setting.
Free or cheap swap: A Tulip tie dye kit from the dollar store has enough dye for 2 to 3 shirts and costs about $5. Old white cotton shirts from a thrift store work as the shirt base. The dye does the heavy lifting.
What goes wrong the first time: You rinse it too soon. The dye needs 24 hours in a sealed bag to set properly. Rinsing after 2 hours produces a faded result that looks nothing like the photo on the kit. Set it, leave it, and do not look. The reveal on day two is part of the fun.
Skip it if: You are doing this indoors, in a room with carpet, or in the last hour before you need to leave the house. None of those situations end well.
How to do it:
- Wash the shirts first. Fresh fabric takes dye better than fabric with dryer residue.
- Lay the shirt flat, twist it according to your pattern (spirals, folds, or scrunches all work), and secure with rubber bands.
- Apply dye to each section. The kit instructions show where to apply each color for each pattern.
- Place the dyed shirt in a ziplock bag. Seal it completely.
- Leave it for 24 hours. Do not open it.
- Remove the rubber bands outdoors or over a sink. Rinse under cold water until the water runs mostly clear.
- Wash alone in the machine on cold. Dry on low.
Tip: Put the shirts in the bag and forget about them. The anticipation is part of the experience, and a kid who checks every hour gets a faded result because the bag is open too long.
Practical note: Tie dye stains nearly everything it touches. Wear clothes you are done with. Cover every surface you do not want to replace. Lay down plastic tablecloths, not just newspaper, because dye bleeds through paper. Have a plan for where the dripping shirt goes while it sets.
11. Make Sun Catchers
Sun catchers are the craft that pays off after dark, literally. Hang one in a window and for the rest of the summer every time the sun hits it, the whole room fills with color. Kids notice that, and it keeps a project alive long after the gluing is done.
Real ages: 3 to 9. Under 4 can press tissue paper with help but will tear it. Over 8 can handle the more precise cutting needed for shaped designs.
Time: 30 minutes. 10 to gather and cut tissue, 10 to glue, 10 to trim and hang. The contact paper version has no drying time.
Mess level: Low. Tissue paper scraps are easy to sweep up.
Supervision: Check in every few minutes. Small pieces mean small parts rules apply, so an adult needs to supervise the cutting for little kids and the small scraps for anyone still mouthing things.
You’ll need: Clear contact paper, colorful tissue paper squares, scissors, and tape or string for hanging.
Free or cheap swap: Tissue paper from last Christmas or birthday gifts works. Any smooth, clear plastic sheet works as the contact paper base, including a page protector taped shut on three sides.
What goes wrong the first time: You do not press the tissue paper firmly enough, and it falls off within a week. The contact paper needs real pressure, and a plastic card, a ruler, or just careful fingers pressing each piece down makes the difference between a week and a season.
Skip it if: Your house has no sunny windows. Sun catchers need a bright window to work, and they do not pay off on a north facing wall.
How to do it:
- Cut two identical pieces of contact paper, about 12 by 15 cm each.
- Peel the backing off one piece and lay it sticky side up.
- Have your child place tissue paper squares all over the sticky surface, overlapping them so no contact paper shows through.
- Press each piece down firmly with a finger or a plastic card.
- Peel the backing off the second piece, lay it sticky side down on top, and press down all around the edges.
- Trim the edges to clean them up, then hang it in a window with tape or string.
Tip: For shaped sun catchers, cut the contact paper into a heart or a star before you start, and arrange the tissue around the edges so the shape is defined by color. A kid made shape reads clearly from across the room.
12. Paint Seashells
Painting seashells is the craft that solves the problem of the bucket of shells your kid brought home from the beach and will not stop talking about. The shells become the display object, and the painting session gives them a purpose that a jar on a shelf never does.
Real ages: 4 to 11. Under 5 can paint broad strokes but need help with fine details. The shell itself can be a choking hazard if it is small, so supervise the collecting as well as the painting.
Time: 40 minutes. 10 to wash and dry the shells, 15 to paint the base, 10 to add details, 5 to clean up. Add drying time if you seal them.
Mess level: Low. Paint stays on the shell if you put down a mat, and shells are not porous so dried paint comes off with a damp cloth if it gets on something else.
Supervision: Check in every few minutes. Small shells and little mouths is a real combination, so keep anything under a toilet paper tube roll away from kids under 4.
You’ll need: Clean seashells, acrylic paint (the dollar store kind is fine), fine brushes, and optionally a clear sealer.
Free or cheap swap: Any shells you already have work. The shells do not need to be perfect, and rough edges or barnacle scars add character. Leftover acrylic paint from another project works here.
What goes wrong the first time: You forget to wash the shells first. Beach grit and salt interfere with paint adhesion, and a painted shell that flakes within a month teaches the kid that the project did not work. A quick scrub with dish soap and a dry towel changes everything.
Skip it if: You have no shells and no beach access and no interest in a shell collection project. Shells are the thing, and buying them defeats the point.
How to do it:
- Collect shells on your next beach trip or use ones you already have.
- Wash each shell with dish soap and a scrub brush, then dry it completely with a towel.
- Paint a base coat in the color of your choice. Let it dry for 15 minutes.
- Add details with a fine brush: stripes, dots, faces, geometric patterns, or ocean themes.
- Let the details dry fully.
- Optional: seal with a light coat of clear acrylic spray, held at arm’s length and applied in a well ventilated area.
Tip: Paint a shell the color of your kid’s favorite stuffed animal and give it a name. A named shell with a story gets displayed on a shelf instead of dropped in a box.
13. Make a Nature Journal
A nature journal is the craft that lives in a backpack. Unlike a scrapbook or a painted pot, the journal gets taken outside and filled on walks, on car rides, and on camping trips. It is the project that works the hardest to earn its place on this list, because it keeps paying attention long after a single session ends.
Real ages: 5 to 12. Under 5 can do rubbings and stick finds in with help. Older kids will keep the whole thing going themselves.
Time: 15 to 30 minutes per outing. The journal accumulates over the summer.
Mess level: None. This is the cleanest ongoing project on the list.
Supervision: Check in. Under 5s need help finding safe items to sketch and paste, and any plant identification needs an adult to confirm nothing is poisonous.
You’ll need: A sturdy blank notebook, a pencil, and something to attach finds. A glue stick works for flat things, and clear tape works for leaves and petals.
Free or cheap swap: Any notebook works, including a composition book from the school supply aisle. A pencil you already have is fine. The finds are all free.
What goes wrong the first time: You try to fill a whole page at once. A nature journal is built one small observation at a time, and a page that has a single sketch and a sentence is more useful than a crowded spread that never gets finished. Keep it simple and keep it going.
Skip it if: Your kid refuses to sit still for drawing. A journal that never gets entries is just a notebook, and this project depends on the habit of recording observations.
How to do it:
- Start on the first walk. Give your kid a pencil and the notebook.
- Find something interesting. A bug on a leaf, a weird shaped stick, a flower with the wrong number of petals.
- Draw a quick version of it. A child’s drawing of a bug that has six legs and antennae is enough.
- Write a short label if your kid can spell, or write it for them.
- If the item can be pressed flat, glue it in on the facing page.
- Do this every walk or car ride. The habit is the point.
Tip: Carry a small ziplock bag in the notebook for the finds that cannot be pressed immediately. A dry bag keeps leaves and petals usable until you get home, and a wet one for the mud that turns into a fossil.
14. Build a Mini Cardboard Castle
Cardboard castles are the craft that scales with ambition. A single box and some tape gives you a playhouse by afternoon, but the kid who wants a working drawbridge and a tower with a flag will spend the entire summer upgrading it. The project is as much or as little as your kid wants to make it.
Real ages: 4 to 12. Under 4 can decorate a flat box. Over 6 will want to design the structure themselves, which means more boxes in more directions.
Time: 90 minutes for a basic two tower castle. More if you are building a multi room keep with a bridge, and that is fine, plan for that.
Mess level: Low. Tape and cardboard are contained if you put down a sheet.
Supervision: Hands on the whole time for the cutting. Under 6 must be doing something else while you cut, and they need close watch around scissors and tape.
You’ll need: Assorted cardboard boxes, packing tape, scissors, a box cutter (adult only), and markers or paint for decoration.
Free or cheap swap: Delivery boxes are the obvious source, and grocery bags and shoe boxes count. A utility knife and a cutting mat from the garage work instead of a craft knife.
What goes wrong the first time: You build it too big. A castle that takes over half the living room is impressive but impractical, and it either blocks traffic or becomes a tripping hazard. Start small, 2 or 3 boxes, and expand it as the kid asks for upgrades.
Skip it if: You have no space to put it. A cardboard castle in a cramped house is a temporary obstacle that everyone trips over for a week, and that is not the vibe summer should have.
How to do it:
- Collect 2 to 3 boxes in roughly the same scale, one larger for the keep, two smaller for towers.
- Tape the boxes together on a flat surface, reinforcing every seam with extra tape.
- Trace and cut the doorway in the keep. A box cutter is adult territory, and a kid can help hold the box steady from the other side.
- Cut notches for the drawbridge, or just fold a flap that serves the same purpose when lowered.
- Decorate the outside with markers or painted details. Add a flag from a scrap of fabric taped to a popsicle stick.
- Move it to its final location and let the play begin.
Tip: Save one tower for a second session the next day. Adding a working drawbridge or a second floor the day after the castle is “done” keeps the project fresh without the pressure of doing it all at once.
15. Create a Butterfly Craft
Butterflies signal that summer is properly here, and a kid who is catching and releasing live ones on the patio is primed for a craft version. The paper versions are the cleanest and the most forgiving, and they hang and move in a way that makes the butterfly feel alive.
Real ages: 3 to 9. Under 4 can help with the wing decorating but needs you for the folding and the body assembly. Over 8 will want to try multiple styles, which is fine, it only takes longer.
Time: 25 minutes. 10 to cut and decorate wings, 10 to assemble and attach the body, 5 to clean up and hang.
Mess level: Low. Paper, tape, and maybe some glue sticks.
Supervision: Check in every few minutes. Under 4s with wings and tape will try to eat both.
You’ll need: Colored paper or cardstock, scissors, a black marker for the body, and string or ribbon for hanging. You can use coffee filters, tissue paper, or construction paper depending on the style.
Free or cheap swap: Any paper you have in the house works. Magazine pages, old greeting cards, junk mail envelopes, all of it cuts fine for butterfly wings.
What goes wrong the first time: The wings do not stay symmetrical. The folding trick that makes the wings come together has to be done right, and the first one will be lopsided. That is part of the charm, and nobody notices a crooked butterfly that a kid made.
Skip it if: Your kid is determined to only use the coffee filter method and you have no coffee filters. There are workarounds, but they all take longer than just buying a 50 count.
How to do it:
- Cut two identical wing shapes from colored paper, about 8 cm wide each.
- Decorate each wing with patterns, dots, or lines. Let the kid design them.
- Fold the wings together along the center line, and tape or glue them together at the seam.
- Cut a long, thin strip of black paper for the body and attach it between the two wings.
- Tape the butterfly to a window or hang it from a string near a sunny spot.
16. Paint a Summer Mural
A mural is the craft that turns a wall, a driveway, or a fence into a kid’s own gallery for the afternoon. The scale is the point, and kids who will not sit for a single canvas will sprawl across a whole roll of paper and paint for an hour without asking for a break.
Real ages: 3 to 11. Under 4 can paint broad sections but needs you to do the detailed parts. Over 8 can plan the whole composition.
Time: 60 minutes of painting. Add setup time for the paper and cleanup time for the brushes.
Mess level: High. Roll paper on the ground or the driveway and paint freely, and the mess is contained to the paper and the immediate area, but paint does get tracked around.
Supervision: Check in every few minutes. Kids need a boundary, the edge of the paper or the grass line, and they need you to enforce it.
You’ll need: A large roll of craft paper or butcher paper, washable paints, large brushes or sponges, and tape to secure the paper.
Free or cheap swap: A roll of craft paper from a paint or hardware store costs a few dollars and covers a big area. You can also tape two or three large sheets of printer paper together, though the seams are weaker.
What goes wrong the first time: The paper moves while they are painting. On a windy day, the edges lift, the paper drags, and the whole thing becomes a fight instead of a painting session. Tape it down well before you open the paint, and use rocks or bricks on the corners if tape alone does not hold.
Skip it if: You have no wall, fence, or driveway to dedicate to a mural for the afternoon. A mural on the floor gets walked on, and that ruins everything.
How to do it:
- Roll out the paper and tape it firmly to the surface. Use bricks or weights on the corners if the wind picks up.
- Lay out a few colors on a palette or a paper plate. Start the kids with just two or three colors, more than that and the painting turns muddy.
- Let them paint their section of the mural. Step back after 20 minutes and talk about what they want to add.
- Let it dry, then tape it to a wall or roll it up for later.
Tip: After the mural is done, cut it into smaller pieces and tape them to the inside of bedroom doors or the fridge. A four foot mural has more impact when it is in pieces that people can see every day.
17. Create Fingerprint Art
Fingerprint art solves the problem of a kid who announces they are bored with zero prep time and zero materials. All you need is ink or paint and paper, and the output is something the kid did, not something you set up. The low floor is the high point, and it makes the technique forgiving.
Real ages: 2 to 8. Under 2 can make the prints but need you for the detailing. Over 6 will want to add more drawing, which is fine, the prints are the base not the finish.
Time: 20 minutes to make the prints, 10 to add details and write names. Done.
Mess level: Low. Ink pads are contained. Paint needs a mat but is also contained.
Supervision: Check in every few minutes. Under 3 will try to eat the ink pad, and the print on the paper is the only one that matters, not the one on their nose.
You’ll need: Washable ink pads, thick paper, and a fine tip black pen or marker for adding details to the prints.
Free or cheap swap: A dollar store pack of ink pads covers a whole summer of 5 minute projects. You can also use washable paint and a paper plate as the ink pad, smeared evenly with a brush.
What goes wrong the first time: You try to be precise. Fingerprints are not precise. The kid rocks their finger, presses too hard, or lifts too soon, and the print comes out distorted. That is the texture, and that is why the detail work matters. Embrace the lopsided print and make it into a monster with three eyes.
Skip it if: Your kid is determined to eat the ink pad and you cannot redirect them. This is a one minute setup craft, and if the setup is a war, come back in a month.
How to do it:
- Pour one color of ink into an ink pad or spread paint on a paper plate.
- Have your kid press their fingertip into the ink and then press it firmly onto the paper. One print at a time.
- Repeat with different fingers and different colors, or do the same color and add detail later.
- Let the prints dry for 5 minutes, then add details with the black pen: eyes, legs, wings, hats.
- Write the date and who made each print, the attribution matters when you are sorting through the pile later.
18. Decorate Reusable Water Bottles
Kids lose water bottles with alarming consistency, and a decorated bottle that says their name and looks nothing like everyone else’s is the closest thing to a solution. This craft makes the bottle the child’s project, and the side effect is they remember to drink from it and bring it home.
Real ages: 4 to 11. Under 6 can press stickers with help and may need you to write the name. Over 8 can do the whole thing alone.
Time: 20 minutes to wipe down, place stickers, and write the name. Done.
Mess level: None. Stickers and paint pens are clean crafts.
Supervision: Check in. Under 4s with stickers will eat them, and paint pens get chewed if left unattended.
You’ll need: A clean reusable water bottle with a smooth surface, waterproof stickers or vinyl decals, and paint pens or permanent markers for names and details.
Free or cheap swap: Any stickers you already have work if they are vinyl. Dollar store stickers work for a week but peel off faster. Old gift tags or magazine clippings sealed under clear tape work as a free version.
What goes wrong the first time: You use regular stickers instead of waterproof ones. On a bottle that sweats in the sun, regular stickers bubble and peel within days. The vinyl kind holds for months, and the price difference is worth it.
Skip it if: Your child’s bottle is the dented dented one they refuse to replace and you already know decoration will not change that. This craft works best on a bottle the kid is already invested in keeping.
How to do it:
- Wash the bottle and dry it completely. Moisture and stickers do not mix.
- Peel and place the stickers where your kid wants them. Press firmly from the center out to remove air bubbles.
- Once the stickers are down, use paint pens or permanent markers to add a name, a date, or small designs between the stickers.
- Let everything dry for 10 minutes before handling heavily.
19. Make DIY Puppets
Puppets are the two in one craft, the project that makes the thing and then immediately needs a stage for it. Most kids who finish a puppet will not put it away, they will start a show within ten minutes, and that means the craft pays off twice in one afternoon. The variety is also what keeps older kids engaged.
Real ages: 3 to 10. Under 4 can glue googly eyes and pom poms with help. Over 6 will want to sew or build more complex characters, which is fine, the simple version still works as a base.
Time: 30 to 40 minutes to make two or three puppets. The show that follows is however long you have.
Mess level: Low. Craft glue and googly eyes on a sheet works fine.
Supervision: Check in every few minutes. Under 3 with googly eyes is a swallowing hazard, and small kids with craft glue will put their fingers in their mouths.
You’ll need: Paper bags, old socks, or felt cutouts, googly eyes, yarn for hair, craft glue, and markers for faces.
Free or cheap swap: Unmatched socks from the laundry are the cheapest puppet base. Old magazines have enough images to collage a face. Buttons and yarn from the kitchen junk drawer work as features.
What goes wrong the first time: You make one puppet and the kid wants three. One puppet is a craft, three puppets is a cast, and you need enough materials for all three or the show ends before it starts. Plan for a cast, not a single.
Skip it if: Your kid has no interest in performing. If they make the puppet and walk away, the craft is fine but the payoff is missing, and that makes the whole afternoon feel unfinished.
How to do it:
- Pick your puppet base. A paper bag has a built in pocket for a hand. A sock works for a hand puppet without the bag. Felt cutouts glue onto a popsicle stick for rod puppets.
- Glue on googly eyes, yarn hair, and features. Let the kid design the personality.
- Use markers to add details: a smile, freckles, a hat, a scarf.
- Let the glue dry for 20 minutes before the show begins.
20. Build a Popsicle Stick Bridge
A popsicle stick bridge is the craft that turns into an engineering lesson without trying to be one. Kids will argue about which design is strongest, test it with weights, and rebuild it after it crashes, all without an adult prompting a learning objective. The failure part is the learning part.
Real ages: 7 to 12. Under 7 does not have the hand control for the glue or the weight testing to be satisfying. Over 8 will want to try multiple designs, which is the correct response.
Time: 75 minutes. 15 to plan and measure, 45 to glue and build in layers, 15 to test. Add drying time between layers if you build it over two sessions.
Mess level: Low. Wood glue is contained on a mat. Hot glue is adult only and makes a mess if a kid tries to use it.
Supervision: Hands on the whole time. The glue gun is 380 degrees and is not a kid tool. Wood glue takes longer to set but is safe for the kid to handle.
You’ll need: Popsicle sticks, wood glue, and a set of books or weights for testing. A hot glue gun is faster but needs adult operation.
Free or cheap swap: Popsicle sticks from the dollar store are cheaper than craft sticks in bulk. Wood glue from the hardware aisle is the same stuff. A clamp made from two books and a ruler works for holding pieces while the glue sets.
What goes wrong the first time: You skip the design step. A bridge built without a plan collapses under its own weight, and the rebuild is the educational part. Let the kid draw their design first, even if it looks nothing like a real bridge.
Skip it if: Your kid is not interested in the testing phase. Some kids will build it, see it fail, and lose interest. For those kids, this is a one afternoon craft that does not earn its place.
How to do it:
- Draw the bridge design first. A triangle truss, an arch, or a simple beam with cross braces are the main options. The kid should know the design before the glue comes out.
- Sort your sticks by quality, use the straight ones for the base and the ones with chips for internal layers.
- Glue the pieces in place on a flat surface, pressing each piece and holding it for 30 seconds.
- Let each layer dry for 10 minutes before adding the next, wood glue needs time to set and rushing this step weakens the whole bridge.
- Test the bridge by stacking books on it one at a time. Count how many it holds before it fails, and talk about why it failed at that point.
Tip: Build the bridge over two sessions, the first for the structure, the second for the weight testing and any reinforcements. A bridge that fails and gets rebuilt is more educational than one that succeeds on the first try.
21. Design a Dream Catcher
A dream catcher is the craft that finishes before dinner and hangs by the bed forever after, which makes it one of the few projects where the payoff outlasts the session by months. The weaving step is slower than the rest, and that is the part that makes it worthwhile.
Real ages: 5 to 11. Under 5 can decorate the hoop but will need you for the weaving. Over 10 will want to add complex bead patterns, which is worth allowing.
Time: 50 minutes. 10 to prepare the hoop and yarn, 30 to weave, 10 to add the hanging elements.
Mess level: None. Yarn and beads are clean.
Supervision: Check in every few minutes. Beads are a small parts hazard for under 4, and the weaving step needs occasional help with tangles.
You’ll need: A craft hoop or a metal ring, yarn or thick thread, small beads, feathers, and scissors.
Free or cheap swap: A cardboard ring cut from a cereal box works as the hoop. Yarn from an old project works for weaving. Feathers from the yard, if you can find them clean, work for hanging.
What goes wrong the first time: You try to weave too tightly at the start. The web needs space to grow outward, and a tight start at the center leaves no room for the pattern to open up. Start loose, and tighten gradually as you move outward.
Skip it if: Your kid will not tolerate the repetitive weaving step. This is not a fast craft, and the weaving needs patience more than anything else.
How to do it:
- Wrap the hoop with yarn to cover the wood or metal, securing the end as you go.
- Tie a starting loop of yarn opposite the wrap end, this is where the weaving begins.
- Wrap the yarn around the hoop and the starting loop, creating a spiral of wraps moving outward.
- After each wrap, pass the yarn through a bead or two, which locks the weave and adds decoration.
- Let the wrapped yarn continue spiraling outward, adding more beads as you go.
- When the circle is nearly filled, tie off the yarn on the inside of the hoop. Trim excess and add feathers and ribbons to the bottom.
Tip: Do this near a window with natural light. The weaving step is harder to see in artificial light, and a well lit workspace makes the whole thing go faster.
22. Build a Mini Volcano
A mini volcano is the craft that delivers the moment, and after 20 minutes of building and painting, the eruption is the payoff that kids remember for the rest of the summer. The baking soda and vinegar reaction is reliable and cheap, and the cleanup is easy if you do it outside.
Real ages: 5 to 11. Under 5 can help with the sculpting but needs you to handle the eruption part, since the fizz and the food coloring can be startling.
Time: 70 minutes. 40 to build and paint the volcano, 5 to set up the eruption, 25 to clean up.
Mess level: High. Baking soda and vinegar are easy to clean, but the food coloring stains everything it touches, and a kid who knocks the volcano over during the eruption spreads it further.
Supervision: Hands on the whole time for the eruption step. The vinegar and baking soda reaction is safe to handle, but a kid under 4 will try to drink it, and that is not optional.
You’ll need: A small plastic bottle, modeling clay or papier mache mix, paint, baking soda, vinegar, and red food coloring.
Free or cheap swap: Any small plastic bottle works as the core. Kitchen flour and salt make a papier mache mix that is cheaper than craft clay. Food coloring is the only thing worth buying, and a tiny bottle lasts years.
What goes wrong the first time: You do the eruption indoors. The food coloring spreads, the vinegar soaks into the rug, and the whole thing takes longer to clean than it spent in the building phase. Do it outside, on the grass or the driveway, and have a hose or a bucket of water ready to rinse immediately.
Skip it if: You cannot do it outside. The indoor version is a disaster, and the cleanup will ruin the mood for the rest of the afternoon.
How to do it:
- Wrap the plastic bottle in clay or papier mache to form the volcano shape, leaving the top open for the reaction.
- Let it dry completely, then paint it with brown and gray to look like rock.
- Let the paint dry.
- When ready for the eruption, place the volcano in an outdoor sink or on the grass.
- Add 2 tablespoons of baking soda to the bottle.
- Add 5 to 10 drops of red food coloring.
- Pour in 1/4 cup of vinegar quickly and step back.
Tip: Do the eruption twice if the kid wants to see it again, because the second eruption is always smaller and the kid will ask why, and that is when the real explanation happens.
23. Make a DIY Kite
A kite is the craft that only finishes when it flies, and the first flight is either magic or a crash and a rebuild. The making part is fun, but the flying part is what earns its place on this list, and that part depends on wind and patience in equal measure.
Real ages: 7 to 12. Under 7 does not have the coordination to keep a kite up, and the disappointment of a crash after 45 minutes of building makes this a risky young kid project. Over 10 usually wants to build something more complex than the diamond frame.
Time: 75 minutes to build. Add 20 to 30 minutes on a windy day to get it flying, and that time is not guaranteed.
Mess level: Low. String and paper are clean crafts.
Supervision: Hands on the whole time for the cutting and measuring. A child’s scissors do not cut dowels, and a loose kite string in a 6 year old’s hand near a tree is a tangle waiting to happen.
You’ll need: Two wooden dowels, lightweight paper or a plastic grocery bag, strong string, tape, and a tail made from ribbon or streamers.
Free or cheap swap: Bamboo chopsticks from a takeout order work as the frame. A plastic grocery bag cut flat works instead of paper. Twine from the kitchen drawer works for the string.
What goes wrong the first time: You do not balance the kite. A kite that is heavy on the nose or the tail side will not fly, and the kid’s natural response to a crashing kite is to throw it, which breaks the frame. Test the balance on the first windy day and adjust the tail before you declare it a failure.
Skip it if: You have no wind and no field nearby. A kite is a weather event, and building it without a place to fly it turns it into a decoration.
How to do it:
- Tie the two dowels together at the corners to form a bow and a cross piece about 3/4 of the way from the top.
- Tie string around all four corners to create the frame structure.
- Tie the spine string from the center to the tail end, about 1/3 of the way down.
- Attach the paper or plastic bag, covering the frame, secure it with tape on all sides.
- Tie the flying string to the crosspiece, the point where it balances.
- Attach a tail at least as long as the spine, ribbons or streamers work best.
- Go to an open field with a steady wind and let the kid run while you hold the spool.
Tip: Start with a small kite, the 2 foot frame is the most forgiving. Larger kites are impressive but harder to control, and a kid who crashes a big kite on the first flight is unlikely to ask for a second one.
24. Create Recycled Robots
Recycled robots are the craft that runs on trash day, not the craft store. The moment a kid realizes that a toilet paper tube and two bottle caps become a robot arm, the whole house starts looking like a parts bin, and that is the design working correctly.
Real ages: 4 to 10. Under 4 can glue large pieces but needs supervision with small caps and sharp edges. Over 6 will plan the design and assemble it themselves.
Time: 40 minutes to build, 20 to decorate, 10 to clean up.
Mess level: Low. The pieces are clean if you rinse the containers first.
Supervision: Check in every few minutes. Small parts, bottle caps, and googly eyes are all choking hazards for under 4, and some of the recycled pieces have sharp edges that need an adult to smooth or remove.
You’ll need: Cardboard tubes, cereal boxes, bottle caps, aluminum foil, tape, and markers for details.
Free or cheap swap: Everything on this list is household trash. Rinse the containers the night before and you are set.
What goes wrong the first time: You let the kid use everything at once. A robot made from 20 different pieces is visually confusing, and the kid spends the building phase looking for the right part instead of assembling. Give them two or three tubes, three or four caps, and a single roll of tape. Focus makes better robots.
Skip it if: You do not have a box or a bin large enough to collect the pieces. This craft needs a collection phase first, and that phase only works if the kid can see the pieces coming together.
How to do it:
- Collect clean pieces: tubes, boxes, caps, and anything that looks like it could be an arm or a leg or a helmet.
- Have the kid pick one tube as the body and decide what the robot will do, a helper robot, a space robot, a kitchen robot.
- Tape on the arms, legs, and head, using caps and smaller tubes as features.
- Use foil for armor, bottle cap eyes, and a tube for a mouth if they want.
- Let them name it and describe what it does.
25. Build a Paper Airplane Collection
Paper airplanes are the craft that never runs out of versions, because each new fold is a different flight, and a kid who goes through a stack of paper in an afternoon is doing the same thing over and over but each result is different enough to keep them engaged. The testing phase is where the attention stays.
Real ages: 5 to 12. Under 5 can fold a simple dart with help but does not get consistent flight. Over 8 will want to try the complex folded designs with multiple layers.
Time: 35 minutes. 5 minutes per plane to fold, 3 minutes per plane to throw, and the rest is the redesign phase when they try again with a stiffer crease.
Mess level: None. Paper is a clean craft.
Supervision: Check in. Under 5 with a pointed plane is a poke hazard to younger siblings, so supervise the throwing inside.
You’ll need: Standard printer paper, markers or colored pencils, and a tape measure or a long hallway to test distance.
Free or cheap swap: Any paper you have works, including the backs of printed documents, junk mail, or old homework. Printer paper is ideal because it holds a crease and is the right weight.
What goes wrong the first time: The creases are loose. A plane with half folded wings and a floppy body spins instead of glides, and the kid assumes the design is bad rather than the fold. Run a fingernail along every crease before the first throw, and then again after each redesign.
Skip it if: Your kid declares it boring after the second plane. This one depends on the kid having an internal drive to optimize, and forcing interest on a kid who doesn’t have it just makes everyone frustrated.
How to do it:
- Pick a design, start with the classic dart, the easiest and the most reliable.
- Fold the paper in half lengthwise, crease it hard, then open it back up.
- Fold the top corners down to meet the center line, forming a triangle point.
- Fold the triangle down over itself, point to the bottom.
- Fold the wings down from the bottom edge to meet the center line.
- Add a small upward bend at the back of each wing for stability.
- Test it. Mark any adjustments. Try the next design.
Tip: Keep a small box or basket by the throwing area for the planes that crash hard. A plane that comes back bent and torn is a plane that gets folded again, and having a repair station keeps the session going longer.
Common Mistakes Parents Make (Before the Glue Even Opens)
You buy supplies you already own. Almost every craft on this list has a free swap that is as good as the store version. Check the drawer before you order. The dollar store version of something you already have is not a win.
You do not lay down the drop cloth first. The difference between a messy craft and a ruined floor is the 60 seconds it takes to spread cardboard or an old sheet. Every craft on this list gets messier than you predict, and the floor is the one surface you cannot replace cheaply.
You hand over the scissor job to a 3 year old. Safety scissors exist for a reason, and they have limits. A 3 year old cannot cut thick cardboard, and a frustrated 3 year old with scissors is how small injuries happen. Cut the hard parts yourself, and let the child cut the paper.
You schedule it right before dinner. Tie dye, murals, and the volcano all run long, and the cleanup lands exactly when you need the kitchen. Give messy crafts a clear 90 minute window with nothing after it.
You skip the sealer on anything that lives outside. Rocks, pots, and birdhouses all need the outdoor sealer step or they fade and peel within weeks. It is a 5 minute step that doubles the life of the craft.
You make one of everything. Painted rocks work as a set, puppets work as a cast, tie dye works as a batch. Single items end up as clutter; groups end up as a game or a collection.
Conclusion
Summer break is the one stretch of the year where there is time to make something just because. You do not need a full craft room, a themed kit, or a Pinterest board you will never follow. You need one box, one bag, one table covered in cardboard, and a kid who is allowed to make it crooked.
Start with the easiest thing on this list that uses what you already have. Nature collage if you can get outside, fingerprint art if you cannot. Do one today. The mess wipes up, the glue dries, and the thing your kid made, however lopsided, is the part that gets kept.
FAQs
What are the best materials to keep on hand for impromptu summer crafts?
Stock one drawer with washable tempera paint, construction paper, glue sticks, liquid craft glue, safety scissors, markers, and a big pack of popsicle sticks. Save the clean cardboard boxes and paper towel rolls as they come in. That covers roughly 20 of the 25 crafts on this list.
How can I minimize the mess during painting crafts?
Lay down newspapers, a plastic tablecloth, or a flattened cardboard box before the paint opens. Use washable tempera whenever you can, and have damp paper towels or baby wipes on the table before you start. Move anything with real stain potential, tie dye, food coloring, murals on the driveway, outside before a single drop lands.
How do I store or display the large volume of crafts my kids make?
Put up a dedicated gallery: a bulletin board, or a string across the wall with clothespins, for flat art. Give 3D pieces one shelf, not the whole house. At the end of summer, photograph everything and let the kids pick their favorite 5 to keep. The photo record is what survives.
Are these crafts suitable for toddlers?
A handful of them are: handprint art, fingerprint art, nature collages, butterfly crafts, and puppets all work for under 4 with close supervision. Anything with loose beads, small shells, or googly eyes needs an adult to do the small parts. Keep an eye on scissors and glue the whole time.
Is tie dye safe to do with my 5 year old?
Yes, if you keep the dye bottles in your hands and the project outdoors. The dye stains skin, clothes, and surfaces, but it is not toxic in the amounts a kit provides. Keep it off the lawn where you care about the grass, wear gloves, and have wipes ready. Let the child twist and scrunch the shirt; you handle the dye.
Which summer craft keeps kids busy the longest?
The cardboard castle and the fairy garden both run for weeks because they are ongoing projects with additions. The wind chimes and the birdhouse keep paying off all season because they live outside and get checked every day. If you want the longest single session, tie dye and the mini volcano are the two biggest time sinks.