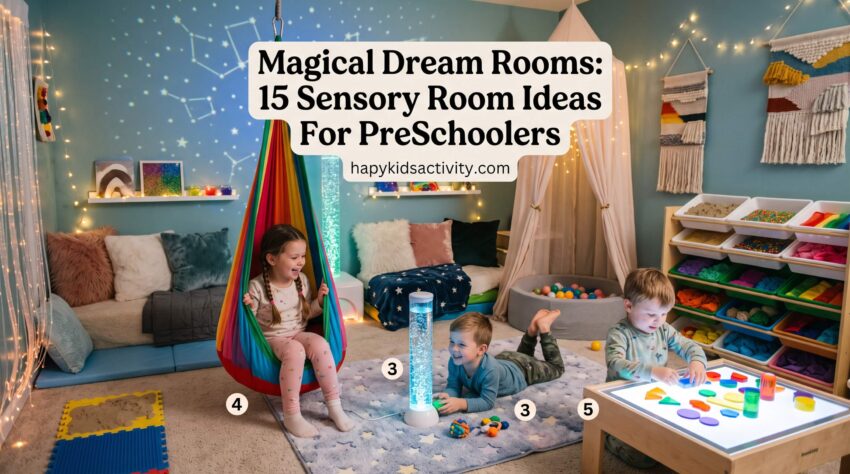
The best sensory room ideas for preschoolers do one of two jobs. They either calm an overloaded kid down (swinging, deep pressure, dim light, soft texture) or give a busy kid the movement and squeeze they are already hunting for (crashing into foam, digging in sand, pushing on a gel pad). You do not need a spare room or a big budget. A four foot by four foot corner with padded flooring, one swing or hammock, one soft light, and two or three texture items covers most 3 to 5 year olds and can be done for well under $150. Start with one calming item and one movement item, watch which one your child goes to, then build out from there.
It was the fourth rainy Saturday in a row. My 4 year old had already dumped the LEGO bin, climbed the back of the couch twice, and was now headbutting the ottoman on purpose and laughing about it.
Nothing was wrong. He was not being bad. His body needed something my living room was not giving him.
That afternoon I dragged a camping mat into the corner behind the armchair, hung a stretchy swing from the doorway pull up bar, turned off the overhead light, and plugged in a $15 star projector. He stayed in there for forty minutes. Quiet. Happy. That corner is the reason I care about sensory room ideas for preschoolers at all.
School just started again, which is when my inbox fills up with the same question: my kid is fine all day and then detonates at 4pm, what do I do. This is what I do. Below are fifteen ideas, with what each one actually costs, which ages it works for, how messy it gets, and what tends to go wrong the first time you try it.
I will also tell you which ones are not worth your money, because a few of them are not.
Before You Start: Seeker Or Avoider?
This is the part most sensory room guides skip, and it is the part that decides whether your corner gets used or becomes a $200 pile of foam.
Some kids are seekers. They crash, spin, chew, climb, push, and hum. Their nervous system is under fed and they are going out to get input. Others are avoiders. Tags bother them, hugs have to be on their terms, loud rooms shut them down, and they hate sticky hands. Plenty of kids are both, in different channels: my oldest craves movement and hates messy textures, so a sand table was a waste on him.
Here is the fast home test. For one week, write down what your kid does right before they lose it. If they are climbing, crashing, and chewing, buy movement and pressure first. If they are covering their ears, hiding under the table, and getting overwhelmed in busy rooms, buy the dark quiet cave first. If you buy the wrong one, the room becomes a place they refuse to go.
Practical note: A sensory corner is not a time out spot. The moment you send your kid there as a punishment, it stops working as a calming place, and you cannot undo that in a week. Ours is somewhere he is allowed to go, never sent.
I want to be upfront about the research, because a lot of articles are not. The evidence on multi sensory rooms is still thin and mostly made up of small studies, and none of it says a room fixes behavior. What is better supported is simpler: movement and deep pressure help a lot of kids settle. So everything below comes from doing this at home, plus what our occupational therapist told us to my face. I am not going to hand you a statistic I cannot back up.
Three ground rules that made the difference for us:
- Use it before the crash, not during. We go in at 4pm every day, before the wheels come off. Trying to steer a mid meltdown preschooler into a calm corner mostly does not work.
- Be boring on purpose. No narrating, no coaching, no “are you feeling calmer now.” Sit on the floor, be dull, let them run the session.
- Keep it dim and quiet. Every light on, plus music, plus a swing, plus a bubble tube is a nightclub, not a calming room. Less input is the whole point.
One more thing. If your child is melting down most days, hurting themselves, not sleeping, not eating a normal range of food, or falling behind on speech, a sensory corner is a helpful tool but it is not an answer. Ask your pediatrician for an occupational therapy referral. If your preschooler already has an IFSP or IEP, sensory breaks can often be written into it, and it is worth asking whether any equipment is covered.
Supply List: What To Buy And What You Already Own
Before you buy a single thing, walk your house. Couch cushions, spare blankets, a camping mat, a bath mat, a laundry basket, an old crib mattress, and a colander cover about half of this list for free.
Here is what I would actually spend money on, in order, with a cheap or free swap for every line. Prices are approximate and drift, so treat them as ballpark.
| Item | What it does | Rough cost | Free or cheap swap | Where I get it |
| Interlocking foam floor mats | Base layer, makes crashing safe | $20 to $35 for a 4 pack | Old crib mattress, folded comforter, camping pad | Costco, Target, Amazon |
| Stretchy pod or platform swing | Vestibular input, the daily driver | $35 to $70 | Bedsheet slung over a doorway pull up bar, or a blanket two adults swing | Amazon, Harkla |
| Rated ceiling hardware | The part nobody budgets for | $15 to $30 | No swap. Do not improvise this one | Hardware store |
| Crash pad or thick mat | Landing zone under the swing | $60 to $150 | Doubled up twin mattress, or a duvet stuffed with pillows inside a cover | Marketplace, IKEA |
| Bean bag or floor cushion | Deep pressure, retreat spot | $30 to $80 | Bean bag cover filled with their own stuffed animals, around $20 | Target, thrift stores |
| LED star projector | Instant mood change, best value item here | $15 to $25 | Flashlight under a colander, shadow puppets on the wall | Amazon, Dollar Tree lights |
| Kinetic Sand or a sand and water table | Tactile, heavy work for hands | $10 a bag, $30 to $60 for a table | Dry oats or pasta in an under bed bin, water in a dish tub | Target, Dollar Tree bins |
| Texture mats | Cheapest real win on this list | $0 to $15 | Coir doormat, bath mat, fleece, foil, bubble wrap | Already in your house |
| Gel pads | Fidget, table time, travel | $8 to $15 | Freezer bag of hair gel and glitter, double bagged and taped | Dollar Tree, Amazon |
| Chew necklace | Safe oral input | $10 to $20 | Straw cup with a thick smoothie, crunchy snacks | ARK Therapeutic, Chewigem |
| Hoberman sphere breathing ball | Visual breathing cue | $15 to $25 | Bubbles, a pinwheel, or a hand on a stuffed animal belly | Amazon, teacher supply shops |
| Foam blocks | Crash and build | $150 to $600 | Diaper boxes stuffed with crumpled paper and taped shut | Marketplace, Lakeshore |
Check your local Buy Nothing group and Facebook Marketplace first, especially for swings, crash pads, and foam. Sensory equipment gets outgrown fast, so it turns up secondhand in good shape all the time. Wash anything fabric on hot before it goes in the corner.
Sensory Room Ideas At A Glance
Scan this, pick two, ignore the rest for now. You can always add more in a month.
| Idea | Best ages | Mess | Time (setup / session) | Supervision | Rough cost |
| 1. Swing | 2.5 to 6 | None | 45 min / 5 to 15 min | Eyes on, always | $50 to $100 |
| 2. Comfort chair | 2 to 6 | None | 5 min / 10 to 30 min | Check in every few minutes | $0 to $80 |
| 3. Stuffed animals | 1.5 to 6 | None | 5 min / open ended | Low, after a safety check | $0 to $30 |
| 4. Chew necklace | 2 to 6 | None | 2 min / as needed | Daily inspection, no sleep use | $10 to $20 |
| 5. Sensory mat path | 2 to 6 | Low | 10 min / 5 to 20 min | Nearby | $0 to $15 |
| 6. Hammock | 3 to 6 | None | 30 min / 5 to 20 min | Eyes on, always | $0 to $60 |
| 7. Breathing ball | 3 to 6 | None | 0 min / 2 to 5 min | With you, it is a shared activity | $0 to $25 |
| 8. Lava lamp | 3 to 6, out of reach | None | 5 min / background | Adult only device, burn risk | $20 to $35 |
| 9. Sand or water table | 2.5 to 6 | High | 15 min / 20 to 40 min, plus 10 min cleanup | Constant with water | $10 to $60 |
| 10. LED bubble tube | 3 to 6 | None | 1 to 2 hours / background | Must be bolted down | $80 to $400 |
| 11. Gel pads | 2.5 to 6 | None unless split | 0 min / 5 to 15 min | Nearby, not for biters | $8 to $15 |
| 12. Foam play structures | 2 to 6 | None | 20 min / 15 to 45 min | Nearby, clear the zone | $0 to $600 |
| 13. Ball pit | 2 to 6 | Medium | 1 hour / 15 to 30 min | Eyes on for under 4s | $60 to $150 |
| 14. Light projections | 1.5 to 6 | None | 5 min / 10 to 30 min | Low, LED only, never laser | $15 to $25 |
| 15. Padded floor | All ages | None | 30 min / all day | None once the edges are secured | $20 to $60 |
Save this for later. If you are reading this on your phone in a parking lot, pin the table above. It is the part you will want when you are standing in the Target aisle deciding between the $40 swing and the $140 one.
Best Sensory Room Ideas For PreSchoolers
Here is what goes in the room, cheapest and most used first. Each one has the trade off spelled out, because every single item on this list annoys somebody in your house.
1. Go for a swing
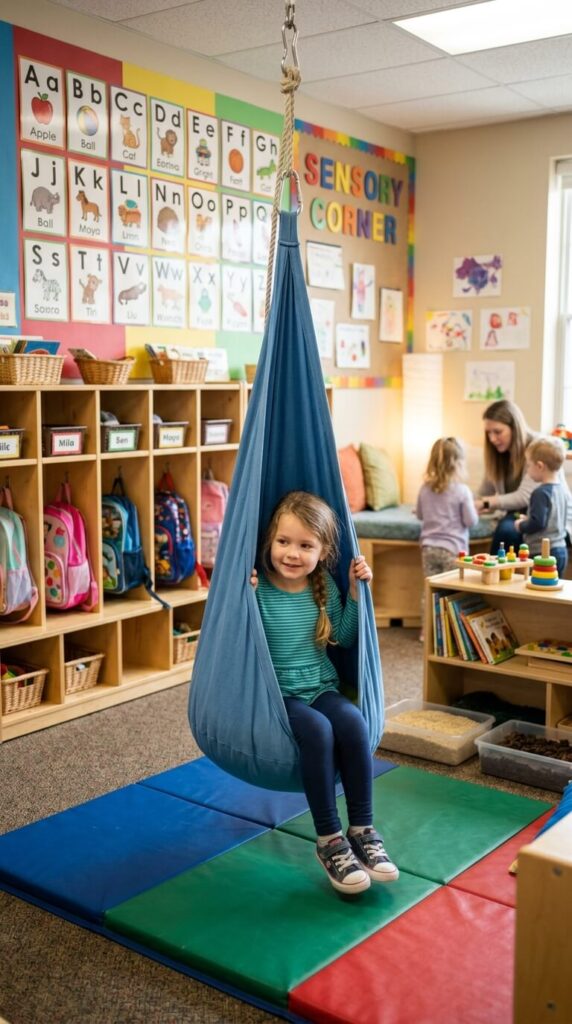
If you only add one thing, add this. Swinging is the single most reliable regulator I have found for a preschooler who is wound up, and once ours could climb into it herself, she started asking for it before she fell apart, which is the whole goal.
Here is the thing nobody tells you: swinging is not automatically calming. Slow front to back motion tends to settle kids. Spinning does the opposite, and a spun out preschooler can seem fine and then fall apart two hours later at dinner. We do linear before dinner and save spinning for outside, in short bursts.
Watch for the overload signs while they swing: flushed or pale face, sweating, yawning, hiccups, going suddenly silent, or wild giggling that flips into tears. That is the stop signal. Switch to a blanket squeeze and turn the lights down.
- Ages: 2.5 to 6. Under 2.5, use a supported bucket style seat and rock them with your hands rather than hanging them. Older kids will want to go higher, so a platform swing with a rope handle lasts longer.
- Time: 30 to 60 minutes to install properly, 5 to 15 minute sessions, no cleanup.
- Mess: None.
- Supervision: Eyes on, every single time. Clip the swing up out of reach or take it down when the session ends.
- Cost and free swap: $35 to $70 for the swing plus $15 to $30 in hardware. Free version: a flat bedsheet knotted over a doorway pull up bar, or two adults holding a blanket and swinging it low and slow.
How to set it up:
- Find a ceiling joist with a stud finder, then confirm it with a small pilot hole. Drywall anchors and adhesive hooks are not an option here. A 40 pound kid in motion pulls far more than 40 pounds.
- Install a rated eye bolt or ceiling mount plate with lag screws driven into the center of the joist. Add a swivel only if you want spinning, and a rated carabiner plus a daisy chain so you can adjust the height.
- Hang it so the seat sits at your child’s hip height and their feet can reach the floor.
- Put a crash mat or a doubled mattress underneath and clear three feet in every direction. Measure the arc, not the resting spot.
- Hang from it yourself first. If it does not hold you, it does not go up.
Tip: Hang it low enough that they can start and stop themselves. A kid who needs you to push uses it a fraction as much as one who can climb in alone.
What goes wrong the first time: People hang it too high, then spend the session pushing. Or they mount it in a doorway that everyone needs to walk through, and it comes down by week two.
2. Regroup in a comfort chair

Every kid needs a spot that is theirs, dim, soft, and enclosed on at least two sides. Ours is a bean bag wedged into the corner behind the armchair with a blanket over the back to make a roof. He goes in there with a book and comes out a different person.
The deep pressure is doing the work. Sinking into something that presses back feels like a firm hug, and that is calming for most kids.
One safety point that gets glossed over constantly: bean bag chairs filled with small polystyrene beads have caused child suffocation deaths and recalls when the zipper got opened. If you buy one, check for a double or child resistant zipper, and check it monthly. Or skip beads entirely.
- Ages: 2 to 6, and honestly older. This is the item that stays useful the longest.
- Time: 5 minutes to set up, 10 to 30 minute sessions, no cleanup.
- Mess: None.
- Supervision: Check in every few minutes. You should be able to see or hear them without standing over them.
- Cost and free swap: $30 to $80. Best cheap version: buy a $20 stuffed animal storage bean bag cover and fill it with their own plushies. Zero filling cost and it clears the toy pile. Free version: two couch cushions and a folded quilt in a corner.
How to set it up:
- Pick a corner away from the toy chaos, ideally where you can block two sides.
- Add the chair, one soft blanket, and one or two books. That is it. A pile of toys turns it into a play zone.
- Drape a sheet or blanket over a chair back or two hooks to make a low roof.
- Kill the overhead light in that corner. One warm lamp or a string of LED lights is plenty.
Tip: If you are considering a weighted blanket, know the rules first. Nothing weighted for a child under 2, ever. For a 3 to 5 year old, it should be light enough that they can push it off themselves with no help, never over the head or face, and never for unsupervised sleep. A folded quilt or lying under a couch cushion for a minute gets most of the same effect for free.
What goes wrong the first time: Parents put it in the middle of the room where it is the brightest, loudest spot in the house, then wonder why it never gets used.
3. Snuggle with stuffed animals
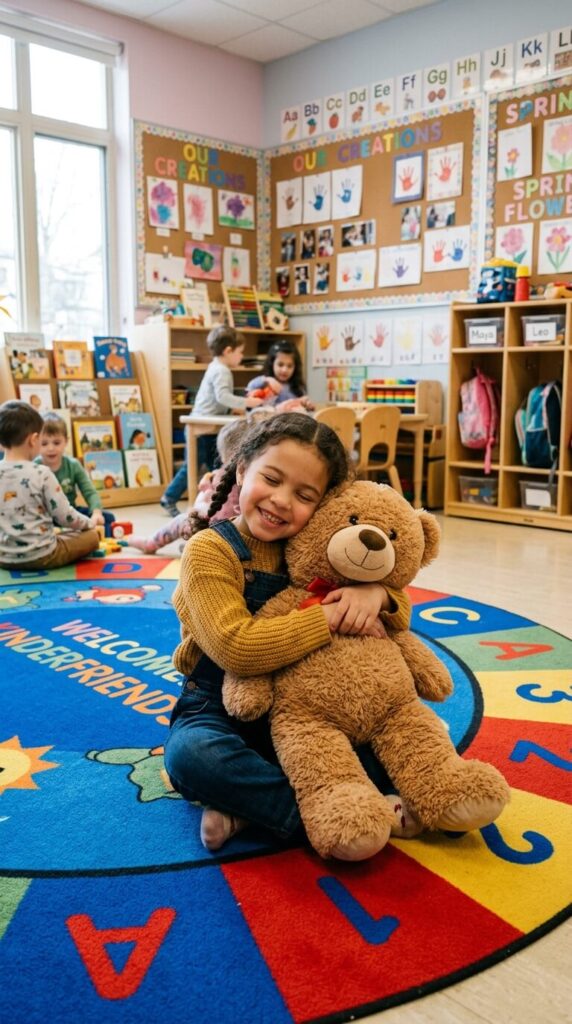
Low tech, free, and easily the most used item in our corner. The one that works is almost always the ugly one they already love, not the new plush you bought for the aesthetic.
Keep it to five to eight animals in one basket. I learned this the hard way. Thirty stuffed animals is not a comfort station, it is a pile to climb and then a mess to clean.
- Ages: 1.5 to 6.
- Time: 5 minutes, open ended sessions, no cleanup beyond tossing them back in the basket.
- Mess: None.
- Supervision: Low, once you have safety checked them.
- Cost and free swap: Free if you own any. Thrift stores are full of them for a dollar or two, and a hot wash sorts them out. A weighted buddy runs $20 to $30 new.
Safety check before they go in the basket: Tug the eyes and nose to see if they are stitched or glued, cut off ribbon tags and any small accessories, and use the toilet paper tube test. If a piece fits through a cardboard tube, it is a choking hazard for a child under 3. Pick machine washable animals with no bean pellet filling, and wash them weekly inside a pillowcase.
On weighted stuffed animals: 1 to 3 pounds is plenty for a preschooler, the general guidance is to stay around 10 percent of body weight for lap pads, and the child has to be able to lift it off themselves. Not on the chest, not for sleep, not for a child under 2.
Tip: I tried the DIY weighted animal with a bag of dried beans inside a pillowcase, and I gave up on it. Dried beans mold if they get damp, the seam splits eventually, and I was finding beans in the rug for a month. If you want weighted, buy weighted.
What goes wrong the first time: The basket becomes general toy storage within a week. Keep it to the calm animals only, and rotate them so they stay interesting.
4. Chew on a sensory necklace

If your kid chews shirt collars, pencils, crayons, or the car seat strap, that is oral seeking, and punishing it does nothing except make everyone tense. Giving them something safe to chew instead works better and takes about four seconds.
This is the one item where I would not buy the cheap multipack. The soft ones shred fast, and a bitten off chunk of silicone is a choking hazard. Firmer chew tools from brands like ARK Therapeutic and Chewigem come in toughness levels for a reason. Inspect it daily and throw it out the second you see a puncture or a tear, not next week.
- Ages: 2 to 6, for kids who chew objects. Not the right tool for a kid who bites people, that needs different support.
- Time: 2 minutes, used as needed through the day.
- Mess: None.
- Supervision: Daily inspection. Not for sleep, not unsupervised in a car seat.
- Cost and free swap: $10 to $20 each. Free version: a straw cup with a thick smoothie, a water bottle with a bite valve, or crunchy snacks that suit your child’s chewing ability and allergies.
How to use it safely:
- Choose a breakaway clasp, or skip the necklace and use a clip on version or a chewable wristband. Any kid who wraps cords around their neck should not have a necklace at all.
- One tool per child, with their name on it. Chew tools do not get shared.
- Wash it daily in hot soapy water or on the top rack of the dishwasher.
- Check the whole surface every morning. Puncture means bin, no negotiating.
Practical note: If your child is swallowing things that are not food, or chewing on painted or metal objects, skip the chewelry step and call your pediatrician first. That pattern needs a proper look, not a silicone pendant.
What goes wrong the first time: Parents buy the cutest one instead of the toughest one. A strong chewer goes through a soft silicone pendant in days.
5. Walk, crawl, or lie on a sensory mat
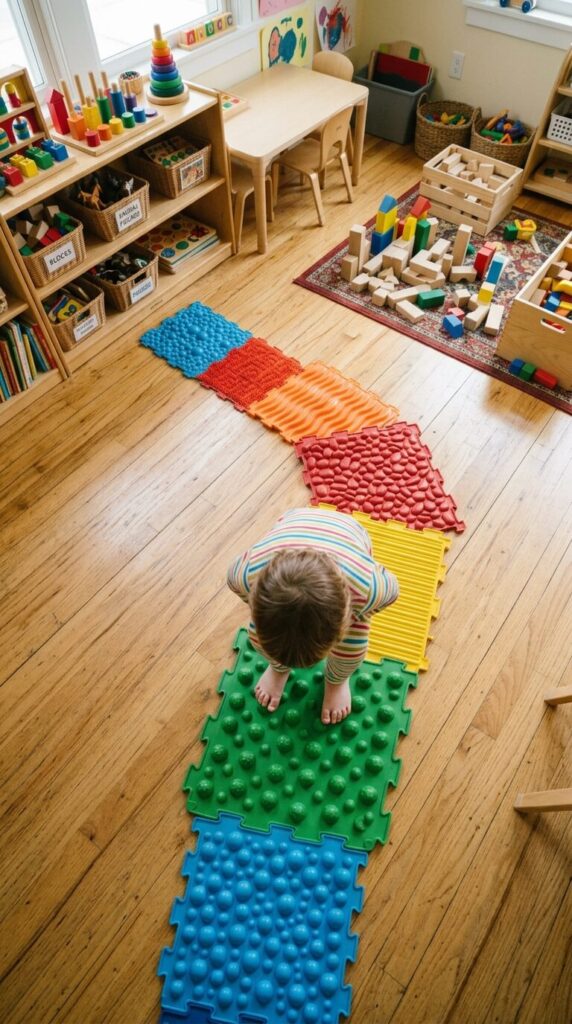
The cheapest real win in this entire list, and the one my kids kept coming back to. I built our first texture path out of things already in the house: a scratchy coir doormat, a fuzzy bath mat, a strip of bubble wrap, a square of aluminum foil, a fleece blanket, and a baking tray with dry oats in it.
Tape every piece down. Loose mats on hardwood are a slip hazard, and the whole thing slides into a heap the first time somebody runs it.
If your kid is a texture avoider, do not start with bare feet. Feet are intense. Start with hands, let them keep socks on, and let them skip anything scratchy. Pushing a tactile sensitive kid onto a coir mat can put them off the corner for weeks. I have done it. It set us back.
- Ages: 2 to 6. For younger toddlers, keep it to two or three textures and crawl it with them. For a 5 or 6 year old, turn it into a timed obstacle course or add a balance element.
- Time: 10 minutes to build from stuff you own, 5 to 20 minute sessions, 2 minutes to put away.
- Mess: Low, unless you include a loose filler tray.
- Supervision: Stay nearby. Bubble wrap and any loose grain tray needs you in the room.
- Cost and free swap: $0 to $15. Dollar Tree sells bath mats, scrub pads, and foam sheets that work fine.
How to set it up:
- Lay four to six textures in a line with a bare floor gap between each.
- Tape all edges down with painter’s tape or duct tape.
- Walk it yourself first, barefoot, so you know which one is too scratchy.
- Name each square something silly and make it a route. “Crunchy bridge, then the ice, then the moss.” A route is a game. A mat is a chore.
Tip: Put any loose grain tray inside a bigger under bed bin. The bin catches the spill and the whole thing slides under the couch when you are done.
Safety: Dry rice, beans, and small grains are a choking and aspiration risk for any child who still puts things in their mouth, so skip loose fillers for those kids and stick to solid textures.
6. Sway in a hammock
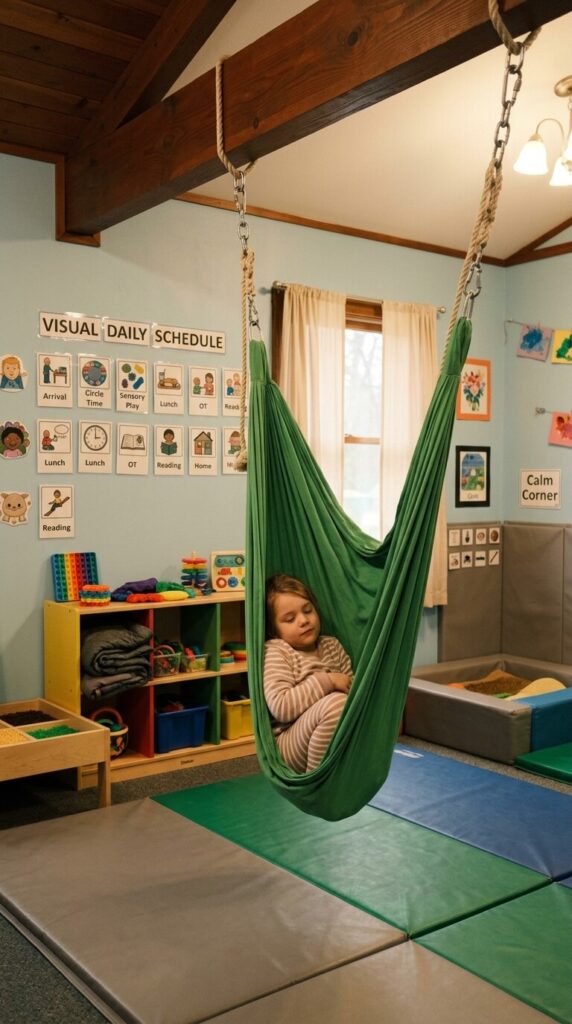
For my sensory avoider, the enclosure mattered more than the motion. A hammock or a fabric pod wraps around them and takes their whole body weight, so they get pressure and gentle movement at the same time without having to hold themselves up.
The free version is the one I actually reach for most: a blanket burrito on the floor. Lay the blanket out, they lie on the edge, you roll them up snug, and they wiggle out when they want. Zero dollars, zero hardware, same deep pressure.
- Ages: 3 to 6 for a hanging hammock. For under 3, use the floor burrito instead.
- Time: 30 minutes to hang, 5 to 20 minute sessions, no cleanup.
- Mess: None.
- Supervision: Eyes on. An enclosed pod with a child inside is never a leave the room situation.
- Cost and free swap: $30 to $60. Free version: a stretchy jersey twin sheet knotted at both ends over a doorway pull up bar, or the blanket burrito.
Safety, not optional here: loose fabric, cords, and small children are a strangulation and entrapment combination. Never let a baby or toddler sleep in a hammock. Never wrap the head or neck in a burrito roll, make sure they can get out on their own, and stop the second they say stop. Use the same rated ceiling hardware as the swing.
Tip: Shop outdoor retailers during end of season clearance in the fall. A durable camping hammock at half price mounts indoors just fine with the right hardware, and September is a good month for it.
What goes wrong the first time: The knot slips. Tie it, hang from it yourself, then let a kid near it.
7. Bounce on a breathing ball

Telling a dysregulated 4 year old to “just take a deep breath” has never once worked in my house. Giving them something to watch works, because they copy the object instead of processing an instruction.
A Hoberman sphere is the classic. You expand it, they breathe in. You collapse it, they breathe out. No talking required, which is the point.
Mine snapped a hinge in the second week because it also makes an excellent projectile. Buy the larger plastic version, not the mini, and keep it as something you get out together rather than something that lives in the toy bin.
- Ages: 3 to 6. Under 3, skip the ball and use bubbles instead. Blowing bubbles is a slow exhale with instant visual feedback, and it is better than any breathing tool I have bought.
- Time: No setup, 2 to 5 minute sessions.
- Mess: None.
- Supervision: This is a together activity, so you are right there.
- Cost and free swap: $15 to $25. Free versions: bubbles, a pinwheel, a hand on a stuffed animal on their belly to make the bear go up and down, or tracing a star shape on their palm while they breathe.
Therapy ball safety, if you add one for bouncing: kids fall off exercise balls. Sit behind them and hold their hips for anything under 4, put the ball against a wall, never use it on a hard floor, and keep it away from furniture corners and glass. A big ball also becomes a battering ram, so deflate it and put it away when the session ends.
What goes wrong the first time: You turn it into a lesson. Say nothing, breathe with the ball yourself, and let them join in when they want.
8. Gaze at a lava lamp

Slow moving light is genuinely calming, and dropping the harsh overhead light is half of what makes a sensory corner feel different from the rest of the house.
I have to be honest about the lava lamp specifically though. It gets hot enough to burn, it runs on an incandescent bulb, the liquid inside is not food safe, and it should never be shaken or moved while warm or it goes permanently cloudy. In a corner whose entire purpose is climbing, rolling, and crashing, a hot glass object is a strange choice.
So here is what I do instead. A cool touch LED flow lamp costs about $10 to $15 and does the same slow bubble thing at zero burn risk. Or a color changing LED bulb inside a paper globe shade for a warm, dim glow. Or a calm down jar, which is water, a squirt of oil, glitter, and a drop of food coloring in a plastic peanut butter jar with the lid glued shut.
- Ages: 3 to 6, with a real lava lamp always out of reach. LED alternatives are fine from toddlerhood.
- Time: 5 minutes to set up, then it just runs in the background.
- Mess: None.
- Supervision: Adult only device. Burn hazard, glass hazard, tip over hazard.
- Cost and free swap: $20 to $35 for a lava lamp, $10 to $15 for an LED flow lamp, about $2 for a calm down jar.
How to set it up:
- Put it on a stable shelf or high surface, well out of reach, never on carpet where it can tip.
- Run the cord behind furniture and secure it. No dangling cords near a bed or crib.
- Put it on a plug timer. These lamps are not meant to run all day, and it saves you remembering.
- Never let a child carry it, shake it, or move it while it is warm.
Safety on lighting generally: no strobe and no fast flashing settings, ever. Rapid flashing light can trigger seizures in photosensitive children. Slow, dim, and boring is what you want.
What goes wrong the first time: Any single light source is a three day novelty. Rotate what is on. Stars one week, the flow lamp the next.
9. Play in a sand or water table

Digging is heavy work for the hands, and heavy work is grounding. This is also the messiest thing on this list by a wide margin, so read the trade off before you buy.
Kinetic Sand is worth the money. It clumps, so it mostly stays in the bin and vacuums up. Regular play sand tracks through the entire house and you will find it in the bathtub for months. That is not an exaggeration, that is a description of my hallway in 2023.
The single best thing I did was put the table on top of a cheap plastic shower curtain liner. Cleanup went from ten minutes to thirty seconds because I just lift the corners and pour the spill back in. A dustpan lives next to it permanently.
- Ages: 2.5 to 6. For younger toddlers, use dry oats instead of sand and stay within arm’s reach. For 5 and 6 year olds, add measuring cups and a scale and it turns into volume play.
- Time: 15 minutes to set up, 20 to 40 minute sessions, 10 minutes of cleanup. Be realistic about that last number.
- Mess: High.
- Supervision: Constant with water. Every few minutes with sand.
- Cost and free swap: $30 to $60 for a table, $10 a bag for Kinetic Sand. Free version: an under bed storage bin with dry pasta or oats, or a dish tub of water on a towel.
Safety, and I am not softening any of it:
- Water is a drowning risk at any depth. Even two inches is enough for a toddler. Never leave a filled water table unattended, dump it after every session, and keep the door closed.
- Use play sand labeled washed and dust free. Dusty sand and crystalline silica dust are a real respiratory hazard, so no blowing, no stirring up clouds, and take it outside if it is dusty.
- Skip water beads entirely for this age group. They expand after swallowing and have caused serious injuries. They are not worth it, no matter how good they look in videos.
- Food based fillers carry allergen risk. Dry pasta, flour, oats, and cereal all involve wheat. Check the allergies of every child in your house and everyone who visits. Birdseed can carry salmonella. Anything small is a choking and aspiration risk for mouthers.
- Put a towel underneath for the slip hazard, and get a table with a tight fitting lid.
Tip: One scoop, one funnel, one cup, one small truck. Any more tools than that and the activity becomes dumping tools on the floor. [INTERNAL LINK: safe sensory bin fillers by age, with allergy notes]
What goes wrong the first time: You set it up on carpet. Do not set it up on carpet.
10. Watch LED bubble tubes
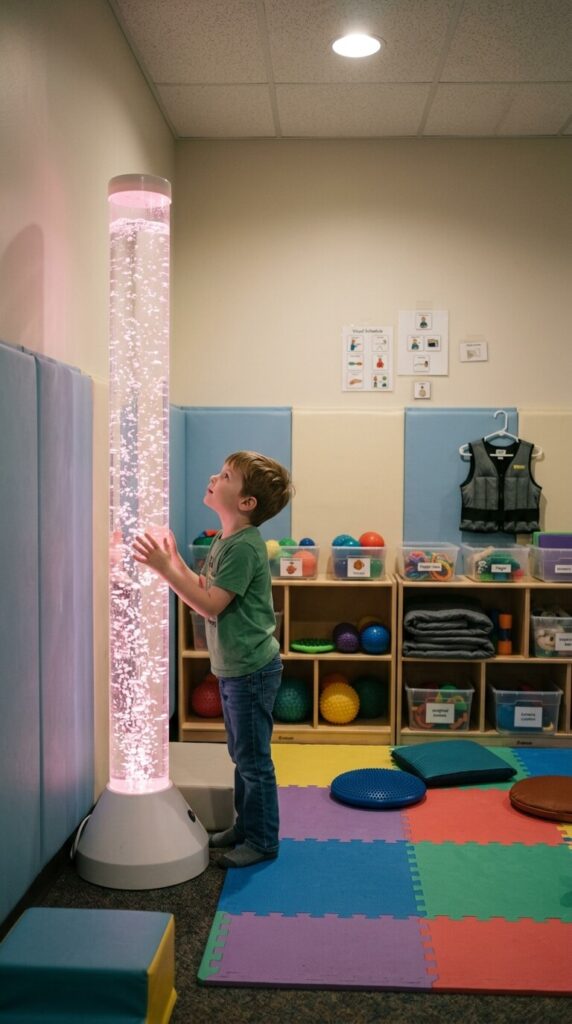
This is the most photogenic item on the list and the least used in real life. I am telling you that because most articles will not.
Ours held around twelve gallons of water, weighed well over a hundred pounds full, and had to be bolted to the wall. The water goes cloudy unless you use distilled water and the manufacturer’s tablets, the bubbles need topping off, and the pump hums constantly. My kids were fascinated for three days and then walked past it for two years.
If you want the visual calm, buy a $20 star projector and put the other $300 into a crash pad and a swing.
- Ages: 3 to 6, as a background feature rather than an activity.
- Time: 1 to 2 hours to install and fill, then it runs in the background.
- Mess: None until it leaks.
- Supervision: It must be bolted down. Filling and draining is an adult job.
- Cost and free swap: $80 to $400. Tabletop versions run $30 to $50. Cheap version: an aquarium bubbler in a sealed jug with a color changing LED underneath.
Safety: bolt it to a stud, plug it into a GFCI outlet, and check the base for leaks regularly, because water plus electricity plus preschoolers deserves respect. If you cannot bolt it to the wall, do not buy it. A tipping tube full of water is a crush hazard.
What goes wrong the first time: People buy this first because it looks incredible in photos. Buy it last, if at all.
11. Press on gel pads

Cheap, quiet, portable, and great for the times a kid needs to sit still. Ours live in the car and come out at restaurants more than they get used in the corner.
They will eventually split. Every one we have owned has. Once it splits it is over, because you are then dealing with gel and glitter in carpet fibers, and no amount of scrubbing gets glitter out. Check the seams weekly and keep them away from any kid who bites.
- Ages: 2.5 to 6, for kids past the mouthing stage.
- Time: No setup, 5 to 15 minute sessions.
- Mess: None until one splits.
- Supervision: Stay nearby. Not for biters or mouthers.
- Cost and free swap: $8 to $15. Dollar Tree carries them seasonally. Free version: a freezer bag of hair gel with glitter or plastic letters inside, double bagged with the top edge duct taped shut. Still supervise, still not for biters.
How to use it:
- Put it flat on a table or a hard book on their lap.
- Let them squish, press, and chase the bubbles around. That is the whole activity.
- If you want to add letters, ask once and drop it if they are not interested.
Tip: Mine liked squashing far more than tracing letters, and the moment I pushed the learning angle, the pad lost its appeal. Let the fidget be a fidget.
What goes wrong the first time: Somebody stands on it. Store it flat, in a drawer, not on the floor.
12. Build foam play structures

Preschoolers do not use foam blocks to build architecture. They use them to crash. Once I accepted that, the whole zone worked better, because I set it up as a crash pit with blocks in it rather than a construction area.
Commercial foam sets are expensive, and the honest truth is that my kids preferred large diaper boxes stuffed with crumpled paper and taped shut. They cost nothing, they hold a preschooler’s weight for a couple of weeks, they collapse dramatically, and you just build new ones when they die.
- Ages: 2 to 6. For toddlers, use fewer and lower pieces. For older kids, add ramps and let them make courses.
- Time: 20 minutes to set up the zone, 15 to 45 minute sessions, 5 minutes to stack back up.
- Mess: None, though the covers get grubby fast.
- Supervision: Nearby, with the crash zone cleared first.
- Cost and free swap: $150 to $600 for a commercial set. Free versions: couch cushions, a mattress topper cut into blocks and covered, or taped up boxes. Check Marketplace for used Lakeshore or preschool sets, they turn up when centers upgrade.
How to set it up:
- Clear a crash zone with nothing hanging above it and no radiators, glass, sharp corners, or doorways in reach.
- Put padded flooring down first. Foam blocks on a tile floor are still a hard landing.
- Start with three or four large pieces. More pieces means more scattering, not more play.
- Wipe the covers down weekly with soap and water.
Safety: look for GREENGUARD Gold or CertiPUR US certified foam and phthalate free covers. Exposed foam gets picked at and chewed, and foam chunks are a choking hazard, so anything used with a child under 3 needs an intact vinyl or fabric cover. Air out new foam for a few days before it goes in the room.
What goes wrong the first time: The crash zone is too close to a wall or a coffee table. Measure where the body actually lands, not where the blocks sit.
13. Hang out in a ball pit

Kids love these, and the even pressure of sitting submerged genuinely does feel like a full body hug. It also takes up more floor space per minute of use than anything else here, and there is a hygiene reality nobody mentions.
Balls collect crumbs, hair, dust, and eventually something worse. Ours needed a bathtub wash in warm water with a splash of white vinegar every couple of months, and with 300 balls that is a solid hour of work. Also, 200 balls is not enough for a kid to actually sink into. Plan on 300 to 500 for a small pit.
- Ages: 2 to 6.
- Time: About an hour to set up and wash new balls, 15 to 30 minute sessions, 5 minutes to gather strays.
- Mess: Medium. Balls travel.
- Supervision: Eyes on for under 4s.
- Cost and free swap: $60 to $150 all in. Cheap version: a pop up pit for $25 to $40 plus balls bought on sale. Lap sized version: a clean under bed tub or a small paddling pool with 100 balls.
Safety: keep the pit shallow enough that your child can sit with their head clear, no burying heads, no jumping in from the couch, and no sleeping in it. Pull out any cracked balls immediately, because a cracked ball has sharp edges and breaks into pieces small enough to choke on. Standard 2.5 inch balls are too large to swallow, but broken ones are not.
Tip: Store the balls in a big zip laundry bag rather than the pit itself. Empty pit means the space is usable for something else, and it takes ten seconds to dump them back in.
What goes wrong the first time: You buy 200 balls, the pit looks sad and half empty, and your kid loses interest in a day.
14. Focus on light projections

The best value item in our entire corner is a $15 LED star projector. It turned the fight about going to the calm corner into a request for the stars, which is worth more than anything else I bought.
Kids lie flat on their backs, track the slow moving lights across the ceiling, and their breathing slows down without anyone telling them to breathe. It also works on exhausted adults, which I did not expect.
- Ages: 1.5 to 6, and it stays useful for years.
- Time: 5 minutes to set up, 10 to 30 minute sessions.
- Mess: None.
- Supervision: Low, once the cord is secured.
- Cost and free swap: $15 to $25. Free versions: a flashlight under a colander pointed at the ceiling, a phone light through a colored water bottle, or shadow puppets on the wall, which reliably buys me ten minutes.
Safety, do not skip this one: use LED projectors, not laser ones. Laser projectors, including the holiday lawn kind, can damage a child’s eyes if they look into the lens, and children absolutely look into the lens. Avoid strobe and fast flash modes because of seizure risk in photosensitive kids. Slow rotation only. Run cords behind furniture and never let a cord dangle into a crib or bed.
Tip: Point it at the ceiling, not the wall. Ceiling projection means they lie down, and lying down does most of the calming work by itself.
What goes wrong the first time: The projector sits at kid height, gets grabbed, and dies in a week. Put it on a shelf.
15. Play on a padded floor
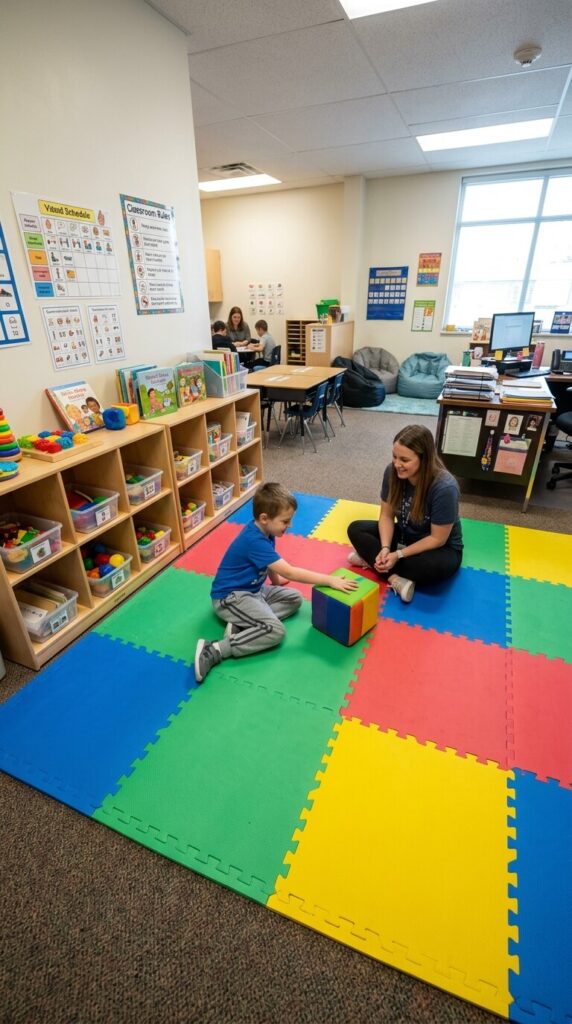
This is the base layer that makes half of the other ideas safe. Interlocking foam tiles, a thick mat, or a doubled up mattress under the swing means you are not flinching every time your kid throws themselves at the floor, and that changes how the whole corner feels.
The detail that matters: the little puzzle edge pieces that come off the tiles are exactly the size that ends up in a toddler’s mouth. Use the straight border strips that come in the pack, or tape the whole perimeter down. Ours also slid around on hardwood until I put a rug pad underneath.
- Ages: All ages, including the crawling stage.
- Time: 30 minutes to lay and tape, then it lives there.
- Mess: None, though crumbs collect in the seams.
- Supervision: None needed once the edges are secured.
- Cost and free swap: $20 to $35 for a four pack at a big box store, $60 for a large set. Free versions: an old crib mattress, a folded comforter, or a camping sleep pad.
How to set it up:
- Lay the tiles out wall to wall in the zone, or just under the swing and the crash area.
- Snap the border strips on, or tape the outside edge down so the puzzle nubs cannot be picked off.
- Add a rug pad or tape underneath if you are on hardwood or tile.
- Pull the tiles up and vacuum underneath monthly. I found a fossilized raisin under ours. Learn from me.
Safety: look for GREENGUARD Gold certification or CPSIA compliance, and let new mats air out for several days before use, because the new mat smell is off gassing. One important limit: foam tiles are not enough padding under a hanging swing. For fall protection under a swing, use a real crash mat or a doubled mattress.
What goes wrong the first time: People buy the thinnest tiles. Half inch tiles are a floor covering. For crashing, you want three quarter inch or thicker.
Common Sensory Room Mistakes To Avoid
These are the specific mistakes I made, plus the ones I see other parents make constantly.
- Using the corner as a time out spot. It only takes a couple of times to poison it. Somewhere they choose to go, never somewhere they are sent.
- Buying the room before you know the kid. Get one calming item and one movement item, watch for two weeks, then spend the rest.
- Turning everything on at once. Swing plus bubble tube plus music plus every light is more input, not less. Pick one or two.
- Waiting for the meltdown. Go in at the predictable rough hour instead. For us that is 4pm, right after preschool pickup.
- Too much spinning. Spinning is potent, and the fallout can show up hours later. Short bursts, linear motion most of the time.
- Improvising the ceiling hardware. Adhesive hooks and drywall anchors are not swing mounts. Joist, rated bolt, tested with your own weight.
- Putting the calm corner in the middle of the toy chaos. It needs to feel different from the rest of the room or it does not read as calm.
- Talking through the whole session. Narrating and coaching interrupts the thing you are trying to help them do. Be dull.
- Never rotating anything. The same twelve items forever get ignored. Box up half, swap monthly, and it feels new again.
- Expecting it to fix behavior. It is a tool for regulation, not a treatment. If daily meltdowns are the pattern, get an occupational therapy assessment alongside it.
- Leaving the swing hanging. In a house with a climber, an unattended hanging swing is a hazard. Clip it up or take it down.
Safety Checks Before You Let Them Loose
Run this list once when you build the corner, then again every few weeks. It takes five minutes.
- Ceiling hardware: into a joist, rated bolt and carabiner, tested with an adult’s weight. Padding underneath that is thicker than a foam tile.
- Nothing weighted for a child under 2. For older preschoolers, they must be able to remove it themselves, never over the head or face, never for unsupervised sleep.
- Toilet paper tube test: if a part fits through a cardboard tube, it is a choking hazard for a child under 3. Check plush eyes, cracked balls, foam crumbs, and puzzle mat nubs.
- Chew tools: intact only, breakaway clasp, one per child, washed daily, binned at the first tear.
- Water: never a filled water table unattended, at any depth. Dump it after every session.
- Sand: washed and dust free play sand only. No dust clouds. Kinetic Sand is not for kids who still mouth things.
- Skip water beads for this age group entirely.
- Food based sensory fillers: check allergies for every child in the house and every visitor. Wheat is in most of them.
- Lights: LED not laser, no strobe or fast flash, nothing hot within reach.
- Electrical: GFCI outlet for anything with water, cords secured behind furniture, nothing dangling into a bed or crib.
- Bean bags: child resistant double zipper, checked monthly, especially with bead fill.
- Furniture: shelves and heavy items anchored to the wall, because this is a room built for climbing.
- Adult only jobs: installing hardware, filling and draining anything, moving a warm lamp, and cutting or trimming foam.
FAQs
What is the primary purpose of a sensory room in a preschool?To give a child a place to reset their nervous system before they hit the wall. For some kids that means turning the input down, so dim light and deep pressure. For others it means giving them the movement and squeeze they are already chasing so they can focus afterwards. Either way it is a regulation tool, not a reward or a punishment.
How long should a child stay in a sensory room?For most preschoolers, 10 to 15 minutes is the sweet spot, and swinging or spinning should be shorter than that. Watch the child rather than the clock. If they get flushed, sweaty, pale, yawny, or go from giggling to crying, that session is done, and you switch to something calm and quiet.
Are sensory rooms only for children with autism or ADHD?No. They are often essential for autistic children, kids with ADHD, and kids with sensory processing differences, but every preschooler has a nervous system, and every preschooler has days where it is too much. My most typically developing kid uses ours the most.
How much does it cost to build a sensory room?A useful corner starts around $60 to $100 if you use what you already own, so foam mats, a bedsheet swing, a star projector, and a texture path from household items. A well equipped room with a mounted swing, crash pad, foam set, and padded flooring runs $500 to a few thousand. Buy in that order and you can stop whenever it is working.
Is a sensory room safe for a 3 year old?Yes, with three conditions. Hanging equipment needs proper joist mounted hardware and an adult watching, anything with small parts or loose fillers comes out only when you are right there, and no weighted items unless your child can lift them off unaided. Water play at that age needs constant supervision at any depth.
How do I get kinetic sand out of carpet?Let it dry completely first, then press a fresh ball of kinetic sand onto the patch and the loose grains stick to it, then vacuum. Do not vacuum it wet, that grinds it into the fibers. For slime, white vinegar on a cloth breaks it down. For glitter, a lint roller followed by packing tape works better than a vacuum.
What if my kid ignores the sensory room?Usually it means the setup does not match the input they want, so try the opposite kind. A crashing kid needs a swing and a crash pad, not a quiet cushion corner. Also try going in with them at a calm time, saying nothing, and doing the activity yourself. Mine joined in within about four minutes.
Read Next
If you are building the corner this month, here is where I would go next.
Once the space exists, the question becomes what to put in the basket. Choosing the right sensory toys walks through how to pick tools for a specific child instead of buying the whole shelf, which is where most of the wasted money goes.
And if your kid comes out of the corner regulated and looking for something to do with their hands, fine motor activities that build hand strength pairs well with a post swing session. Regulated first, then fine motor work. That order matters more than people think.
For the long indoor stretch coming after the holidays, screen free indoor activities for toddlers is the list I pull up on the fifth grey day in a row.
Conclusion
Here is what I would do if I were starting over this week, in this order. Buy foam tiles and tape the edges. Hang a bedsheet from a doorway pull up bar and try it for a few days before you spend anything on a real swing. Build the texture path from what is already in your house. Add a $15 star projector. That is roughly $40 to $50 and it covers movement, pressure, texture, and light, which is the whole job.
Then watch. Whichever one your kid keeps going back to is where the next $100 goes. The thing that surprised me most was not that the corner calmed him down. It was that after a few months he started taking himself there, before anyone told him to, at the exact hour he usually fell apart. That is the actual win. Not a quieter afternoon, though you get those too, but a 4 year old who is starting to notice what his own body needs.