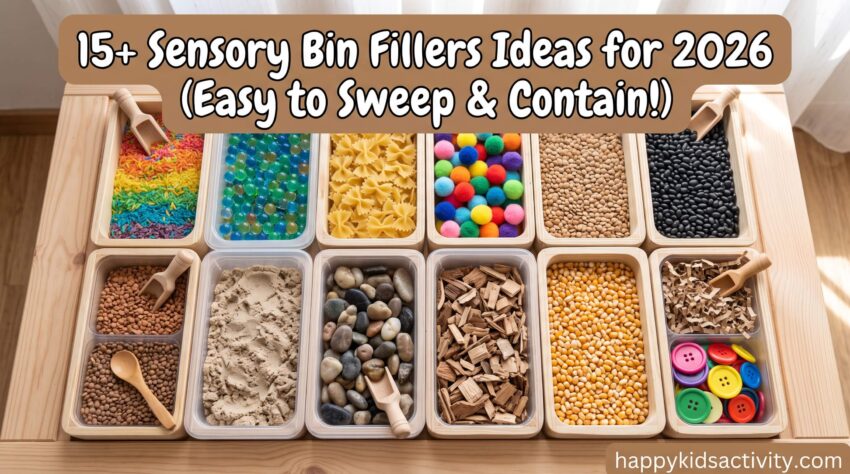
It is 4:15 on a rainy Saturday. The LEGO bin has already been dumped, there are crayons in the couch cushions, and your kid has asked for the tablet four times in eleven minutes. Dinner is not for another hour. That gap is what a sensory bin is for. One container, one filler, two scoops, and you get a stretch of quiet that is not a screen.
Here is the part most lists skip: the filler you pick decides how your afternoon ends. Some sweep up in ninety seconds. Some grind into the carpet and stay in your house until you move. So this is not just a list of pretty bins. For every filler below you get the ages it actually works for, honest prep and cleanup times, what it costs (plus a free swap), how messy it really is, and the thing that goes wrong the first time.
It is early fall as I update this for 2026, so if you want the cheapest possible start, skip ahead to the pinecones and acorns. They are dropping right now and they cost nothing.
Sensory Bin Fillers at a Glance (Pick One in 30 Seconds)
Scan this, pick one, go. Times are prep plus play plus cleanup, based on what actually happens at my kitchen table, not best-case.
| Filler | Works best for | Mess (1 to 5) | Total time | Taste-safe? |
| Rice | 2.5 to 6 yrs | 3 | 5 + 20 + 5 min | No |
| Dry beans | 3 yrs and up | 2 | 3 + 20 + 3 min | No, raw kidney beans are toxic |
| Pasta shapes | 2.5 yrs and up | 2 | 3 + 20 + 5 min | No |
| Oats | 6 mo to 3 yrs | 4 (dust) | 2 + 15 + 8 min | Yes |
| Sand | 18 mo and up | 5 | 5 + 25 + 10 min | No |
| Pebbles or rocks | 3 yrs and up | 1 | 5 + 20 + 3 min | No |
| Pinecones or acorns | 2 yrs and up | 2 | 60 + 20 + 5 min | No |
| Dried corn kernels | 3.5 yrs and up | 2 | 3 + 20 + 5 min | No |
| Cotton balls or pom-poms | 18 mo and up (jumbo only) | 1 | 2 + 15 + 3 min | No |
| Felt scraps | 12 mo and up | 1 | 10 + 15 + 2 min | No |
| Feathers | 2 yrs and up | 2 | 2 + 10 + 5 min | No |
| Water beads | 5 yrs and up only | 3 | 6 hrs + 20 + 10 min | No, never |
| Shredded paper | 2.5 yrs and up | 4 | 5 + 25 + 8 min | No |
| Buttons or beads | 4 yrs and up | 1 (but lost parts) | 3 + 30 + 8 min | No |
| Ice cubes or snow | 18 mo and up | 3 (wet) | Overnight + 15 + 5 min | Yes, plain ice |
| Cooked spaghetti | 12 mo and up | 4 (wet) | 15 + 20 + 10 min | Yes |
| Dried coffee grounds | 3 yrs and up | 3 (stains) | Overnight + 20 + 8 min | No |
| Cheerios or puffed cereal | 6 to 18 mo | 2 | 1 + 10 + 3 min | Yes |
Mess key: 1 means you pick it up by hand in two minutes. 3 means sweeping plus finding stray bits in the hallway tomorrow. 5 means it gets into your rug fibers and you accept that.
Sensory Bin Safety: The Rules I Do Not Bend
Sensory play is one of the safest activities you can hand a small child, right up until it is not. Almost every problem comes from one of five things, so read this once and you can relax for the rest of the article.
The tube test. The official small parts cylinder used for toy safety is about 1.25 inches across and 2.25 inches deep. A toilet paper tube is slightly wider, which makes it a conservative stand-in at home: if a filler passes through a toilet paper tube, treat it as a choking hazard for any child under 3 or any child who still mouths things.
Noses and ears, not just mouths. Dried beans, corn kernels and water beads all swell when they get wet, which is exactly what happens inside a nostril or an ear canal. If something goes in, call your pediatrician or head to urgent care. Do not go after it with tweezers or a cotton swab, because that pushes it deeper and makes removal harder.
Some food fillers are not food. Raw red kidney beans contain a natural toxin (phytohaemagglutinin) and a small handful of uncooked ones can cause serious vomiting and diarrhea, so I use pinto, black or lentils instead and still treat every raw bean as “not for eating.” Raw flour is not taste-safe either, since the CDC and FDA have tied raw flour to E. coli and salmonella illness. That one surprises people, because half the internet calls flour a baby-safe filler.
Allergies belong in the plan, not the comments. Wheat pasta, oat dust, and anything with nut shells are all real exposure risks, and oats are often processed on wheat equipment, so use certified gluten-free oats if celiac is in the picture. Before a playdate, text the other parent and ask. It takes ten seconds and it beats a reaction in your living room.
Adult jobs stay adult jobs. You cut the felt, you run the oven for foraged pinecones, you boil the pasta, you hydrate and dispose of any beads. Your kid can help with all the scooping, pouring and sweeping.
Two more habits that matter more than they sound. Put the bin away the second play is over, on a high shelf with the lid on, because the person who finds an unattended bin of beads is always the baby or the dog. And skip the dusty fillers (oats, flour, unwashed sand) if anyone in the house has asthma.
When I say arm’s reach below, I mean you are sitting next to the bin with your phone down. When I say same room, I mean you can unload the dishwasher and glance over every minute or two.
Practical note: If your child gags, recoils, or melts down at a texture more than once, that is information, not defiance. Do not make them put their hands in it. Offer tongs or a scoop so they can play without touching, or switch to a coarse dry filler like pasta or pom-poms, which most texture-sensitive kids tolerate far better than fine or dusty ones. If food and touch aversions show up across lots of situations, it is worth mentioning to your pediatrician or an occupational therapist. Some of the setup ideas here work well for sensory-seeking and sensory-avoidant kids alike.
Exciting Sensory Bin Filler Ideas for Toddlers
The filler sets the tone of the whole session. Smooth grains that flow like water get pouring and dumping. Heavy stones get lifting and construction. Silent fabric gets quiet, careful sorting. Same bin, completely different afternoon.
If you have a baby who is not sitting up steadily yet, start with floor-level texture play instead and come back to bins in a few months.
1. Rice
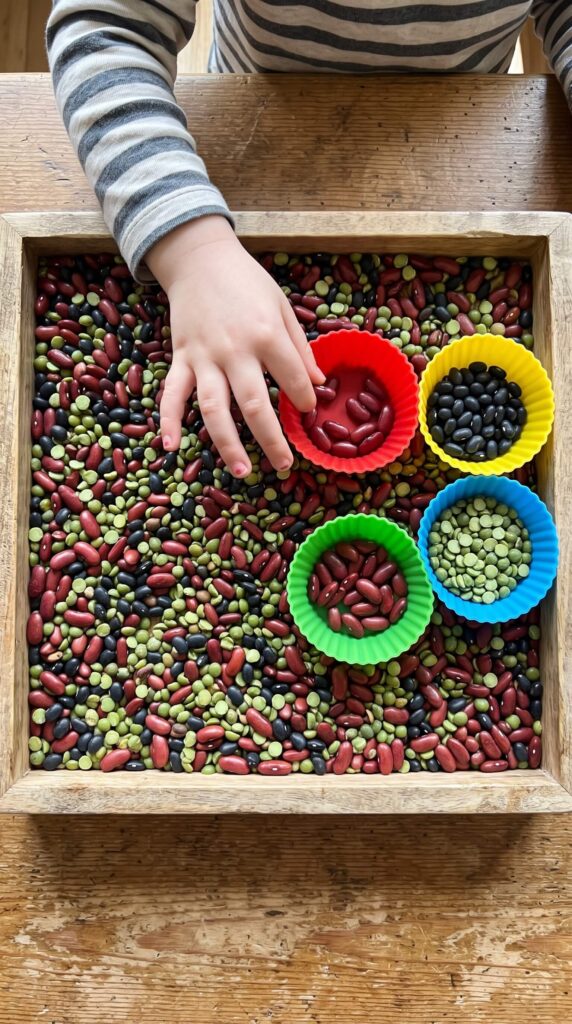
Rice is where everyone starts, and there is a reason. A 5 lb bag of store-brand long grain costs a few dollars and gives you roughly two inches of depth in a shoebox-size bin, which is plenty. Any deeper and it just gets flung.
It pours like water, and that is the whole appeal. My kid filled and dumped the same measuring cup thirty times in a row the first afternoon, and that repetition is exactly where the hand strength comes from. On hardwood it is also the loudest filler here, which kids love and you will notice.
For colored rice, shake two cups of rice with a tablespoon of white vinegar and ten to fifteen drops of food coloring in a zip-top bag, then spread it on a parchment-lined sheet pan for about an hour. It smells like salad dressing the first day and then the smell fades. Rubbing alcohol dries faster and the colors come out brighter, but the rice is no longer taste-safe, so label that bag.
- Best for: 2.5 to 6 years. Adapt down by swapping in oats or puffed cereal for a child who still mouths. Adapt up by hiding letter magnets and turning it into a treasure hunt, or by giving a 5 year old a measuring challenge (fill this jar exactly halfway).
- Time: 5 minutes prep (an hour if you are dyeing it), 15 to 25 minutes play, 5 minutes cleanup.
- Supplies: A shoebox or under-bed bin, 5 lb rice, two cups, one funnel. Dollar Tree carries plastic dish pans and scoops for a dollar or two.
- Free swap: Two yogurt cups, the top half of a water bottle as a funnel, and a cardboard box lined with a trash bag if you have no bin at all.
- Mess and supervision: 3 out of 5. Rice travels at least six feet, so put a sheet down. Same room is fine over 3, arm’s reach under 3.
- First-time snag: One damp hand and the rice turns to paste on their fingers, and the next stop is their shirt. Dry hands before you start, and keep drinks off the table.
Tip: Use the vacuum hose, not the rotating brush head. The brush fires grains straight under the couch, and a robot vacuum will smear rice across your entire floor.
2. Dry Beans
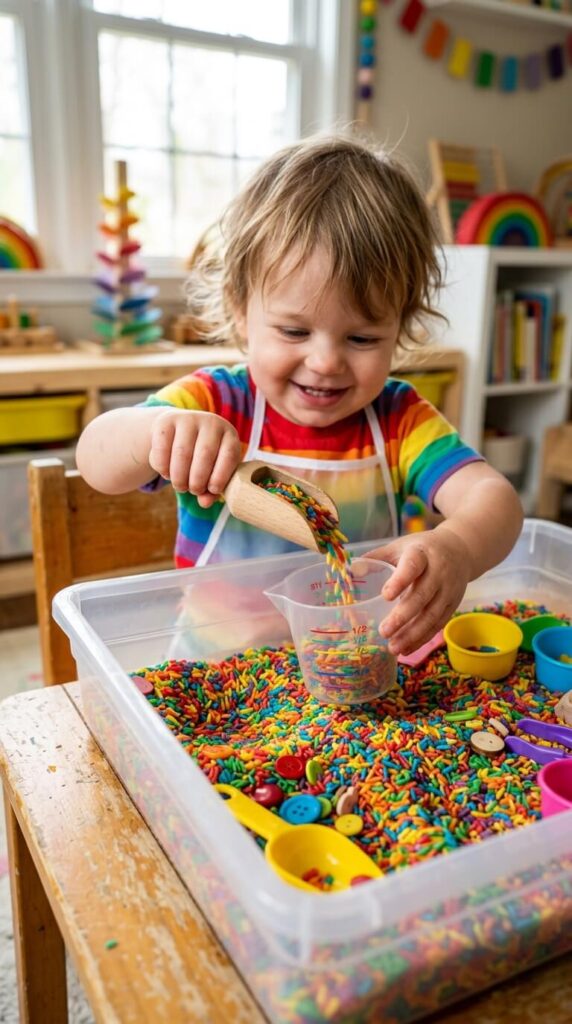
Beans are what I pull out when my kid is wound up and needs something to push against. They are heavier than rice, so scooping takes real effort, and that resistance settles a lot of kids in a way light fillers never do.
They are also the easiest thing here to clean up. Big pieces, no dust, and they do not shatter underfoot. The trade-off is bounce. One good arm sweep and beans skid clear across the kitchen, so use a bin with tall sides.
A mix of pinto, black and green split peas looks great and gets kids sorting without a single prompt from you.
- Best for: 3 years and up, and only if mouthing is well behind you. Adapt down by using jumbo pom-poms for the same scooping motion. Adapt up with tweezers, sorting races, or counting by tens into muffin tins.
- Time: 3 minutes prep, 20 minutes play, 3 minutes cleanup.
- Supplies: One or two pounds each of two or three bean types, usually a dollar or two a pound in the dry goods aisle.
- Free swap: The single bag already in your pantry. One color works fine, kids sort by size instead.
- Mess and supervision: 2 out of 5, but noisy and bouncy. Same room.
- First-time snag: Two things. Skip red kidney beans entirely (see the safety notes above), and know that beans are the classic up-the-nose filler. Also, lentils and split peas are the exception to the easy-cleanup rule. Lentils in carpet are close to permanent.
3. Pasta Shapes

Pasta earns its spot because the shapes do half the teaching for you. Wheels, bowties, shells and spirals all feel different in the hand, and kids naturally start grouping them.
Rotini holds dye better than anything else, and penne or ziti threads onto a shoelace, which is harder than it sounds for a 3 or 4 year old. Wrap a piece of tape around the end of yarn if you do not have a lace.
One warning nobody mentions: dry pasta shatters when it is stepped on, and the shards are sharp on a hardwood floor. Sweep before anyone goes barefoot.
- Best for: 2.5 years and up. Adapt down by boiling it first (see cooked spaghetti below). Adapt up with threading patterns, pasta necklaces, or gluing shapes onto cardstock afterward for.
- Time: 3 minutes prep, 20 minutes play, 5 minutes cleanup. Add 30 minutes if you dye it.
- Supplies: Two or three boxes of store-brand shapes, about a dollar each, plus a shoelace.
- Free swap: All the half-empty boxes of odd shapes in the back of your pantry, tipped into one bin.
- Mess and supervision: 2 out of 5. Same room.
- First-time snag: Kids bite dry pasta. It is hard enough to cut a gum or chip a tooth, so redirect the biters fast and switch them to cooked pasta.
Tip: If you dye pasta with rubbing alcohol, the color is brighter and it dries in about 20 minutes, but that pasta is no longer taste-safe. Write “play only” on the storage jar in marker. Dry pasta keeps for a year or more in an airtight container.
4. Oats

Oats are the one filler I hand to a baby without thinking twice. Soft, dusty, taste-safe, and cheap enough that I do not care if half of it ends up on the floor.
They are also the best base for hiding small toys, because oats are opaque and clumpy in a way rice is not. A 1 year old will dig out the same plastic cow eleven times and be pleased every single time.
The honest downside is dust. Oats look tidier than they are, and they leave a fine film on the floor plus a faint cereal-aisle smell that hangs around. Skip them if anyone in the house has asthma.
- Best for: 6 months (once sitting steadily) to 3 years. Adapt down by putting a handful in a shallow tray on the high chair and accepting that a baby this age will mostly eat it. Adapt up by adding a splash of water so a 4 year old can make oat dough and press it into molds.
- Time: 2 minutes prep, 15 minutes play, 8 minutes cleanup including a floor wipe.
- Supplies: A large canister of store-brand rolled oats, a small metal scoop, a few animal figures.
- Free swap: The oatmeal nobody in your house is eating. That is what mine came from.
- Mess and supervision: 4 out of 5, all of it dust. Arm’s reach for under 2, since a mouthful of dry oats makes babies gag. Keep a sippy cup of water next to you.
- First-time snag: Wet oats. One damp hand and the whole bin starts turning to paste, and it will smell sour within a day or two. Once oats get wet, they are done, toss them.
Use certified gluten-free oats if celiac is a factor in your family, since standard oats are often processed on wheat equipment.
5. Sand
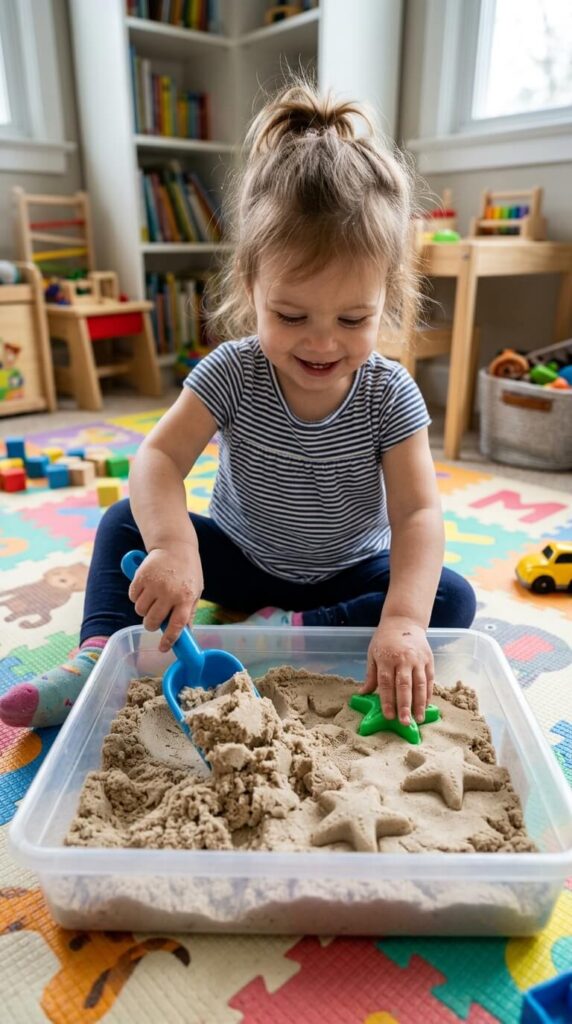
Sand is two completely different activities depending on which kind you buy. Loose play sand digs and pours and gets absolutely everywhere. Kinetic sand holds its shape, packs into molds, and stays put much better.
For indoor play I use kinetic sand (Spin Master’s Kinetic Sand is the one on every shelf) because it contains itself. The trade-off is that it crumbles into little pills that grind into carpet, it does not vacuum well at all, and it picks up hair and crumbs it never lets go of. Mine lasted about four months before it looked grey.
If you go with loose sand, buy sand labeled for children and silica-free (Sandtastik is the one I have used) rather than a hardware store bag of paver sand. The dust is the reason.
- Best for: 18 months and up with arm’s reach. Kinetic sand really shines at 3 and up, when molds and shapes start to matter. Adapt up by burying “fossils” and handing over a paintbrush instead of a shovel, which stretches five minutes of digging into twenty.
- Time: 5 minutes prep, 25 minutes play, 10 minutes cleanup.
- Supplies: A 10 lb bag of kids’ play sand or a 2 lb tub of kinetic sand, plus molds and a shovel.
- Free swap: A dish pan of dirt from your own yard, outside. Kids do not love it any less.
- Mess and supervision: 5 out of 5 for loose sand indoors, 3 for kinetic. Hard floors only, or take it outside, and plan on changing clothes. Sand that gets into a diaper is a miserable afternoon.
- First-time snag: Throwing, and sand in eyes. Sand also never fully comes out of a rug, so do not do this on carpet even once.
Tip: When kinetic sand dries out and stops clumping, add a few drops of water and knead it. It comes back.
6. Pebbles or Rocks
Rocks are the easiest cleanup on this whole list. You pick them up with your hands in about ninety seconds and you are done. No sweeping, no dust, nothing hiding in the rug.
They are also the heaviest, which cuts both ways. The weight is what makes them satisfying for kids who like to lift, haul and dump, especially paired with a toy digger and a dump truck. It is also what chips a tile, dents drywall and hurts a bare foot.
Buy polished river pebbles from the vase filler aisle at Dollar Tree, or a bag of river rock from a garden center. Rinse and dry garden rock first, it comes coated in dust. Choose pieces clearly bigger than an inch and skip anything gravel-sized.
- Best for: 3 years and up, and honestly not at all if your kid is in a throwing phase. Adapt up with stacking challenges, balance towers, or rock painting for a 5 year old.
- Time: 5 minutes prep, 20 minutes play, 3 minutes cleanup.
- Supplies: Two or three bags of polished pebbles, plus construction vehicles.
- Free swap: Rocks collected on a walk, scrubbed with a dish brush and dried.
- Mess and supervision: 1 out of 5 for mess, but the highest damage risk here. Same room, arm’s reach if a smaller sibling is nearby.
- First-time snag: The noise and the impact. Lay a hand towel in the bottom of the bin, which muffles the clatter and saves your tile the first time the bin gets tipped.
Tip: In summer, put the rocks in the freezer for twenty minutes before you set out the bin. Cold, heavy and smooth is a whole different experience, and it costs nothing.
7. Pinecones or Acorns

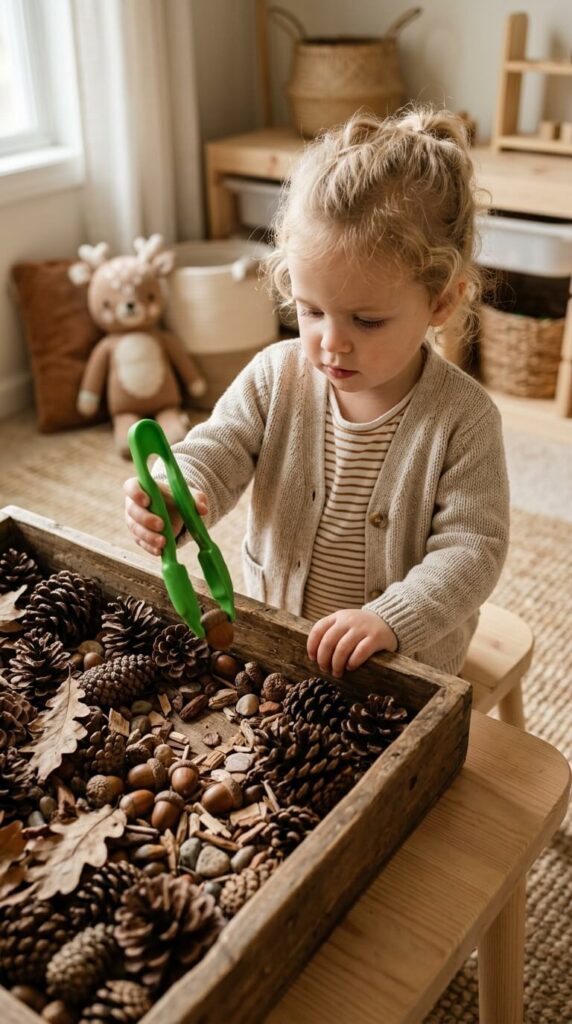
Free, seasonal and the only filler that comes with a walk attached. Where I live, pinecones and acorns are all over the ground from September through November, and my kids treat collecting them as the actual activity. The bin is just where they get sorted afterward.
Do not skip this step: bake foraged pinecones at 200 degrees on a foil-lined sheet pan for about 30 minutes. Foil, because the sap drips and bakes onto the pan. If you skip the oven, you will find small insects on your windowsill two days later. That is not a hypothetical, that is how I learned to bake them.
Acorns often have weevil larvae inside, so bake or freeze those too, and expect a few to have tiny holes.
- Best for: 2 years and up with arm’s reach, since acorns are exactly choking size. It gets much better at 4 and up, when they can do the collecting and sorting themselves.
- Time: 30 minute walk, 30 minute bake, 20 minutes play, 5 minutes cleanup.
- Supplies: Nothing. Add tongs, a basket and an egg carton for sorting.
- Free swap: The entire activity is the free swap.
- Mess and supervision: 2 out of 5, mostly little bits of pinecone scale and a fine dusty debris. Same room.
- First-time snag: Sap on hands and splinters from the scales. A little cooking oil rubbed on their palms takes sap right off, better than soap.
Worth knowing before you buy the craft store version: most bagged pinecones are cinnamon-scented, sometimes strongly. For a texture-sensitive kid that scent is often the deal breaker, not the pinecone.
8. Dried Corn Kernels
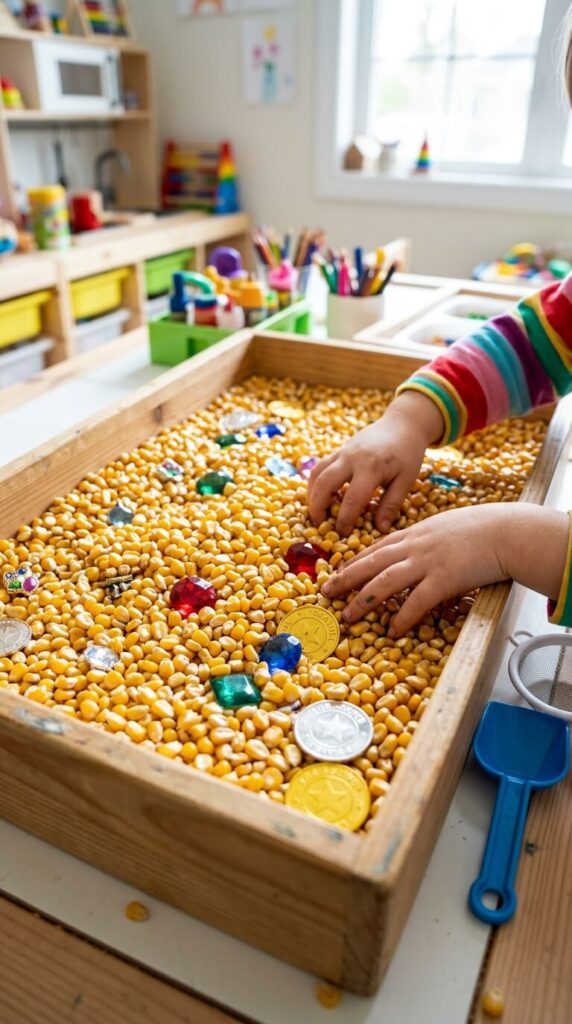
The cheapest filler per pound by a wide margin. A 50 lb bag of feed store deer corn runs about ten dollars, which is absurd value if you want to fill a whole sensory table.
For indoor bins with young kids I use food-grade popcorn kernels instead, a couple of dollars for a two pound bag. Bulk feed corn is dusty and sometimes has debris in it, so I keep that one outside and sift it first.
The sound is the draw. Corn rattles and crunches in a way rice never does, and it does not create dust the way oats do.
- Best for: 3.5 years and up. Adapt up by hiding magnetic letters, adding a flour sifter, or turning it into a grain elevator with a toy tractor and a funnel.
- Time: 3 minutes prep, 20 minutes play, 5 minutes cleanup.
- Supplies: A bag of popcorn kernels and a couple of scoops.
- Free swap: The popcorn already in your cupboard.
- Mess and supervision: 2 out of 5 for volume, but corn bounces out of the bin more than any other filler and rolls straight under the fridge. High-sided bin, sheet underneath. Same room.
- First-time snag: Corn is the number one thing kids put up their noses, and it swells once it is in there. It is also hard enough to crack a tooth if bitten. Both are reasons I hold this one until closer to 4.
Tip: Before you store any dry good long term, freeze it for a few days. It kills pantry moth eggs, which is how a forgotten bag of rice in the craft closet turns into moths in your kitchen.
9. Cotton Balls or Pom-Poms

This is my go-to when I need quiet. No clatter, no dust, nothing to sweep, and it works on carpet, which almost nothing else here does.
Pom-poms are also the best filler for tong work. Give a 3 year old a pair of cheap plastic tongs and a muffin tin and you have a color sorting activity that hits the same muscles as holding a pencil.
Use jumbo poms, 1.5 inches or bigger, for anyone under 3. The little half-inch ones are choking and nose-sized, and cheap dyed poms bleed color onto damp hands.
- Best for: 18 months and up with jumbo poms and arm’s reach. Tongs start working around 3. Adapt up by adding a color-matching chart or a timed sorting race.
- Time: 2 minutes prep, 15 minutes play, 3 minutes cleanup.
- Supplies: A couple of bags of craft pom-poms from Dollar Tree, plastic tongs, an ice cube tray or muffin tin.
- Free swap: An old fleece blanket cut into squares, or a basket of rolled-up mismatched socks.
- Mess and supervision: 1 out of 5. Static is the only real issue, they cling to clothes and vanish under the couch. Same room.
- First-time snag: They look exactly like marshmallows. A cotton ball in a wet mouth turns into a wad in seconds, which is a real gagging risk, so for under 3 I use pom-poms rather than cotton balls.
Practical note: Keep the dog out of the room for this one. Cotton balls and pom-poms are a known cause of intestinal blockages in dogs, and dogs will absolutely eat them off the floor. This is the filler most likely to end in a vet bill rather than a pediatrician call.
10. Felt Scraps

Felt is the apartment filler. It makes no noise at all, there is nothing to sweep, and nobody downstairs knows you are doing anything. If you have ever set up rice at 7pm and immediately regretted it, this is the alternative.
The catch is that felt on its own is less interesting than grains. It needs a job attached to it: color matching, shape sorting, stuffing pieces into a container, layering them into a “bed” for a stuffed animal.
Here is the trick that made it stick in our house. Dampen the felt and it clings to tile and to a glass shower door, so a bin of felt shapes plus a small spray bottle in a dry bathtub buys you a solid twenty minutes.
- Best for: 12 months and up, and one of the safest fillers here. Cut pieces bigger than two inches for under 3. Adapt up by cutting letters, numbers or matching pairs of shapes.
- Time: 10 minutes cutting (your job), 15 minutes play, 2 minutes cleanup.
- Supplies: Craft felt sheets, usually under a dollar each at Walmart or Michaels, or a multipack from the dollar store. Free swap: An outgrown fleece jacket or a worn flannel sheet cut into squares.
- Mess and supervision: 1 out of 5. Same room.
- First-time snag: Boredom, not mess. If you hand over a bin of plain squares with no tools and no task, you will get about four minutes.
Scissors stay with you on this one. You cut, they sort.
11. Feathers
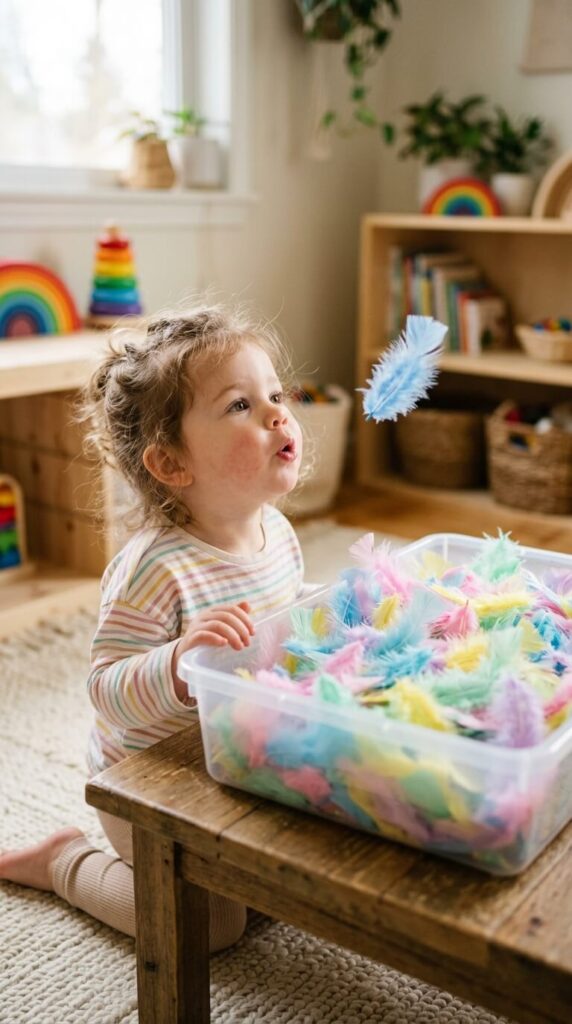
Feathers are strange and light and completely different from everything else on this list. Kids blow them across the bin, run them up their own arms, and watch them drift down. It is a real physics lesson with no setup.
Buy craft feathers labeled sanitized. Do not use feathers your kid finds outside. Wild feathers can carry mites and bacteria, and in the US it is actually illegal to keep feathers from most native migratory birds under the Migratory Bird Treaty Act, which surprises almost everyone.
Pick soft marabou over stiff quilled feathers, or trim the hard tips. A stiff quill at toddler eye height is a poke waiting to happen.
- Best for: 2 years and up. Expect a short session, this is a ten minute activity, not a thirty minute one. Adapt up with blowing races using a straw, or a hand fan to make them fly.
- Time: 2 minutes prep, 10 minutes play, 5 minutes cleanup.
- Supplies: One bag of craft feathers, a few dollars at any craft store, plus a paper plate as a fan.
- Free swap: Strips of tissue paper, which behave almost the same way in the air.
- Mess and supervision: 2 out of 5, but they escape. Feathers end up in the hallway, in the heating vent, and in the dog’s mouth. Arm’s reach.
- First-time snag: Feathers go in mouths, and the fluff makes kids gag and cough. Skip this one entirely for a child with asthma or a feather or down sensitivity, and know that dyed feathers rub color onto damp hands.
12. Water Beads (Non-Toxic)
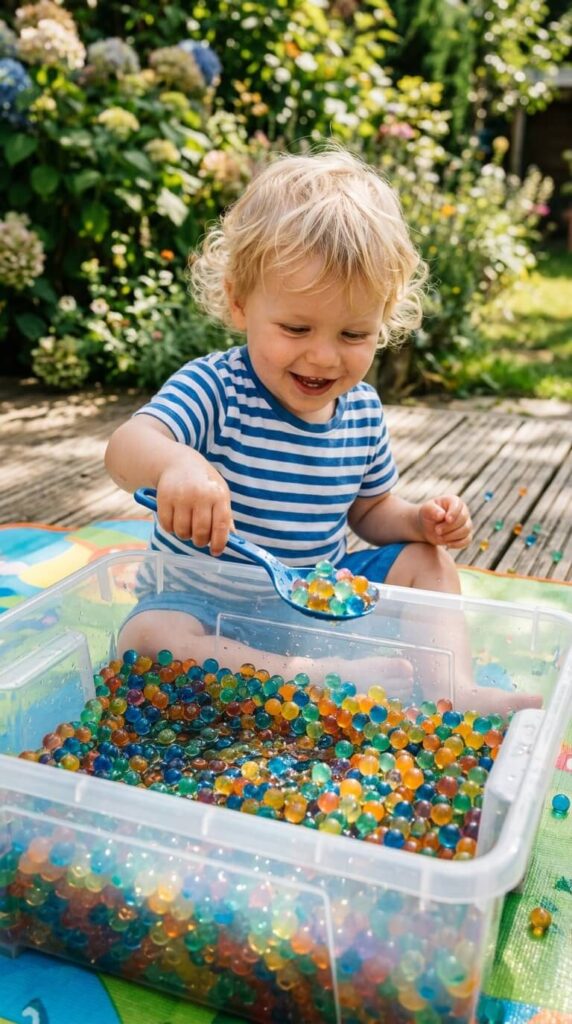
Water beads are the most fun and the most dangerous thing on this list, and I am not going to soften that to keep the tone light. The appeal is real. Tiny hard pellets soak up water overnight and turn into slippery, bouncy, jewel-like spheres that feel like nothing else, and kids are transfixed by them.
The problem is what happens if one is swallowed. Water beads are made from a superabsorbent polymer that keeps expanding as it takes on fluid, so a bead that goes down small can grow inside the body and cause a bowel obstruction. They also do not show up on a standard X-ray, which means the cause can be missed while a child gets sicker. The US Consumer Product Safety Commission has warned about this risk, and in 2023 a Chuckle & Roar water beads activity kit was recalled after reports of injury, including the death of an infant. Beads pushed into an ear or nose swell in place too.
So here is my actual rule. Water beads come out at 5 and up, with me sitting right there the whole time, and they do not come out at all if there is a crawling baby or a mouthing toddler anywhere in the house. Not in another room, not napping. Beads roll, they hide, and they dry back down into little hard pellets that live in carpet until someone finds one.
- Best for: 5 years and up only. If your child is younger and you want the same squishy, slippery feel, use cooked spaghetti or a bin of plain water with ice and cups instead.
- Time: 4 to 8 hours to hydrate, so start them the night before. 20 minutes play, 10 minutes cleanup including a count.
- Supplies: One packet of non-toxic beads makes a shocking amount, a large bowl for hydrating, cups and a slotted spoon.
- Free swap: Cooked and cooled pasta, which gives you a similar slippery texture with none of the risk.
- Mess and supervision: 3 out of 5, and arm’s reach for the entire session. Cheap dyed beads can stain grout and light carpet, and a loose bead on a hard floor is slick enough to put an adult on the ground.
- First-time snag: People throw them out down the sink and clog the drain. Bag them and bin them. Kept in water in the fridge they last about a week before they go slimy.
13. Shredded Paper
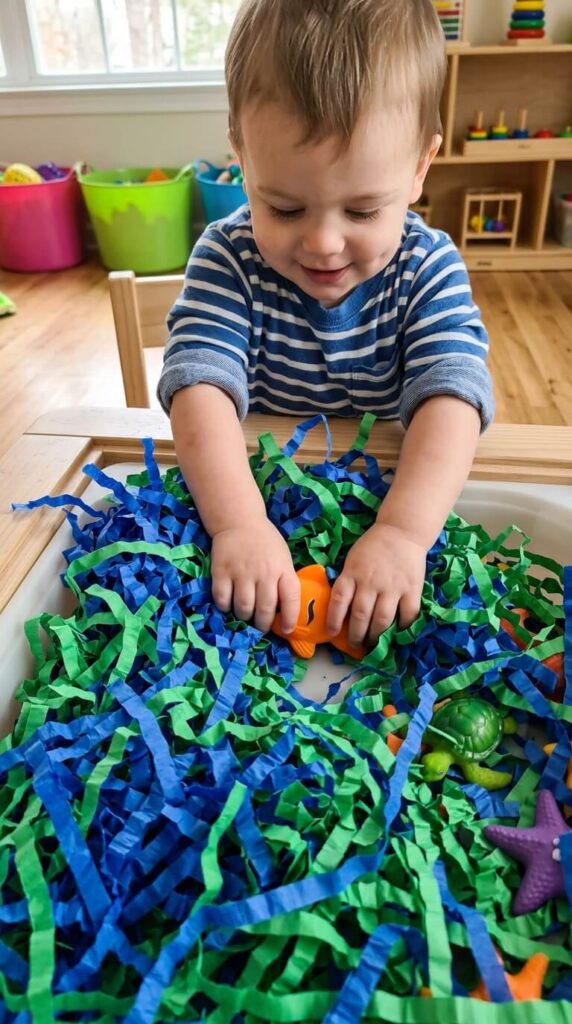
Free, endless, and louder than you expect. Shredded paper gives you volume, which is the one thing dry goods cannot do cheaply. A bag of it fluffs up into something close to a small ball pit and toddlers throw themselves into it.
It is also the best filler for hiding toys, because kids have to dig with both arms to find anything.
Two things to leave out: glossy magazine inserts, which transfer ink onto damp hands, and till receipts. Thermal receipt paper is coated with BPA or BPS, which is not something I want a toddler chewing. Check office shredder output for staples while you are at it.
- Best for: 2.5 years and up. Adapt up by making it a recycling center or a bird nest, or by spraying strips with washable liquid watercolor for a themed bin (green for jungle, blue for ocean).
- Time: 5 minutes prep, 25 minutes play, 8 minutes cleanup.
- Supplies: Your own shredder or ten minutes of tearing up junk mail. The bought version is crinkle-cut gift basket filler, a dollar or two at Dollar Tree, which is stiffer and holds its shape better.
- Free swap: This whole filler is the free swap.
- Mess and supervision: 4 out of 5, mostly volume and static. It clings to fleece pajamas and gets carried into every other room. Same room.
- First-time snag: It doubles in size once it is fluffed, so a shoebox bin turns into a floor covering. Use the biggest container you own. Also, long strips wrap around a vacuum brush roll, so pick the big pieces up by hand first.
14. Buttons or Beads (With Supervision)

For a 4 or 5 year old, this is the filler that holds attention longest. Not because it is exciting, but because it gives them a job. Sorting by color, then by size, then by how many holes each button has, then threading them into a pattern.
The one that changed things for us was pipe cleaners instead of string. A pipe cleaner is stiff enough that a 4 year old can actually thread beads onto it without the string collapsing every time, and the frustration drops away.
Count them out before you start. I do forty beads, and I count them back in. If I come up short, I know to check the floor before the baby is up from her nap.
- Best for: 4 years and up, and not at all if there is a mouthing sibling in the house. Adapt up with pattern cards, bracelet making, or a “sort by two attributes at once” challenge.
- Time: 3 minutes prep, 30 minutes play, 8 minutes cleanup including the count.
- Supplies: A bag of large threading beads or a craft store button assortment, pipe cleaners, and a muffin tin.
- Free swap: Buttons cut off outgrown clothes, or drinking straws snipped into one inch pieces, which thread beautifully.
- Mess and supervision: 1 out of 5 for mess, but this is the worst filler for lost pieces. Beads roll into floor vents, so lay a towel over the vent before you start. Arm’s reach.
- First-time snag: Inherited craft jars. If a button or bead jar came from a grandparent or a thrift store, tip it out and check it first for pins, sharp metal shanks, stray coin cell batteries and small strong magnets. Swallowed button batteries and magnets are life-threatening emergencies, and they hide in mixed craft jars more often than you would think.
15. Ice Cubes or Snow
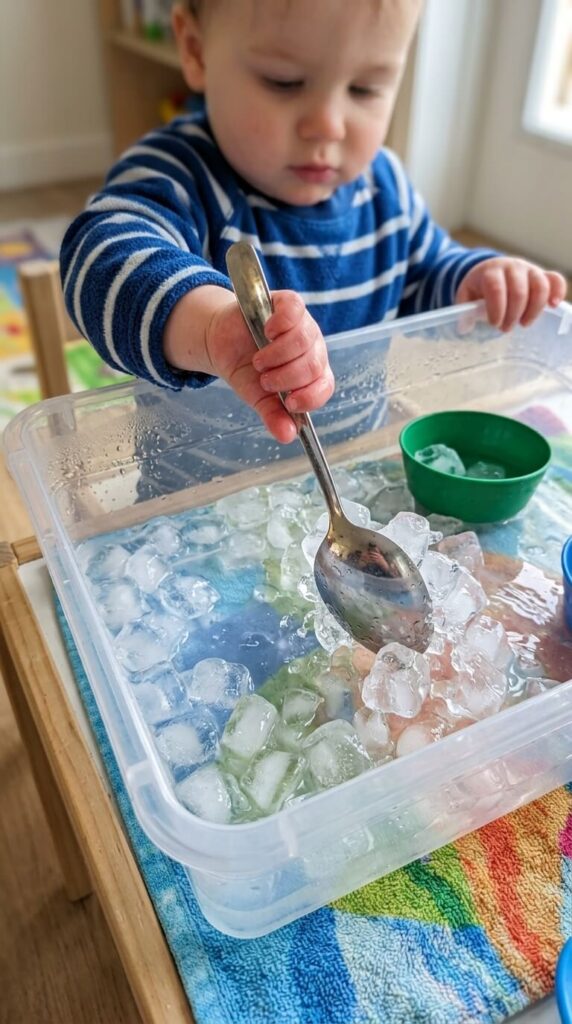
The summer saver. On a day too hot to be outside past 10am, a bin of ice buys real time, and the melting is half the entertainment.
Freeze water in a silicone muffin mold with a small plastic animal inside each one, then hand over a squeeze bottle of warm water, a little bowl of salt, and a paintbrush. The rescue mission runs itself.
If you want a science angle without making it a lesson, set out three cups: one with salt, one with warm water, one with nothing. The salt one wins and kids notice on their own.
- Best for: 18 months and up with arm’s reach, best at 3 and up. Adapt down with bigger cubes and warm water only. Adapt up by asking them to predict which will melt first and timing it.
- Time: Overnight to freeze, 15 minutes play, 5 minutes cleanup with a towel.
- Supplies: A silicone mold, small toys, a squeeze bottle, salt.
- Free swap: The ice cube tray already in your freezer.
- Mess and supervision: 3 out of 5 and wet rather than crumbly. Towel underneath, clothes you can change, and hard floors only. Water on tile is a slip risk.
- First-time snag: Cold hands hurt fast and toddlers will not tell you until they are crying. Keep bare-hand contact to a few minutes at a time and have a warm dry towel next to the bin.
For color, use washable liquid watercolor or diluted Crayola Washable Kids’ Paint rather than gel food coloring. Gel colors stain little hands for a full day and tint light grout. If you are using real snow, take it from an untouched patch, not from anywhere plowed, salted, or walked by animals. And never substitute dry ice for regular ice, in any bin, at any age.
3 More Sensory Bin Fillers Worth Trying
Fifteen is the classic list, but these three solve problems the others do not. One is taste-safe and wet, one is free and smells like a coffee shop, and one is for babies who are still going to eat whatever you put in front of them.
16. Cooked Spaghetti
This is the water bead alternative for families with young kids. Slippery, squishy, weirdly satisfying, and taste-safe.
Cook a box, rinse it under cold water, then toss it with a teaspoon of oil so it does not set into one solid brick. A few drops of washable liquid watercolor turns it neon.
- Best for: 12 months and up. Cut strands into two inch pieces for under 2, because long wet strands and a young toddler is a gagging setup.
- Time: 15 minutes to cook and cool, 20 minutes play, 10 minutes cleanup.
- Mess and supervision: 4 out of 5 and thoroughly wet. Dry bathtub, tile floor, or outside, and strip them down to a diaper. Arm’s reach under 2.
- First-time snag: It goes sour by the next day, so treat it as a same-day activity. And pick dropped pasta off the floor while it is still wet, because it dries onto hardwood like glue.
17. Dried Coffee Grounds
Free, smells wonderful, and it looks exactly like dirt, which makes it the best base for a dinosaur dig or a construction site.
Spread used grounds on a sheet pan and let them dry overnight. Skip that step and they will grow mold in about two days.
- Best for: 3 years and up, and not for a child who still mouths, since a mouthful of coffee grounds is a real caffeine dose for a small body.
- Time: Overnight drying, 20 minutes play, 8 minutes cleanup.
- Mess and supervision: 3 out of 5. Coffee stains light carpet, grout and clothing, so hard floors or outdoors only. Same room.
- First-time snag: Dark grounds hide toys so well that kids give up. Use bright plastic figures, not brown dinosaurs.
18. Cheerios or Puffed Cereal
The baby bin, and the only one I set up without thinking about mouths at all. For a 6 to 18 month old who is sitting steadily, a shallow tray of dry cereal is texture play, pincer grasp practice and a snack in one.
Only use cereal your baby already eats safely. Never build a “taste-safe” bin out of whole nuts, popcorn, hard candy or whole grapes, all of which are serious choking hazards for this age no matter how much supervision you are giving.
- Best for: 6 to 18 months. Adapt up by handing a 2 year old a spoon and two bowls to transfer between.
- Time: 1 minute prep, 10 minutes play, 3 minutes cleanup.
- Mess and supervision: 2 out of 5. It crushes to powder underfoot. Arm’s reach.
- First-time snag: For most babies this is a snack, not an activity, and you will get ten minutes at best. That is still sensory play. Do not fight it.
How to Elevate the Play
The filler is the cheap part. What actually decides whether you get eight minutes or forty is everything around it.
Add Tools and Utensils
A new tool in the same old rice buys you more time than a whole new filler does. That is the single most useful thing I have learned about sensory bins, and it saves a lot of money.
Raid the kitchen drawer instead of buying a set. A turkey baster, a whisk, an ice cube tray, silicone muffin liners, measuring spoons and a funnel all change how the material moves. The best one in our house is an old parmesan shaker, because sifting rice through the holes never gets old.
Always put in two containers, not one. The whole instinct at this age is transfer, and a single cup has nowhere to go.
Where people overdo it: more tools is not better. Three or four is the sweet spot. Hand over ten and my kids dump all of them in and play with none of them.
Add a child-size dustpan and brush from the dollar store to the tool set. It gets used during play and it makes cleanup part of the activity instead of the thing that ends it.
Rotate Fillers Regularly
Keep one filler out and the rest bagged up. Two gallon zip bags or an old cereal keeper, labeled in marker, stacked on a high shelf. Three weeks away is enough to make plain rice feel new again. You do not need to buy anything. Freeze any dry good for a few days before it goes into long term storage. It kills pantry moth eggs, and it is the difference between a reusable bin and moths in your kitchen cupboards in February.
One correction to the usual advice: do not rotate too fast. The second and third time my kids play with the same bin, they stay longer than the first time, because they are done investigating and have started actually playing. Novelty gets them to the table. Familiarity is what keeps them there. Swap the filler when interest drops off, not on a schedule.
Anything that got damp goes in the trash, not back in the bag. Damp grains mold, and dyed rice fades if you store it somewhere sunny.
Mix Materials Thoughtfully
Contrast is what makes a mix interesting. Rice with pom-poms, oats with felt shapes, corn with a few smooth pebbles, or a layer of beans over a layer of rice so there is something to dig through.
Two hard rules. Never mix wet with dry, because one wet spoon turns an entire bin of rice into clumps. And never mix sand into anything, because sand contaminates everything it touches and you will not get it out.
The trade-off nobody mentions: once you mix, it is mixed forever. Nobody is separating five pounds of rice from a bag of split peas. Only combine fillers you are happy to store together permanently.
Introduce Themes
A theme gives the play a story. Farm, construction site, ocean, dinosaur dig, bakery, car wash. Add a few figures, a scoop, and let them run with it.
Themes really land from about 3 up. Under 2, they want to pour, full stop. If you spend an hour building an elaborate small world for a 20 month old, it will be flattened in ninety seconds and you will be the only one disappointed.
For figures, Dollar Tree animal tubes are fine, and Safari Ltd TOOBs are worth the ten or twelve dollars because they last for years. Otherwise raid the existing toy bin. A few real objects like shells, twigs or a pinecone beat buying more plastic.
Then let them narrate it wrong. The dinosaurs can live in the ocean. Resisting the urge to correct their play is one of the quiet ways this activity builds a kid’s confidence.
Tips for a Smooth Experience
Most parents who give up on sensory bins give up because of the cleanup, not the kid. These are the fixes that actually stuck for us.
- Pick fillers by age and stage. Taste-safe or jumbo for anyone under 3 or anyone still mouthing. Save rice, beads and small beans for after that phase ends, and use the toilet paper tube test if you are unsure.
- Use a defined container. A clear under-bed storage box, about ten dollars at Target or Walmart, beats a dedicated sensory table for most families. The walls are higher, it has a lid, and it slides under the couch when you are done. For a first try, a Dollar Tree dish pan is plenty. If you know you are in this for the long haul, the IKEA FLISAT table with TROFAST bins is the setup most people land on eventually.
- Set up on a mat. A flat sheet, an old shower curtain or a splat mat, then gather the corners and funnel everything back in. Two upgrades that work better than any mat: put the bin inside an empty kiddie pool, or do dry fillers in a dry bathtub, which has walls on all four sides. Scoop the tub out with a dustpan afterward and do not rinse anything down the drain.
- Keep tools nearby. If the scoops are not within reach, your kid goes looking, and what they find is the good kitchen scissors.
- Store for reuse. Labeled bags, lid on, high shelf, out of reach the moment play ends. Freeze dry goods for a few days first.
- Model at first, then stop talking. Sit down, pour from one cup to another twice, and then go quiet. Narrating and suggesting is the fastest way to end the play. Silence is what lets them take it over.
- End it while they still like it. Pack up at the first dump attempt, not after the meltdown. You want them asking for it again tomorrow.
- Let them sweep. From about 2.5, kids can handle a small dustpan and brush, and cleanup stops being your job alone.
Practical note: Your kid will dump the bin. It is not defiance, it is where the pouring instinct naturally ends up. Fighting it turns a nice activity into an argument. Put a second empty bin next to the first and make that the legal dump target. You buy another ten minutes and you get a reason for them to move it all back.
Common Mistakes First-Time Sensory Bin Parents Make
These are the specific things I got wrong, and the ones I watch other parents get wrong at playdates.
Filling the bin too deep. Two inches is plenty. A brimming bin gets dumped almost immediately, and you have used four times the rice for the same activity.
Setting up on carpet for the first try. Do the first session on a hard floor you can sweep, once you know how your kid handles it. Rice on a rug is fine. Sand, kinetic sand, coffee grounds and lentils on a rug are not.
Expecting it to buy you a shower. It buys you fifteen minutes at the same table, with your coffee, in the same room. It is not childcare, and the second you leave is the second the bin ends up on the floor.
Dyeing rice the same afternoon you want to play. Vinegar-dyed rice needs about an hour to dry and it clumps if you rush it. Dye it the night before.
Buying a kit before testing the texture. Plenty of kids hate dry, gritty textures and love wet ones, or the reverse. Spend three dollars on a bag of rice before you spend forty on a themed set.
Leaving the bin out after play. This is the one that actually matters. An unattended bin of beads or dry corn gets found by the baby, the dog, or a determined 2 year old at 6am.
Cleaning it all up yourself. Cleanup is part of the activity and kids are surprisingly into it if they get their own dustpan.
Pushing a kid’s hands into a texture they hate. You will get one bad association and lose the activity for months. Hand them tongs and let them keep their hands clean.
Frequently Asked Questions
At what age should I introduce sensory bins to my child?Around 6 to 8 months, once your baby can sit steadily on their own, using taste-safe fillers only such as rolled oats, puffed cereal or cooked pasta. Expect eating rather than exploring at that age, and hold off on rice, dry beans and pebbles until the mouthing phase ends, usually somewhere between 2.5 and 3 years.
How long should a toddler play with a sensory bin?Realistically, 10 to 20 minutes for a toddler and 30 minutes or more for a 4 or 5 year old who has been given a task like sorting or threading. You will see longer sessions the second and third time you offer the same bin, and handing over one new tool mid-session is the most reliable way to restart interest.
Are sensory bins messy? How do I control it?Yes, but the mess is predictable, which means you can plan for it. A flat sheet under the bin, an under-bed box with high walls, and a hard floor handles nearly all of it, and dry fillers like beans or pasta sweep up in about three minutes.
What is the absolute best sensory filler for a beginner?Plain dry white rice. It is cheap, it sweeps up, it makes a satisfying sound, it works with any scoop you already own, and if your kid turns out to hate it you are out three dollars.
Is a sensory bin safe for a 3 year old?For most 3 year olds, yes, as long as mouthing is behind them and the filler is either taste-safe or too big to pass through a toilet paper tube. Skip water beads entirely at this age, and stay in arm’s reach with anything small and hard like corn kernels, beads or acorns.
How do I get rice, sand, or water beads out of the carpet?Rice, beans and pasta come up with a vacuum hose attachment, not the rotating brush head, which flings them further into the pile. Sand and kinetic sand never come fully out of carpet, which is why I keep both on hard floors only. Pick water beads up by hand while they are still hydrated, because once they dry they shrink into hard pellets that hide in the fibers and swell up again later.
Read Next
If the ice bin was a hit, the natural next step is taste-safe sensory play ideas for babies under 1, which covers the same skills with fillers you do not have to police.
And for the afternoons when nobody can go outside and the bins have lost their shine, indoor rainy day activities for toddlers is the list I keep coming back to.
Bring Sensory Play to Life Today
You do not need a themed setup or a kit. One container, one filler from your pantry, two cups, and a sheet on the floor is the whole thing.
If you only do one thing this week, do this: put two inches of dry rice in an under-bed box, set it on a flat sheet on a hard floor, and hand over a measuring cup and an empty yogurt tub. Sit down with your coffee and say nothing for the first five minutes.
Then put it away while they still want more, and you will have something to reach for on the next rainy Saturday. Which one are you starting with? If you try a filler that goes badly, I want to hear about that too. That is usually the more useful story.