
The brain development activities that actually work for an 11-month-old are the ones that practise three things: cause and effect, in-and-out, and pulling up to stand. That means water play with cups and sponges, nesting cups, knobbed puzzles, taste-safe paint, and floor play you narrate out loud. Keep sessions to 5 to 15 minutes, use taste-safe materials only because everything still goes in the mouth, and put away anything that fits through a toilet paper tube. Dried beans, rice, pom-poms and small plastic pieces can wait until closer to age 3.
It is 5:40pm and they have already emptied the wipesDinner is not started. The baby is cruising the coffee table with one hand, screaming the second I stand up, and they have pulled every wipe out of the packet and got two of them in their mouth. I offered the same rattle for the third time today and they pushed it away like I had insulted them.
So I put a baking tray with an inch of warm water on two towels on the kitchen floor, dropped in three clean sponges, and sat down beside it.
Eleven minutes. At 5:40pm, eleven minutes is a lot.
That is the honest standard for this age. Not an hour of enrichment. Eight to fifteen minutes of something new enough to be interesting, at floor level, with you close enough to touch them.
What Brain Development Actually Looks Like At 11 Months
Your baby is doing three things right now that everything on this list is built around.
They are testing cause and effect. Drop the cup, you pick it up, drop it again. That is not defiance, it is the experiment, and they need to run it about forty times.
They are obsessed with in and out. Taking things out of containers comes first and comes easily. Putting things in comes next, and the CDC lists “puts something in a container” as a 12-month milestone, so at 11 months you are watching it arrive.
And they are pulling up on everything, which means anything at standing height gets ten times more attention than the same toy on the floor.
Object permanence is landing too. If they look for a toy after you hide it under a towel, that is the whole reason peek-a-boo suddenly gets funnier this month rather than more boring.
Practical note: at 11 months, repetition is the learning. If your baby does the same thing eleven times in a row, the activity is working. If they abandon it in ninety seconds, it usually means the challenge was too far ahead of them, not that they lack focus.
Two things worth knowing about how much movement they need. WHO guidance for babies under one year is several bouts of interactive floor-based play a day, at least 30 minutes of tummy time spread across waking hours, and no more than an hour at a stretch strapped into a highchair, stroller or carrier. That last one is the part most of us get wrong on a busy day.
What You Actually Need (And What To Skip)
Ten of the nineteen ideas below started life as “buy this wooden toy.” You do not need to. Here is what earns its money and what your kitchen already covers.
Already in your house, and genuinely the best of it
- Measuring cups, a muffin tin, a colander, a whisk, metal and wooden spoons
- A baking tray or washing-up bowl (this is your water table)
- Dish towels, washcloths, two old bath towels
- Empty yogurt pots, a wipes tub, cardboard boxes, kitchen roll tubes
- Silicone cupcake liners and a silicone basting brush
Worth buying, usually under $15 each
- Nesting cups. Fisher-Price Stack and Roll Cups are the classic, and they last from 6 months to preschool.
- A ring stacker. The Fisher-Price Rock-a-Stack is the one most of us grew up with.
- A chunky knobbed wooden puzzle with 3 or 4 pieces. Melissa and Doug make the common ones.
- A bag of Mega Bloks First Builders. These are rated 12 months and up, which matters (more on that at number 3).
- A weighted wooden bead maze. Nothing detaches, which makes it the safest toy on this whole list.
Dollar store run, about $6 total
Dollar Tree covers a surprising amount of this: plastic bowls and cups, dish sponges, washcloths, a baking pan, silicone basting brushes, and the single best purchase on the list, a clear plastic shower curtain liner for a dollar or two. That is your splat mat. Cheaper than any craft-store mat and big enough to actually catch the mess.
Skip at 11 months
Alphabet boards, shape sorters with small pieces, anything with a screen, and wall-mounted busy boards unless you can screw into studs. None of them are wrong, they are just early, and three of them are choking hazards depending on the set.
I am writing this in September, so the turkey craft at number 2 is about to be seasonal. Everything else here works any month of the year.
Safety Rules That Actually Matter For 11-month-Olds
This is not disclaimer padding. An 11-month-old mouths everything, can pull up on anything, and has an airway roughly the width of a drinking straw. Nine rules, and the first one does most of the work.
- The toilet paper tube test. If an object fits through a toilet paper tube, it is a choking risk and it goes away until age 3. The official version is stricter: the CPSC small parts cylinder is 1.25 inches wide and up to 2.25 inches deep, and toys for under-3s are not allowed to have parts that fit inside it. A cardboard tube is about 1.75 inches, so it is a rough kitchen screen, not the real test. Use it anyway, it catches most things.
- Dried beans, split peas, lentils, rice and popcorn kernels are not baby sensory fillers. They are choke-sized, they get inhaled, and dried legumes swell once they are damp, which makes getting one back out of a nose or an ear far harder than it sounds. Taste-safe fillers only until your child stops putting handfuls in their mouth, usually closer to 3.
- One inch of water is enough to drown a baby. Stay within arm’s reach for every water activity on this list, sit down on the floor so you cannot drift off, and tip the water out the second you are done. For babies under one, the danger spots are tubs, basins and buckets, not pools.
- Non-toxic does not mean edible. Crayola Washable Finger Paint carries the AP non-toxic seal, which means a taste will not hurt them. It is still not food. If your baby is eating fistfuls rather than tasting, switch to yogurt paint.
- Food-based play only with foods they have already eaten. Smearing a brand new food on their skin muddies the picture badly if a reaction shows up. Introduce foods by eating them, then use them for play.
- Anything they can pull up on has to pass the shove test. Push the top edge hard with one hand. If it rocks, it goes against a wall, gets weighted, or gets screwed into studs. Drywall anchors plus a baby’s full weight is how busy boards come off walls.
- Never pull a baby up by the hands, wrists or forearms, and never swing them by the arms. A sudden pull on a straight arm is the classic cause of nursemaid’s elbow, which is the most common elbow injury in children under five. Offer your fingers and let them do the pulling.
- No baby walkers. The American Academy of Pediatrics has called for a ban on mobile infant walkers, and Canada made selling them illegal back in 2004. A sturdy push toy or a weighted table is fine, a seated walker is not.
- Adult-only steps stay adult-only. Cutting, hot glue, drilling, and anything hot. And two things that need an emergency room rather than a wait-and-see: swallowed button batteries and swallowed magnets.
Pick A Brain Development Activity In 30 Seconds
Scan the middle column first. Some of these need a tweak before they suit an 11-month-old, and I have said so rather than pretending otherwise.
| # | Activity | Works at 11 months? | Total time | Mess | Supervision | Costs money? |
| 1 | Discovery Table Magic | Yes, if it is weighted | 10 to 20 min | None | Stay in the room | $25+, or free swap |
| 2 | Turkey Craft Time | Only without loose pom-poms | 15 to 20 min | Low | Arm’s reach | Nearly free |
| 3 | Building Block Bonanza | Yes with Mega Bloks, no to LEGO | 10 min | None | Stay in the room | $10, or free |
| 4 | Wooden Activity Wall | Only if screwed into studs | 45 min to install | None | Stay in the room | $30+ |
| 5 | Green Pea Sensory Bin | Not as written, swap the filler | 25 min | High | Hands-on | Under $1 |
| 6 | Messy Paint Exploration | Yes, with taste-safe paint | 35 min | Highest here | Hands-on | Pennies |
| 7 | Precision Egg Painting | As grip practice, not precision | 25 min | Medium | Hands-on | Under $5 |
| 8 | Bead Maze Challenge | Yes, the safest pick here | 10 min | None | Check in | $15 |
| 9 | Rainbow Sensory Treasure Hunt | Yes, the towel version | 10 to 15 min | Low | Arm’s reach | Free |
| 10 | Kitchen Sponge Water Play | Yes | 30 min | High, but it is water | Hands-on, arm’s reach | Free |
| 11 | Shape Sorting Learning | Yes with the lid off | 6 min | None | Arm’s reach | Free swap works |
| 12 | Farm Animal Floor Play | Yes, big animals only | 12 min | None | Stay in the room | Free |
| 13 | Science Experiment Fun | Yes, no fizz tablets | 20 min | Medium, water | Hands-on | Free |
| 14 | Learning Through Play | Too early for letters | 6 min | None | Arm’s reach | Free swap works |
| 15 | Stacking and Nesting Fun | Yes, best value on the list | 10 min | None | Check in | $8, or free |
| 16 | Puzzle Problem-Solving | Yes for taking pieces out | 6 min | None | Arm’s reach | $10 |
| 17 | Father-Baby Art Time | Yes | 35 min | High | Hands-on | Pennies |
| 18 | Classic Ring Stacking Play | Yes for pulling rings off | 10 min | None | Check in | $10, or free |
| 19 | Standing Practice with Dad | Yes, and it is the best one here | 5 min bursts | None | Hands-on | Free |
1. Discovery Table Magic
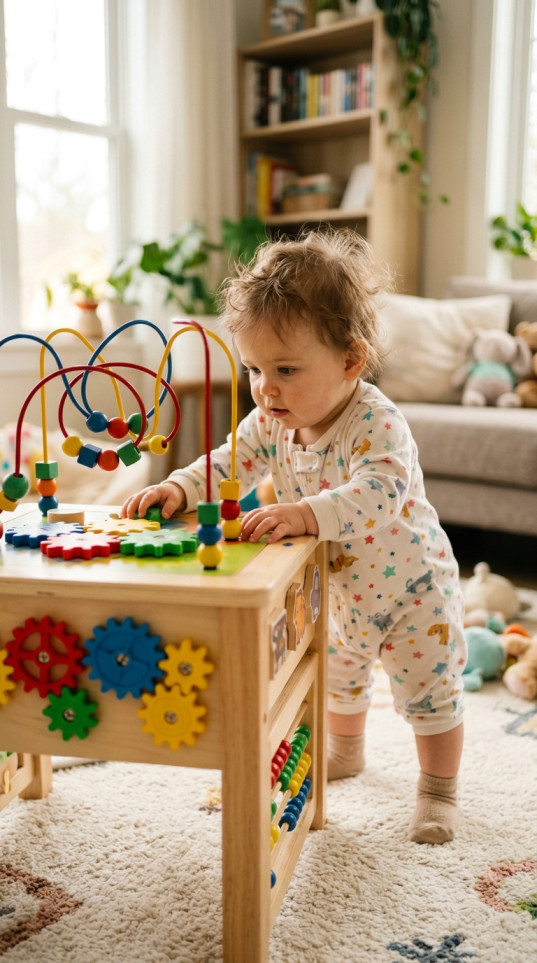
The reason this works at 11 months has nothing to do with the gears. It works because it is at standing height, and standing height is where all their attention is right now.
- Real ages: 9 to 24 months, best from 11 to 18
- Time: 2 minutes to set up, 5 to 15 minutes of play, no cleanup
- Mess: none
- Supervision: stay in the room, and sit behind them the first few times they pull up on it
- You’ll need: a weighted activity table or a bead maze table
- Free swap: tape a bead maze or two plastic lids to a coffee table, or turn a laundry basket upside down and put the toy on top. Cheaper again: a strip of painter’s tape along the sofa with three things stuck to it.
Setup and Materials
- Shove the top edge of the table hard with one hand. If it rocks, put it against a wall or weight the base with a bag of rice inside a shopping bag.
- Put it on a rug, not hardwood.
- Sit on the floor behind them so they have a backstop when they let go.
- Name what they do out loud as they do it. “You turned it.”
Tip: on hardwood my daughter used the table as a walker and shoved it across the kitchen. A rug fixed that in one second and saved her chin.
Neurological and Developmental Benefits
Turning one gear and watching another move is cause and effect in its clearest form, and at this age that is the headline skill. The different grips the table demands (pinch, palm, poke) build hand control without any drilling.
The bigger win is that their hands are busy while their legs do the hard work. Standing play is how they build the leg and core strength walking needs, and they will tolerate far more of it when there is something to fiddle with.
What goes wrong the first time: They use it to cruise, it slides, they land hard. Rug first.
Skip it if: They are not pulling to stand yet. Lay the toy flat on the floor instead, same benefit, no frustration. Also skip if any gear or ball pops off and fits through a toilet paper tube.
2. Turkey Craft Time
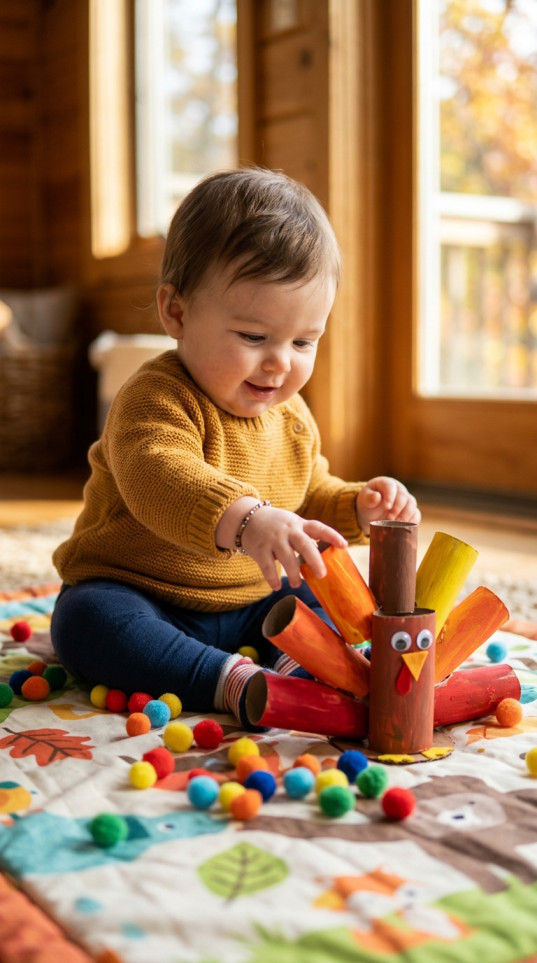
Straight up: at 11 months this is not a craft, it is a texture wall you build for them. And the original version of this setup, loose pom-poms scattered on the floor, is one of the most common choking hazards in a baby’s play space.
- Real ages: 10 months to 2 years for the wall. The loose pom-poms wait until 3.
- Time: 10 minutes of adult prep plus overnight drying, then 5 to 10 minutes of play
- Mess: low, because the messy step is yours and it happens the night before
- Supervision: arm’s reach. Anything taped to a wall gets pulled off and tasted.
- You’ll need: 4 to 6 kitchen roll tubes, red, orange and yellow paint, painter’s tape, a big piece of cardboard, one clear plastic bottle with a lid, hot glue (adult only)
- Free swap: skip the paint and use the plain tubes. Or cut squares from an old orange t-shirt, each one bigger than your hand so it cannot be swallowed.
Setup and Materials
- Paint the tubes and leave them to dry overnight (adult step).
- Cut them into different lengths with the scissors well away from the baby (adult step).
- Tape the tubes to a big sheet of cardboard, then lean the cardboard against a wall. Bottom row about 12 inches off the floor so a cruiser can reach it.
- Drop the pom-poms into the clear bottle and glue the lid shut. Now they can see them, shake them and hear them, and cannot get them out.
- Sit behind them and name the colours while they pull at the feathers.
Tip: tape the tubes to cardboard rather than straight onto paint. Painter’s tape has taken paint off two of my walls, and cardboard also means you can move the whole thing to whichever room you are in.
Neurological and Developmental Benefits
Reaching up while standing is harder than it looks. They have to hold their balance with one hand while the other one works, and that is the bilateral coordination that everything from cutting to dressing later depends on.
The sealed bottle does something the loose pom-poms never could. Wanting an object they can see but cannot reach is a real problem for them to solve, and problems are what they are hungry for this month.
Naming colours as they touch them is not going to teach them colours yet. It does build the receptive vocabulary that lands months before they can say a word back.
What goes wrong the first time: They strip every tube off the board in about ninety seconds and chew them. That is normal. Cardboard goes soggy fast, so bin any piece with bite marks and expect to rebuild it weekly.
Skip it if: Your baby is in a hard mouthing phase and you cannot stay within arm’s reach, or if painted cardboard going in the mouth is a no for you. The sealed bottle on its own is still a good five minutes.
3. Building Block Bonanza
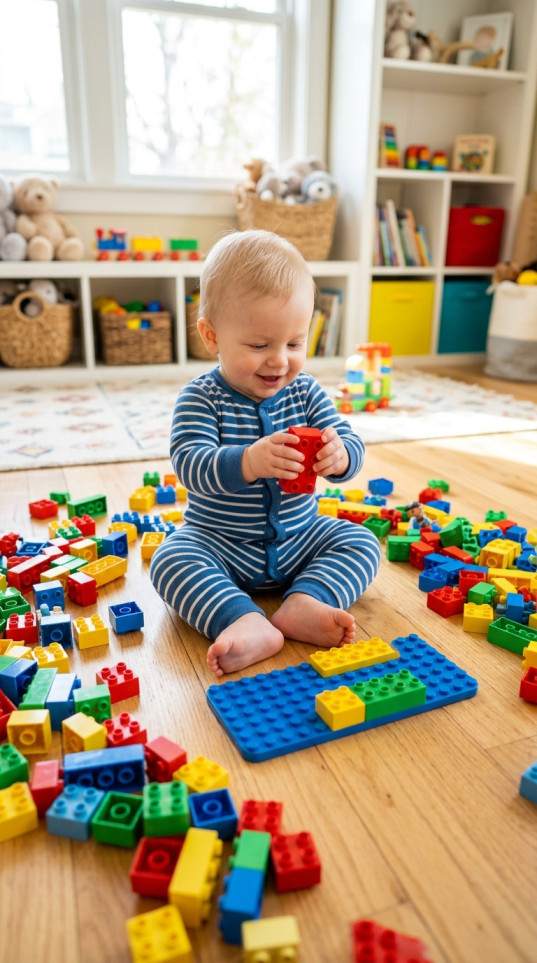
At 11 months they do not build. They demolish. Once I stopped expecting a tower, this became one of the longest-running games in our house.
- Real ages: Mega Bloks First Builders are rated 12 months and up, LEGO Duplo is 18 months and up, and standard LEGO is 4 and up. Standard LEGO is a hard no here.
- Time: 1 minute to set up, 5 to 10 minutes of play
- Mess: none
- Supervision: stay in the room, and step in if they are biting blocks
- You’ll need: a bag of the big Mega Bloks, or Duplo with you sitting right there
- Free swap: empty tissue boxes, wipes tubs and clean yogurt pots. Tape a few cardboard boxes shut and you have the best free blocks there are, plus they make a better noise when they fall.
Setup and Materials
- Stack three blocks about two feet in front of them, just far enough that they have to move.
- Let them knock it down.
- Rebuild it while they watch.
- Repeat roughly forty times. I am not exaggerating.
Tip: build slowly and narrate. The rebuild is often more interesting to them than the knock-down, and watching your hands do something deliberate is how imitation starts.
Neurological and Developmental Benefits
Knocking a tower down is a baby proving that their action changes the world. That is the whole cognitive job of this month, and they will run the experiment until they are satisfied.
There is a quieter skill in here too. Letting go of an object on purpose, aimed at a spot, is newer and harder than grabbing one. Watch their hand hover before they release a block. That pause is the learning.
What goes wrong the first time: You expect them to connect two bricks. Pressing Duplo together takes two coordinated hands and about another year of hand strength. Set that expectation aside and the activity stops being disappointing.
Skip it if: They are teething hard. Duplo and Mega Bloks both crack under a determined bite, and a cracked block has sharp edges. Check them over and bin any that are chewed through.
4. Wooden Activity Wall
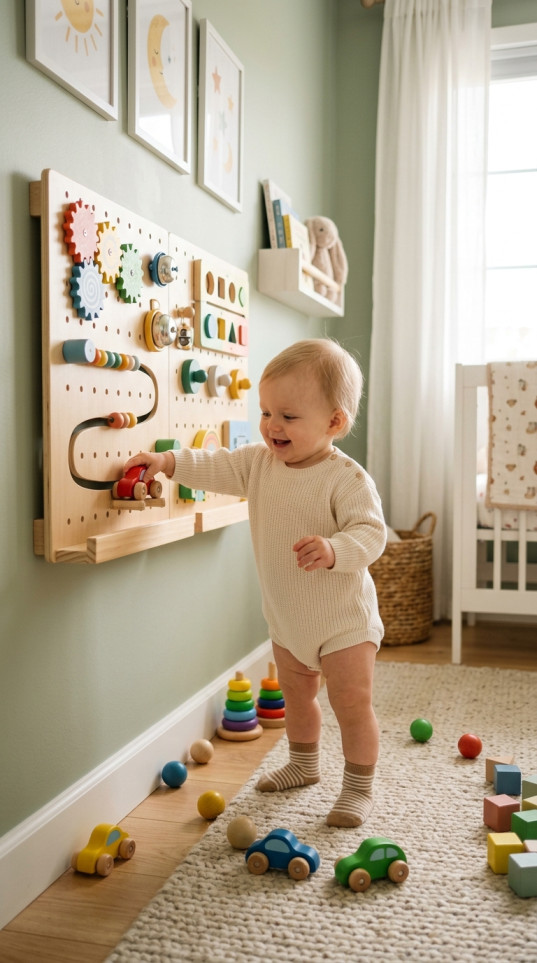
This one is genuinely good and it is also the only activity on this list that can hurt your baby if you install it badly. Worth doing properly or not at all.
- Real ages: 10 months to 3 years, but the mount height decides whether they can use it
- Time: 30 to 45 minutes for you to install, then it is always available
- Mess: none
- Supervision: stay in the room. Latching doors pinch fingers.
- You’ll need: a wooden busy board, a stud finder, screws long enough to reach the stud, a drill (adult only)
- Free swap: lay a busy board flat on the floor instead of mounting it. Or the actually free version: stick a strip of painter’s tape at cruising height with a sponge, a ribbon and a plastic lid on it and let them peel everything off. Peeling tape off a wall is weirdly gripping for a baby.
Setup and Materials
- Find the studs. Not “probably a stud”, actually find them.
- Mount the bottom edge about 12 inches off the floor and the top no higher than 30. A cruiser cannot reach anything above their shoulder while balancing.
- Hang off it yourself with real weight before you let the baby near it.
- Check the screws once a month, because they do work loose.
- Put two or three floor toys underneath so they can drop down and keep playing.
Tip: if you rent or cannot get into a stud, screw the board to a wide plank of wood and lean it in a corner or clamp it to a table leg instead. Drywall anchors plus a baby’s full weight is exactly how these boards come off walls.
Neurological and Developmental Benefits
Vertical play makes them work for it. Balancing on their feet while both hands turn a wheel or slide a latch trains the balance system and the core at the same time, which is the combination that gets them walking.
Latches and spinners also give them a satisfying, repeatable result. At 11 months, “I did that on purpose and it happened again” is the best feeling available to them.
What goes wrong the first time: It gets mounted at adult eye level, so the baby can only reach the bottom row. Mount it low, then move it up in six months.
Skip it if: You cannot get screws into studs, or your baby is not cruising yet. A board coming off a wall onto a baby’s face is not a hypothetical risk.
5. Green Pea Sensory Bin
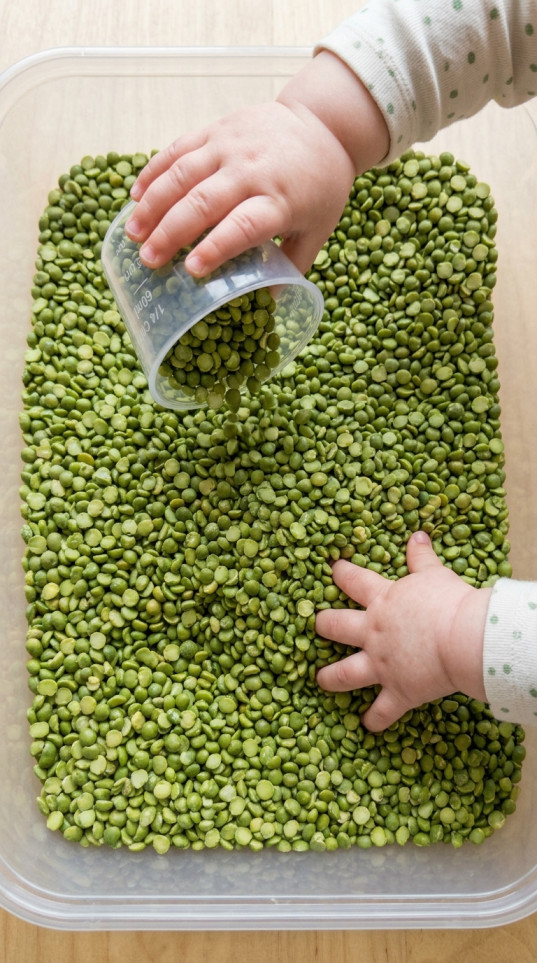
I have to be direct about this one. Dried split peas are the wrong filler for an 11-month-old, and the fix costs about sixty cents. Everything good about this activity (the pouring, the sound, the scooping) works just as well with something they can safely swallow.
Practical note: Dried peas, beans, lentils, rice and popcorn kernels are not baby sensory fillers. They are choke-sized, they get inhaled, and dried legumes swell as soon as they are damp, which is exactly why a pea in a nose or an ear is so much harder to get out than a bead. Wait until your child has stopped putting handfuls of things in their mouth, which for most kids is closer to 3.
- Real ages: dried peas, 3 and up. The taste-safe version below, 8 months and up.
- Time: 15 minutes to cook and cool the filler, 10 minutes of play, 10 minutes of cleanup
- Mess: high, and it travels
- Supervision: hands-on, sitting with them, the entire time
- You’ll need: a shallow clear bin or a roasting tray, cooked and cooled large pasta shapes or plain cooked oatmeal, measuring cups, a slotted spoon, a shower curtain liner underneath
- Free swap: the bin is your roasting tray, the scoops are your measuring cups, and half a box of pasta is about sixty cents. This version is cheaper than the original.
Setup and Materials
- Cook a box of big pasta shapes (shells or rigatoni), drain, run cold water over them and stir through a drizzle of oil so they do not glue together.
- Tip them into a shallow tray sitting on the plastic liner.
- Strip the baby to a nappy if you are feeling brave, or accept the outfit is going in the wash.
- Sit facing them and pour cups of pasta from one container into another. Do not demonstrate eating it, or that is the game for the next ten minutes.
- Sweep the strays up before anyone stands on them barefoot.
Tip: a drop of gel food colouring in the cooking water gives you rainbow pasta. Expect faintly stained palms for a day, and keep it off grout, because turmeric and beetroot dyes have stained mine permanently.
Neurological and Developmental Benefits
The value here is texture, weight and containment. Filling a cup, carrying it, tipping it out and doing it again is the in-and-out drill their brain is running all month, and cooked pasta gives them resistance and slipperiness at the same time.
The sound does a lot of the work too. Pasta hitting a metal measuring cup is a completely different noise from pasta hitting a plastic one, and you can watch them notice.
What goes wrong the first time: They eat it. With cooked pasta that is a snack. With dried peas it is a hospital trip, which is the entire reason for the swap.
Skip it if: Your baby has not eaten wheat yet. Use oats they have already had instead, or run the same activity with plain water. Only ever play with foods that are already in their diet, because a reaction to something smeared on skin is far harder to interpret than a reaction to something eaten.
6. Messy Paint Exploration
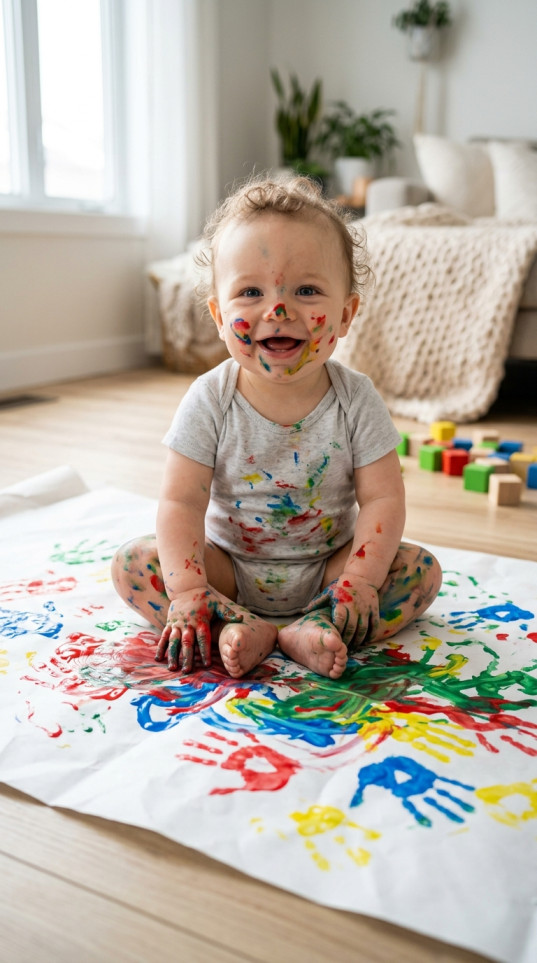
The messiest thing on this page, and the one my kids remember. The trick is timing it right before a bath and using paint you do not mind them eating.
- Real ages: 8 months and up, as long as the paint is taste-safe
- Time: 10 minutes to set up, 10 minutes of play, 15 minutes of cleanup and a bath
- Mess: the highest here. Plan the cleanup before you start.
- Supervision: hands-on, every second, with a wet flannel already in your hand
- You’ll need: plain full-fat yogurt, three drops of gel food colouring, a muffin tin, thick paper or a flattened cardboard box, a clear shower curtain liner, a towel by the bath
- Free swap: yogurt paint costs pennies and you already have it. If you would rather buy, Crayola Washable Finger Paint carries the AP non-toxic seal, so a taste will not hurt them, but it is still not food.
Setup and Materials
- Liner down, and spread it wider than you think you need. The paint always ends up outside the paper.
- Mix yogurt with gel colouring in the muffin tin cups, one colour per cup.
- Tape the paper down at all four corners, or they will peel it up and wear it.
- Nappy only. Clothes off, socks off (yogurt on a tiled floor is slippery).
- Put out one colour to start. Add a second once the first is smeared.
- Wipe their hands before they rub their eyes, which they will do within about a minute.
Tip: do this ten minutes before bath time, never after. I learned that in the worst way, with a clean baby and a purple bathmat.
Neurological and Developmental Benefits
The hand-to-mark connection is a big moment. They move their palm, a line appears, and they look at their own hand differently for a second. That is cause and effect they caused with their body rather than a toy.
Cold, slippery yogurt is also a genuinely new texture for a baby whose food mostly arrives on a spoon.
Some babies hate it. They freeze with both hands in the air and look at you like you have betrayed them. That is not a failed activity, that is useful information about their sensory preferences, and the fix is to offer a brush or a sponge so they never have to touch it directly.
What goes wrong the first time: They crawl off the mat mid-paint and you get handprints down the hallway. Have your flannel in hand, not across the room, and block the exit with your legs.
Skip it if: Dairy is not in their diet yet, or if wet hands genuinely distress them. Chunky crayons on paper, or a paintbrush and a cup of plain water on the patio, gets you most of the way with none of the mess.
7. Precision Egg Painting
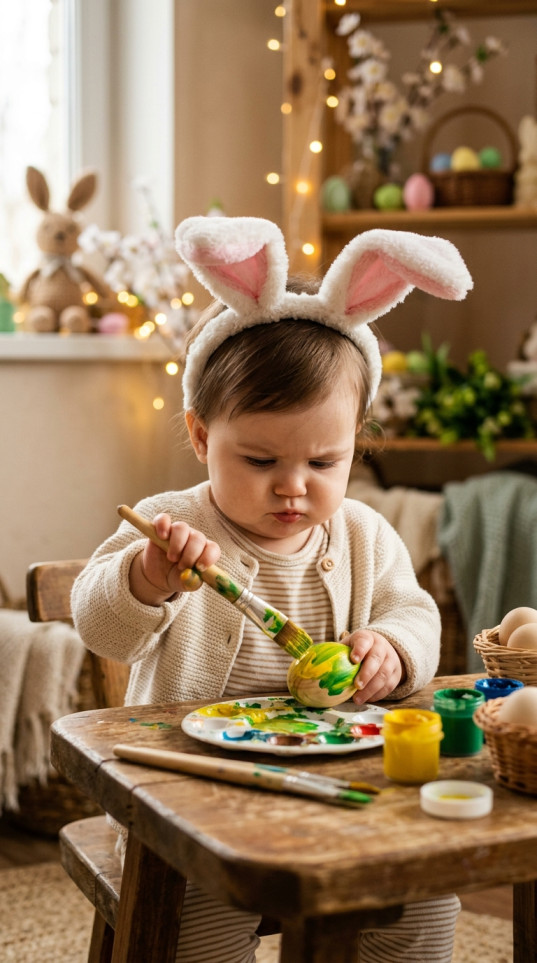
There is no precision at 11 months, and that is fine. What you actually get is grip practice with a chunky brush, plus a rolling target that makes them use both hands.
- Real ages: real brush control is closer to 18 months to 2 years. At 11 months treat this as holding, dipping and chewing.
- Time: 10 minutes to set up, 5 minutes of play, 10 minutes of cleanup
- Mess: medium
- Supervision: hands-on
- You’ll need: wooden or plastic craft eggs (Michaels, Hobby Lobby or Amazon, a few dollars for a bag), a short chunky brush, yogurt paint again, a tray with a raised lip
- Free swap: paint a potato. It is heavier, it does not roll off the tray, it costs about thirty cents, and it works exactly the same.
Setup and Materials
- Sit the egg in a muffin tin cup so it cannot roll away and take the paint with it.
- Put out one colour only.
- Hand them the brush. Expect it to go straight in their mouth, which is why the paint is taste-safe.
- If the brush loses, let them palm-print the egg instead. Same activity, no argument.
- Rinse the eggs and reuse them next month.
Tip: A silicone basting brush from the dollar store beats a bristle brush here. It survives being bitten, and there are no bristles to come loose in their mouth.
Neurological and Developmental Benefits
Holding a fat brush handle is real hand-strength work, and dipping then transferring is early two-step sequencing. They have to remember what they were doing between the cup and the egg.
The rolling egg adds something a flat page cannot. They have to steady it with one hand while the other one works, which is the same two-hands-two-jobs skill as holding a cup while drinking.
What goes wrong the first time: using real hard-boiled eggs, which the original version suggested. They crack, they roll, they smell within an hour, and a painted egg goes in the bin anyway, so you have made a mess for nothing. Wooden eggs also let you sidestep the egg allergen question entirely, which matters if egg is not yet in their diet.
Skip it if: they are in a phase of eating everything in reach, or you are using real eggs (please do not). And skip the bunny ears from the original setup. No 11-month-old keeps a headband on, and there is no reason to have elastic near their face.
For more on why chunky handles and pincer grips matter this year, see our guide to fine motor activities that build hand strength and coordination.
8. Bead Maze Challenge
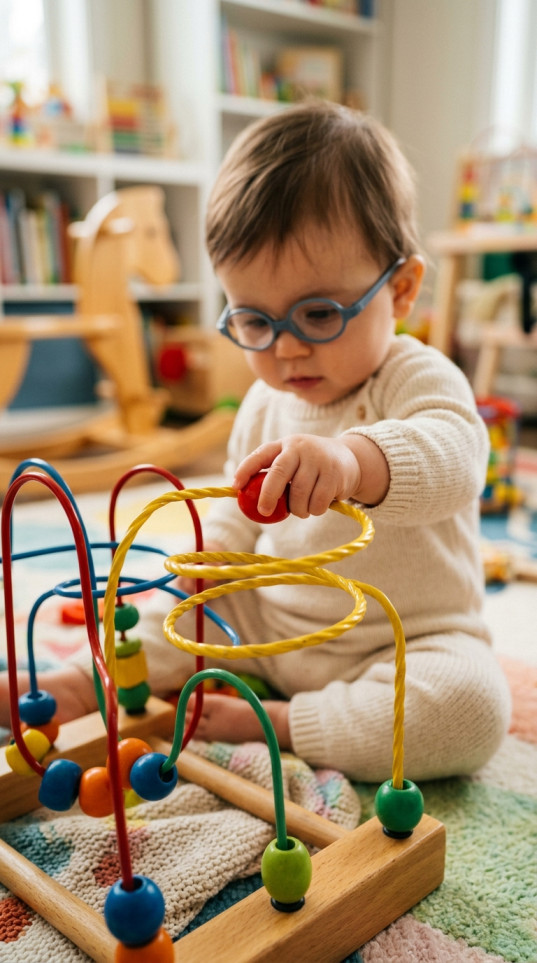
If you buy one thing off this list, buy this. Nothing detaches, which makes it the only toy here I would hand over while I load the dishwasher.
- Real ages: 9 months to 3 years
- Time: no setup, 5 to 10 minutes of play
- Mess: none
- Supervision: check in every few minutes
- You’ll need: a wooden bead maze with a heavy base. Melissa and Doug and Hape both make solid ones for around $15.
- Free swap: a colander plus a few chunky bangles or large jar rings to push through the holes. Do not thread beads onto string or shoelaces as a substitute, because cord around a baby is a strangulation risk.
Setup and Materials
- Put it on the floor, not on a table. On a table they will pull the whole thing off onto their feet.
- Sit opposite them and slide one bead slowly along a curve.
- Let them bang it, mouth the wires and shake it first. That is part of how they work out what it is.
- Give the wires a firm pull where they enter the base once a month, because on cheaper ones they work loose.
Tip: buy on base weight, not on how many loops it has. A light base tips the moment they lean on it, and a tipping toy is the fastest way to make a baby give up on it.
Neurological and Developmental Benefits
Pushing a bead around a bend is real visual tracking plus wrist rotation, and the bead cannot be dropped or lost, so the activity keeps going long after their patience for stacking has run out.
There is a hidden benefit for you. This is the one toy on the list with no small parts, no water and no mess, which makes it the thing you reach for when you need four minutes with both hands.
What goes wrong the first time: They try to yank the beads off the wire and get cross. Nothing to fix. They need to test whether it comes apart before they will accept the rules of the toy.
Skip it if: The base is light enough to tip when they lean on it, or the wire ends are exposed rather than sunk into the wood.
9. Rainbow Sensory Treasure Hunt
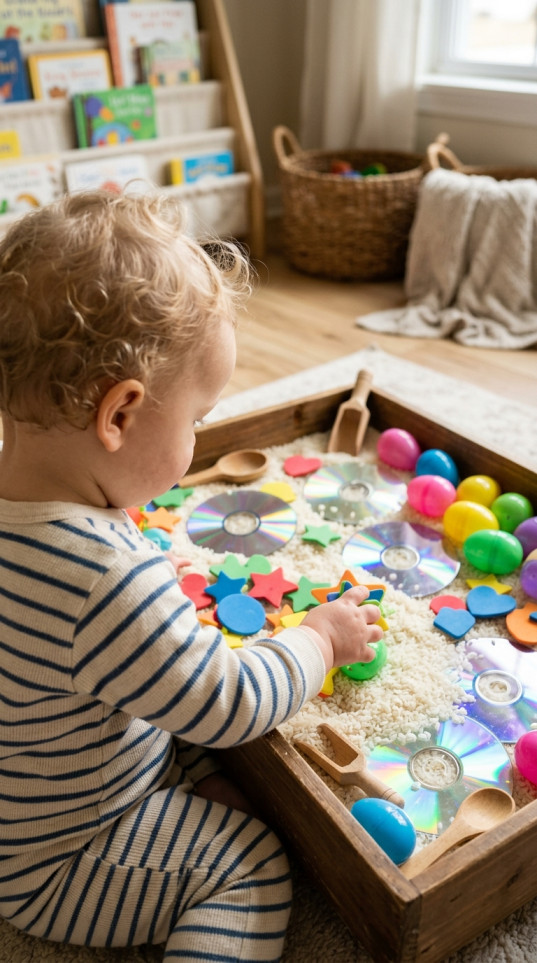
The original version of this used dyed rice and old CDs. Both of those are out, and the version below is free, safer and honestly more fun at this age.
- Real ages: the towel version, 9 months and up. The rice version, 3 and up.
- Time: 3 minutes to set up, 5 to 10 minutes of play
- Mess: low
- Supervision: arm’s reach
- You’ll need: a laundry basket or big bin, three dish towels, and five or six large treasures. A stainless measuring cup, a silicone spatula, a hairbrush, a stacking cup, a whisk, a wooden spoon.
- Free swap: all of it is already in your kitchen. A stainless bowl gives you the shiny reflective moment that the CDs were there for, with none of the risk.
Setup and Materials
- Drop the treasures into the bin.
- Lay the towels loosely over the top.
- Lift one corner so they catch a glimpse of something shiny, then let go.
- Wait. Do not dig it out for them. The waiting is the activity.
- When they find something, name it, then hide it again while they watch.
Tip: Hide the same object several rounds in a row before you swap it out. Repetition is what makes object permanence click, and swapping too fast turns it into a different game.
Neurological and Developmental Benefits
Looking for something after it disappears is one of the milestones the CDC lists around 12 months, so a hiding game at 11 months is landing right on schedule. You can almost watch the penny drop the third or fourth time.
Mixed textures do the sensory half of the job. A cold metal cup, a floppy silicone spatula and a bristly hairbrush in one bin gives their hands more information than a tub of rice does.
What goes wrong the first time: With the rice version, rice in the mouth and rice in every floorboard gap for a month. With CDs, a cracked disc has a genuinely sharp edge and a baby can snap one against a table leg, so those do not go in a baby bin at all.
Skip it if: Nothing, really. This is the most universally successful activity here. If your baby is sensory-cautious, use fabrics and objects they already know rather than anything novel.
10. Kitchen Sponge Water Play
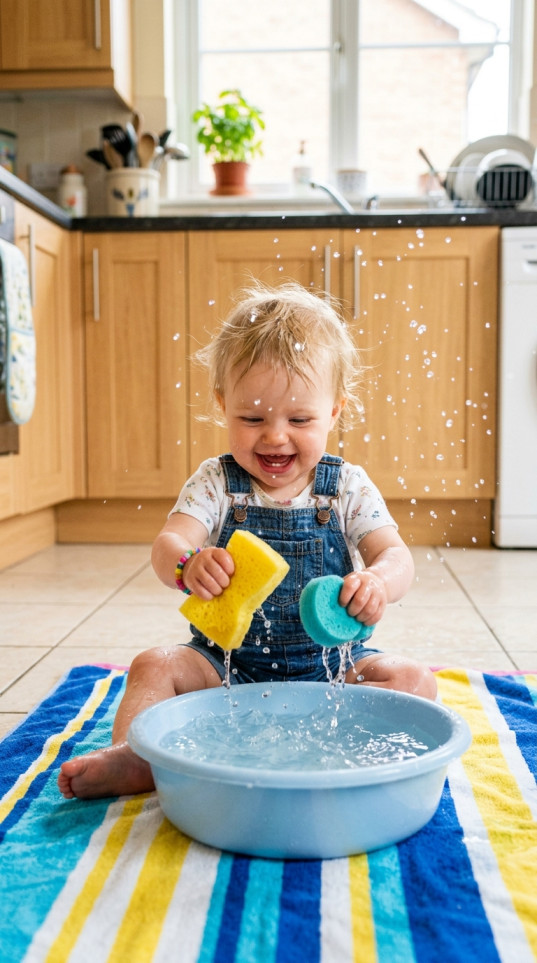
This is the one from the story at the top. It is the highest return per minute of setup on the whole list, and it is also the one with a real drowning rule attached, so read the supervision line properly.
- Real ages: 9 months and up, always within arm’s reach
- Time: 5 minutes to set up, 10 to 15 minutes of play, 10 minutes of cleanup
- Mess: high, but it is only water
- Supervision: hands-on, sitting on the floor beside them, and you do not leave the room for any reason
- You’ll need: a baking tray or washing-up bowl, an inch of lukewarm water, two thick towels underneath, three or four clean cellulose sponges or washcloths, a couple of cups
- Free swap: washcloths you already own. They are safer than sponges because they cannot be bitten into chunks, and they hold nearly as much water.
Setup and Materials
- Two towels down, tray on top. Two, not one.
- One inch of lukewarm water. No more, no matter how contained it looks.
- Cut oversized sponges down if you need to (adult step), keeping every piece bigger than a toilet paper tube.
- Show them one squeeze, then hand it over.
- Sit down beside the tray and stay there for the whole thing.
- Tip the water out the moment you stop. Do not leave a full basin on the floor while you fetch a cloth.
Tip: the pouring cups matter more than the sponges do. Punch a hole in the bottom of a yogurt pot and the dripping will buy you five extra minutes on its own.
Practical note: babies bite chunks out of sponges, and a wet lump of sponge is exactly the wrong thing in an airway. Check every sponge for teeth marks when you pack up and bin any that are damaged. Skip the green scrubby-backed ones and anything labelled antibacterial.
Neurological and Developmental Benefits
Squeezing a soaked sponge is one of the only things at this age that builds genuine hand and forearm strength, and it is the same squeeze they need later for a glue stick, a spray bottle and a pair of scissors.
The weight change teaches them something their words are years away from. Heavy when full, light when empty, and the difference happens in their own hand while they cause it.
What goes wrong the first time: The floor. You will underestimate the splash radius, and their clothes are going in the wash regardless. Two towels and a change of outfit ready, then it is fine.
Skip it if: You cannot sit down and stay put for the whole activity. An inch of water is enough to drown a baby, and for babies under one the risk sits in tubs, basins and buckets rather than pools.
Halfway point. If your hands are wet right now, this is the natural moment to save the page and come back to the second half tonight.
11. Shape Sorting Learning
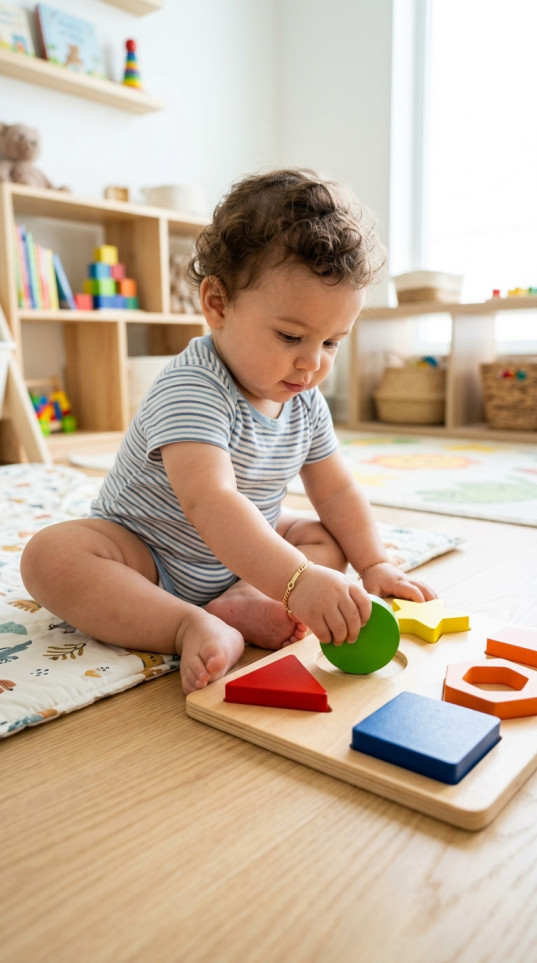
Take the lid off. That one change turns a shape sorter from a frustration machine into a toy an 11-month-old will use for weeks.
- Real ages: actual shape matching is 18 months to 3 years. At 11 months this is a drop-things-in-a-container game, which is exactly where they should be.
- Time: 1 minute to set up, about 5 minutes of play
- Mess: none
- Supervision: arm’s reach if the pieces are small, otherwise check in
- You’ll need: a chunky wooden sorter, or better at this age, a wide-mouth container plus four or five large objects
- Free swap: a wipes tub and a set of stacking cups. Or a coffee canister with a hole cut in the lid (adult step, tape the cut edge) plus big jar lids about three inches across.
Setup and Materials
- Take the lid off the sorter, or just use an open container.
- Drop one piece in yourself so they see where it goes.
- Tip the whole thing out.
- Let them do the tipping out. That is their favourite part and it is not laziness, emptying is a genuine skill.
- Leave the lid off for at least a month.
Tip: do not guide their hand to the right slot. Let them post it wrong, bang it, turn it over and try again. The trial and error is the entire developmental point, and steering their hand removes it.
Neurological and Developmental Benefits
Putting something into a container is one of the CDC’s 12-month milestones, so the drop-in game is right on target. Releasing an object deliberately over an opening takes more control than picking it up did.
Emptying also teaches them containers have insides, which sounds obvious until you watch a baby work it out for the first time.
What goes wrong the first time: Parents keep the lid on and hold the correct shape over the correct hole. The baby learns nothing from that and usually crawls away.
Skip it if: The pieces fit through a toilet paper tube, which plenty of sorter pieces do. That makes them a choking hazard for a baby even when the box says the set is fine for toddlers.
12. Farm Animal Floor Play
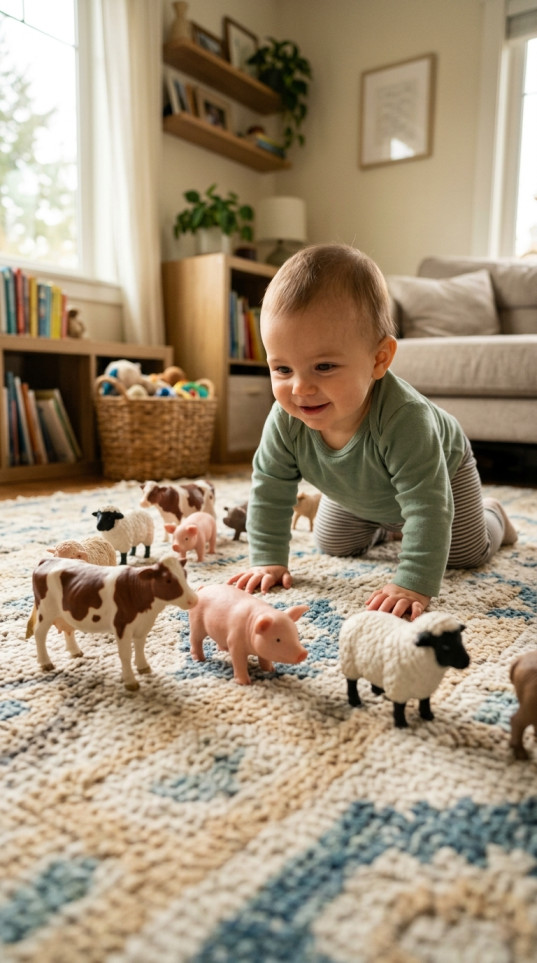
Free, no setup, and it is the one that produced the first animal noise in our house. It also needs a hard rule about toy size.
- Real ages: 8 months and up, big animals only
- Time: 2 minutes to set up, about 10 minutes of play
- Mess: none
- Supervision: stay in the room, arm’s reach if the plush toys have any attached parts
- You’ll need: four or five large plush or solid rubber animals. Schleich figures are lovely and far too small, so save those until 3.
- Free swap: the plush toys already in their cot, plus any animal picture book. You making the noises is the actual activity, not the toys.
Setup and Materials
- Spread the animals just out of reach, in three different directions.
- Name one and make its sound.
- When they get to it, name it again while they are holding it.
- Move it somewhere new and repeat.
- Put one behind you so they have to come around you to get it.
Tip: that last step is the good one. Changing direction while cruising or crawling is harder than travelling in a straight line, and going round an obstacle (you) is real spatial work.
Neurological and Developmental Benefits
Crawling or cruising toward something they want is the gross motor half. Motivation does more for movement at this age than any amount of encouragement does.
Animal sounds are the language half, and they are easier to copy than words because there is no consonant to get right. “Moo” often arrives well before “cow”, and at 11 months they understand far more than they can say.
What goes wrong the first time: Small plastic figures. Babies also chew glued-on eyes off cheap plush toys, and squeakers can be worked out through a seam and swallowed. Check the seams on anything from a hand-me-down box.
Skip it if: The animals fit through a toilet paper tube, or the plush ones are shedding stuffing.
13. Science Experiment Fun
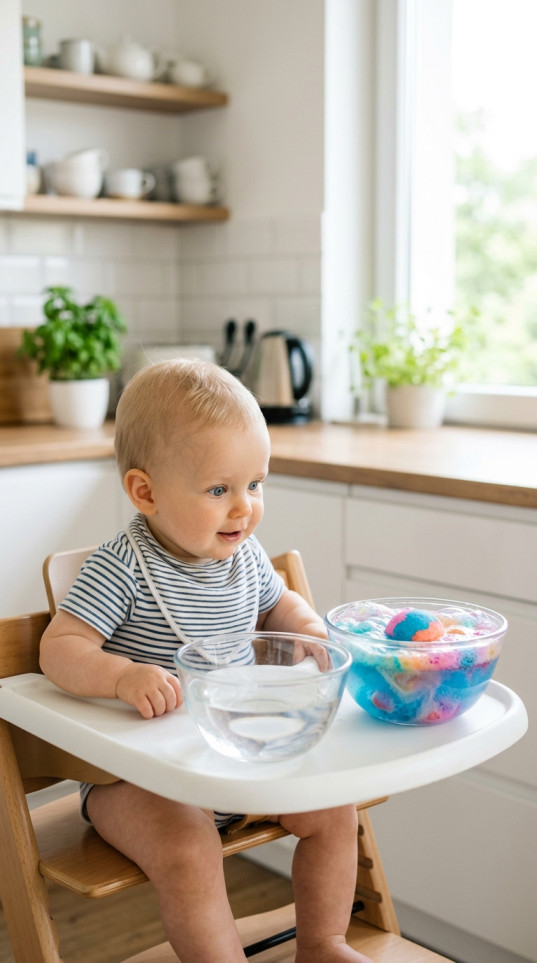
Real value here, but the fizzing tablet from the original setup has to go. An 11-month-old will get it in their mouth, and it is not made for that.
- Real ages: 10 months and up
- Time: 10 minutes to set up (plus overnight if you freeze the ice ring), about 10 minutes of play
- Mess: medium, all water
- Supervision: hands-on, arm’s reach, same water rules as number 10
- You’ll need: a deep tray, two clear bowls, plain water, and five or six large float-or-sink items: a wooden spoon, a metal spoon, a plastic lid, a stacking cup, a bath duck, an orange
- Free swap: all of it is household. For a bit of theatre, freeze water in a bundt tin overnight and put the big ice ring in the tray. It is far too big to be a choking risk, unlike ice cubes, and the melting is the experiment.
Setup and Materials
- Tray on a towel, on the floor.
- Two bowls of plain water, nothing added.
- Hand them one item at a time and say “floats” or “sinks” as it lands.
- Let them pour water between the two bowls with a small cup.
- Warm water in one bowl, cool in the other, is a better contrast for a baby than anything fizzy.
Tip: the metal spoon versus the wooden spoon is the moment worth waiting for. One disappears, one bobs, and it is visible enough that even a baby reacts to the difference.
Practical note: bath bombs and fizzing tablets are not baby play materials. They are citric acid and fragrance, they are choke-sized, and they will end up in the mouth. Same answer for glitter and for water beads, which swell after they are swallowed.
Neurological and Developmental Benefits
Prediction starts with noticing, and noticing is what two identical bowls give you. Same water, different objects, different result.
Pouring between containers is the in-and-out skill again in a wetter form, and it holds their attention longer than the dry version does.
What goes wrong the first time: They drink the water. With plain water that is fine, which is precisely why nothing goes in it.
Skip it if: You cannot stay seated beside them the entire time.
14. Learning Through Play
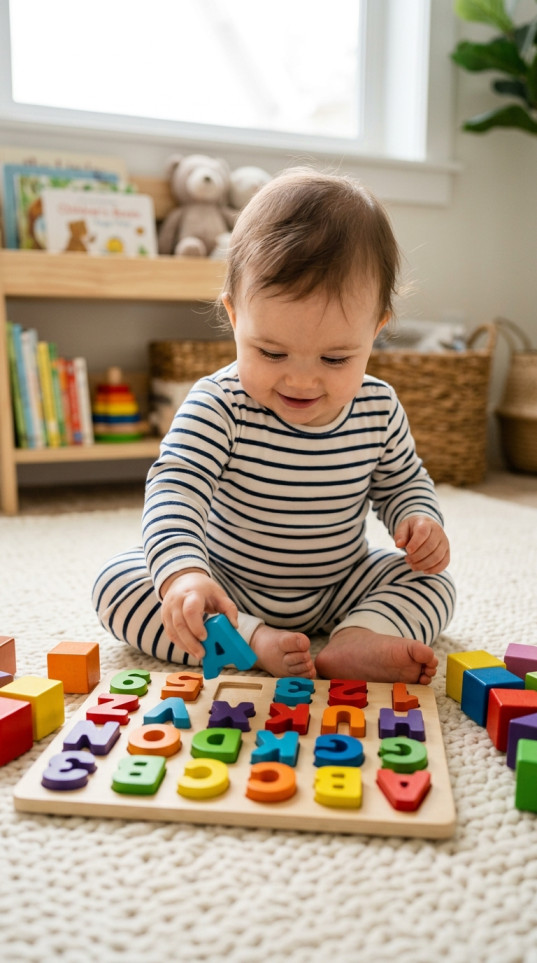
An alphabet board at 11 months is a peg-and-grip toy with letters printed on it. Buy it for the grip, not for the letters, and you will not be disappointed.
- Real ages: letter recognition is a 3 and up skill. At 11 months this is taking pieces out of grooves.
- Time: 1 minute to set up, about 5 minutes of play
- Mess: none
- Supervision: arm’s reach, because letter pieces are often small
- You’ll need: a chunky wooden letter or number board. Melissa and Doug make the common one. Check the piece size before you buy.
- Free swap: a muffin tin and six large objects to drop into the cups. Identical skill, no cost, and the tin makes a better noise.
Setup and Materials
- Take all the pieces out before you hand it over, so the first thing they meet is an empty board.
- Give them two pieces at a time. A full set is too much visual noise.
- Name the picture, not the letter. “Apple”, not “A”.
- Let them bang the board on the floor. That is allowed.
Tip: object words beat letter names by a mile right now. Words that attach to something they can see and hold are the ones that stick, and letters attach to nothing yet.
Neurological and Developmental Benefits
Levering a piece out of a snug groove is real hand-strength work, and the groove gives their fingers a target, which is more useful than a flat surface.
The honest truth is that the language you speak while they play is doing more for their brain than the board is. The board is just the reason you are both sitting there.
What goes wrong the first time: Expecting them to put pieces back in. Out comes now, in comes months later, and that order never reverses.
Skip it if: The letter pieces fit through a toilet paper tube, which many alphabet sets do.
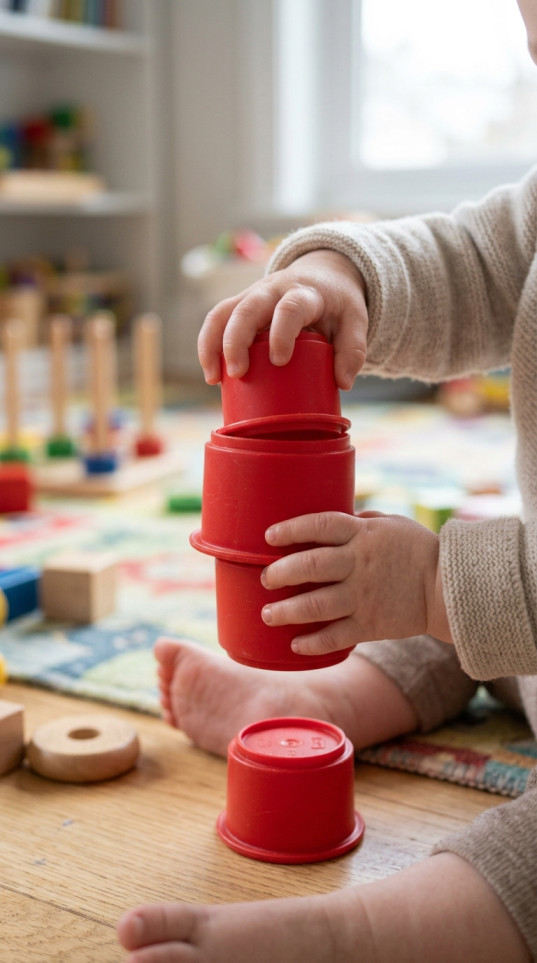
15. Stacking and Nesting Fun
Best value for money on this entire page. Ours went in the bath, in the sandpit, in restaurants and in a hospital waiting room, and they still get used four years later.
- Real ages: 6 months to 2 years, and what they do with them changes every couple of months
- Time: no setup, about 10 minutes of play
- Mess: none
- Supervision: check in every few minutes
- You’ll need: a set of nesting cups. Fisher-Price Stack and Roll Cups are the classic, usually about $8.
- Free swap: your measuring cups, or five yogurt pots in different sizes. Dollar Tree plastic cups work fine too.
Setup and Materials
- Dump them out in a pile rather than handing them over neatly.
- Nest two, then pull them apart while they watch.
- Hand them the two biggest cups, which are the easiest pair to get right.
- Hide a small treasure under an upside-down cup and let them lift it off.
- Add cups as they get better, not all at once.
Tip: nesting comes before stacking. A tower they build themselves is usually closer to 15 to 18 months, so do not judge the toy by how tall the tower gets this month.
Neurological and Developmental Benefits
Size relationships are learned by hand before they are learned by eye. A cup that will not go inside a smaller cup is a problem they solve by trying, failing and rotating, over and over.
The hiding game is object permanence in its cleanest form, and it is the single best use of these cups at 11 months.
They also travel. A stack of cups fits in a nappy bag, works in a restaurant, works in a bath, and gives you ten minutes in a waiting room without a screen.
What goes wrong the first time: honestly, nothing. Worst case they scatter them and you pick them up.
Skip it if: The smallest cup in the set fits through a toilet paper tube. Some sets include one that does. Take that cup out and keep it in the kitchen.
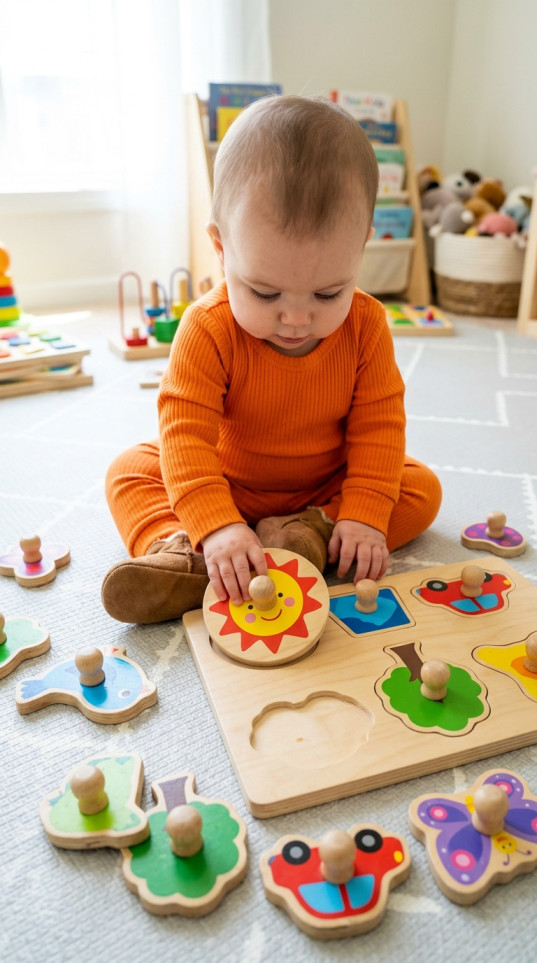
16. Puzzle Problem-Solving
At 11 months a knobbed puzzle is a taking-out toy, and the picture hiding underneath each piece is the part they actually care about.
- Real ages: 10 months for taking pieces out, 18 months and up for putting them back
- Time: 1 minute to set up, about 5 minutes of play
- Mess: none
- Supervision: arm’s reach, because knobs can loosen
- You’ll need: a knobbed wooden puzzle with three or four pieces and big clear pictures underneath, usually around $10
- Free swap: a colander plus a few wooden spoons to push through the holes. Same does-it-fit logic, and the spoons are already in the drawer.
Setup and Materials
- Hand it over with all the pieces in the frame.
- Lift one piece out, show them the picture underneath, and put it back.
- Let them pull the rest out however they manage it.
- Name whatever is revealed under each one.
- Put them all back in slowly while they watch, then start again.
Tip: pull hard on every knob before you hand the puzzle over. Those knobs are glued, they do come off, and a wooden knob is almost exactly choke-sized. This is the first thing I check on any hand-me-down puzzle.
Neurological and Developmental Benefits
The picture reveal is a small surprise every single time, and surprise is what keeps a baby coming back. Object permanence again, in a different wrapper.
Gripping a knob between thumb and finger is the same pincer grasp they use for finger food, so this doubles as mealtime practice without the mess.
What goes wrong the first time: They empty all four pieces in ten seconds and lose interest. Your slow rebuild is the second half of the activity, and watching your hands work is often more interesting to them than doing it themselves.
Skip it if: Any knob is loose, or the puzzle has more than five pieces. Five is already a lot of choice for this age.
17. Father-Baby Art Time
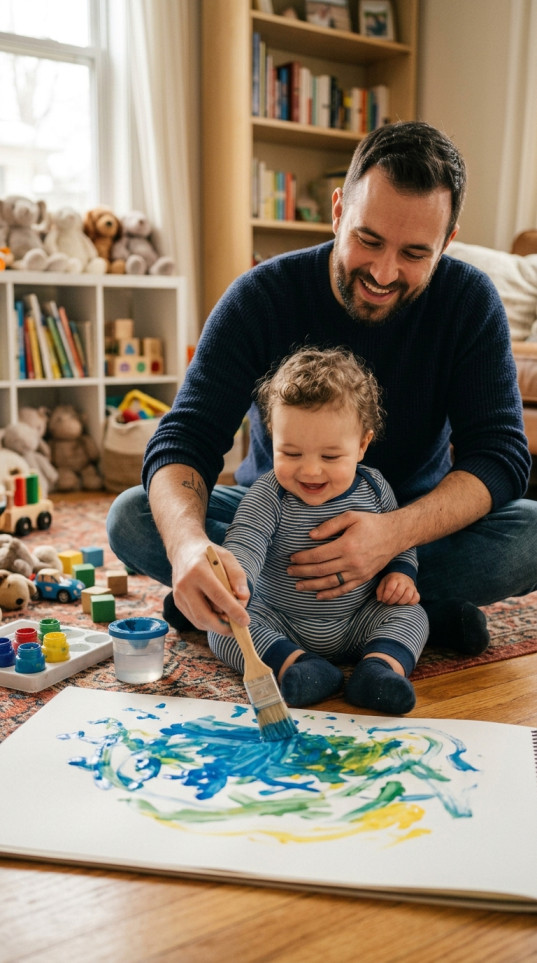
Works with any grown-up, and it is worth saying that the shared attention matters more than the paint does. If you only have ten minutes with your baby today, this beats handing them a toy.
- Real ages: 8 months and up
- Time: 10 minutes to set up, 10 minutes of play, 15 minutes of cleanup
- Mess: high
- Supervision: hands-on, you are already sitting in it
- You’ll need: big paper or a flattened box, yogurt paint, one chunky brush each, a plastic liner, wipes within reach
- Free swap: a cup of plain water and a brush on a warm patio or a fence. The marks appear and then fade as they dry, which babies find fascinating, and there is nothing to clean up.
Setup and Materials
- Sit behind them with your legs either side so you are their backrest. They will paint for longer if they are not working on their balance at the same time.
- Paint your own sheet next to theirs. Copying you is half the appeal.
- Offer your hand rather than taking theirs.
- Describe what is happening as it happens. “Red on your fingers. Now it is on the paper.”
- Stop while they are still enjoying it, not when they are done.
Tip: hand-over-hand guiding only if they put their hand in yours. Steering an infant’s hand through a craft to get a nice result teaches them the activity is something being done to them.
Neurological and Developmental Benefits
Joint attention is the real mechanism here. When you name the thing they are already looking at, in the moment they are looking at it, that is how vocabulary gets built, and it beats every toy on this page for language.
The immediate mark from a brush stroke is also cause and effect with a bigger payoff than most, because it stays there after they stop moving.
What goes wrong the first time: The grown-up ends up making the artwork. Nobody needs a keepsake from an 11-month-old. Let it be a smear.
Skip it if: Dairy is not in their diet (use a taste-safe alternative they have already eaten) or they are overtired. Messy play with a tired baby is a short, loud activity that ends in a bath either way.
18. Classic Ring Stacking Play
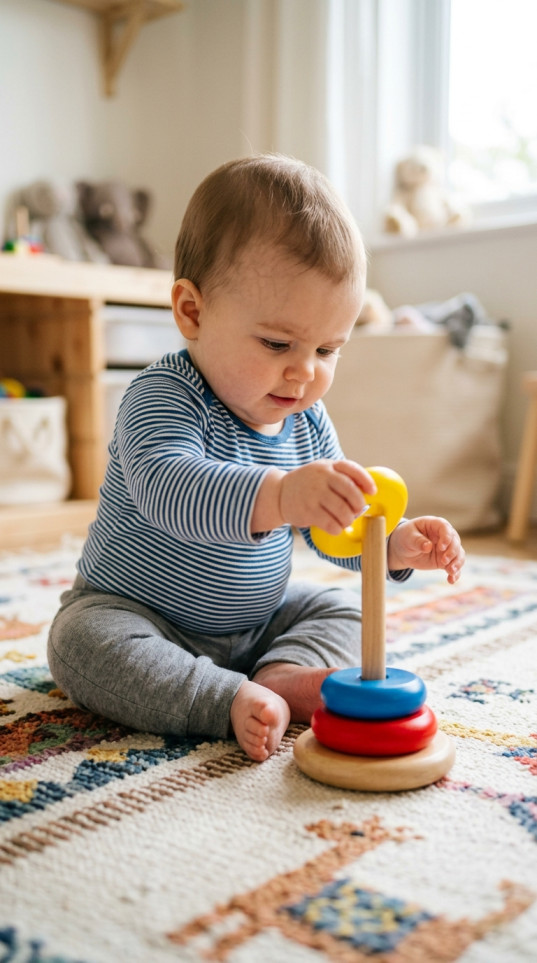
They will take the rings off long before they put any on, and taking them off is a genuine skill, not a failure to do the real thing.
- Real ages: 6 months for pulling rings off, 15 to 18 months for stacking them in size order
- Time: no setup, 5 to 10 minutes of play
- Mess: none
- Supervision: check in every few minutes
- You’ll need: a ring stacker with a wide base. The Fisher-Price Rock-a-Stack is the standard one, around $10.
- Free swap: tape a kitchen roll tube upright to a box lid and use bangles or canning jar rings. Works, costs nothing, and you can make the tube shorter as they improve.
Setup and Materials
- Hand it over with all the rings already on.
- Let them pull rings off. Expect this stage to last weeks.
- Hold the base steady yourself and tilt the peg slightly toward them.
- Cheer the near misses, because the aiming is the skill.
- Leave the order wrong if they get one on. Nobody is grading the tower.
Tip: hold the base for the first few weeks. Threading a ring onto a peg that slides away is genuinely hard, and the frustration comes from the sliding, not the threading.
Neurological and Developmental Benefits
Ordering by size is a later skill. The win available right now is aiming a hole at a stick, which needs both hands doing different jobs at once, and that shows up years later in cutting, dressing and handwriting.
When the tower falls, they get a free gravity lesson and a small test of whether they will try again. Some babies immediately do. Some look at you to see how you react first, which is worth knowing about your kid.
What goes wrong the first time: Parents quietly fix the order. Leave it wrong. A stack in the wrong order that they built themselves is worth more than a neat one you made.
Skip it if: The smallest ring or the top ball fits through a toilet paper tube. Cheaper knockoff sets vary a lot on this, so check yours rather than assuming.
19. Standing Practice with Dad
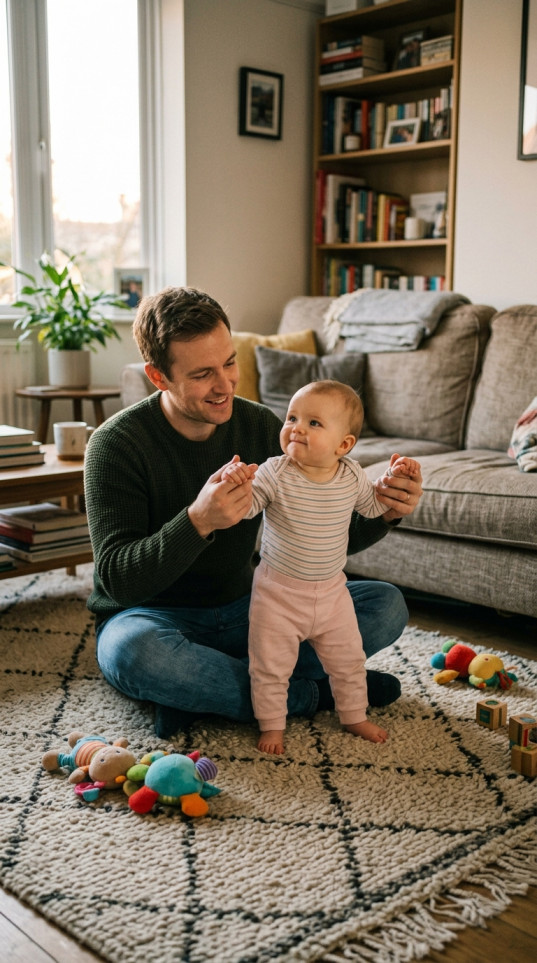
If I could only keep one activity from this list, it would be this one, and it costs nothing. It also has the one technique mistake on this page that can actually injure a baby, so the steps matter.
Practical note: never pull a baby up by the hands, wrists or forearms, and never swing them by the arms. A sudden pull on a straight arm is the classic cause of nursemaid’s elbow, which is the most common elbow injury in children under five. Offer your fingers and let them do the pulling.
- Real ages: 9 to 14 months
- Time: no setup, 5 minute bursts, several times a day
- Mess: none
- Supervision: hands-on, the whole time
- You’ll need: a rug, a clear floor, and bare feet. Socks on hardwood is how babies slide.
- Free swap: free already, and better than any push toy you could buy.
Setup and Materials
- Sit on the floor facing them, close enough that they can reach you.
- Offer two fingers and let them grip and pull themselves up. Do not lift them.
- Once they are up, let them balance with one hand on you, then try no hands for a second while you stay close.
- Put a favourite toy on the sofa cushion so there is a reason to stand there without holding you.
- Practise sitting back down. Lowering themselves is scarier than standing for most babies and it is the part that gets skipped.
- Keep the landing zone soft. Babies who trust the landing try more.
Tip: the sofa cushion beats holding their hands every time. Standing at a surface with hands free is what builds the balance that walking needs, and hand-held walking does much less than it looks like it does.
Neurological and Developmental Benefits
Pulling up, standing and lowering back down builds the leg and core strength walking runs on, and the balance system gets a workout every time their head changes height.
WHO guidance for babies under one is several bouts of interactive floor-based play a day, at least 30 minutes of tummy time spread across waking hours, and no more than an hour at a stretch in a highchair, stroller or carrier. Five minute standing bursts through the day fit that better than one long session.
What goes wrong the first time: Too much hand-held walking. It photographs well and it looks like progress, but independent standing is doing the real work.
Skip it if: Nothing here, this suits almost every baby. And do not use a seated baby walker to speed it up. The American Academy of Pediatrics has called for a ban on mobile infant walkers, and Canada made selling them illegal in 2004.
If your 11-month-old is not pulling up at all yet, that is a good thing to raise at their 12-month check rather than something to push. Most babies walk somewhere between 9 and 18 months, and there is no prize for early.
Common Mistakes I Made, And See Other Parents Make
- Buying the toy instead of setting up the play. Ten of the nineteen ideas above started as “buy this wooden thing”. Your measuring cups, a baking tray and two towels cover most of this month.
- Putting everything out at once. Five things out, the rest in a cupboard, swap on Sunday. A floor covered in toys reads as visual noise to a baby, not abundance.
- Treating dried rice and beans as baby sensory play. They are all over Pinterest for this age group and they should not be. Cooked pasta does the same job.
- Trusting “non-toxic” to mean edible. It means a taste will not hurt them. It does not mean a fistful is fine.
- Ending on a meltdown. Pack up while they are still interested. If you wait for them to be done, they learn that this activity finishes with them crying.
- Doing it for them. Posting the shape, fixing the ring order, guiding the brush. The fumbling is the learning, and every time you tidy it up you take the lesson away.
- Praising the result. They do not care about the painting. They care that you were watching and you said their name.
- Skipping the toilet paper tube test on hand-me-downs. Second-hand toy boxes are exactly where the choke-sized pieces live, usually mixed in with a set that looks fine.
- Setting up on hardwood. Anything they pull up on slides, and their chin finds the edge. A rug solves a surprising number of problems on this list.
- Staying quiet. Narrating what they are doing is the highest value, zero cost thing on this entire page, and it is the one most of us forget when we are tired.
FAQs
How long should an eleven-month-old be expected to focus on a single activity?Expect two to five minutes on their own and up to fifteen if you are down on the floor playing too. There is no reliable published attention span figure for this age, so treat those as what I actually see rather than a rule, and take a quick exit as information about the activity, not about your baby. Leave the materials out where they can wander back to them.
Is messy play genuinely necessary for brain development at this age?Necessary is a strong word, but it is genuinely useful, because texture, temperature and weight are information a baby can only get through their hands. Squeezing a wet sponge or pushing a hand through cold yogurt paint gives them feedback no plastic toy can. If your baby hates it, offer a brush or a spoon so they can explore it without touching it directly.
How can I encourage my eleven-month-old to play independently without constant intervention?Start beside them, get them properly absorbed in something like the nesting cups, then move back a few feet while staying in their line of sight and keep talking. Build the distance over weeks, not days. Independent play is a skill they practise rather than a switch that flips, and a baby who can see you will play alone far longer than one who cannot.
What role does structural symmetry and toy rotation play in cognitive development?Toy rotation earns its reputation: four or five items out at a time gets a baby exploring each one deeply instead of skimming the whole floor. Symmetry, on the other hand, is not something worth engineering in a baby’s toy set, so do not overthink how the shelf looks. Rotate weekly, keep it simple, and reintroduce old toys after a fortnight when they feel new again.
Are rice and dried bean sensory bins safe for an 11 month old?No. Dried rice, beans, peas, lentils and popcorn kernels are choke-sized, they get inhaled, and dried legumes swell once damp, which makes removal from a nose or ear genuinely difficult. Use taste-safe fillers such as cooked pasta or cooked oatmeal until your child has stopped mouthing everything, usually somewhere around age 3.
How do I get washable paint out of carpet?Blot it, do not rub, then work from the outside of the stain inward with cold water and a little dish soap, and keep swapping to a clean part of the cloth. Washable paints like Crayola come out of carpet reasonably well if you get to them while wet, but turmeric, beetroot and strong gel food colouring can stain permanently, especially on grout. That is the reason the paint activities here happen on a plastic liner.
Read next
If the independent play question above is the one you actually came for, our low-prep quiet time activities that encourage independent play is the next step, and most of it scales down to 11 months if you stay in the room.
And if the animal noises at number 12 got a reaction, classic clapping games are the natural follow-on. Pat-a-cake is a 12-month milestone on the CDC’s list, so this is the right month to start offering it.
Conclusion
Pick one thing off the table and do it before dinner tonight. Not all nineteen, one.
If you want the highest return for the least effort, it is the baking tray with an inch of water and three washcloths, and you already own everything it needs. If you have five minutes rather than twenty, sit on the floor and offer your fingers so they can pull up on you.
The thing I wish someone had told me at eleven months is that the activity is mostly a reason for the two of you to be at floor level together, talking. The gears and the cups and the paint are scaffolding for that. Sensory bins, stackers and supported standing are worth rotating through because novelty buys you attention, but the narration is what does the heavy lifting.
Save the table before you close the tab, and when they hit a new milestone and the old favourites stop landing, come back and pick a different one. Our sensory activities for toddlers who seek movement and input is where most of these ideas go next, usually somewhere around fifteen months.