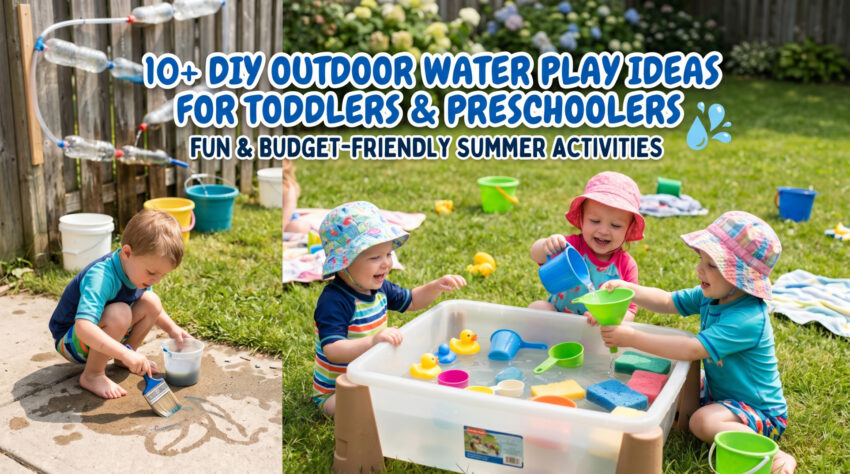
The best DIY outdoor water play ideas for kids under 6 all use the same three things: one shallow bin of warm water, something to squeeze or pour, and something worth rescuing. Sponge bombs, a frozen block of toys, a soapy toy car wash, nature soup and a recycled water wall each cost under $5, take about 10 minutes to set up, and hold a toddler or preschooler for 20 to 45 minutes. Every one of them needs an adult within arm’s reach and every container dumped the moment play ends, because drowning is the leading cause of death for children ages 1 to 4 (CDC) and a few inches of water in a bucket is enough.
It was 10:20 on a Saturday in late July. Ninety-one degrees, the kids had been up since 6:15, the splash pad across town had a line out to the parking lot, and the $34 water table I bought in May was sitting in the corner of the patio holding one inch of green rainwater and a drowned beetle.
My four year old asked what we were doing today. I had nothing.
So I went inside, grabbed three kitchen sponges out of the pack under the sink, cut them into strips with kitchen scissors, and zip tied them in the middle. Four minutes of work. That bought me forty minutes of shrieking, soaking, wonderful backyard chaos, and it cost about a dollar.
That is the whole idea behind this list. Warm water, one shallow bin, and something to squeeze. No water park, no big yard, no $60 splash mat that leaks by August.
Below are twelve DIY outdoor water play ideas that actually hold up with kids under 6, with the real age ranges, the real mess, the real time cost, and the part nobody puts on Pinterest: what goes wrong the first time you try it.
What You Actually Need For DIY Outdoor Water Play
You can run nine of the twelve ideas below with what is already in your kitchen. Here is the honest supply list, with a free or cheap swap for every single bought item.
| Item | Where to get it | What it costs | Free or cheaper swap |
| Shallow clear bin | Sterilite or Rubbermaid under-bed bin, Walmart or Target | $8 to $12 | A dish tub, a roasting pan, the emptied bottom drawer of a plastic dresser, or a deflated kiddie pool |
| Kitchen sponges | Dollar Tree multipack | $1.25 for 6 to 9 | The sponges already under your sink, minus the green scrubby ones |
| Spray bottles | Dollar Tree cleaning aisle | $1.25 each | A rinsed-out hair detangler or hydrogen peroxide bottle |
| Squeeze bottles | Dollar Tree condiment bottles | $1.25 each | An empty ketchup bottle or a dish soap bottle rinsed well |
| Droppers or syringes | Amazon 10-pack of plastic pipettes | about $7 | The oral medicine syringes from infant Tylenol or Motrin. Ask the pharmacy counter, they hand them out free |
| Liquid food color | McCormick 4-pack, any grocery store | about $5 | A handful of frozen blueberries or shredded red cabbage squeezed in warm water |
| Tear-free soap | Johnson’s Head-To-Toe or any baby wash | about $5 | A tiny squirt of Dawn, kept well away from faces |
| Scoops and cups | Nothing, do not buy the $20 sensory tool set | $0 | Measuring cups, a turkey baster, a slotted spoon, yogurt cups, an old whisk |
| Heavy-duty tarp | Hardware store, 10 by 20 feet | $15 to $25 | Skip it and run a sprinkler over a smooth grass slope instead |
| Water shoes | Any big-box store in season | $8 to $15 | Old Crocs, or bare feet on grass only |
Practical note: buy two of every scoop, cup and spray bottle. Almost every water play fight I have refereed was two kids wanting the same turkey baster, and a second baster costs nothing. Two identical tools prevents most of it.
The single best purchase on this whole list is a $1.25 bag of Dollar Tree sponges. It beats every water toy I have ever paid real money for, including the water table.
Safety Rules That Actually Matter With Outdoor Water Play
This section is not filler. Read it once, then you can run everything below without thinking about it again.
Drowning is silent and it is fast. The CDC lists drowning as the leading cause of death for children ages 1 to 4. It does not look like splashing and shouting. It looks like nothing, and it can happen in the time it takes to answer a text. Stay within arm’s reach of any child under 4 who is near standing water.
Pick a water watcher. If there are other adults around, say out loud who is watching, and hand that person the job with no phone in their hand. Swap every 15 minutes. The American Academy of Pediatrics and Red Cross both push this because “everyone is watching” reliably means nobody is.
Dump every container the second play ends. Bins, buckets, kiddie pools, the bottom of the wagon, all of it. Then flip them upside down so they cannot refill with rain. The CPSC has warned for decades about young children drowning in 5 gallon buckets holding only a few inches of liquid. Flipping containers also kills your mosquito problem in one step.
Run the hose before you hand it over. Water sitting in a black or dark green hose in full sun gets hot enough to scald a small child. Run it onto the grass for 30 to 60 seconds until it turns cold, then let them hold it. Also worth knowing: most garden hoses are not certified drinking-water safe, so no drinking from the nozzle unless the hose says otherwise on the label.
Test every surface with the back of your hand. Dark tarps, rubber splash mats, metal slides and mid-afternoon concrete all get hot enough to burn bare feet. If you cannot hold your hand on it for five seconds, they cannot stand on it.
Use the toilet paper tube test on every small toy. If an object fits through a cardboard toilet paper tube, it can choke a child under 3. That rules out most of the mini figures people freeze into ice cubes. Size up to bigger animals or duplo-style figures instead.
Latex balloons need a hard age line. Federal labeling law warns that children under 8 can choke or suffocate on uninflated or broken balloons, and a burst water balloon leaves dozens of exactly the wrong-sized scraps in wet grass. If you do balloon activities at all, do a knees-on-the-ground fragment sweep before anyone plays again.
Water beads are the one genuine no. More on this under idea 4, but the short version: the CPSC has issued warnings and multiple recalls, there has been at least one reported infant death, and swallowed beads keep swelling inside a child. Skip them entirely for under 4s.
Adults do the cutting, the hot stuff and the tool work. Cutting bottles, using a staple gun, driving ground stakes, handling scissors and hauling a full bucket are grown-up jobs. Kids get the fun part.
Sun and cold, both in the same hour. Broad spectrum SPF 30 or higher, reapplied every two hours and after every towel dry, plus a UPF rash guard and a hat, since water bounces UV straight back up at them. And then watch for the flip: young children lose body heat much faster than adults, so a kid in wet clothes at 80 degrees can start shivering inside 25 minutes. Pale lips and hunched shoulders mean it is over. Towel, dry clothes, snack.
Swim diapers, not regular diapers. A regular disposable diaper in a water bin swells to the size of a grapefruit and can split at the seam, which dumps absorbent gel beads into the water. Swim diapers do not have that gel. They also do not hold much, so know your kid.
If your child bolts, be stricter than this list. Wandering toward water is a documented and serious risk for autistic children in particular. If that is your kid, latch the gate before setup, keep zero standing water when you are not actively playing, and do not rely on “she knows not to.”
Pick An Outdoor Water Play Idea In 30 Seconds
Scan this, pick one, close the tab and go outside. Times include prep, play and cleanup, but not freezing time.
| # | Activity | Real ages | Mess | Total time | Supervision | Pick it when |
| 1 | Sponge Bombs | 2 to 6 | Low | 45 min | Arm’s reach under 3 | You have 5 minutes and zero plan |
| 2 | Ice Cube Rescue | 2 to 6 | Low | 30 min | Arm’s reach under 3 | It is brutally hot and you froze them last night |
| 3 | Backyard Car Wash | 2 to 6 | Medium | 60 to 80 min | Close, the ground gets slick | Your kid copies every chore you do |
| 4 | Rainbow Water Beads | 5 to 6 only | Low, but beads escape | 40 min | Hands-on, count in and out | Never for under 4s. See the warning below |
| 5 | DIY Water Wall | 3 to 6 | Low | 60 min build, then reusable | Check every few minutes | You want one build that lasts all summer |
| 6 | Slip-and-Slide Upgrade | 4 to 6 | Low, ruins the grass | 60 min | Hands-on the entire time | Big yard, big energy, and you will stand there watching |
| 7 | Nature Soup | 18 months to 6 | High | 45 min | Arm’s reach under 3 | You have a yard and no supplies at all |
| 8 | Water Balloon Piñata | 4 to 6 | Low, plus litter | 40 min for 10 min of play | Hands-on | It is a birthday and you want one big moment |
| 9 | Sink or Float? | 2 to 6 | Low | 25 min | Arm’s reach under 3 | You want play with an actual lesson inside it |
| 10 | Giant Ice Excavation Block | 3 to 6 | Low | 60 to 75 min | Check every few minutes | You need the longest stretch of quiet on this list |
| 11 | Colour-Mixing Water Lab | 3 to 6 | Medium, it stains | 50 min | Check every few minutes | Your kid loves potions and mixing |
| 12 | Splash Pad Toy Sorting | 2 to 6 | Low | 40 min | Arm’s reach under 4 | You own a splash pad and they are bored of it |
Longest engagement on the list: the giant ice block and the car wash. Shortest: sink or float, which is genuinely done in 12 minutes and then becomes a splash bin, and that is fine.
1. Sponge Bombs
If you only try one idea on this list, try this one. Water balloons take fifteen minutes to fill, last four seconds, and leave latex scraps all over the grass that a toddler will absolutely find and put in her mouth. Sponge bombs are reusable, soft, and you can make a set in the time it takes to boil pasta.
Real ages: 2 to 6. For 2s and young 3s this is not a throwing game, it is a dunk-and-squeeze game, and it works just as well.
Time: 8 to 10 minutes to make them once, then 30 to 45 minutes of play, 5 minutes cleanup.
Mess: Low. Everyone gets soaked, nothing stains, nothing to scrub.
Supervision: Arm’s reach under 3, because of the open bucket. Every few minutes for 4 and up, plus one rule you actually enforce.
Free swap: The sponges already under your sink. Skip anything with the green abrasive backing, it scratches wet skin. Kitchen twine works if you have no zip ties.
Adult-only step: All the cutting, and trimming the zip tie tails flush.
Materials Needed
- Standard household sponges (preferably in assorted, bright colors)
- Strong rubber bands or small plastic zip ties
- A large bucket filled with water
- Scissors
I use a $1.25 Dollar Tree multipack, which makes three or four bombs and holds up for two summers. Use 4 inch zip ties if you have them. Rubber bands work, but they snap when the sponge swells, and a rubber band snapping off wet skin genuinely hurts.
Step-by-Step Setup
- Cut three rectangular sponges lengthwise into three or four strips each. Kitchen scissors are fine, and this part is yours, not theirs.
- Stack about nine strips in your hand, mixing colors so each bomb looks different. Different-looking bombs cut down on arguments about whose is whose.
- Cinch the bundle hard in the exact center with a zip tie, pull it tight, then cut the tail off flush with the tie. A leftover tail scratches.
- Fluff the strips out into a pom-pom shape.
- Half fill a bucket with warm water, not cold. Warm water roughly doubles how long a toddler stays interested, and I have tested this more than once by accident.
- Set the rule before the first throw: below the shoulders, and nobody throws at anyone who is not looking.
Tip: Wring the bombs out and hang them on the fence or a chair back when you are done. Left balled up in a bucket, they smell like a wet dog by Tuesday and grow mildew by Friday.
Developmental Benefits
Throwing at a target is exactly the kind of gross motor work preschoolers need, and the aiming part builds hand-eye coordination in a way that no screen does. A soaked sponge is also a strong sensory hit: heavy, cold, squishy, dripping. For 2s, squeezing the water out is the real prize, and it builds the same hand strength that later shows up in scissors and pencil grip.
What goes wrong the first time: Everyone aims for faces. A fully soaked sponge bomb weighs about a quarter of a pound, and from six feet away it stings, especially in the eyes. Say the rule out loud first, then referee the first two minutes properly and you will not have to again.
Skip it if: Your child hates being splashed without warning, which is very common with sensory-sensitive kids. Give them the refill bucket and make them the boss of loading, or set up two buckets and let them throw only at the fence.
2. Ice Cube Rescue
Toys trapped in ice, and your kid is the rescue crew. It sounds too simple to work. It works. The reason it works is that there is a clear goal, and a preschooler will stick with a clear goal far longer than with open-ended play.
Real ages: 2 to 6, with the toy size adjusted by age.
Time: 5 minutes to set up, 4 hours minimum in the freezer (overnight is easier), 15 to 25 minutes of play, 5 minutes cleanup.
Mess: Low. It is water and a bit of salt.
Supervision: Arm’s reach under 3, mostly because of the toy size and because toddlers put ice chips in their mouths.
Free swap: A silicone muffin tin you already own beats any purchase. No spray bottle? A cup of warm water and a spoon does the job, just slower.
Do not use: any toy that fits through a cardboard toilet paper tube if your child is under 3. That rules out most mini figures. Size up to a big plastic dinosaur, a large animal figure, or a duplo-style person.
Materials Needed
- Ice cube trays, silicone muffin tins, or small plastic food storage containers
- Miniature water-safe toys (plastic dinosaurs, building block figures, or small animal figurines)
- Spray bottles, child-safe plastic tweezers, or small wooden mallets
- Warm water and a small bowl of table salt
Two changes I would make to that list. Use a silicone muffin tin rather than an ice cube tray, because muffin cups hold a toy big enough to be safe and they pop out without a fight. And leave the wooden mallets in the drawer for under 6s. Hammering ice sends chips flying at eye height and it always turns into hammering something else.
Step-by-Step Setup
- Drop one toy into each cup of a silicone muffin tin. Push it down so it is properly submerged, otherwise it floats and sticks out of the finished ice.
- Fill with water and freeze at least 4 hours, or overnight.
- To release them, run warm water over the underside of the tin for about 10 seconds. They pop straight out.
- Set the ice out in a shallow bin or on the grass in the shade, and keep half the batch in the freezer for round two.
- Hand over spray bottles of warm (not hot) water, plus a small bowl of table salt and a spoon.
- Let them work out that salt melts a hole faster than water does. Do not tell them, just put it there.
Tip: In full sun, ice in an open bin is gone in about 20 minutes, so set up in the shade if you want this to last. If you are trying to burn a whole hour, do the giant block in idea 10 instead.
Developmental Benefits
Squeezing a spray trigger is one of the best hand-strength exercises there is, and it is the same muscle group that shows up later in handwriting. If your child needs two hands to squeeze it, that is normal at 3 and it is the point. The salt part is real science too: salt lowers the freezing point of water, so the ice around it melts faster. That is not a chemical reaction, it is a temperature change, and “the salt makes the ice melt faster” is plenty of explanation for a 4 year old.
What goes wrong the first time: You use tiny toys and small ice cube trays, and the whole thing is over in six minutes. Bigger toys in bigger ice is the entire trick. The second thing that goes wrong is a kid who taste-tests the salt bowl. Give them a teaspoon of salt, not a cup, and expect one dramatic face.
Skip it if: Your child rage-quits slow tasks. Melting ice is slow by design. If that is your kid, hand over warm water plus salt from the start and skip the tweezers entirely.
3. Backyard Car Wash
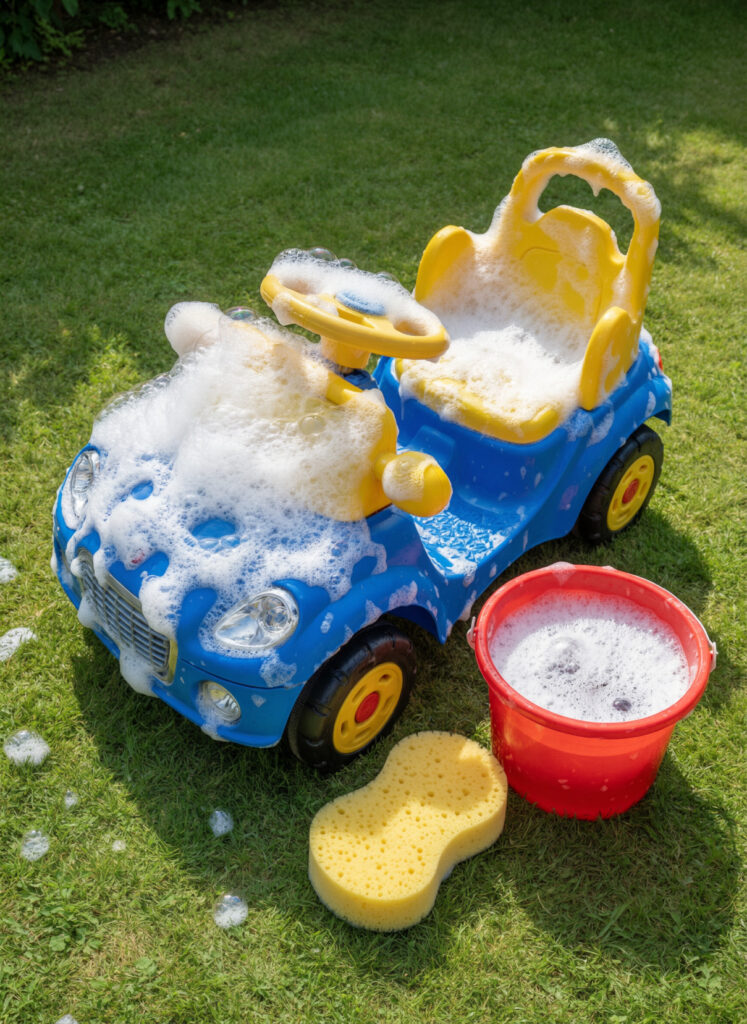
Toddlers want to do chores. Not the chores you need done, obviously, but chores. A car wash gives them a real job with a visible before and after, and it is the closest thing on this list to a guaranteed hour.
It also means the trikes actually get clean, which is why it beats most sensory activities on value for time.
Real ages: 2 to 6, and this is one of the few ideas where the 2 year old gets more out of it than the 5 year old.
Time: 10 minutes to set up, 30 to 60 minutes of play, 10 minutes cleanup.
Mess: Medium. Suds travel, and everything within ten feet ends up wet.
Supervision: Close, and not for the water. Soapy concrete has almost no grip. Stay near enough to catch someone.
Free swap: Old bath towels instead of drying towels, a cut-up t-shirt instead of a car sponge, and one squirt of Dawn instead of a car wash product.
Where to set up: Grass, or the flattest part of the driveway. If you can choose, choose grass.
Materials Needed
- A collection of water-safe vehicles (plastic trucks, tricycles, ride-on cars)
- Two large buckets
- Tear-free baby shampoo or mild dish soap
- Large car-washing sponges, soft scrub brushes, and old drying towels
Half fill the buckets rather than filling them. A full bucket is heavy enough to tip onto a toddler, and the CPSC has warned for years about small children drowning in 5 gallon buckets holding just a few inches of liquid. Two half-full buckets work exactly as well.
One more thing that list should say: keep battery-powered ride-on cars out of it. Sponging one is fine, hosing it down is how you kill the battery pack and the connectors. Plastic trikes and trucks only.
Step-by-Step Setup
- Mark the wash zone with chalk or a couple of towels, ideally on grass. Soapy driveway is genuinely slippery, closer to ice than to wet pavement.
- Half fill bucket one with warm water and a squirt of Johnson’s Head-To-Toe or a small squeeze of Dawn. Tear-free still stings a bit, so it does not go near faces.
- Half fill bucket two with clean rinse water.
- Line up the vehicles. Give each kid their own sponge and their own brush, in different colors.
- Show them the sequence once: scrub, rinse, dry. Then step back and let them do it out of order for the next forty minutes.
- Before you start, agree on the “yes list” of what can be washed. Trikes yes, the dog no, the house no, your actual car definitely no.
Tip: A stiff brush on real car paint leaves fine scratches, so if your car is anywhere near the wash zone, move it. I learned that on a black hood.
Developmental Benefits
There is real pride in this one. A kid who scrubs a filthy trike clean can see what they did, which is rare in play. Physically it is all bending, reaching, wiping and hauling, so it works the big muscles. Two or more kids will negotiate who washes what without any input from you, which is more useful language practice than most structured games. And soap suds are a rich sensory experience on their own, warm and slippery and impossible to hold.
What goes wrong the first time: Somebody runs on the soapy concrete and goes down hard. That is the one real risk here, and it is easily avoided by setting up on grass and using less soap than feels right. Second thing: they wash one trike for thirty minutes and then want to wash the house. Have the yes list ready.
Skip it if: You only have concrete and a kid who cannot stop running. Move to the sponge bombs instead, same soaking, no slip zone.
4. Rainbow Water Beads
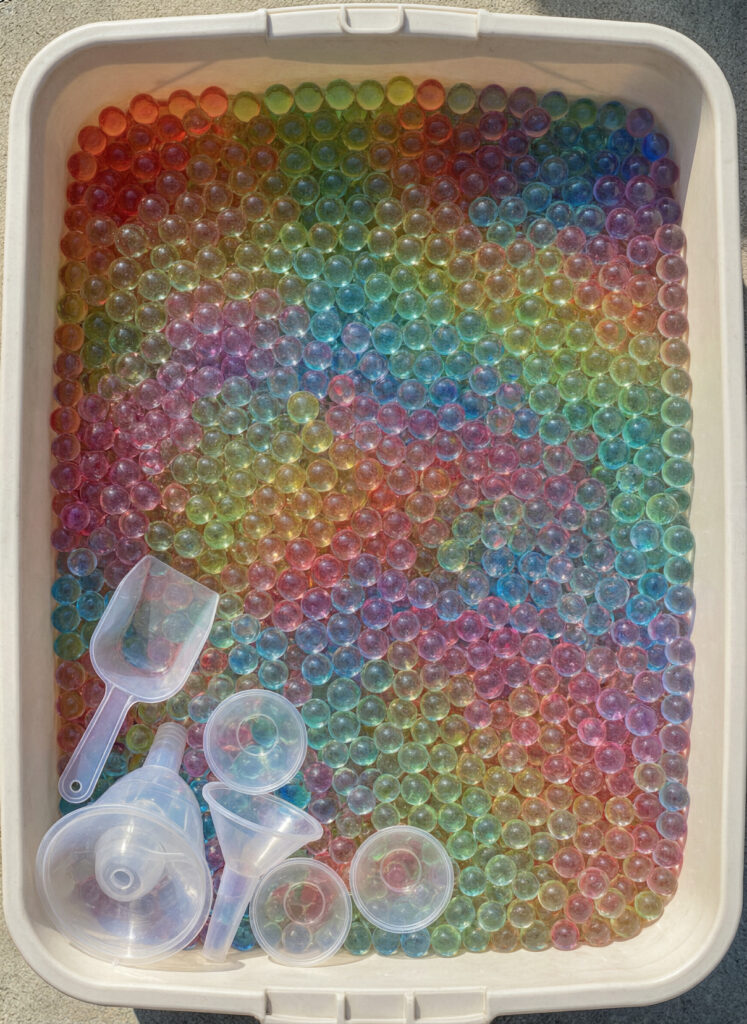
Read this part before you add them to a cart. This is the one idea on the list I would not run with a child under 4, and I want to be direct about why rather than burying it at the bottom of the section.
Practical note: Water beads are superabsorbent polymer, the same family of gel used inside disposable diapers. Swallowed, they keep absorbing and keep growing inside the body, which can cause an intestinal blockage. They are also hard to spot on an X-ray, so the problem often gets found late. The CPSC has issued public warnings and there have been multiple recalls, including cases involving surgery and at least one reported infant death. Unexpanded beads are the most dangerous of all, because they are small enough to swallow easily and then swell.
So here is my honest guidance for a post about kids under 6. Skip water beads entirely for under 4s, including any child who still mouths things, and including any yard where a younger sibling or a visiting toddler could wander over. At 5 and 6, with a child who reliably does not put things in their mouth, you can do it with you sitting right there and a bead count in and out.
If that is not your kid today, use the ice marble version below. It gives almost the same slippery, cold, jewel-like sensory hit with none of the risk, and my kids honestly liked it more.
Real ages: 5 to 6 only, with an adult at arm’s reach. Not 4 and under.
Time: 4 hours to soak, 20 to 30 minutes of play, 10 minutes to collect every last bead.
Mess: Low mess, high escape. They roll, they hide in grass for months, and on a hard floor they are ball bearings.
Supervision: Hands-on, seated with them, phone down. This is not a check-in-every-few-minutes activity.
Safer swap for under 4s: ice marbles. Half fill balloons with water, add two drops of food color, freeze overnight, then snip the balloon off with scissors (your job, not theirs) to get a smooth colored ice sphere. Cooked and cooled rolled oats or cooked pasta also work for the scoop-and-pour part.
One correction: tapioca pearls get recommended online as a safe water bead substitute. Large boba pearls are round, slippery and exactly the size that blocks a small airway, and there are documented choking cases. They are not a good swap for under 3s.
Materials Needed
- Dehydrated water beads
- A large, shallow plastic storage bin
- Clean water
- Sensory play tools (slotted spoons, measuring cups, plastic funnels, and small bowls)
Step-by-Step Setup
- Count the dry beads into the bin. Actually count them, or measure a level tablespoon, so you know what you are collecting later.
- Cover with several inches of water and leave them 4 hours or overnight. They will not be ready in twenty minutes.
- Set the bin on a patio table, not on the ground. Table height keeps beads contained and stops a younger sibling reaching in.
- Add scoops, cups and a funnel. Ask for sorting by color, or how many fill a half-cup measure.
- When play ends, pour the whole bin through a colander, then walk the area looking for strays. Put them in the trash, not down the drain and not in the garden.
Developmental Benefits
The texture is the point: cool, smooth, slippery, and impossible to grip, which is oddly calming for a lot of kids. Scooping and pouring builds hand control, and sorting by color or counting into a measuring cup slides real math into it without anyone noticing. Kids who seek out heavy sensory input tend to love this one, which is exactly why it gets recommended so often for the age group least able to handle it safely.
Important Safety Note: Water beads must be used under strict adult supervision, and never with children under 4 or with any child who still puts objects in their mouth. Store the dry packet locked away, not in the craft bin, because dry beads are the highest-risk form.
What goes wrong the first time: You soak them for twenty minutes and they are still hard little pellets, so the activity does not happen. Soak time is not optional. The other thing that happens is that you find beads in the lawn in September.
Skip it if: Your child is under 4, mouths things, or has any sibling under 4 in the house. Use the ice marbles instead. Nobody will know the difference.
5. DIY Water Wall
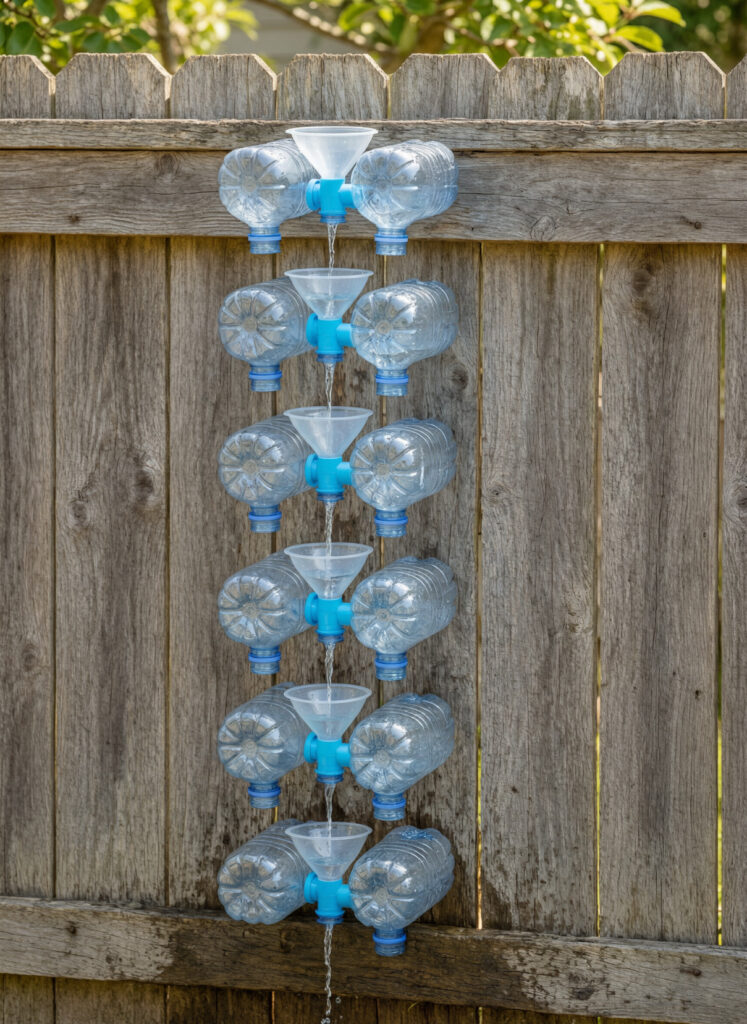
A water wall is a vertical run of funnels, bottles and channels zip tied to a fence, and your kid pours water in the top to see where it comes out. It is the most impressive-looking thing on this list and the one with the most honest trade-off, so let me give you that up front.
You will spend 45 minutes to an hour building it. The first session may only last 15 minutes. But it stays on the fence, and mine got used two or three times a week from June to September, which no other activity here matched.
Real ages: 3 to 6. A 2 year old will pull the bottles off the fence, which is developmentally correct and also the end of your water wall.
Time: 45 to 60 minutes for the adult build, then 20 to 40 minutes per session, reusable all summer.
Mess: Low, apart from the mud patch that forms underneath. Put a bin or bucket at the bottom.
Supervision: Check every few minutes once it is built. This is one of the calmer options.
Free swap: The whole thing is recycling. Bottles, milk jugs, yogurt pots and takeout containers. Rinse milk jugs properly or the wall smells sour by day two.
Adult-only steps: every cut, the staple gun, and checking that whatever you mount it on cannot tip over.
Materials Needed
- A vertical surface (a chain-link fence, a wooden trellis, or a pegboard)
- Recycled plastic items (water bottles, milk jugs, yogurt containers)
- Plastic tubing or old pool noodles cut into halves
- Zip ties, strong waterproof tape, or staple gun
- A watering can or a bucket with a small pitcher
Two notes on that surface. A cut plastic bottle rim is genuinely sharp, closer to a blade than to a rough edge, so every cut edge gets a strip of duct tape folded over it before it goes up. And skip a lightweight trellis or a leaning pegboard unless you can anchor it. A chain-link fence, a solid wooden fence panel or a garage wall is the right base, because a kid will absolutely lean their whole weight on this thing.
Step-by-Step Setup
- Rinse everything. Cut the bottoms off water bottles to make funnels, and punch a few holes in the base of a yogurt pot to make a rain shower.
- Fold duct tape over every cut rim. Do all of them, not most of them.
- Lay the pieces on the ground in the order you want first, so you can see the path before you commit.
- Zip tie them to the fence in a zig zag, each piece two to three inches below and slightly offset from the one above. If everything is dead straight the water shoots past.
- Set the top opening at your child’s chest height, not yours. If they cannot reach it, you become the water pourer for the next half hour.
- Trim every zip tie tail flush.
- Put a bin or bucket at the base to catch the runoff, and hand them a small pitcher rather than a full watering can. A full can dumps faster than the wall can carry it.
Tip: Test it yourself with one pitcher of water before you call them over. There is always one funnel aimed two inches off, and fixing it takes ten seconds before, or ruins the reveal after.
Developmental Benefits
This is the strongest STEM activity on the list, and not in a vague way. They pour, they watch the water miss, and then they physically move a bottle to fix it. That loop of predict, test, adjust is the actual scientific method, running in a backyard, with no worksheet. They also pick up gravity, volume and flow rate in the only way that sticks at this age, which is by getting it wrong first.
What goes wrong the first time: You build it at adult height and aim everything straight down, so the water skips the second funnel entirely and your kid loses interest before you have finished explaining it. Chest height, zig zag, offset. That is the fix.
Skip it if: You want something happening in the next ten minutes. This one is a Saturday morning project, not a rescue plan for a bored kid at 4pm. Build it while they play with idea 1.
6. Slip-and-Slide Upgrade
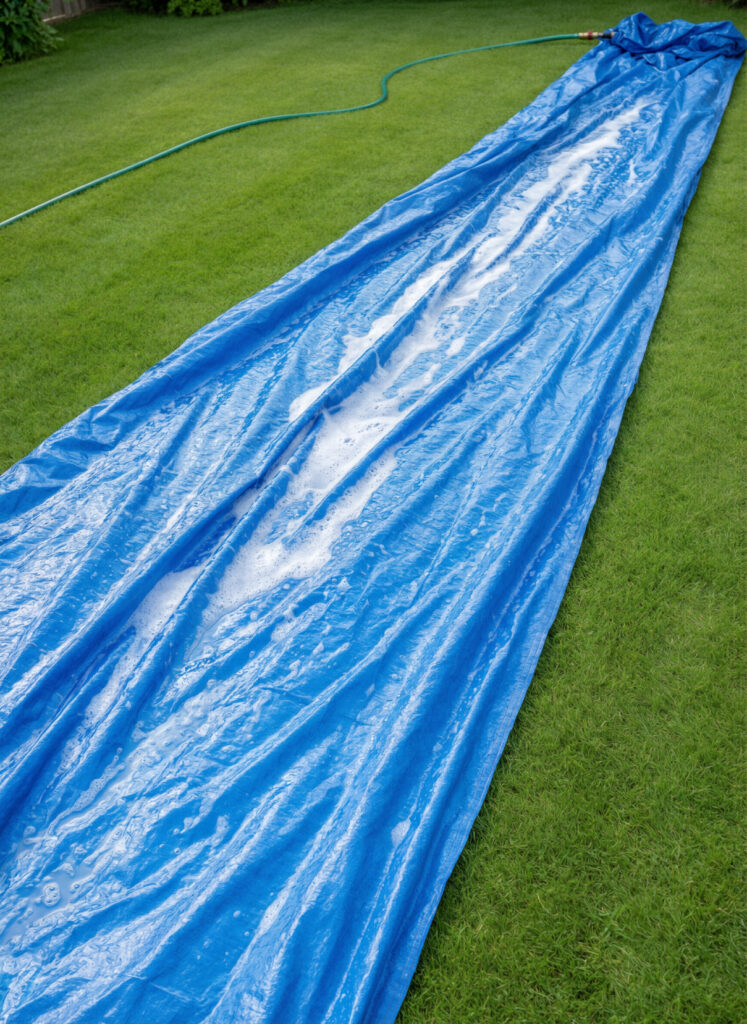
This is the most fun and the highest injury risk on the list, so it gets the longest safety section and the tightest age range. I am not going to tell you a homemade tarp slide is automatically safer than a store-bought one, because it is not. A bare tarp is slicker than a purpose-made slide, it has no padded edges, it bunches into a wave when a kid catches it with a heel, and the grommets are metal.
What a DIY version does give you is control over the length, the slope, the amount of soap and the landing area. Used properly, that is where the safety comes from.
Practical note: The CPSC has warned since 1993 about serious neck and spinal injuries on water slides, and that warning centers on bigger, heavier users diving head first and stopping suddenly at the end. For kids under 6 the rule that follows is simple and non-negotiable: they go down sitting, feet first, one at a time, and there is at least six to eight feet of soft, clear grass past the end of the tarp.
Real ages: 4 to 6 for sliding. For 2s and 3s, lay the tarp flat with a sprinkler over it and let it be a splash mat. Same tarp, none of the risk.
Time: 15 minutes to set up and check the ground, 20 to 40 minutes of play, 10 minutes to pack up. The grass needs a few days.
Mess: Low mess, but it flattens and yellows a strip of lawn, so put it where the grass is already struggling.
Supervision: Hands-on the entire time, with an adult standing at the bottom end. This is not one you set up and step away from.
Free swap: No tarp? Run a sprinkler across a smooth grass slope. Slower, safer, and still gets the shrieking.
Adult-only steps: ground inspection, anchoring, and controlling how much soap goes down.
Materials Needed
- A large, heavy-duty plastic tarp (minimum 10 feet long)
- Landscape anchor pins (optional, for securing the corners)
- A garden hose
- Tear-free baby shampoo
On the anchor pins: I would leave them out of the sliding lane entirely. A metal pin driven flush still works its way up as the ground gets soaked, and it sits exactly where a hip or a knee lands. Weigh the top corners with rocks or sandbags placed off to the sides instead, and tuck the bottom edge under itself.
Two pool noodles zip tied along the long edges is the upgrade that genuinely helps. They keep the water on the tarp, keep kids from sliding off the side, and give you a soft edge instead of hard ground.
Step-by-Step Setup
- Walk the whole strip on your hands and knees first. You are looking for rocks, sticks, dog holes, tree roots and sprinkler heads. A buried sprinkler head under a thin tarp is a solid object right where a knee goes.
- Pick a gentle slope or flat ground. A steep slope plus soap is far too fast for a 4 year old, and speed is not what makes this fun for them anyway.
- Roll the tarp out and weigh the top corners, keeping anything hard well outside the lane.
- Zip tie a pool noodle along each long edge if you have them.
- Soak the tarp thoroughly before anyone touches it. A dark tarp in full sun gets hot, and a dry tarp gives kids friction burns on the belly.
- Add a small line of tear-free wash down the middle, then more only if needed. Too much soap means no control and stinging eyes.
- Set the walk-back lane on the opposite side, on grass, and keep it soap-free. Soapy grass beside the slide is how the adults fall over.
- Rules out loud: sit down, feet first, one at a time, and wait until the person ahead of you is standing up.
Tip: put them in a rash guard or a t-shirt. Belly slides on a tarp that has dried out for two minutes leave a genuine friction burn, and a shirt prevents it.
Developmental Benefits
Pure gross motor work: running, stopping, balancing, and figuring out how to get their body moving from a sitting start. It burns more energy in twenty minutes than an hour of anything else here. There is also a real self-regulation piece in learning to wait for their turn while soaking wet and desperate to go, which is harder than it sounds at 4.
What goes wrong the first time: The tarp is not wet enough, the first kid gets stuck halfway, scrapes their stomach and quits. Keep the hose running on it the whole session, not just at the start. The second thing is the tarp bunching into a wave, which happens when it is anchored at only one end. Weigh both ends.
Skip it if: Your only flat space is over concrete or gravel, your yard has a fence, tree or patio edge within about fifteen feet of the run-out, or your child cannot wait for a turn yet. There are eleven other options here.
7. Nature Soup
7. Nature Soup
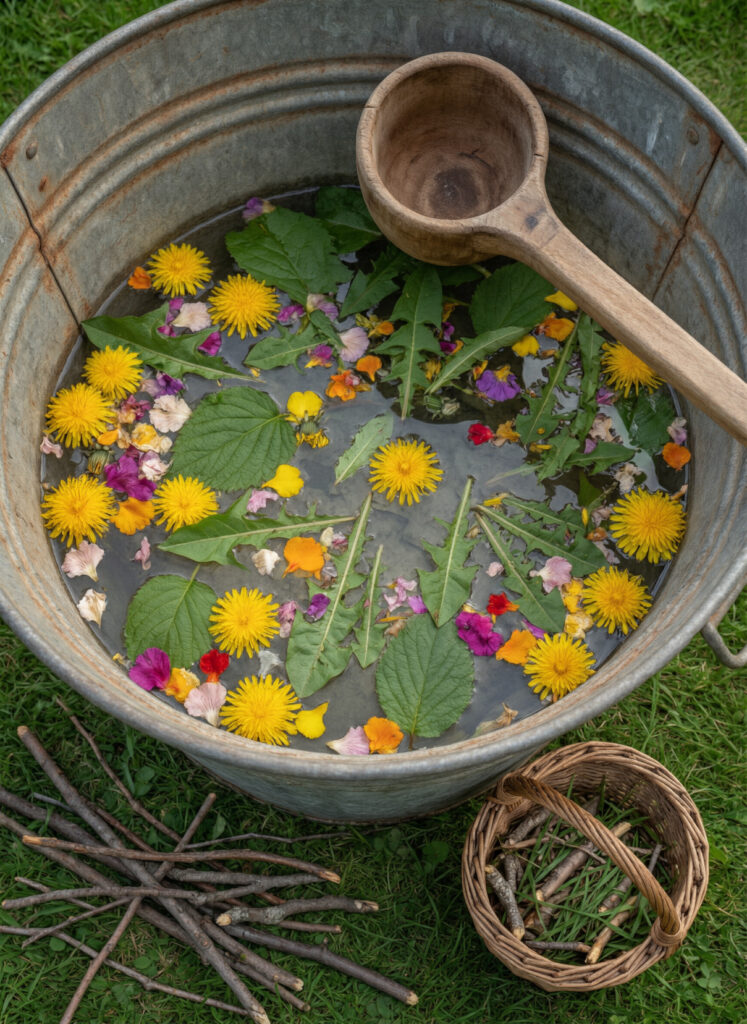
Zero prep, zero cost, and the highest ratio of engagement to effort on this list. A tub of water, a wooden spoon, and permission to put leaves in it. My youngest has cooked nature soup for over an hour while I sat five feet away doing nothing.
There is one thing this activity needs that most versions online leave out entirely, and that is a plant rule. Do that part first and the rest is easy.
Real ages: 18 months to 6. It scales up beautifully, older kids invent recipes and menus.
Time: 5 minutes to set up, 20 to 45 minutes of play, 10 minutes cleanup.
Mess: High, in the good way. Wet grass clippings, mud, petals, and a tub of green water. Nothing stains.
Supervision: Arm’s reach for under 3s, because this is the activity where things go in mouths. Every few minutes for 4 and up.
Free swap: All of it. The only thing worth adding is an old whisk, which is the best nature soup tool there is.
Practical note: Before you send anyone foraging, walk the yard yourself once. No mushrooms, ever. No berries of any kind, because a preschooler cannot tell a blackberry from a pokeweed berry and neither can most adults. And check for the common backyard plants that are genuinely toxic if chewed: foxglove, oleander, lily of the valley, azalea and rhododendron, yew, hydrangea, castor bean, and daffodil or tulip bulbs. If your lawn was treated with weed killer or fertilizer recently, skip the grass clippings altogether this week.
Materials Needed
- A large, wide bucket or a shallow water table
- Natural elements (leaves, grass clippings, flower petals, smooth pebbles, twigs)
- Kitchen utensils (ladles, wooden spoons, plastic whisks, old measuring cups)
Skip the pebbles for under 3s, or use ones too big to fit through a toilet paper tube. Small smooth stones are exactly the size and shape that a toddler chokes on, and they are the one item on that list I would not hand over without thinking.
Step-by-Step Setup
- Half fill a wide tub with warm water and set it on the grass, ideally over the patch of lawn that needs watering anyway.
- Give each kid a basket or a yogurt tub and set the boundary: this side of the fence, and only things that have already fallen.
- Say the rule once, plainly. We cook it, we do not taste it. Then repeat it once mid-play, because they will forget.
- Let them dump their haul in. Resist sorting it or improving it.
- Hand over the spoon, the ladle and the whisk. The whisk is the one they will fight over.
- When it stalls, give the soup a customer. “The dinosaur is hungry, but he only eats yellow things.” That one sentence has turned five minutes into forty in my yard more times than I can count.
- Wash hands properly at the end, and dump the tub before you go inside.
Tip: keep a colander next to the tub. Straining the soup from one container into another is somehow more interesting than making it, and it buys you another ten minutes.
Developmental Benefits
This is the best pretend play activity here. Children narrate what they are doing, invent recipes, name ingredients and serve customers, which is real language and story work. Stirring a heavy tub of water is more physical than it looks, and pouring between containers builds the same hand control as the dropper activities, just with bigger muscles. It also gets them looking closely at their own yard, which they mostly walk past.
What goes wrong the first time: You set no plant boundary, and you spend the whole session policing what they picked instead of relaxing. Walk the yard first, tell them where they can pick, then let go. Second thing: wet grass clippings stick to feet and hands and travel inside. Leave a towel at the door.
Skip it if: Your child still puts everything in their mouth and you cannot sit right there with them. Also skip it if your yard was treated this week.
8. Water Balloon Piñata
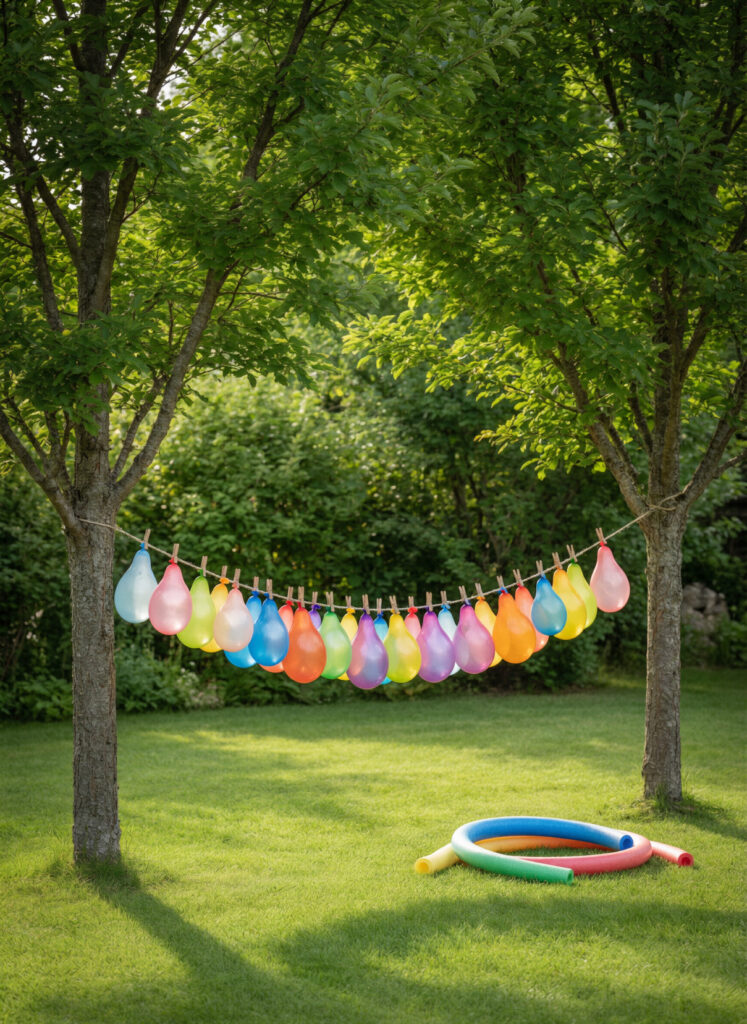
Balloons hanging from a rope, one kid with a pool noodle, and a very satisfying splash. It is a great birthday party moment. It is not a great Tuesday afternoon activity, and the reason is the math: about 25 minutes of filling and tying for about 10 minutes of play.
Go in knowing that and you will love it. Go in expecting an hour and you will be annoyed.
Real ages: 4 to 6 with a pool noodle. A 3 year old can do it if an adult holds the balloon still at their height.
Time: 20 to 25 minutes to fill and hang, 10 to 15 minutes of play, 10 minutes for the fragment sweep.
Mess: Low water mess, but real litter. Latex scraps end up everywhere.
Supervision: Hands-on. One adult on the swing zone, the whole time.
Free swap: Hang soaked sponge bombs from idea 1 instead. No fragments, reusable, and you can do it in four minutes. This is what I use for anything that is not an actual party.
Practical note: Federal labeling law warns that children under 8 can choke or suffocate on uninflated or broken balloons, and a burst water balloon leaves dozens of scraps in wet grass where they are almost invisible. Count your balloons before you hang them. If you tie twelve, you are looking for at least twelve pieces of latex on your hands and knees afterwards, and you are not done until you have them.
Materials Needed
- Standard water balloons
- A sturdy length of rope or strong clothesline
- A plastic baseball bat, a lightweight broomstick, or a pool noodle
For under 6s, use the pool noodle. Not the bat, not the broomstick. A plastic bat swung by an excited 5 year old who cannot see who is behind them does real damage to a sibling’s face, and the noodle bursts a water balloon perfectly well.
If you are filling more than a dozen, Bunch O Balloons fills about 35 in twenty seconds off a hose fitting and is the only water balloon product I have been glad I bought.
Step-by-Step Setup
- Fill the balloons the morning you plan to use them, not the night before. Overnight they soften, sweat and start letting go of their knots.
- Do not overfill. A balloon filled until it is tight bursts while you are tying it, usually down your leg.
- String the rope between two solid anchors at your child’s head height, and put something bright on it (a towel, ribbon) so nobody runs into a rope at neck height. Take it down the moment you are finished.
- Tie the balloons on a few inches apart. Tie the rope high enough that a swinging noodle cannot reach the anchor points.
- Chalk a circle or lay a towel about ten feet back. Everyone who is not swinging stands behind it, and you stand between the line and the swinger.
- One kid swings, everyone else counts down. Then swap.
- Sweep for latex before anyone plays in that spot again.
Tip: If you want this to last longer than one round, hang about six balloons and six sponge bombs together. The sponges go back on the rope, the balloons do not, and the game keeps going.
Developmental Benefits
Hitting a hanging, slightly swinging target is harder than hitting a still one, so this builds timing and hand-eye coordination in a way a stationary game does not. It also takes real physical control and a bit of nerve, and the payoff is immediate and loud, which is very motivating for a 4 year old who is still figuring out their own strength.
What goes wrong the first time: You fill balloons for half an hour, they are gone in eight minutes, and there is a two year old in the grass picking up latex scraps while you clean up. Plan the sweep as part of the activity, and keep the younger sibling out of the area until it is done.
Skip it if: You have a child under 3 in the yard, or you are on your own with multiple kids and cannot stand guard on the swing zone. Do the sponge bomb version instead, it is genuinely almost as good.
9. Sink or Float?
9. Sink or Float?
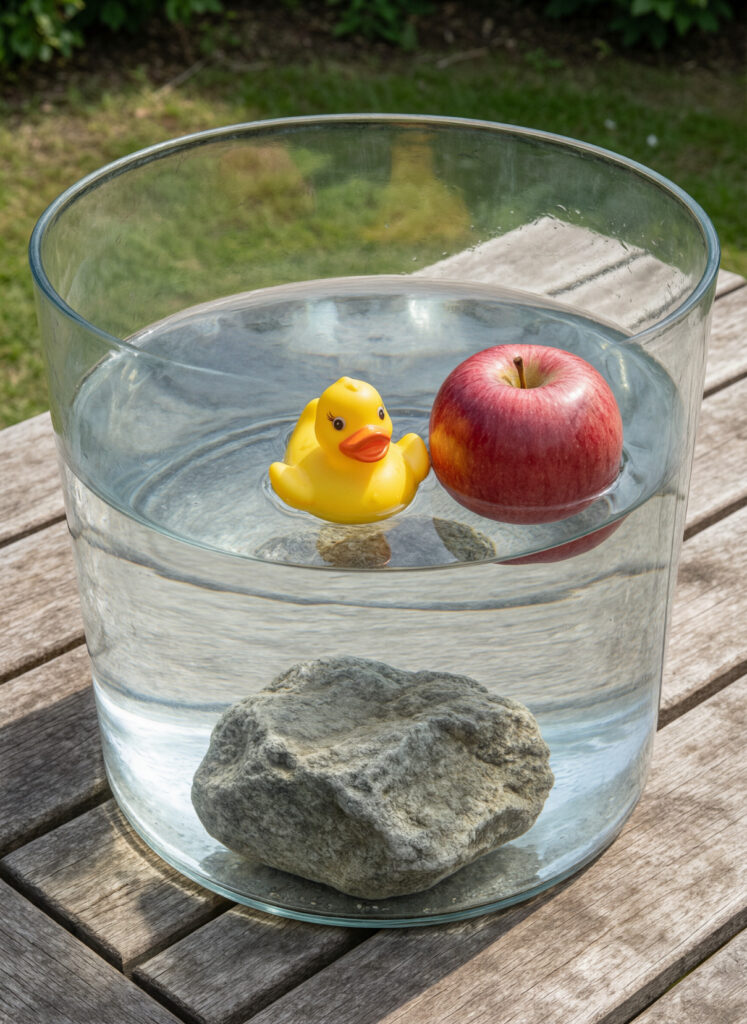
The simplest idea here, and the only one with a real lesson built in. Be realistic about the length though: the actual experiment runs about twelve minutes, and then the bin becomes a splash bin for another twenty. That is not a failure, that is how it goes, and the twelve minutes are worth it.
Real ages: 2 to 6. A 2 year old does thumbs up or thumbs down instead of words, which works fine.
Time: 5 minutes to gather, 10 to 20 minutes of actual experimenting, 5 minutes cleanup.
Mess: Low. One bin, one towel.
Supervision: Arm’s reach under 3.
Free swap: Everything comes from your kitchen and your yard. Do not buy a “sink or float kit.”
Materials Needed
- A large tub of water or a small kiddie pool
- A collection of varied household and natural objects (e.g., a metal spoon, a plastic toy block, a wooden stick, a heavy rock, a sponge, a rubber duck, an apple)
- Two small baskets labeled “Sink” and “Float” (optional)
Two swaps. Leave out coins and any object small enough to pass through a toilet paper tube if your child is under 3, since those go in mouths at exactly the wrong moment. And use a fist-sized rock rather than a heavy one, which cracks bins and lands on toes.
Do not plan on eating the apple afterwards.
Step-by-Step Setup
- Fill the tub about two thirds with warm water and lay the objects out on a towel next to it.
- Pick up one object. Ask the question, wait for the guess, then let them drop it in.
- Sort into two piles as you go, wet and dry, or use the two labeled baskets if you have them.
- Once you have run through everything, do the three that surprise people. A whole orange floats. Peel it and it sinks, because the rind holds air. A sheet of foil shaped like a boat floats, and the same sheet crushed into a ball sinks.
- Let them re-test their favorites as many times as they want. Repetition is the learning.
- Then let the bin turn into a splash bin, because it will.
Tip: Compare two objects the same size, like a wooden block and a rock, rather than a small heavy thing and a big light thing. That is the comparison that actually teaches something.
Developmental Benefits
This is a genuine first taste of the scientific method: predict, test, look at the result, try again. One thing to be careful about, though. If you frame it as “heavy things sink,” you are teaching a rule that is wrong, and a kid who has seen a boat will catch you out. A big steel ship floats and a small pebble sinks. At this age, the honest and more useful framing is “some things sink and some things float, and we cannot always tell by looking, so we test it.” That is real science, and it leaves room for the density conversation at 8 instead of undoing a wrong rule.
What goes wrong the first time: You use ten objects that all float, so there is no surprise and no reason to guess. Aim for a mix that includes at least three genuine sinkers and two things they will get wrong.
Skip it if: Your child is in a phase of dumping the entire bin over. Do this one at a table with a smaller tub, or come back to it in a month.
10. Giant Ice Excavation Block
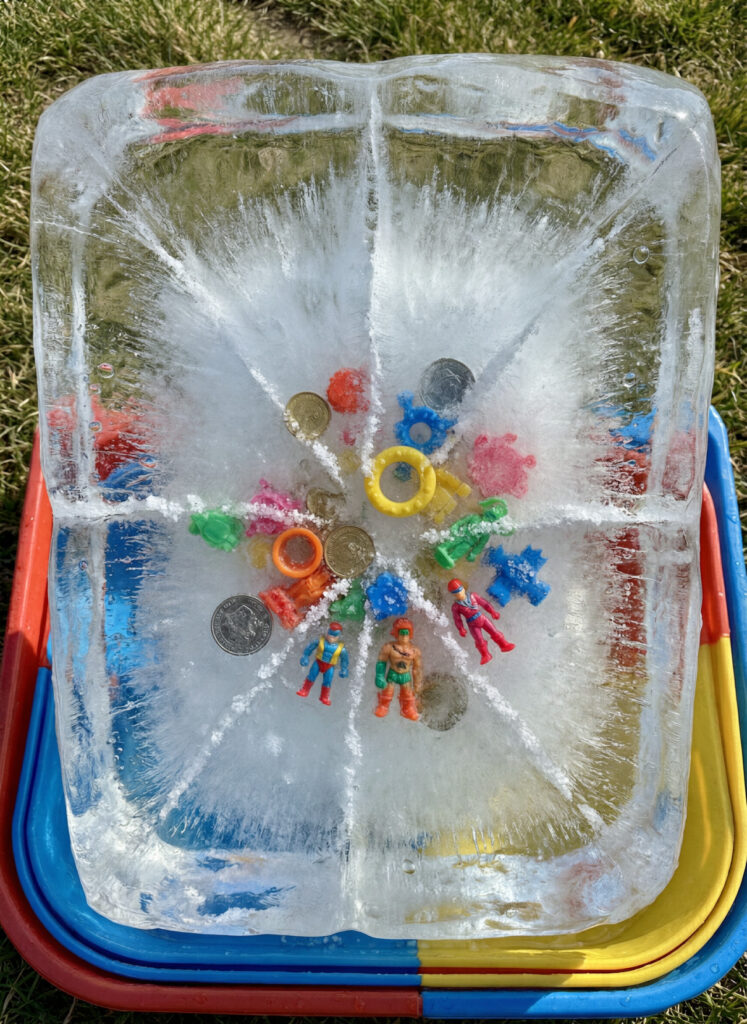
This is the longest-lasting activity on the list. Thirty to sixty minutes is normal, and I have had a 5 year old work at one for an hour and a half with breaks. If you need real time to make dinner or answer emails within earshot, this is the one.
It takes planning though. A block this size needs a full day in the freezer, not a night.
Real ages: 3 to 6. Younger than 3, use the muffin tin version in idea 2 instead.
Time: 15 minutes of prep across the day before, 24 hours to freeze solid, 30 to 60 minutes of play, 10 minutes cleanup.
Mess: Low. A puddle and some salt.
Supervision: Check every few minutes for 4 and up. Arm’s reach at 3, mostly because of the toy size and the salt.
Free swap: A loaf pan or an old plastic takeout container. Do not buy anything for this.
Adult-only steps: moving the block, and releasing it from the container.
Materials Needed
- A large plastic container or lunchbox (minimum 2-3 litres capacity)
- Multiple small plastic toys (dinosaurs, coins, rings, action figures)
- Water and excavation tools (droppers, squeeze bottles, plastic forks, and salt)
Two real changes. First, a 2 litre block weighs about four and a half pounds. A 3 year old cannot lift it, and dropped on a foot or a patio paver it does damage, so you carry it and you set it down where it is going to stay. A loaf pan sized block, closer to 1.5 litres, is the sweet spot: still an hour of digging, still liftable by an adult with one hand.
Second, take the coins and rings out. Coins are one of the most commonly swallowed objects in early childhood, and a ring is exactly the wrong size. Use figures too big to pass through a toilet paper tube.
Step-by-Step Setup
- Put a few toys in the container, add water to cover them by about an inch, and freeze for 3 to 4 hours. Leave an inch of headroom at the top of the container, because water expands as it freezes and thin plastic cracks.
- Add the next toys and more water, then freeze again. Two or three layers total. If you fill it all at once, every toy floats to the top and the dig is over in five minutes.
- Optional and worth it: put two drops of food color into one middle layer only, so a color reveal appears partway down.
- Freeze overnight after the last layer, so around 24 hours all in.
- To release it, sit the container in an inch of warm water in the sink for 20 to 30 seconds. Do not bang it on the counter.
- Set the block in a shallow bin, in shade. In a bin you can find every toy at the end, and the meltwater is contained. On the lawn you lose a figure and flood one patch of grass.
- Hand over squeeze bottles or droppers of lukewarm water, a small bowl of salt with a spoon, and plastic forks. No hammers, no mallets, no rocks.
Tip: Freeze two blocks. The second one is what saves you when they finish the first and immediately ask for more, and it costs nothing but freezer space.
Developmental Benefits
This activity asks for patience and rewards it, which is unusual and valuable. They also work out their own strategy: some kids pour warm water in one spot to tunnel, others salt the whole surface. Squeezing bottles and droppers for half an hour is serious hand strength work, more than any craft I know. And the salt part is real science, just named correctly: salt lowers the freezing point of water, so ice with salt on it melts at a lower temperature than plain ice. It is a temperature effect, not a chemical reaction.
What goes wrong the first time: You fill the container in one go, all the toys float to the surface, and the block is picked clean in four minutes. Layers are the entire secret. The other one is salt on the lawn, which leaves a dead yellow patch. Keep the bin on the driveway or the patio if you are using salt.
Skip it if: You need something right now. This one has a 24 hour lead time. Set it up tonight and you have tomorrow morning covered.
11. Colour-Mixing Water Lab
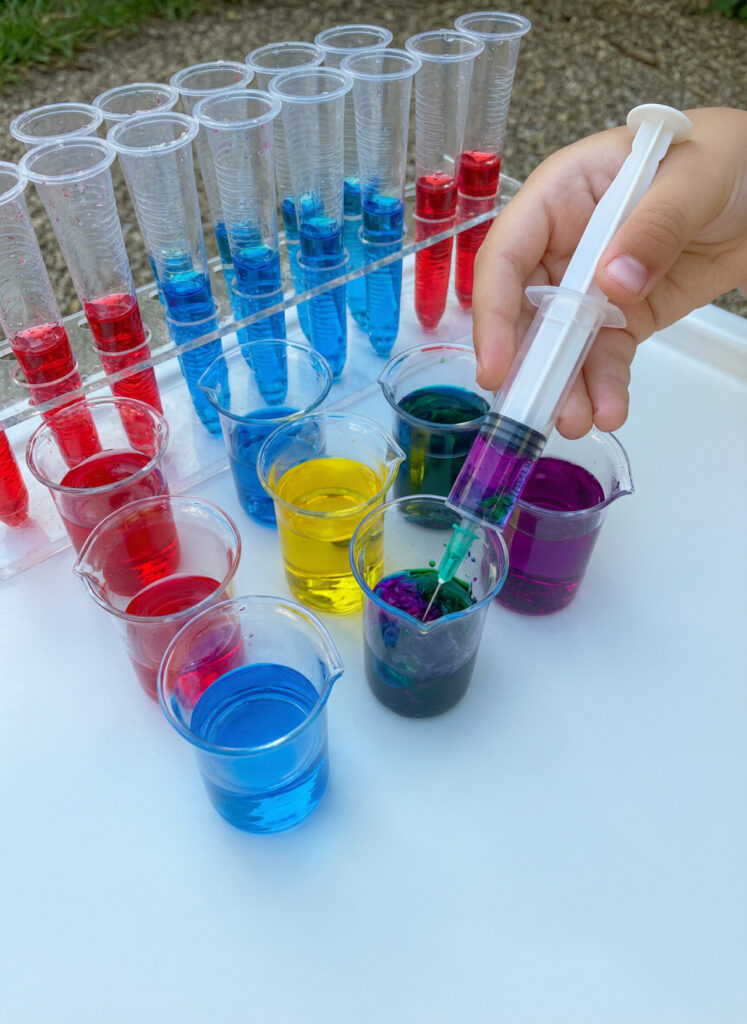
Three cups of colored water, a few droppers, and a kid who thinks they are making potions. It is a good one. It is not, however, mess-free, and I want to correct that before you set it up on a light patio.
Food coloring is a dye. It stains fingers for a day or two, it stains cotton more or less permanently, and it sits in the pores of pale concrete and patio grout for weeks. Set this one up on grass, or over a $1.25 plastic tablecloth, and use old clothes.
Real ages: 3 to 6. At 3 it is pouring with a color surprise. At 5 and 6 they start predicting.
Time: 10 minutes to set up, 20 to 30 minutes of play, 10 minutes cleanup plus a stain check.
Mess: Medium, and the staining kind rather than the wet kind.
Supervision: Every few minutes, plus one rule: it looks like juice, and we do not drink it.
Free swap: Oral medicine syringes from infant Tylenol or Motrin are the best droppers in the house and they are free. The pharmacy counter will usually hand you a couple if you ask. No food coloring? Squeeze warm water through frozen blueberries for purple, or shredded red cabbage for blue-purple.
Materials Needed
- 6 to 8 clear plastic cups or glass bottles
- Safe liquid food colouring (Red, Blue, Yellow – Primary colours)
- Plastic droppers, syringes (without needles), or small measuring cups
- A large water table or a plastic mat laid out on the grass
Use the clear plastic cups, not glass bottles. Glass in a wet yard with a 3 year old holding it is not a risk worth taking for a nicer photo.
Use liquid color, not gel. Wilton gel colors are far more concentrated and they stain hands and grout much harder than McCormick liquid drops. Two drops per cup is plenty. Four makes everything look black.
Step-by-Step Setup
- Lay a white or light plastic tablecloth on the grass. It contains the drips and it makes the colors readable, which matters, because on green grass the colors vanish.
- Fill three cups with warm water and add two drops each of red, blue and yellow. Three colors only. Add a fourth and everything is muddy brown inside two minutes.
- Put out three or four empty cups, or better, an ice cube tray as a mixing palette. Twelve small wells spill far less than six tall cups.
- Hand over the droppers or syringes.
- Ask one question and then be quiet: “what do you think red and yellow will make?”
- Give them a dump bucket and a rinse cup. Without somewhere to pour the failures, everything gets tipped on the tablecloth.
- Rinse hands, rinse the tools, and hose down any concrete that caught drips before it dries in.
Tip: The actual color lesson lasts about four minutes. Everything after that is pouring and transferring, which is the real value, so do not keep quizzing them once they stop caring.
Developmental Benefits
Mixing two colors and getting a third is one of the first cause and effect experiments that a child can run entirely by themselves, over and over, with a new result each time. Using a dropper or a syringe is precision hand work, and it is genuinely difficult at 3, which is the point. Most kids also start naming their creations, and “swamp potion” is language work whether or not it looks like it.
What goes wrong the first time: You set out six colors, and within two minutes every cup is the same grey-brown and your kid is disappointed. Three primaries, one dump bucket. That is the whole fix. The second thing is doing it on a light patio and finding pink grout lines in October.
Skip it if: You only have a pale concrete or wood deck space and no tablecloth, or your child is still at the stage of drinking whatever is in a cup.
12. Splash Pad Toy Sorting
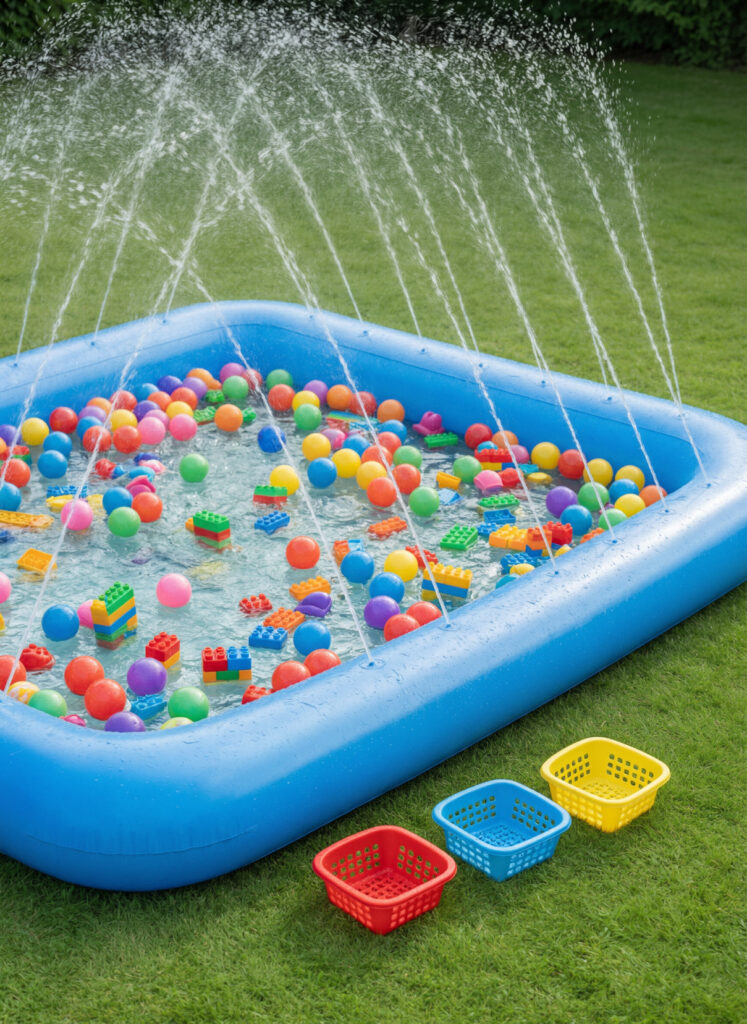
This is the idea for anyone whose kid got bored of the splash pad or the paddling pool by the second week of July. You are not adding water, you are adding a job, and that is what makes an old setup interesting again.
It is also the least universal idea here, since it assumes you own a splash pad. A sprinkler and a bin does the same thing.
Real ages: 2 to 6, with the sorting rule matched to the age.
Time: 10 minutes to set up, 20 to 30 minutes of play, 10 minutes cleanup.
Mess: Low. Toys and water, nothing else.
Supervision: Arm’s reach under 4. Running plus water plus a shallow pool is the combination that produces both scraped knees and the more serious risk.
Free swap: No splash pad, no problem. Set a sprinkler on low and put the toys in a bin behind it. Same game.
Materials Needed
- A small outdoor splash pad or shallow paddling pool
- An assortment of waterproof toys (plastic balls, building blocks, magnetic letters)
- 3 to 4 plastic baskets or buckets in different colours
Check the magnetic letters before they go in the water. If any are cracked or the magnet is loose, throw them out rather than putting them in the game. Swallowed loose magnets, especially more than one, can pull together through the bowel wall and cause serious internal injuries. It is the reason there is a federal magnet safety standard. For under 3s, leave the magnets out entirely and use big plastic balls and duplo-style blocks instead.
While you are checking: any ball or block small enough to pass through a toilet paper tube stays out for under 3s, and small hard balls around one and three quarter inches are a known choking size.
Step-by-Step Setup
- Test the surface with the back of your hand first. Dark rubber splash mats and mid-afternoon concrete get hot enough to burn bare feet.
- Fill the pad or pool and turn the sprayers on. Keep the pool genuinely shallow for under 4s.
- Scatter the toys in the water.
- Put the sorting buckets on the grass, not across a stretch of concrete. Wet concrete plus a running 3 year old is where this activity actually goes wrong.
- Set the rule at the right level. At 2, one rule only: “put all the balls in the red bucket.” At 3 or 4, sort by color. At 5 or 6, sort by two things at once, like blue and round.
- Send them. Then get out of the way.
- Empty the pool and flip it over when you are done.
Tip: When they work out they can carry five toys at once instead of one, let them. That is them solving the problem, and correcting it turns a game into a chore.
Developmental Benefits
Running, bending, grabbing and stopping on a slippery surface is a real workout for balance and body control. The sorting half is proper cognitive work, spotting a toy among moving water and spray, then holding a rule in mind while their body is busy, which is harder than sorting at a table and much more fun. Doing both at once is exactly the kind of play preschoolers are built for.
What goes wrong the first time: You put the buckets ten feet away across concrete, and somebody skins a knee in the first two minutes. Buckets on grass, close enough that the running is short.
Skip it if: Your child is at the stage of throwing rather than sorting, or your only surface is rough concrete. Move the whole thing to the grass with a sprinkler.
Common Mistakes To Avoid
These are the specific ones I have made, not general advice.
Using cold hose water. This is the single biggest one. Warm water roughly doubles how long a toddler stays with an activity. Cold water out of a hose gets you about six minutes and a kid with folded arms. Fill the bin from the kitchen tap or the bathtub and carry it out.
Putting the bin on the ground. A bin on the ground gets sat in, and then they are soaked in the first ninety seconds and the activity is over. Shin to hip height on a step stool, a patio table or an upturned crate keeps it a water activity instead of a bath.
Running water play at 5pm. A soaked, cold, overtired preschooler at 5:15 costs you the entire evening. Mid-morning or straight after lunch. I have made this mistake enough times to state it as a rule.
Announcing it before it is ready. Set the whole thing up, then call them. Announce it first and you get ten minutes of “is it ready yet” while you are still cutting sponges.
No towel plan. One towel per kid plus two spares, a laundry basket of dry clothes just inside the back door, and a chalk line or towel they have to dry off behind before they come in. Without it, you are carrying a dripping naked child through your kitchen.
Sunscreen at the wrong time. It goes on dry skin about fifteen minutes before, and back on after every towel dry. Also, a sunscreened toddler is genuinely impossible to hold onto, so put it on before there is any chance of them making a run for the road.
Buying one of each tool. Two identical scoops, two spray bottles, two cups. Almost every water play argument I have refereed was about a single turkey baster.
Filling containers to the top. Half full is lighter, safer and works exactly as well. Full buckets tip onto small children.
Sneakers. Shoes come off before, not after. Wet canvas sneakers take two days to dry and they smell. Crocs, water shoes or bare feet on grass.
Expecting the activity you planned. The first ten minutes are your activity. The next forty are them doing something else entirely with the same materials, usually pouring water on a completely unrelated object. That is not the activity failing, that is the activity working.
Leaving the water out. Dump it, flip it, every single time, even if you are coming back in twenty minutes. That is the habit that matters most out of everything on this page.
Frequently Asked Questions
What should my child wear during outdoor water play?A swim diaper rather than a regular one if they are still in diapers, since regular diapers swell up and can split open in water. Add a UPF long-sleeved rash guard, a hat, and water shoes or old Crocs with a heel strap, because wet grass and wet concrete are both slippery and bare feet find every sharp thing in a yard.
How can I ensure water play is safe for children under six?Stay within arm’s reach of any child under 4 near standing water, name one adult as the water watcher with no phone in their hand, and dump every container the moment play ends. Drowning is the leading cause of death for children ages 1 to 4 according to the CDC, it is silent rather than noisy, and a few inches in a bucket is enough.
How do I prevent mosquito issues when using standing water?Dump every bin, bucket and pool at the end of each session and turn them upside down so rain cannot refill them. For a permanent feature like a fountain or a rain barrel, mosquito dunks containing Bti are the usual fix and are widely sold in garden centers.
Are water beads safe for toddlers?No. The CPSC has issued warnings and multiple recalls after serious injuries, including cases requiring surgery and at least one reported infant death, because swallowed beads keep swelling inside the body and are hard to see on an X-ray. Skip them completely under 4, and note that large tapioca or boba pearls are not the safe swap they are often claimed to be, since they are a documented choking hazard themselves. Use homemade colored ice marbles instead.
How can I conserve water while still allowing my kids to play?Use a shallow bin instead of filling a kiddie pool, since most of these ideas need two or three inches of water at most. Set the bin over the part of the lawn or the garden bed that needs watering anyway, and tip the used water onto plants at the end rather than down the drain.
How do I get food coloring stains off skin, clothes and concrete?On skin it fades in a day or two on its own, and a baking soda paste speeds it up. On clothes, rinse in cold water immediately and then soak in an oxygen bleach like OxiClean, because once food dye dries into cotton it often stays, which is why this is an old-clothes activity. On concrete, hose it down before it dries, and if it has already set, scrub with oxygen bleach and let the sun finish the job over a few days.
Read Next
If you are planning water play for a group rather than your own two or three, read 25 water games to make party fun without a pool next. Everything above is built for one or two kids in your own yard. A birthday crowd needs games with turns, teams and a clear end, and that post is written for exactly that problem.
And for the part nobody warns you about, the crash that hits about twenty minutes after a wet kid comes inside, low prep quiet time activities for toddlers is what I actually reach for next. Water play buys you an hour outside, then you need something calm that needs nothing from you.
Conclusion
I am writing this in early September, which in a lot of the country is still firmly water play weather, and the ice block is honestly better in a warm September than in a brutal July because the digging lasts longer.
If you only take one thing from this page, take this: fill a shallow bin with warm water, put it at your child’s hip height, and hand them two identical cups. That is it. That is the whole activity, and it works from about eighteen months to about five years old, no cutting, no freezing, no shopping.
The twelve ideas above are all variations on that, with more surprise built in. Pick one, set it up before you tell them, and dump the water before you come inside.
Then go stand in it with them. The photos you will actually keep are the ones where you got wet too.