
A backyard obstacle course for kids is a short loop of 3 to 6 stations that mixes crawling, jumping, balancing and throwing, built from things you already own: cardboard boxes, pool noodles, hula hoops, couch cushions and painter’s tape. Setup takes 10 to 15 minutes and costs nothing if you shop your own house first. Keep climbing stations lower than your child’s hip height, land every jump on grass or foam, and stay within arm’s reach of any child under 3 who is climbing.
It was the third morning of summer break, not even 10am, and my 4 year old had told me he was bored twice and shoved his sister once. I had no plan, half a roll of blue painter’s tape, two Amazon boxes sitting by the recycling bin, and about eleven minutes of patience left in the tank.
The course I threw together took ten minutes to build. It bought me forty. They ran it, argued about it, rebuilt it their own way, then made me run it while my son counted the seconds out loud (badly).
That is the real argument for obstacle courses for kids. The development stuff is genuine and I will get to it. But the reason parents keep coming back to this is simpler: it is the fastest cheap way I know to turn a jittery, whiny kid into a tired, pleased-with-themselves one without leaving your own yard.
Below are 20 stations we have actually built, including the ages each one truly works for, how much mess it makes, how long it holds attention, and what went wrong the first time I tried it.
The Benefits of Obstacle Courses (It’s More Than Just Play)
I am not going to pretend I build these for the developmental payoff. I build them because everyone is losing it and the yard is right there. But the payoff is real, and it is worth knowing what you are actually getting.
1. Physical Growth
Crawling, jumping and balancing recruit the big muscle groups. Gripping a bean bag, pinching a plastic egg onto a spoon and stacking rings work the small ones, which is the same muscle work behind fine motor activities for kids that build hand strength and coordination.
For scale: The World Health Organization’s guidance for 3 and 4 year olds is at least 180 minutes of physical activity spread through the day, with at least 60 of those minutes at the huffing-and-puffing level. For ages 5 to 17, WHO puts it at 60 minutes a day of moderate to vigorous activity, and the CDC says the same for ages 6 to 17. One good course run six times covers a solid chunk of that before lunch.
2. Cognitive Development
The sequencing is the sneaky part. “Tunnel, then hoops, then the basket” is three-step working memory dressed up as a game. My daughter could not repeat that order back to me for about a week. Then one afternoon she narrated the entire course to her grandmother on the phone, in order, unprompted. That is the part you do not see happening while it is happening.
3. Emotional Resilience
She will knock the pool noodle down. She will be furious about it. Round four, she knocks it down and shrugs.
That shift only happens if you let them run the course more than once, which is why I no longer bother building anything that takes longer to set up than to repeat.
4. Social Skills
Two kids on one course means turn-taking, cheering and, realistically, one shoving match at the tunnel entrance.
Practical note: if you have two or more kids, build the course as a loop with a wide start rather than a straight line. A straight line creates a bottleneck at station one and the fight is about the bottleneck, not about the game.
Safety First: How to Build a Toddler-Friendly Obstacle Course
None of this is filler. Every hazard below is one I have either hit or come close to.
- Use soft materials, and check what is under them. Foam interlocking mats, thick grass, old comforters and couch cushions all work. Before you put anything down, walk the yard and clear sticks, rocks, dog mess and (the one that got me) the hard plastic sprinkler heads that sit flush with the lawn until a knee finds one.
- Keep climbing lower than their hip. My rule: if the top of the stack is higher than your child’s hip bone, take a layer off. Cushion mountains slide apart the second a kid puts weight on the edge, so stand next to it with a hand out for anyone under 4.
- Secure anything that can tip. Weigh cardboard boxes down with a couple of books inside. Never rest a bar across the backs of chairs, only across the seats, and use a pool noodle rather than a broomstick so a mistimed crawl means a soft bump instead of a wooden one to the skull.
- Avoid small parts with toddlers. The test: if it fits through an empty toilet paper tube, it is a choking hazard for a child who still mouths things. That rules out plastic coins, marbles, small dinosaurs, cotton balls and the halves of cracked plastic Easter eggs.
- Treat food-based stations as an allergy question first. Dry rice, pasta, oatmeal, flour and birdseed are all common sensory-bin fillers and all common allergens. If other kids are coming over, ask the parents before you fill the bin, and skip dry rice and beans entirely for under 3s (inhalation risk, not just choking).
- Adults do the cutting and the setup, not the kids. Box cutters, scissors on thick cardboard, staple guns and tent stakes are all adult jobs. Also check metal and dark plastic play equipment with the back of your hand in summer, because a slide in full sun can burn skin.
- Watch for fatigue. Clumsiness is the tell. When they start tripping over things they cleared five minutes ago, they are done, and a water break is faster than a bandage.
- Supervise properly, not nearby-ish. Arm’s reach for climbing and for any water station. Every few minutes is fine for tape lines and bean bags. The activity table further down tells you which is which.
Never tie anything around a child’s neck. No knotted capes, no ribbon, no rope. Tuck a towel into the back of their shirt collar or use a cape with a velcro closure. Same goes for the yarn “laser beam” station: tie the yarn with a loose slip knot at both ends so it snaps free instead of dragging a lawn chair down onto them.
How to Set Up Your Backyard Obstacle Course
You do not need equipment. You need a layout that makes sense to a 3 year old and a finish line worth running toward.
Step 1: Plan Your Layout
Think in zones. It stops you from building six versions of the same skill, and it stops the yard from looking like a cluttered mess that makes a toddler freeze instead of run.
- Crawl Zone: low to the ground. Tunnels, taped boxes, a limbo bar.
- Jump Zone: hoops, cushions, chalk circles, anything with a soft landing.
- Balance Zone: tape lines, a plank flat on the grass, stepping stones.
Then order them. Big energy first (jumping, sprinting), fiddly stuff second (sorting, stacking, carrying water), and something joyful at the end. A kid who ends on a bubble machine will run the whole thing again. A kid who ends on a sorting task will wander off.
Aim for 3 to 5 stations for under 4s and 5 to 7 for school age. Keep the whole loop small enough that you can see every station from one spot, because you will be standing in that spot for the next half hour.
Step 2: Gather Your Materials
Shop your own house before you buy anything. Here is what actually earns its money, and what to use instead if you would rather spend nothing.
| Item | Where I get it | Rough cost | Free or cheap swap |
| Play tunnel | Amazon, or the IKEA BUSA tunnel | $20 to $30 | Three large boxes taped end to end, or a blanket over two chairs |
| Pool noodles (2) | Dollar Tree | $1.25 each | A rolled bath towel, or a broom laid low |
| Hula hoops (3) | Walmart or Target | $3 to $5 each | Chalk circles, or paper plates taped down |
| Painter’s tape | Any hardware store, ScotchBlue | About $6 | Sidewalk chalk, or a garden hose laid out straight |
| Sports cones | Amazon, Five Below | $10 to $15 | Red Solo cups, upturned cereal bowls, shoes |
| Bean bags | Dollar store | $1 to $3 | Rolled-up socks (they actually work better indoors) |
| Foam interlocking mats | Amazon, Costco | $20 to $30 | An old comforter folded in four, a yoga mat, couch cushions |
| Bubble machine | Gazillion Bubbles | $15 to $25 | Hand wands and dish soap solution |
| Sensory filler | Kinetic Sand at Target | About $10 | Dry oatmeal or dry pasta, but not for under 3s |
| Sidewalk chalk | Crayola washable, dollar store | $2 to $5 | A cheap paintbrush and a cup of water on pavement |
| Station markers | Paper plates, dollar store | About $1 | Index cards weighed down with rocks, or chalk numbers |
The dollar store version of a hula hoop cracks by about the fourth session, so if hoops are going to be a regular thing, the thicker Walmart ones are worth the extra two dollars. Pool noodles, on the other hand, are perfect at $1.25 and I buy four every May.
Step 3: Number the Stations, Then Walk It Yourself
Write 1 through 5 on paper plates and set one at each station. Without numbers, kids skip straight to whatever looks best and the course stops being a course.
Then run it yourself once, badly and dramatically, before you hand it over. Two things happen: you find the wobbly box before your kid does, and they see the whole sequence instead of trying to hold your verbal instructions in their head.
Backyard Obstacle Course Ideas
Twenty stations, grouped by the skill they build. Pick three to five, not twenty. The table is here so you can scan, match it to your kid’s age and your own tolerance for mess today, and get outside.
“Time” means setup plus realistic play before they lose interest. “Supervision” means what it says: arm’s reach is arm’s reach.
| # | Station | Best ages | Mess | Time (setup + play) | Supervision |
| 1 | Tunnel Crawl Adventure | 1 to 6 | None | 10 + 10 min | Arm’s reach under 3 |
| 2 | Under-the-Broom Limbo Crawl | 2 to 8 | None | 3 + 5 min | Check in |
| 3 | Couch Cushion Climbing Wall | 1 to 5 | Grass stains | 5 + 10 min | Arm’s reach, always |
| 4 | Hula Hoop Jump Path | 2 to 8 | None | 3 + 10 min | Check in |
| 5 | Painter’s Tape Balance Beam | 2 to 9 | None | 5 + 8 min | Check in |
| 6 | Pillow Island Jumps | 2 to 7 | Low | 5 + 10 min | Arm’s reach under 3 |
| 7 | Bean Bag Toss Target | 2 to 10 | None | 2 + 10 min | Check in |
| 8 | Ball Transfer Race | 3 to 9 | Low | 2 + 8 min | Check in |
| 9 | Water Cup Carry Challenge | 3 to 9 | Wet clothes | 2 + 8 min | Check in |
| 10 | Shape Sorting Mid-Run | 1 to 4 | None | 2 + 5 min | Arm’s reach (small parts) |
| 11 | Color Matching Cone Dash | 2 to 6 | None | 3 + 10 min | Check in |
| 12 | Ring Stack Race | 2 to 6 | None | 5 + 10 min | Arm’s reach under 3 |
| 13 | Splash Zone Sprinkler Run | 2 to 10 | Soaked | 3 + 20 min | Constant, slick grass |
| 14 | Sand Pit Dig & Dash | 2 to 8 | High | 5 + 15 min | Arm’s reach under 3 |
| 15 | Bubble Pop Finish Line | 1 to 8 | Slippery film | 2 + 10 min | Check in, watch footing |
| 16 | Pirate Treasure Hunt Course | 3 to 9 | None | 15 + 25 min | Check in |
| 17 | Jungle Safari Rescue | 2 to 7 | None | 10 + 20 min | Check in |
| 18 | Superhero Training Camp | 3 to 9 | None | 10 + 20 min | Arm’s reach (string, cape) |
| 19 | Mini Ninja Warrior Track | 4 to 10 | None | 20 + 30 min | Arm’s reach on climbs |
| 20 | Seasonal Obstacle Course | 1 to 10 | Varies | 10 + 20 min | Varies by station |
Crawl & Climb Challenges
1. Tunnel Crawl Adventure

A nylon play tunnel is the easy version. The free version is three large boxes taped end to end, and diaper boxes or 18-inch Amazon boxes happen to be almost exactly toddler width.
- Cut the flaps off both ends of each box.
- Tape every seam on the inside and the outside. Packing tape or Duck brand duct tape holds. Masking tape gives up in about four crawls.
- Keep the total length under about four feet.
That last step matters more than it sounds. My son got halfway down a six-foot tunnel, could not see daylight at either end, and backed out crying. Short tunnel, happy kid. Works from about 12 months, and one child in at a time.
2. Under-the-Broom Limbo Crawl

A pool noodle across the seats (not the backs) of two low chairs. Use the noodle rather than a broomstick, because heads and broomsticks meet eventually.
- Rest the noodle across both seats, ends loose so it drops free instead of pulling a chair over.
- Set the height at belly button level for a duck-walk, or two inches off the ground for a full army crawl.
- Lower it an inch each round.
On grass, the chairs slowly wander apart and the bar keeps falling. Push the back legs into the lawn a little, or move this one to the patio.
3. Couch Cushion Climbing Wall
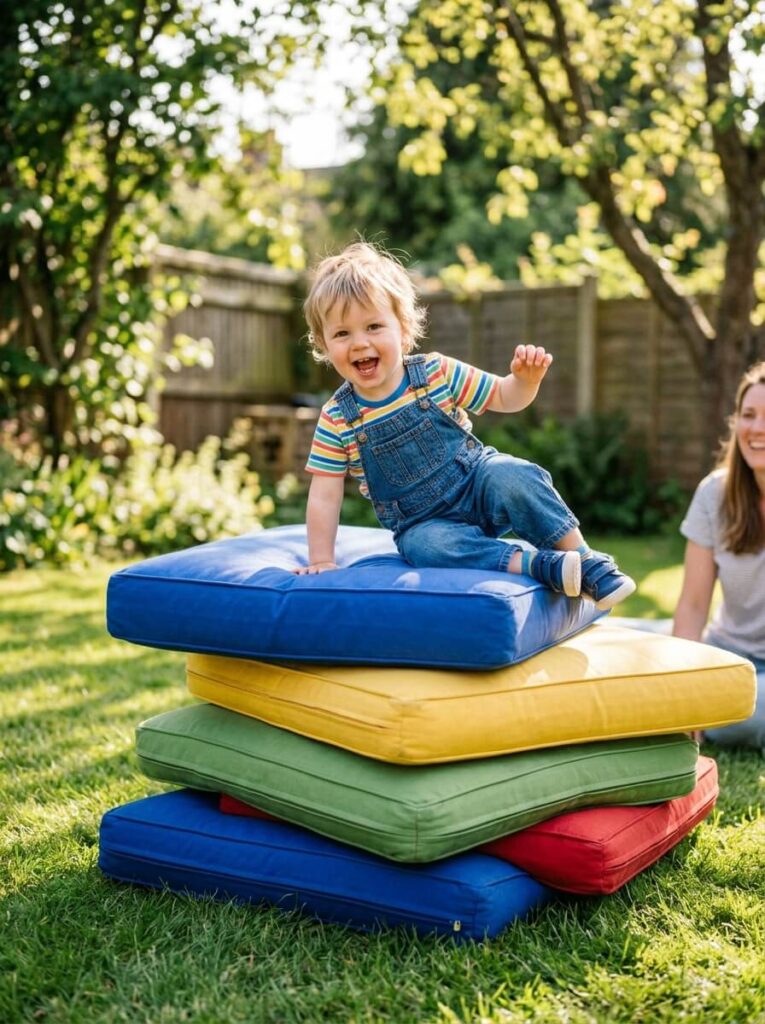
Firm couch cushions, old bed pillows or foam mats stacked into a small mound. Widest on the bottom, and no higher than your child’s hip.
- Dry-test the stack with your own hand before they climb. If it slides, you have too many layers.
- Put the softest thing you own on the landing side.
- Stand on that side with a hand out for anyone under 4.
Cushions on morning grass come back soaked, because dew does not lift off a lawn until mid-morning. I learned that with a set of outdoor cushions that smelled like a pond for a week. Camping mats or an old comforter are the safer sacrifice.
Jump & Balance Zones
4. Hula Hoop Jump Path
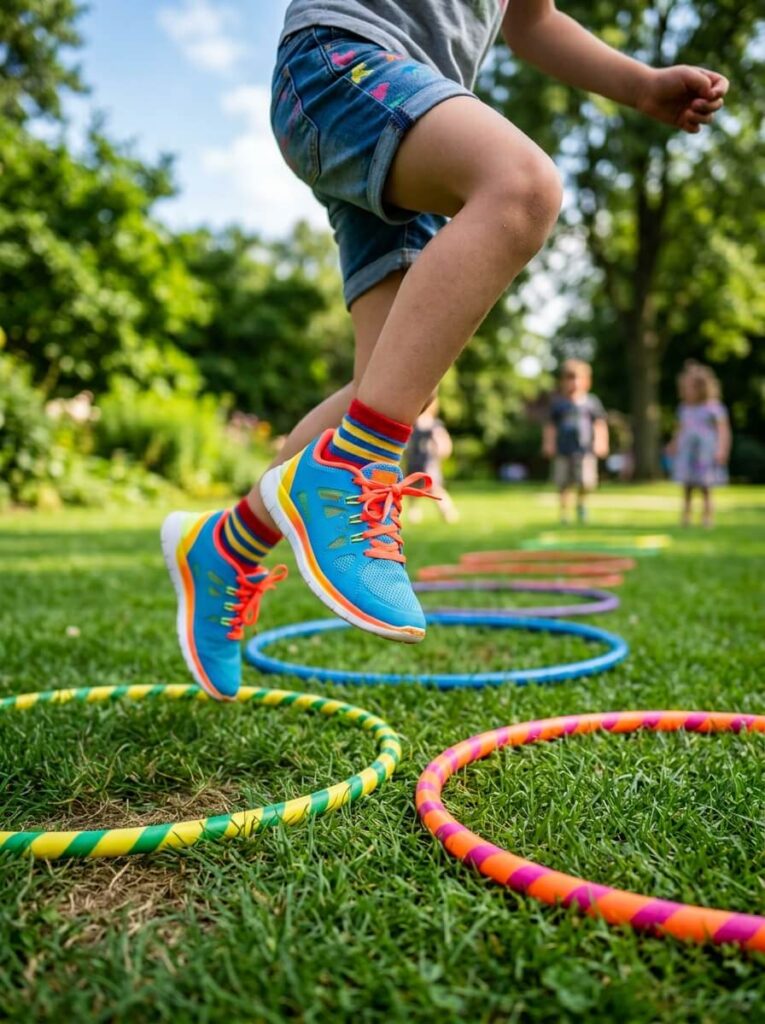
Three to five hoops, or chalk circles if you would rather spend nothing. Space them much closer than instinct says: a 3 year old’s two-footed jump covers roughly 8 to 12 inches, not the two feet you are picturing.
- Lay the hoops in a gentle curve so they have to look ahead.
- Ask for two feet in, two feet out.
- Widen the gaps once they clear the whole path without a stumble.
For under 3s, use chalk circles instead. Hoop rims roll underfoot and that is the trip I see most often.
5. Painter’s Tape Balance Beam

Here is the thing nobody mentions: painter’s tape does not stick to grass. At all. It works beautifully on a patio, a driveway or an indoor hallway, and it does nothing on a lawn.
- On pavement, lay one straight line about eight feet long. ScotchBlue peels off smooth concrete cleanly, but test a corner on rough aggregate first because it can leave fuzz.
- On grass, use a garden hose laid straight, or a length of 2×4 flat on the ground.
- Ask for heel to toe, arms out.
Add a curve or a zigzag for anyone over 5. All the balance work, none of the fall risk of a raised beam.
6. Pillow Island Jumps

The grass is lava. Scatter cushions a step apart and they jump island to island.
- Use flat cushions or bath towels folded into squares.
- Space them for a step, not a leap, for under 4s.
- Call out the lava rules loudly. That part is the whole game.
Throw pillows slide out from under a landing foot, on grass and especially on tile. That was our one genuine near-miss with this station, and switching to folded towels fixed it completely.
Coordination & Precision Games
7. Bean Bag Toss Target

Three to five bean bags, or rolled-up pairs of socks, thrown into a laundry basket.
- Use a soft-sided laundry hamper or an open box, not a hard bucket. Bean bags bounce straight back out of a hard bucket and the kid reads that as failure.
- Start the throw line about three feet away for a 3 year old, and show the underhand toss once.
- Move the line back a foot every time they get two in.
Do not make them land every bag before moving on. I tried that. We got a meltdown at bag four and the course ended there. “Get one in, then run” keeps the whole thing moving.
8. Ball Transfer Race (Spoon or Cup Carry)
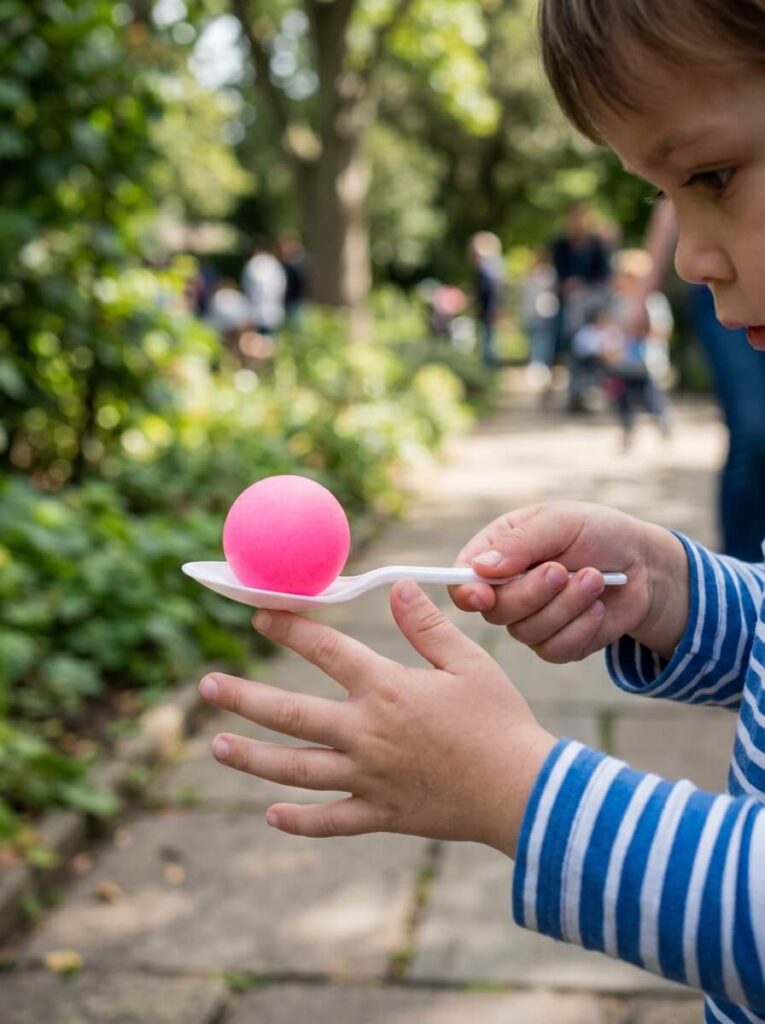
A spoon and a small ball, carried from A to B without dropping it. A big serving spoon is far easier than a teaspoon, and a plastic cup is easier again for under 4s.
- Mark a start and finish about ten feet apart.
- Drop it, freeze, pick it up, carry on.
- Add a step-over obstacle halfway once they have it.
Ping pong balls roll for a very long way on a sloped driveway. Plastic Easter eggs sit better in the spoon, but check them for cracks first, because a split egg half is exactly the size that worries me around toddlers.
9. Water Cup Carry Challenge
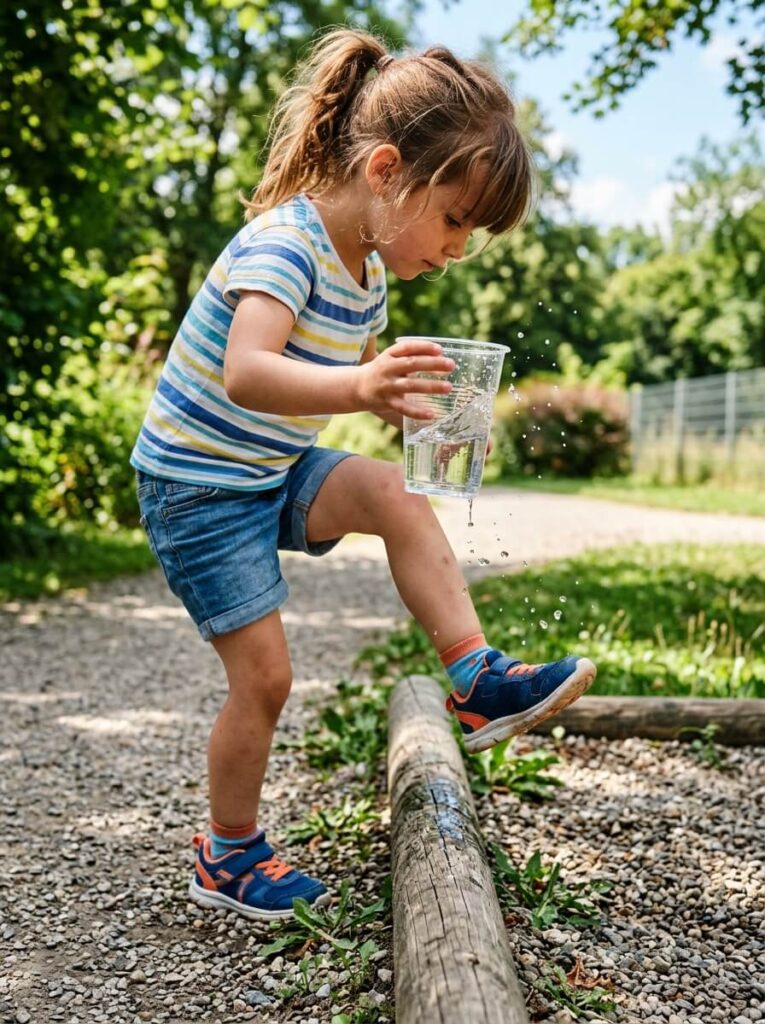
One plastic cup, half full, carried along a short path.
- Half fill it, no more, and use a cup with a wide base.
- Set a short path with one small step-over.
- Mark the target line with a bucket they pour into at the end, which gives the water somewhere to go.
Expect wet shoes and expect at least one deliberate dump, because for a 2 or 3 year old the dumping is the game. Skip this one on a wooden deck. Wet decking is slick.
Problem-Solving & Thinking Skills
10. Shape Sorting Mid-Run
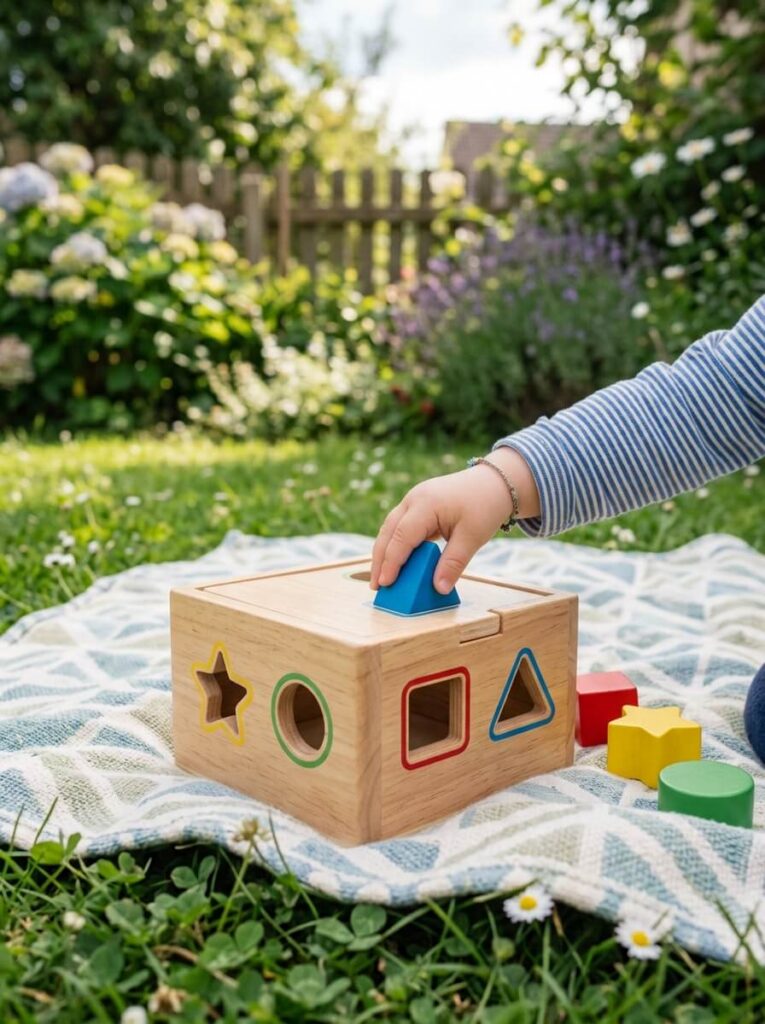
A shape sorter toy, or coloured containers with matching objects, dropped in right after a sprint or a jump station.
- Put the sorter on a tray or a towel. Loose pieces vanish into grass in seconds.
- Set out three pieces only, not the whole set.
- Three matches, then they run on.
Switching from full-body sprinting to fine motor precision is genuinely hard for a 4 year old, which is the point. Under 2s will mostly just dump the sorter out and grin at you, and that is a perfectly acceptable outcome. Check every piece against the toilet paper tube test first.
11. Color Matching Cone Dash
Coloured cones, cups or toys scattered across the lawn while you call out colours from the sideline.
- Scatter six to eight items in an open area.
- Call one colour. They find it, tag it, come back.
- For over 5s, call two colours in sequence to load up the memory work.
Put a small rock or a handful of dirt in each cup, or the first breeze redistributes your entire station. Toddlers usually recognise colours well before they can name them, so let them run and point rather than making them say it.
12. Ring Stack Race

Stacking rings collected on the way round, then stacked at the finish. A Fisher-Price Rock-a-Stack works, and so do paper plates with the middles cut out.
- Hide one ring at each station.
- Tape the base pole to something flat and heavy. A paper towel holder alone tips over the second a ring lands hard.
- Stack in size order at the end.
This is the one my 5 year old asks for by name, because collecting things while running feels like a video game. It also quietly demands that she remember how many rings she is missing.
Sensory Play Stations
13. Splash Zone Sprinkler Run

A garden sprinkler on a low setting, positioned so they dash through the spray.
- Put this station last, or second to last. Put it first and you will never get them back to the dry stations.
- Aim the spray over grass, never across a patio or decking.
- Let them choose whether to go through it. Cold water on a warm toddler is a shock, and one refusal does not mean they hate it.
Wet sneakers on wet grass slide. Bare feet grip better, but scan the lawn for clover and bees first if you are going barefoot. Water stations need you present the whole time, not glancing over from the porch.
14. Sand Pit Dig & Dash

A sandbox, or a shallow storage tub filled with Kinetic Sand, dry oatmeal or dry pasta. Bury a few small toys and they dig one out before moving on.
- Bury three or four toys, shallow. Deep burial for a 2 year old just becomes frustrating.
- Position it at the end of the course, not the middle.
- Keep an old paintbrush next to the tub for brushing sand off hands and feet.
That paintbrush is the difference between one sandy station and a sandy everything. Two things to know: dry rice and beans are not safe for under 3s (inhalation as well as choking), and any grain left outside will find ants within the hour. Ask other parents about wheat allergies before you fill a bin with pasta or oatmeal.
15. Bubble Pop Finish Line

A bubble machine (the Gazillion Bubbles one is the one that has survived our summers) or a couple of hand wands, running as they cross the line.
- Set it up on grass. Bubble solution leaves a genuinely slippery film on a patio.
- Fill the reservoir above the wheel line, or cheap machines just hum and produce nothing.
- Switch it on as they come round the final corner.
Chasing unpredictable bubbles is real visual tracking practice, and it is the single best finish line I have found for the under-5s. Keep the solution out of reach between rounds. Dish soap stings eyes and tastes awful.
Practical note on stains: grass and mud come out far more easily if you deal with them before the clothes go in the hamper. Let mud dry and brush it off, then work a little Dawn or a stain stick like Fels-Naptha into the grass marks on the knees before washing. Grass stains that go through a hot wash untreated tend to stay for good.
Themed Adventure Courses
A story does something that no amount of station design achieves on its own: it makes them forget they are working. Same course, twice the mileage.
16. Pirate Treasure Hunt Course

A hand-drawn map, plus “treasure” hidden under boxes and inside the tunnel.
- Draw the map on a torn brown paper bag. It takes two minutes and it lands much better than printer paper.
- Hide treasure semi-visibly for under 5s, since a hiding place they cannot find turns into your problem fast.
- Mark each station on the map with a symbol that matches the paper plate number.
Use large plastic coins or wooden blocks rather than small plastic ones with toddlers around. And skip chocolate coins: in July they last about ten minutes before they are a puddle, and they bring ants to your treasure chest.
17. Jungle Safari Rescue

Your child is a park ranger. Stuffed animals are stranded around the yard and need rescuing, which means crawling through caves and balancing over crocodile rivers to reach them.
- Place six animals at varying difficulty, one high enough to need a stretch.
- Give them a bag or bucket to carry rescues in.
- Count them at the end so nobody sleeps outside.
Use the second-string stuffed animals, not the one they cannot sleep without. A soaked, grass-stained favourite at 7pm is a bedtime problem you have created for yourself.
18. Superhero Training Camp
A cape, a red blanket for lava, and yarn strung between chairs as laser beams.
- Make the cape from a towel tucked into the back of the shirt collar, or use a velcro-fastening cape. Nothing knotted at the neck, ever.
- Tie the yarn low, around chair legs, with a loose slip knot at each end so it snaps free under pressure.
- Run the sequence: leap the lava, crawl under the lasers, balance the tightrope.
Keep the yarn well below face height on any part of the course they will be running rather than crawling. A taut string at eye level is an eye injury waiting to happen, and it is the one adaptation I insist on with this station.
19. Mini Ninja Warrior Track

Soft climbing blocks, a rope laid flat, balance spots and a tunnel, timed with a stopwatch. This is the version that finally worked for my 8 year old, who had aged out of hoops and lava.
- Build five to seven stations with a clear run between them.
- Time each attempt and write the times on the driveway in chalk.
- Keep every climb soft and hip height or lower, even for the big kids.
Timing only motivates from roughly 5 or 6 upward. Younger than that, a stopwatch mostly produces pressure. With mixed ages, give the older one a handicap (“you do it hopping”) or the younger one quits within two rounds.
20. Seasonal Obstacle Course

Same bones, different props. It is early September as I write this, which means we are heading into the best leaf-pile weeks of the year.
- Fall: rake leaves into a pile to jump into. Rake onto a tarp first and check for sticks, rocks and dog mess as you go, and know that damp leaf piles are full of mould if anyone in the house has allergies.
- Winter: indoors, cotton balls become snowballs and white blankets over cushions become drifts. Cotton balls are a choking hazard for under 3s, so use rolled socks instead at that age.
- Spring and Summer: water balloon targets, plastic egg hunts mid-run, dashing between flower beds. Pick up every scrap of broken balloon immediately, because balloon fragments are one of the most serious choking risks for small children.
Rotating props every couple of months is the only reason my kids still find this interesting after four years.
How to Customize for Age and Ability
If it is too hard they quit, and if it is too easy they wander off. Getting this dialled in matters more than how many stations you build.
Toddlers (1-3 Years Old)
- Keep it big and soft. Oversized props, low heights, nothing with a sharp edge or a small part.
- Stick to basics. Crawling forward, stepping over, carrying an object, dropping it in a bucket. Three stations is plenty.
- Drop the pressure entirely. No stopwatch, no order police. If they stop halfway through to examine an ant for four minutes, the course is going fine.
Preschoolers (4-6 Years Old)
- Add a thinking task. The shape sorter or the colour dash mid-run is the sweet spot for this age.
- Introduce gentle competition. “Can you beat your own time?” works. Comparing them to a sibling usually does not.
- Let them redesign it. Around 5, rebuilding the course becomes the better half of the activity. Hand it over and let them.
Big Kids (7 to 10 Years Old)
- Add constraints, not height. Backward, one-legged, eyes on a ball, carrying a full cup. Constraints scale difficulty without raising fall risk.
- Give them the build. Let them design a course and time you on it. Mine are ruthless judges and it buys me another twenty minutes.
- Stack the skills. Two colours to remember, five rings to collect, a sequence to repeat.
Kids with Different Abilities
- Sensory needs first. Skip the bubble machine noise, the sudden sprinkler and anything that pops. Warn before every new sensation, and let them watch a full round before joining.
- Adjust the barrier, keep the challenge. Widen balance lines, lower every jump, or swap balance tasks for textured walking paths. A course can be built entirely from reaching, sorting and transferring objects while seated, and it still works.
- Praise the effort, not the completion. “You tried the wobbly bit” beats “you finished” for a kid for whom finishing was never the point.
- Your child’s physical therapist or pediatrician can tell you which movements to encourage and which to avoid, and they will usually have adaptive suggestions specific to your child.
What If It Rains?
Most of these move indoors with almost no changes. A hallway is the best obstacle course space in any house, because the walls do the crowd control for you.
Painter’s tape finally comes into its own indoors: balance lines down the hall, a hopscotch grid on the kitchen floor, a spider web of tape across a doorway to climb through. The tunnel works indoors. So do the bean bags, the ring stack and the sorting station.
Two indoor rules at our house: no jumping off furniture, and cushions go on the floor before anyone starts. If you have neighbours below you, swap the jumping stations for crawling and balancing ones.
When nobody has any run left in them, we switch to something quieter. Virtual field trips are good for a rainy afternoon reset virtual field trips for kids, and tactile projects like mason jar painting keep hands busy without the noise fun mason jar painting projects for kids.
Must Read: indoor gross motor activities for rainy days
Obstacle Course Mistakes Parents Make the First Time
Every one of these is a mistake I have personally made.
- Building ten stations. Enthusiasm gets you a huge course and a kid who quits at station three. Three to five stations, run six times, beats ten stations run once.
- Building it while they watch. Ten minutes of watching a parent tape boxes is ten minutes of “is it ready yet.” Either build during nap, or hand them a job (they are surprisingly good at placing hoops).
- No finish line. A course with no defined end just dissolves. Bubbles, a bell, a high five, a chalk line. Anything that says “done.”
- Taping a balance line onto grass. It does not stick. Save the tape for pavement and use the hose on the lawn.
- Putting the sprinkler first. Once they are wet and delighted, the dry stations no longer exist.
- Gating progress on perfect success. “All five bean bags in the basket before you move on” sounds motivating and reads as punishment to a 4 year old. One in, then run.
- Setting up across a slope. Anything with a ball or a cup goes downhill, repeatedly. Find the flattest strip of yard you have.
- Skipping your own walk-through. This is how you find the wobbly box, the hidden sprinkler head and the branch at forehead height after your kid does.
- Using the good cushions. Dew, grass stains, mud. Use the ones you would not mind losing.
- Timing a 3 year old. They do not understand the clock and they can feel the pressure. Save the stopwatch for the 6 year olds.
Frequently Asked Questions (FAQs)
What is the ideal age to start introducing obstacle courses to a child?As soon as your child is a confident crawler or new walker, so roughly 12 to 18 months. At that age the whole course is one box to crawl through and a ball to fetch at the end, and that is genuinely enough.
Is a backyard obstacle course safe for a 3 year old?Yes, with three conditions: nothing to climb that is higher than their hip, a soft landing surface under every jump, and no small parts that would pass through an empty toilet paper tube. Stay within arm’s reach for climbing and water stations, and check the lawn for sticks, rocks and sprinkler heads before they start.
How long should an obstacle course be for a toddler?Short. Three to five stations that take about a minute or two to complete per round, so they can repeat it several times. The repetition is where the skill building happens, not the length.
Do I need to buy expensive equipment to build a good obstacle course?No. Cardboard boxes, couch cushions, rolled socks, painter’s tape and a laundry basket will build a better course than most bought kits. If you want to spend anything at all, spend $5 on pool noodles at Dollar Tree.
How do I keep my child interested if they lose focus quickly?Add a story or change one variable. Turn it into a safari rescue, run the course backward, hop instead of run, or let them redesign the whole thing. The layout stops being interesting long before the movement does.
Are obstacle courses safe for children with limited mobility?Yes, when the course is built around what your child can do rather than around running and jumping. Reaching, sorting, transferring objects while seated and moving a wheelchair through a soft cone maze all count. Ask your child’s physical therapist for adaptations specific to them.
Read Next
If this worked and you want to stretch it into a whole afternoon, fun backyard water party ideas for kids picks up right where the sprinkler station leaves off, and most of it uses the same buckets and cups you already dragged outside.
Running this with a crowd instead of your own two? Fun family reunion games covers the mixed-age problem properly, which is the thing that breaks most backyard courses when the cousins show up.
Conclusion
The course does not need to be clever. Ours is usually a taped box, three hoops, a tape line on the driveway and the sprinkler at the end, and it holds up better than anything I have overthought.
Go look at what is next to your recycling bin right now. If you have one big box, one pool noodle and a laundry basket, you already have a three-station course and you are about ten minutes from a much quieter house. Build it, run it with them once, then let them tell you what to change. That last part is where they stop being participants and start being designers, and it is the reason we still do this four years in.