
The summer science activities for kids that actually hold up are the ones using what’s already in your kitchen and paying off in under half an hour: balloon rockets and DIY popsicles for ages 3 to 6, ice cream in a bag and a pizza box solar oven for ages 5 to 9, and a water bottle rocket or leaf chromatography for ages 8 and up. Most cost under $5 and need 30 minutes or less of your actual attention. Below, all 13 are sorted by age, mess level, and how much supervision each one really requires, so you can pick one and start today.
Day four of summer break, 9:40 in the morning. My son had already burned through his screen time, dumped the LEGO bin, and picked a fight with his sister over who owned one specific pool noodle. Then he walked into the kitchen and said the sentence every parent hears in June: “There’s nothing to do.”
I handed him a Ziploc bag, half a cup of half-and-half, and the ice tray. Eight minutes of shaking later he was eating ice cream he’d made himself and explaining salt to his sister like he’d personally discovered it.
That’s the whole idea here. This isn’t a summer curriculum and nobody’s getting graded. It’s 13 ways to turn a dead twenty minutes into something your kid brings up at dinner.
What makes this list different from the other fifty you’ve scrolled past: I’m telling you which ones flop, which ones your 4-year-old will quit halfway through, and which one genuinely needs safety goggles and an adult holding the pump. Some of these are worth your Saturday. A couple are worth skipping depending on your kid.
Pick a Summer Science Activity for Kids in Under a Minute
Scan this, pick one, close the tab. That’s the goal.
| # | Activity | Best ages | Mess | Total time | Supervision |
| 1 | Backyard Scavenger Hunt | 3 to 8 | Low | 30 min | Check in every few min |
| 2 | DIY Popsicles | 2 to 10 | Low | 15 min + freeze | Hands-on 10 min |
| 3 | Ice Cream in a Bag | 5 to 11 | Medium | 20 min | Hands-on the whole time |
| 4 | DIY Weather Station | 7 to 12 | Low | 1 hr build + daily | Hands-on for cutting |
| 5 | Leaf Chromatography | 8 to 13 | Low | 1 to 2 hrs | Hands-on (alcohol) |
| 6 | Seed Germination | 3 to 10 | Medium | 20 min + 2 weeks | Check in |
| 7 | Water Bottle Rocket | 8+ | High (water) | 45 min | Adult runs it, no exceptions |
| 8 | Balloon Rockets | 3 to 10 | None | 30 min | Check in (watch latex) |
| 9 | Pizza Box Solar Oven | 5 to 11 | Medium | 1.5 hrs | Adult cuts, then check in |
| 10 | Nature Journaling | 4 to 12 | None | 20 min | Barely any |
| 11 | Insect Observation | 2 to 12 | Low | 30 min | Hands-on for under 5 |
| 12 | Bee Hotel | 5 to 12 | Low | 45 min | Check in |
| 13 | Firefly Lantern Jar | 3 to 10 | None | 40 min | Hands-on (dark yard) |
Save this for later. If you’ve got a summer’s worth of rainy afternoons and 5pm slumps coming, pin the chart above. It’s the thing you’ll actually want at 4:30 on a Tuesday when nobody has an idea and everyone’s cranky.
Fun Summer Science Activities for Kids
Each one below has the same header block: ages, time, mess, supervision. Then the supply list with a free or cheap swap for everything, the steps, what tends to go sideways the first time, and the safety stuff that isn’t optional. Read the header block, decide in five seconds, move on
1. Backyard Summer Scavenger Hunt
Description
Best for: ages 3 to 8, stretches to 11 with a harder list Time: 5 min prep, 20 to 30 min hunting, 5 min sorting Mess level: 1 out of 5. Dirt on hands, maybe grass stains on knees Supervision: hands-on for under 4 (they will put things in their mouth), check in every few minutes for 5 and up
Description
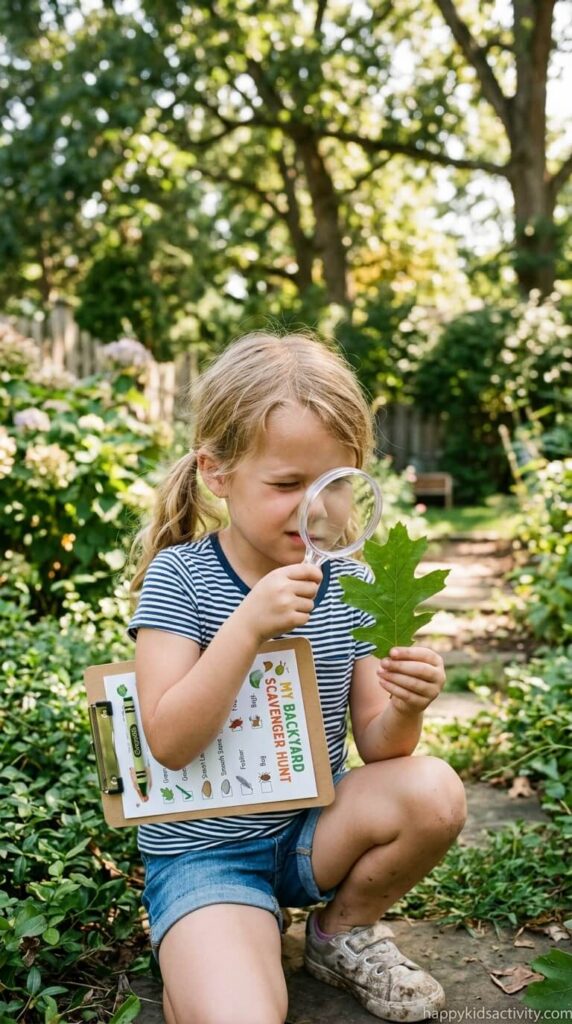
A scavenger hunt is the lowest-effort activity on this list and the one I’ve repeated the most. You’re not teaching botany. You’re getting a kid to look slowly at a yard they’ve walked past a thousand times, which is the actual first skill in science.
The version that works isn’t “find a leaf.” It’s “find a leaf with bumpy edges, and a different one with smooth edges.” Specificity is what makes them slow down. Check out our backyard water party ideas if you want to pair this with something wetter afterward.
Materials Needed
- A printed list of 8 to 10 items. Free. Ten is the ceiling. I’ve made 20-item lists and watched them get abandoned at item 6.
- A collection bag or basket. Free swap: a grocery tote, or a paper lunch bag they decorate first (that’s five extra minutes of buy-in).
- A magnifying glass. Dollar Tree sells plastic ones for $1.25. Your phone camera at max zoom is actually sharper. The Learning Resources Primary Science Jumbo Magnifier (about $7 on Amazon) is the one that survives being dropped.
- A clipboard, if you want a no-collect version. Free swap: a cereal box panel with a binder clip.
- A notebook and pencil. Free swap: the back of an envelope.
- A field guide. Skip it. The Seek app by iNaturalist is free, works offline-ish, and identifies plants and bugs from a photo in about two seconds.
Steps
- Walk the yard yourself first. Two minutes. This is the step everyone skips and it’s the one that saves the activity. Make sure the things on your list actually exist out there.
- Write 8 to 10 items, mixing easy and hard. Something rough. Something that smells good. A leaf with jagged edges. Evidence an animal was here. Something smaller than your fingernail.
- Hand out the list, the bag, and the magnifier. One kit per kid, or you’ll be refereeing instead of watching bugs.
- Set a timer for 20 minutes. The timer matters. Open-ended hunts fizzle out.
- Have them look under things, not just at eye level. The underside of a leaf and the shady side of a rock hold most of what’s interesting.
- Sit down together and sort the pile. Ask “which two of these are most alike?” That single question does more than any worksheet.
- Put the living things back where they came from.
Tip: Write “something you can’t identify” on the list. It’s always the item they’re proudest of.
What goes wrong the first time
Your kid finds the first three items in ninety seconds and declares victory. The fix is putting one hard-to-find thing on the list, something that requires walking the whole yard. “A feather” or “two different kinds of seed” usually does it.
The other failure: with a toddler, “a yellow flower” becomes forty dandelions. Make it one item, cross it off out loud, move on.
Safety notes
- No touching mushrooms or berries. Teach the rule as “we point at those.” Plenty of common backyard mushrooms are toxic and kids can’t tell the difference.
- No touching fuzzy or spiny caterpillars. Puss caterpillars and io moth caterpillars sting and the sting is memorably painful. Fuzzy does not mean friendly.
- Poison ivy: three leaflets, pointed, often glossy. Show them a photo before you go out.
- Under 3: acorns, pebbles, and seed pods are choking hazards. Stay within arm’s reach.
- Tick check afterward if you went through tall grass, plus hand washing before snacks.
Science Concepts
- Observation and sorting. Grouping things by shared traits is classification, which is the backbone of biology.
- Ecosystem roles. A rotting leaf, an ant, and a feather are all doing a job. That conversation lands better with a real leaf in hand than in any book.
2. Make DIY Popsicles
Best for: ages 2 to 10. A 5-year-old can run most of it Time: 10 to 15 min hands-on, 4 to 6 hrs freezing (overnight is safer), 5 min cleanup Mess level: 2 out of 5 while making, 4 out of 5 while eating Supervision: hands-on for the pouring, then you’re free
Description
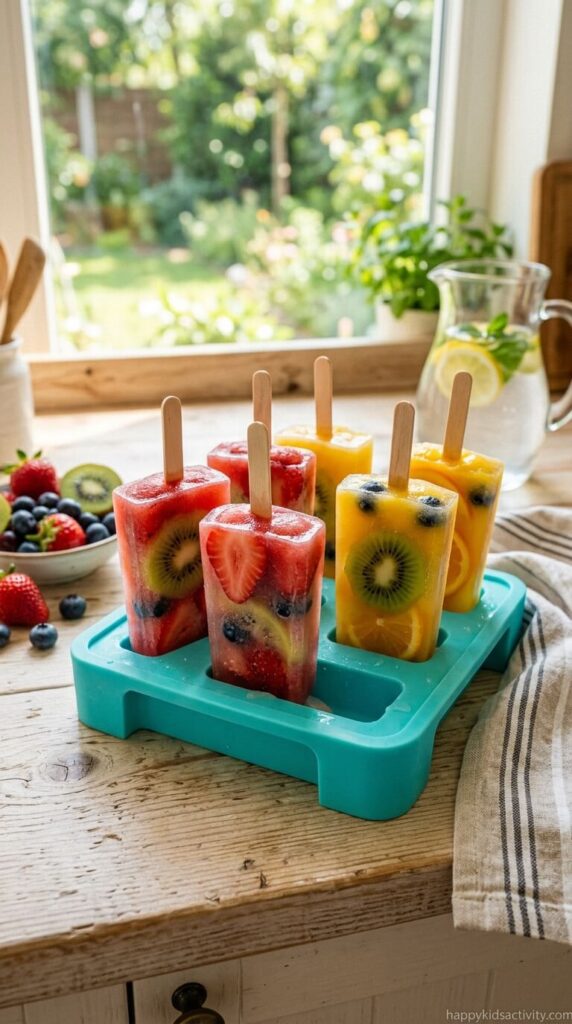
Popsicles are the easiest win here, but there’s a catch nobody mentions: popsicles made from straight juice freeze into a solid, icy brick that a small kid can’t bite through. They lick it for ten minutes, get frustrated, and it ends up melting on the deck.
The fix is fat. Blend in a spoonful of yogurt or half a banana and you get something that bites cleanly instead of shattering. Roughly one part plain yogurt to three parts fruit or juice is the ratio I keep coming back to. If you want a related cool-down craft, ice cube painting uses the same freezer and the same science.
Materials Needed
- Juice, blended fruit, or a yogurt and fruit mix. Whatever’s in the fridge. Overripe fruit that nobody will eat raw is perfect here.
- Popsicle molds. Free swap: an ice cube tray, or 3 oz Dixie cups (a sleeve is about $3 and you get 50). Dollar Tree carries silicone molds seasonally. Zoku and Nuby molds are around $10 to $15 if you want reusable.
- Wooden craft sticks. About $3 for 100 at Walmart or Dollar Tree. Free swap: plastic spoons stuck handle-down, which double as the handle and the scoop.
- Plastic wrap or foil, if you’re using the ice cube tray method.
Steps
- Blend or mix your base. Taste it before freezing. Freezing dulls sweetness noticeably, so it should taste slightly sweeter than you want the final popsicle to be.
- Fill the molds about nine tenths full. Liquid expands as it freezes, and an overfilled tray becomes a fused sheet of popsicle.
- Freeze for 45 to 60 minutes first, until it’s slushy.
- Now push the sticks in. They’ll stand up on their own in slush. This is far more reliable than the plastic wrap trick, which only works if the wrap is actually drum-tight.
- Freeze another 4 hours minimum. Overnight if you can stand the waiting.
- Run warm tap water over the outside of the mold for 20 to 30 seconds to release them. Pulling a stuck popsicle out by the stick just gives you a bare stick.
Tip: Layer it. Pour one flavor, freeze an hour, pour the next. You get stripes, and the wait between layers is a natural lesson in why the freezer works from the outside in.
What goes wrong the first time
Sticks fall over and end up frozen at a 45 degree angle. Solved entirely by the slush step above.
The other one: kids ask if they’re ready roughly every eleven minutes. Give them a specific time on the clock, not “later.” Written on a sticky note on the freezer door works better than telling them.
Safety and allergen notes
- Do not freeze whole grapes or whole blueberries into popsicles for kids under 4. A frozen whole grape is a serious choking hazard, and freezing makes it harder and slipperier. Puree instead.
- No honey for children under 12 months. Risk of infant botulism. Use maple syrup or nothing.
- Watch dairy and nut butters if you’re serving these to visiting kids. Ask the other parent before you hand a kid anything you made.
- Craft sticks can splinter. Check them before handing them over, and take the stick when they’re done rather than letting a toddler wander with it.
Science Concepts
- Freezing point and states of matter. Liquid becomes solid when you pull enough thermal energy out of it. Kids can watch it happen in stages if you check on it hourly.
- Why juice pops are icy and cream pops aren’t. Fat and sugar interfere with water forming large ice crystals. This is the same principle behind the ice cream in activity 3, and connecting the two is worth thirty seconds of your time.
3. Homemade Ice Cream

Best for: ages 5 to 11. Under 5 gives up before it sets Time: 5 min prep, 8 to 10 min shaking, 5 min cleanup Mess level: 3 out of 5. The salt water is the problem, not the ice cream Supervision: hands-on the entire time
Description
This is the one I reach for when I need a win in twenty minutes. It works, it’s edible, and the science is impossible to miss because the kid feels the cold through the bag.
It’s also the one with the highest chance of ending in tears, and both reasons are avoidable if someone tells you first.
Practical note: Ice mixed with rock salt drops to roughly 5 to 10°F, which is well below freezer temperature. Bare hands on that bag for eight straight minutes is a genuine cold burn risk, not a “brr, that’s chilly” situation. Gloves or a folded kitchen towel, every time, no negotiating. Kids will drop the bag the second it starts hurting, and it usually lands salt-side-down.
Materials Needed
- Half-and-half, heavy cream, or whole milk. Half a cup per kid. Whole milk works but comes out closer to a milkshake than ice cream. Coconut milk (full-fat, canned) is the dairy-free version and the texture holds up fine.
- Sugar, 1 tablespoon per half cup of cream.
- Vanilla extract, a quarter teaspoon. Optional but obvious if you skip it.
- Ice, about 2 to 3 cups per kid. This is the thing people underestimate. Make a full extra tray the night before.
- Rock salt, about a quarter cup per batch. Morton Ice Cream Salt sits near the ice at most grocery stores. Cheaper swap: water softener salt from the hardware store is the same thing for a fraction of the price per pound. Kosher salt works. Table salt works but you’ll need more of it and the result is soupier.
- Freezer-grade zip bags, one gallon and two pint size per kid. This is not the place to save money. Cheap sandwich bags split at the seam. Ziploc freezer bags hold up.
- Gloves or a thick towel per kid.
Steps
- Mix cream, sugar, and vanilla in a pint bag. Press out the air and seal it.
- Put that sealed bag inside a second pint bag and seal that too. Double-bagging is the single most important step on this page. One leak and the batch tastes like seawater and goes in the trash.
- Fill the gallon bag halfway with ice, then pour the rock salt over it.
- Drop the double-bagged cream into the ice, seal the big bag, and press out the air.
- Wrap it in a towel or put gloves on. Then shake, squish, and toss it around for 8 to 10 minutes.
- Rotate kids every 30 seconds. This is how you actually get to eight minutes. One kid shaking alone quits at ninety seconds.
- Rinse the outside of the inner bag under the tap before you open it. Salt water on the outside of that bag will find its way in.
- Eat straight from the bag with a spoon. It’s soft-serve texture, not scoopable. That’s correct, not a failure.
Tip: Squish and knead the bag rather than only shaking it. It sets faster and small arms tire less.
What goes wrong the first time
The bag leaks. Every time somebody tells me this didn’t work, it’s the bag. Double-bag, freezer grade, air pressed out.
Second: they stop at four minutes because their arms hurt and the mixture is still liquid. It looks like nothing is happening right up until it suddenly thickens around minute seven. Tell them that in advance.
Safety and allergen notes
- Cold burn risk. Covered above, and I’ll say it twice. Insulate hands.
- Dairy allergy. Canned coconut milk is the substitute that actually works. Oat and almond milk stay slushy because there’s not enough fat.
- Do not pour the salt water on the lawn. It’ll kill the grass. Down the sink is fine.
- Rock salt is not food. It’s often not food-grade. Keep the bag away from little hands who think it looks like candy.
Science Concepts
- Freezing point depression. Salt lowers the temperature at which the ice-water mixture can exist as liquid, so the melting brine gets colder than plain ice ever would. This is why cities salt roads.
- Thermal energy transfer. Heat moves from the warmer cream into the colder brine, never the other way. The frost forming on the outside of the big bag is proof, and kids notice it themselves.
4. DIY Weather Station
Best for: ages 7 to 12. Below 7, the daily data logging falls apart by day three Time: 45 to 60 min to build, then 5 min a day for one to two weeks Mess level: 1 out of 5, but there’s cutting involved Supervision: adult does all the cutting, then check in
Description
I’ll be honest about this one. It’s the most educational project on the list and the one families are most likely to abandon. The build is fun. The two weeks of writing numbers in a notebook is where it dies.
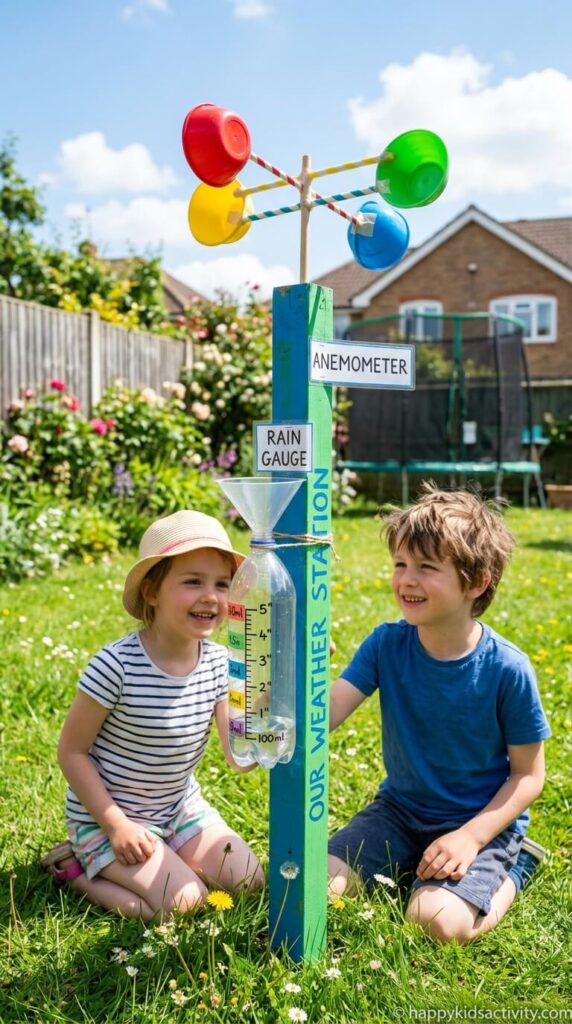
So here’s my advice: build the rain gauge first and only add the other two if the first one holds their interest. The rain gauge is the instrument that actually works reliably, and a kid who checks it after a thunderstorm and finds an inch of water is thrilled.
Materials Needed
For the rain gauge:
- A clear 2-liter bottle or a straight-sided glass jar. Free, already in your recycling.
- A permanent marker. A Sharpie oil-based paint marker survives rain better than a regular Sharpie, which fades in about four days.
- A ruler. Free swap: tape the ruler to the outside of the jar instead of marking it.
For the anemometer:
- 4 small paper or plastic cups. Dixie cups, or cut the bottoms off egg carton cells for free.
- 2 sturdy straws. Paper straws collapse when wet, use plastic here.
- A pencil with an unused eraser, and a pushpin.
For the barometer:
- A balloon, a wide-mouth glass jar, a rubber band, and a lightweight straw.
- Tape and an index card for the scale.
Steps
- Rain gauge: an adult cuts the top third off the bottle, then inverts that cone into the base as a funnel and tapes the seam. Mark quarter-inch lines up the side starting from the bottom of the straight section, not the curved base, or your measurements will be wrong.
- Anemometer: tape two straws into an X. Tape one cup to each straw end, all four facing the same rotational direction. Push the pushpin through the straw center into the pencil eraser. Mark one cup with a Sharpie so you can count rotations.
- Before you go outside, test the anemometer in front of a box fan. If it doesn’t spin freely indoors it will never spin outdoors, and you’d rather discover that now than in front of a disappointed kid.
- Barometer: cut the neck off the balloon, stretch the rubber flat and airtight over the jar mouth, secure with the rubber band. Tape a straw horizontally to the center of the balloon so it points out like a needle. Stand an index card behind the straw tip and mark where it sits.
- Put everything in the same spot, away from walls and trees, and read it at the same time each day.
- Compare your readings to the local forecast. When your homemade barometer needle drops and rain shows up the next day, that’s the payoff moment.
Tip: The pushpin usually binds against the eraser and stops the cups spinning. Wiggle the pin to widen the hole slightly, or slip a small plastic bead over the pin as a spacer. Two minutes of fixing saves the whole afternoon.
What goes wrong the first time
The anemometer doesn’t spin. Nine times out of ten it’s friction at the pin. See the tip above.
The balloon barometer drifts with air temperature more than with pressure, so on a hot afternoon the needle rises for reasons that have nothing to do with weather. Keep it in the shade at a stable temperature, and tell your kid up front that this instrument is the finicky one. Presenting a known limitation as a known limitation is better science than pretending it’s precise.
Safety notes
- An adult cuts the bottle. Cut PET plastic edges are sharper than they look and they catch skin easily. Sand them or fold tape over the rim.
- The pushpin is a choking hazard. Count them out and count them back in if there’s a toddler in the house.
- Don’t put the station on a roof, a ladder, or a fence a kid has to climb. Ground level, boring spot.
Science Concepts
- Measurement and consistency. Same time, same place, every day. That’s most of what separates data from guessing.
- Atmospheric pressure. Falling pressure often precedes a storm. Seeing it on a homemade instrument makes an invisible force real.
- Prediction and testing. Have them write tomorrow’s forecast before checking the news. Being wrong is the interesting part.
5. Leaf Chromatography
Best for: ages 8 to 13. A 5-year-old can mash leaves, but the payoff is too subtle for them Time: 20 min setup, 30 to 90 min of waiting, 10 min cleanup Mess level: 2 out of 5. Low mess, strong smell Supervision: hands-on. Rubbing alcohol is in play
Description
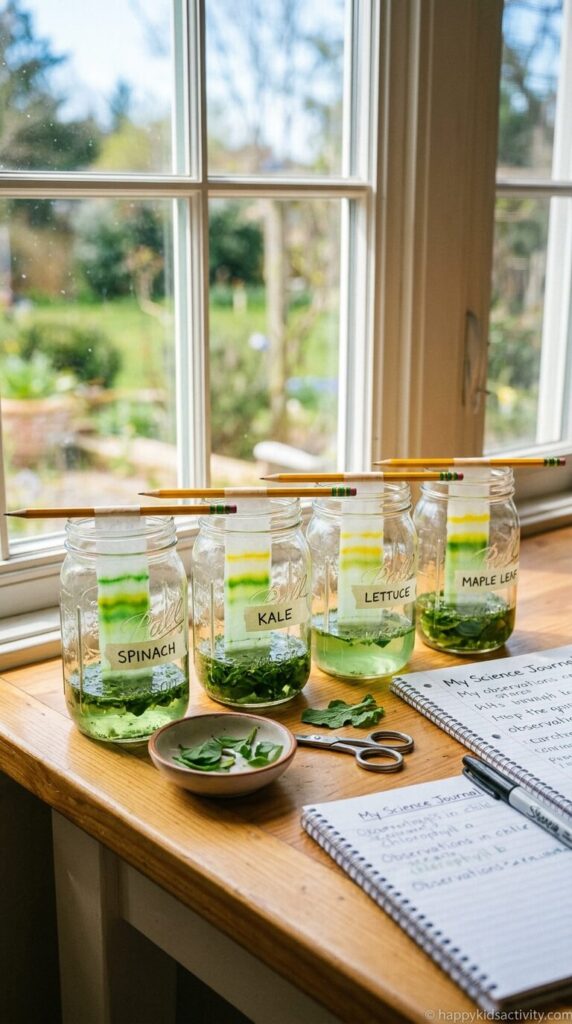
Set expectations before you start: your kid is not going to get a rainbow. They’re going to get a green band with a yellowish edge above it, and if the setup went well, a faint orange line. That’s the honest result, and it’s still fascinating once they understand what they’re looking at.
The thing that surprised me most is that spinach from the fridge outperforms almost anything from the yard. Deep green, thin leaves, tons of pigment. Grab yard leaves for comparison, but put spinach in one of the jars as your control.
Materials Needed
- Dark green leaves. Free. A handful of baby spinach plus two or three yard varieties for comparison.
- Isopropyl alcohol. 91% works noticeably better and faster than 70%. About $2 at any pharmacy or Walmart. Do not substitute nail polish remover. Acetone is harsher, melts some plastics, and the fumes are worse.
- White coffee filters. Free swap: strips of white paper towel run faster but the bands blur more. A basic Melitta cone filter cut into half-inch strips gives cleaner separation.
- Clear glass jars or drinking glasses, one per leaf type.
- A pencil and tape to suspend the strips.
- A spoon or the back of a fork for mashing.
Steps
- Tear the leaves small and put them in the jar. Then mash them hard with a spoon for a full minute. Torn pieces alone release very little. You want a bruised, pulpy mess.
- Pour in just enough alcohol to barely cover the pulp. Adult does this. More alcohol means a weaker, more diluted extract.
- Set the jars in a bowl of hot tap water for 5 minutes. Not boiling, just hot from the faucet. Warmth pulls out a lot more pigment and this step is what separates a visible result from a disappointing one.
- Cut a strip of coffee filter about half an inch wide and long enough to reach from the pencil to just below the liquid line.
- Here’s the step that doubles your color: dip the very tip of the strip into the green liquid, let it dry for a minute, and repeat three or four times. You’re concentrating the pigment into a single loaded line before you run it.
- Tape the strip to a pencil, rest the pencil across the jar mouth, and lower the strip until the tip touches the liquid. The loaded pigment line should sit just above the liquid, not in it.
- Wait 30 to 60 minutes as the alcohol climbs the paper and drags the pigments along at different speeds.
- Pull the strip, let it dry, and compare it to the strips from your other leaves.
Tip: Do this near an open window. The alcohol smell in a closed kitchen gets unpleasant fast, and a couple of my kids’ friends have complained of headaches from it.
What goes wrong the first time
Faint or nonexistent bands, almost always because the leaves weren’t mashed enough or the extract was too diluted. Mash harder, use less alcohol, warm the jar, load the strip multiple times.
Also, if the paper tip sits in the leaf pulp instead of the clear liquid above it, the pulp wicks up and you get a smear.
Safety notes
- Isopropyl alcohol is flammable. No candles, no stove, no gas water heater pilot light in the same small room.
- It’s toxic if swallowed and stings badly on broken skin or in eyes. The adult pours it. Every time.
- Not appropriate for under 5 to handle at all. They can pick the leaves and then step back.
- Ventilate the space. Concentrated fumes cause headaches and dizziness.
- Dispose of it by pouring the used alcohol down the drain with running water. Don’t leave open jars sitting where a toddler can reach.
Science Concepts
- Chromatography. Different molecules travel through paper at different speeds depending on size and how strongly they stick, so a mixture separates into bands.
- Plant pigments. Chlorophyll is green, carotenoids are yellow and orange, anthocyanins are red and purple. The yellows and oranges are in there all summer, hidden underneath.
- Why leaves change in fall. Chlorophyll breaks down first and the colors that were always present become visible. Your kid just proved that in July, which is the best part of the whole activity.
6. Seed Germination
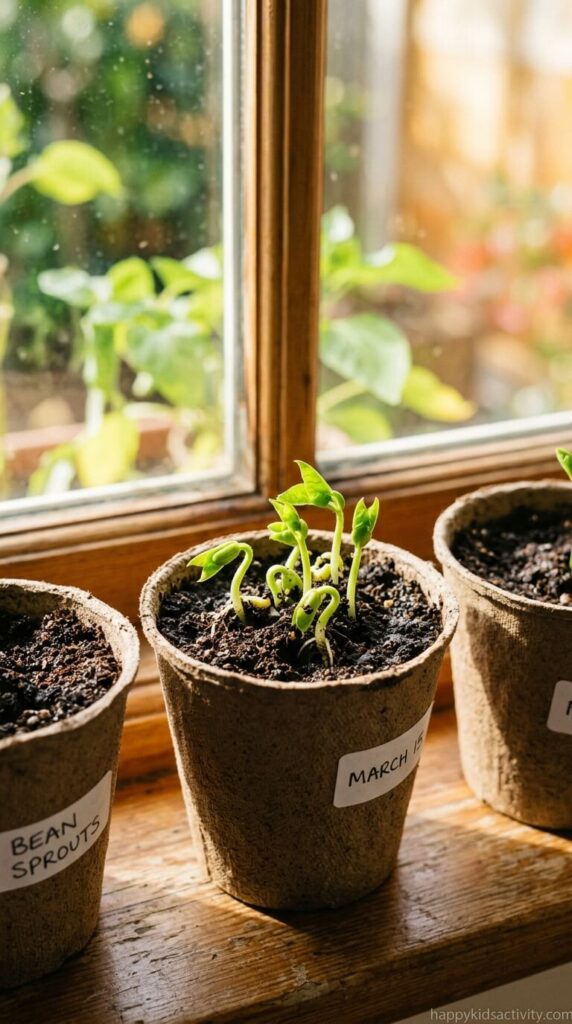
Best for: ages 3 and up to plant, 6 and up to run it as a real experiment with variables Time: 20 min setup, 2 min a day, results over 10 to 14 days Mess level: 3 out of 5 at planting, then nothing Supervision: hands-on for the soil, then check in
Description
The classic version has a flaw: for the first four or five days, a pot of soil looks exactly like a pot of soil. Kids lose interest before anything visible happens.
So do two versions at once. Soil pots for the real experiment, plus a bean on a damp paper towel inside a Ziploc taped to a sunny window. The bag version shows a root emerging by day two or three, which buys you the patience to wait on the pots.
Materials Needed
- Fast seeds. Radish seeds sprout in 2 to 3 days and are the right choice for an impatient kid. Lima and green beans take 4 to 6 days but are big enough for small fingers to handle. Skip sunflowers indoors, they get leggy and sad.
- Where to get them: Dollar Tree sells seed packets around 4 for $1.25 in spring and often still has stock into summer. Burpee packets at Walmart or Home Depot run $1.50 to $3. Free swap: dried lima or pinto beans from the pantry sprout perfectly well. A bag costs a dollar and has hundreds of seeds.
- Potting soil. Miracle-Gro potting mix, smallest bag, about $5. Free swap: dirt from the yard works, it’s just slower and clumpier.
- Containers. Free. Yogurt cups, egg cartons, or paper cups with a pencil hole poked in the bottom for drainage.
- A dark box for the no-light group. Any cardboard box.
- A notebook for daily logging.
Steps
- Fill 6 containers with soil and plant 2 or 3 seeds about half an inch deep in each. Overplanting is fine, more seeds means better odds.
- Label them before you do anything else. Light + water, light + no water, dark + water, dark + no water. Two spares.
- Split them into their groups. Sunny windowsill for the light group, closed cardboard box for the dark group.
- Water only the “water” pots, just enough to keep the soil damp, not soaked. Damp means it holds together when you squeeze it and doesn’t drip.
- Set up the bag version too: a bean on a folded damp paper towel, sealed in a Ziploc, taped to a window.
- Log something every single day, even “nothing.” A row that says “no change” for four days makes the day-five sprout feel earned.
- Compare at day 10 to 14 and talk through what each group tells you.
Tip: Take a photo next to a ruler at the same time each day. At the end, flip through them fast on your phone. Instant time-lapse and kids love it.
What goes wrong the first time
Overwatering. Kids equate care with water and they’ll drown the seeds into rot. Give them a tablespoon-sized measure and a rule: once a day, one measure, only if the top of the soil is dry to the touch.
The result nobody expects
Don’t skip the dark-but-watered pot. Those seeds sprout, and they come up tall, pale, and floppy, reaching desperately for light that isn’t there. It’s called etiolation, and it’s the most memorable outcome of the entire experiment. My kids still talk about the “ghost beans.”
Safety notes
- Seeds are a choking hazard for under 3, and dry beans are exactly the right size to be dangerous. Stay hands-on.
- Some commercial seed packets are treated with fungicide. Check the packet, wash hands after handling, and don’t let kids taste seeds.
- Potting soil dust shouldn’t be inhaled. Wet it slightly before mixing and don’t let them dump it from a height.
- Wash hands after handling soil, every time.
Science Concepts
- Germination. A dormant seed contains everything it needs to start growing except water. Water is the trigger.
- Controlled variables. Change one thing, keep everything else identical. This is the single most useful science idea a kid can pick up at this age.
- Why plants need light. The ghost beans prove seeds don’t need light to sprout, but seedlings absolutely need it to survive. Two different answers to what sounds like one question.
7. Plastic Bottle Rocket: Designing and Launching a Water-propelled Rocket
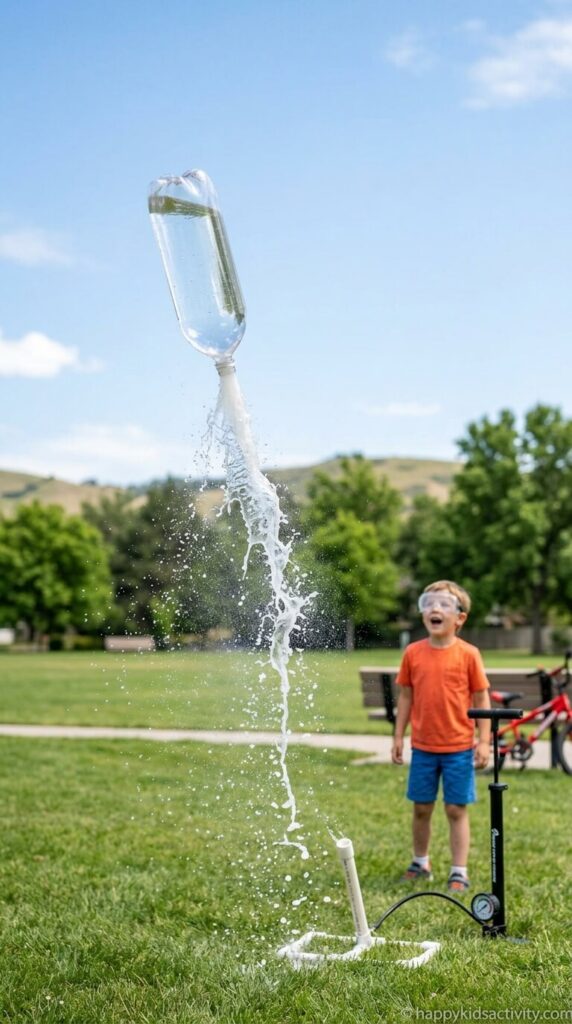
Best for: ages 8 and up to build. Any age can watch from behind the adult Time: 30 min build, 15 min of launches, 5 min cleanup Mess level: 4 out of 5, all water. Everyone gets soaked Supervision: an adult runs the pump and the launch. This is not a hand-it-over activity
Description
This is the loudest, most exciting thing on the list and also the only one with real stored energy in it. A pressurized 2-liter bottle holds enough force to hurt someone if it’s done carelessly, so I’m going to be direct about the rules before I get to the fun part.
Done properly, it goes 20 to 40 feet up, everybody screams, and you’ll be asked to do it eleven more times.
Practical note, read this before you build anything: Use only a bottle that held a carbonated drink. Soda bottles are engineered to hold pressure. A water bottle, juice bottle, or milk jug is not, and a thin-walled bottle can rupture instead of launching. Never use glass. Never exceed about 40 psi. Nobody stands over the bottle, ever, and everybody wears eye protection including the adult on the pump.
Materials Needed
- An empty 2-liter soda bottle. Free. Carbonated drinks only, as above.
- A bicycle floor pump with a pressure gauge. A Bell or Schwinn floor pump runs about $25 to $35 at Walmart or Target. The gauge is the safety feature, which is why I’d skip a handheld pump. Free swap: borrow one. Somebody on your street owns a bike pump.
- A sports needle adapter for the pump. Usually included, or about $5 for a pack.
- A rubber stopper that fits the bottle neck snugly. A #3 or #4 lab stopper (a few dollars online) holds far better than a wine cork. Wine corks leak air around the sides and blow early.
- Safety goggles for everyone. About $2 each at Harbor Freight or Home Depot. Swimming goggles work in a pinch.
- Fins. Free. Two chopsticks or pencils rubber-banded to the sides so the inverted bottle stands up. Cardboard triangles taped on work better if your kid wants to iterate.
Steps
- Rubber-band the chopsticks to the bottle so it stands neck-down on its own, sticking out past the neck like legs.
- Fill the bottle about one third with water. One third to 40 percent is the sweet spot. More water makes it heavy and it flops over; less water and there’s not enough mass to push against.
- Push the sports needle all the way through the center of the rubber stopper until the tip comes out the other side.
- Wet the stopper slightly and jam it firmly into the bottle neck. Firmly. A loose stopper pops at 8 psi and the rocket hops two feet.
- Pick your spot. Wide open grass, nothing overhead, at least 30 feet from windows, cars, pets, and anyone’s face. Look up. Check for power lines.
- Goggles on. Everyone stands behind the adult, at least 15 feet back.
- The adult pumps, watching the gauge, calling out the pressure so the kids can count along. Stop at 40 psi. If it hasn’t launched by then, stop pumping and back away.
- It launches when friction gives out. Water blasts down, the bottle goes up. Whoever is pumping gets soaked. That’s part of the deal.
- Change one thing and launch again. Water level, fin size, pressure. This is the real experiment.
Tip: Have your kid predict how high it’ll go before each launch and mark it against a fence or tree. Comparing predictions across four launches is what turns a stunt into science.
What goes wrong the first time
The stopper blows out early and the rocket barely leaves the ground. It’s almost always a wine cork or a loose fit. A proper tapered rubber stopper pushed in hard fixes it.
Second thing: the pop is loud. Kids under 5 who were thrilled beforehand often burst into tears at the actual launch. Warn them, and let them cover their ears or watch the first one from the porch.
Safety notes
- Adult handles pressurization and launch, no exceptions. Not a strong 10-year-old. An adult.
- Goggles on every person present, including bystanders and the adult.
- Never look down into the bottle neck while it’s pressurized.
- If it fails to launch, stop pumping, everyone stays back, and let it sit. It will bleed off or eventually pop. Do not walk over and inspect it.
- Carbonated-drink bottles only, never glass, never over 40 psi.
- Check overhead for lines, branches, and windows before every session.
- Keep pets inside. Dogs chase the rocket, which puts them right where it lands.
Science Concepts
- Newton’s third law. Water thrown down hard means the bottle gets pushed up equally hard. There’s no cleaner demonstration of it.
- Air pressure as stored energy. Compressed air in a sealed bottle is a spring. Once you frame it that way, the safety rules make sense to the kid instead of feeling arbitrary.
- Trade-offs in engineering. More water means more push but more weight. There’s an optimum, and finding it by trial is exactly what engineers do.
8. Balloon Rockets
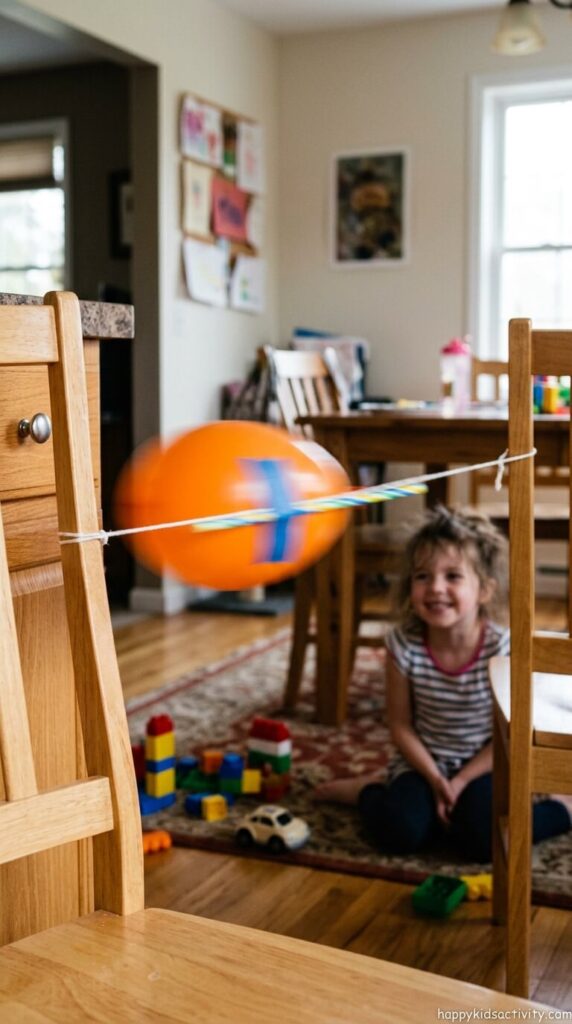
Best for: ages 3 to 10. The most toddler-friendly physics on this list Time: 10 min setup, 20 to 30 min of play Mess level: 0 out of 5 Supervision: check in, but stay aware of the latex (see safety)
Description
This is the rainy-day version of activity 7 and it works indoors with zero cleanup. It’s also the one my youngest asked to repeat most, because a 4-year-old can run the whole launch themselves.
The detail that makes it click: use long twisting balloons, not round ones. They fly noticeably farther and straighter, and your kid will figure out why on their own without you having to explain aerodynamics.
Materials Needed
- Balloons in different shapes. A bag of assorted latex balloons is about $3 at Dollar Tree or Party City. Get long ones if you can. Round, oval, and long is the whole experiment.
- Plastic drinking straws. Free swap: cut a piece of a bendy straw from the drawer.
- Fishing line or smooth string, 10 to 20 feet. Fishing line beats string because there’s less friction and the balloon travels farther. A cheap spool is about $4 and lasts forever.
- Masking tape. Free swap: any tape you own.
- Two anchor points. Chair backs, doorknobs, a stair rail.
Steps
- Tie one end of the line to your first anchor, low down.
- Thread the free end through the straw, then tie it to the second anchor across the room.
- Pull it drum-tight. A saggy line is the number one reason these stall halfway.
- Inflate a balloon and pinch the neck shut. Do not tie it.
- Tape the balloon to the straw in two places, one near the nozzle and one near the front, with the nozzle pointing back toward the start. One piece of tape makes the balloon spin instead of fly.
- Slide it to the start, let go, and watch it go.
- Now change one variable at a time. Same balloon, different inflation. Different shape, same inflation. Line angled slightly uphill.
- Mark the finish distance with tape on the floor so you can compare runs.
Tip: Tape a small paper cup to the straw and see how many pennies the rocket can carry before it can’t reach the end. That single addition turns ten minutes of play into forty.
What goes wrong the first time
The balloon travels three feet and stops. Two causes: the line isn’t tight enough, or the tape is bunching the balloon into a shape that drags. Tighten the line, retape flat.
Safety notes
- Latex balloons are one of the leading choking hazards for children. Uninflated balloons and popped fragments are the dangerous part, not the inflated balloon. A fragment can seal a small airway in a way that’s very hard to clear.
- Pick up every scrap immediately if a balloon pops. Count them if you have to.
- Kids under 8 should never mouth a deflated balloon or be left to inflate one unsupervised.
- Latex allergy is real. Foil or mylar balloons are the substitute. They’re heavier and don’t fly as well, but they work.
- Fishing line is a strangulation and cut hazard. Take it down when you’re finished rather than leaving it strung across a room.
Science Concepts
- Thrust. Air rushing out the back pushes the balloon forward. Same law as the water rocket, one tenth the risk.
- Drag and shape. The long balloon wins because it pushes less air out of the way. Kids reach this conclusion themselves, which is worth more than being told.
- Fair testing. Changing only one thing per run. Younger kids want to change everything at once, and gently holding them to one change is the actual lesson.
9. Solar Oven: Making S’mores with a Pizza Box
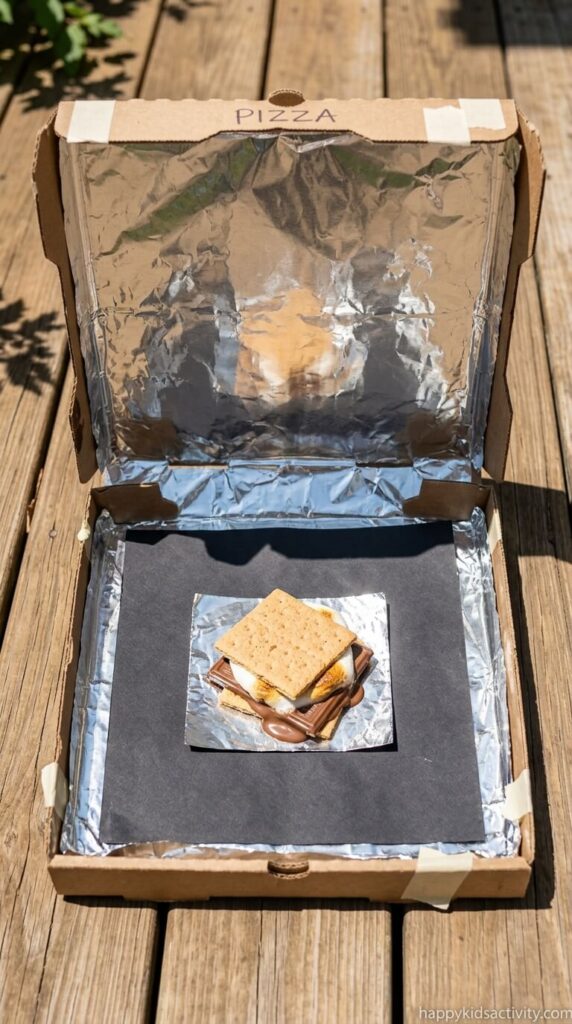
Best for: ages 5 to 11 to assemble with help. Adult does every cut Time: 30 to 40 min build, 30 to 60+ min cooking, 10 min cleanup Mess level: 3 out of 5. Sticky marshmallow, that’s it Supervision: adult cuts, then check in every 15 minutes
Description
Reality check first, because this is where most parents get burned. A pizza box solar oven melts chocolate and softens marshmallows. It does not toast or brown them. If your kid is picturing a campfire s’more with a charred marshmallow, they will be disappointed, and it’ll feel like the project failed when it didn’t.
Frame it as “melty s’mores made by the sun.” Set that expectation out loud before you start and this becomes one of the best activities on the list. It feels like magic when a kid opens the box and the chocolate has gone glossy.
A pizza box oven typically reaches somewhere around 160 to 200°F on a clear, hot day. That’s hot enough to melt sugar and chocolate and nowhere near hot enough to safely cook meat, eggs, or anything else that needs a food-safe temperature. Marshmallow and chocolate aren’t just the fun option, they’re the correct one.
Materials Needed
- A clean cardboard pizza box. Free. Ask any pizza place for an unused one, most will hand one over for free or a dollar.
- Heavy-duty aluminum foil. Reynolds Wrap heavy duty is worth it here. The thin store-brand stuff tears while you’re smoothing it down, and every tear is a spot that doesn’t reflect. About $5 and you’ll use a fraction of the roll.
- Clear plastic wrap. Whatever you have.
- Black construction paper or cardstock. Free swap: paint a piece of cardboard with black craft paint. Apple Barrel black at Walmart is under $1 for a bottle.
- Clear packing tape and a glue stick.
- A utility knife or box cutter. Adult only.
- A ruler, a chopstick or pencil to prop the flap.
- S’mores ingredients. Graham crackers, a Hershey’s bar (it breaks into clean squares, which matters more than you’d think), and Jet-Puffed marshmallows.
Steps
- An adult cuts a flap in the box lid. Cut along the front and both sides, leaving a one-inch border. Do not cut the back edge, that’s your hinge.
- Fold the flap up and crease it well.
- Line the inside of the flap with foil, shiny side facing out toward the sun. Glue-stick it down and smooth every wrinkle. Wrinkles scatter light instead of aiming it.
- Line the inside bottom and walls of the box with foil too.
- Tape the black paper flat on the foil floor. Black absorbs, foil reflects. You need both.
- Cover the window opening with plastic wrap from the inside of the lid, pulled tight, taped all the way around so it’s sealed. This traps the heat.
- Build the s’mores on small foil squares. Graham cracker, then chocolate, then marshmallow on top of the chocolate. Order matters: chocolate melts faster than marshmallow softens, and if the marshmallow is underneath, the chocolate slides right off.
- Close the lid, prop the flap with a chopstick, and angle it so the reflected light lands squarely on the window.
- Put it in direct sun between 11am and 3pm. Hazy day, no result. Cloudy day, don’t bother.
- Rotate the box every 15 minutes to follow the sun. Skip this and the reflection drifts off target while you’re waiting.
- Pull them out, add the top cracker, done.
Tip: Preheat the empty oven in the sun for 20 minutes before the food goes in. It shaves real time off the cook and stops the first ten minutes being spent just warming cardboard.
What goes wrong the first time
Nothing melts, and it’s almost always the weather. Direct midday sun on a clear day is not a suggestion. Check the forecast the night before and pick your day.
The second issue is patience. Half an hour is a long time to a 6-year-old. Send them off to do something else and set a timer, or the waiting sours the whole thing.
Safety notes
- An adult does all the cutting. Box cutters and cardboard are a bad combination for kids, and the blade skips.
- The foil and the food get hot enough to burn small fingers. Not oven-hot, but hot. Use tongs or let it sit two minutes before handing it over.
- Never cook meat, eggs, dairy, or leftovers in it. It cannot reach a food-safe temperature, and warm-but-not-cooked is how you get someone sick.
- Don’t leave it unattended near dry grass or mulch. Concentrated reflected sunlight plus dry material is an ignition risk, small but real.
- Allergens: graham crackers contain wheat, most chocolate bars contain milk and are often made on lines with nuts, and marshmallows contain gelatin (so they aren’t vegetarian). Gluten-free grahams and vegan marshmallows both exist if you’re hosting.
Science Concepts
- Solar energy. Sunlight carries energy you can collect and concentrate with nothing more than cardboard and foil.
- The greenhouse effect in miniature. Light passes in through the plastic, converts to heat on the black paper, and the heat can’t get back out through the plastic. That’s the same mechanism, at a scale a kid can hold.
- Reflection versus absorption. Shiny surfaces bounce light, dark surfaces soak it up. You built one of each into the same box, on purpose.
10. Nature Journaling
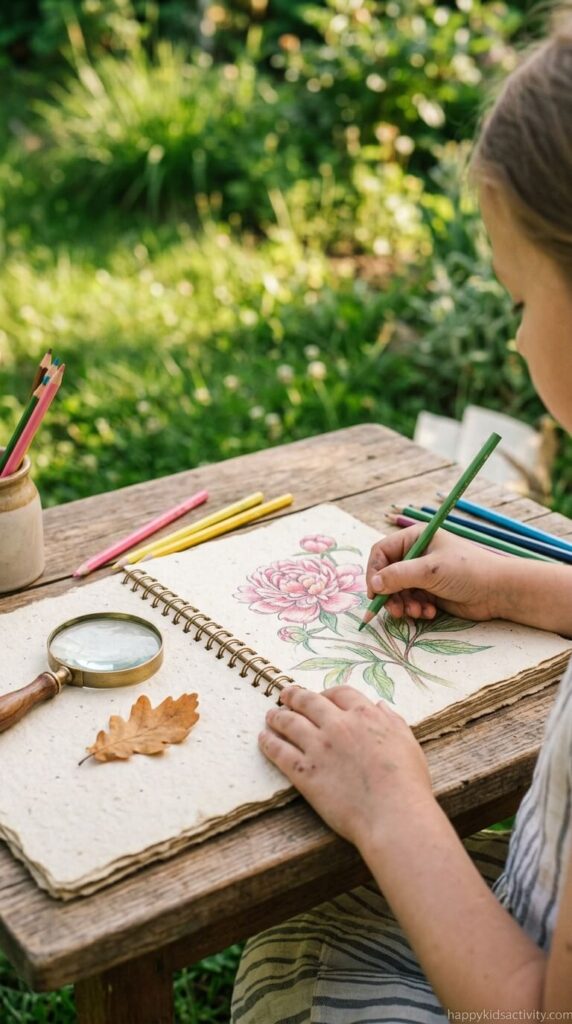
Best for: ages 4 and up for drawing, 7 and up for writing Time: 15 to 30 min per session, zero prep after the first day Mess level: 0 out of 5 Supervision: almost none, which is the point
Description
This is the quietest thing on the list and it will absolutely not work on a day when your kid is bouncing off the walls. Save it for after swimming, or the hour before dinner when everyone’s spent. Trying to force a journaling session on a high-energy morning is how the notebook ends up in a drawer forever.
The other thing to know: a blank page paralyzes kids. “Go draw what you see” gets you a blank page and a frustrated child. Give them a frame instead.
Materials Needed
- A notebook. A composition notebook is under $1 during back-to-school season, and August is when to buy five of them. Free swap: fold ten sheets of printer paper into a construction paper cover and staple the spine.
- Pencil and colored pencils. Crayola 12-pack, about $2. Colored pencils beat markers outdoors because they don’t bleed through and don’t dry out in the heat.
- Optional: a Moleskine or Strathmore watercolor pad if your kid responds to nice materials. Some do, a lot don’t.
- A magnifying glass if you have one from activity 1.
Steps
- Pick one spot and commit to it. A specific tree, one flowerbed, a corner of a park. Give it a name. “Our spot” does more work than it sounds like it should.
- Go at roughly the same time of day, two or three times a week.
- Use the same three prompts on every page. Write them at the top before you go:
- What I see
- What I hear
- One thing I don’t understand
- Sit for at least five minutes before drawing anything. The first five minutes are when the animals come back after you’ve disturbed them.
- Date every entry. Non-negotiable, it’s what makes the notebook useful later.
- Look up one mystery per session, using the Seek app or a library book.
- At the end of summer, read the first entry out loud. The difference between page one and page twenty is startling, and kids feel it.
Tip: That third prompt, “one thing I don’t understand,” is what turns a sketchbook into a science journal. It’s also the only prompt my kids never got bored of.
What goes wrong the first time
You do it once, enthusiastically, and never again. This activity lives or dies on repetition, so tie it to something that already happens. Right after the pool. Sunday mornings. Attach it to an existing habit or it won’t stick.
Also, resist correcting their drawings. An inaccurate sketch they made themselves is worth ten accurate ones you helped with.
Safety notes
- Sun exposure. Sitting still in one spot for 30 minutes in July burns faster than kids expect. Hat, shade, sunscreen, water.
- Check what they’re sitting on. Poison ivy, fire ant mounds, and stinging nettle all look like fine places to sit.
- Ticks if it’s tall grass. Check afterward.
- If you’re near water, the usual rules apply and you’re supervising, not journaling alongside them.
Science Concepts
- Observation without interference. Watching and recording rather than poking and collecting. It’s a real scientific method and it’s the one most kids never get taught.
- Change over time. A flower bud in one entry and an open bloom three entries later is a data set, and it’s theirs.
- Seasonal transition. Late summer entries pick up the first signs of autumn, which is a satisfying place for the notebook to land.
11. Insect Observation
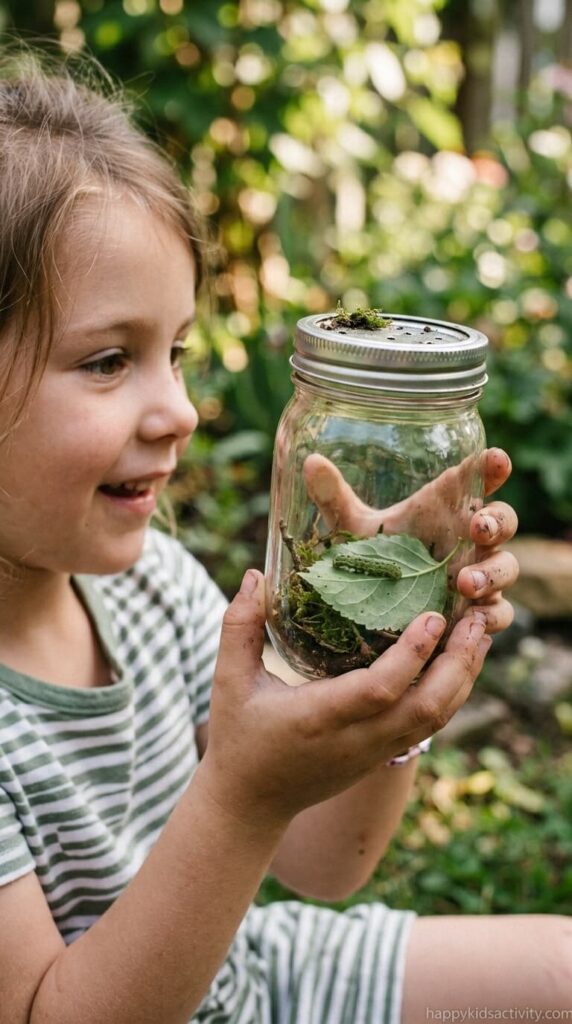
Best for: ages 2 to 12. The widest age range of anything here Time: 20 to 40 min, no prep Mess level: 2 out of 5. Dirt on hands and knees Supervision: hands-on for under 5, close by for everyone else
Description
If you only do one thing from this list, do this one. It costs nothing, works in any yard or park, and a 3-year-old and a 10-year-old can do it side by side and both get something out of it.
Here’s the thing that took me a few summers to learn: the best bug spot in any yard is the underside of a flat rock or a board that’s been sitting on damp soil. Not the flowers, not the grass. Flip a paving stone that’s been down a few weeks and you’ll find pill bugs, centipedes, worms, and beetles in about four seconds flat.
Materials Needed
- A magnifying glass. Dollar Tree, $1.25. Free swap: your phone camera zoom, which shows more detail anyway.
- A clear container with an air-holed lid, for a brief look only. Free swap: a clean peanut butter jar with holes punched in the lid. Plastic beats glass here, because it survives being dropped in the grass by a 4-year-old.
- A plastic spoon or a leaf for moving bugs. This replaces fingers, always.
- A notebook and pencil.
- Optional: the Insect Lore bug viewer (about $8) has a magnifying lid and is the one purchase in this section that earns its keep.
Steps
- Head for damp and shady. Under rocks, under boards, at the base of a downspout, in the mulch, on the undersides of large leaves.
- Flip the rock toward yourself, look, then put it back exactly as it was. That’s someone’s roof.
- Observe in place first. Most of what’s interesting is the behavior, and behavior stops the moment you scoop it into a jar.
- If you want a closer look, coax it onto a leaf or a spoon and into the container. Never pick a bug up with fingers, for the bug’s sake and your kid’s.
- Ask counting questions. How many legs? Six means insect, eight means arachnid. Wings or no wings? How many body sections? That’s real taxonomy and a 5-year-old can do it.
- Keep the jar in the shade and release within 10 to 15 minutes.
- Put it back exactly where you found it. Same rock, same side.
- Sketch it and write down where you found it. Location is data.
Tip: A closed jar left in direct sun will cook an insect in a couple of minutes. Nobody warns you about this and it’s the most common way a gentle activity turns into a sad one. Shade, always, and a timer on your phone.
What goes wrong the first time
A kid squeezes a bug, kills it, and is heartbroken. Set the rule before you go out: we look, we don’t grab. Give them the spoon so their hands have a job that isn’t grabbing.
The other one: they get frustrated because they can’t find anything. That’s the flat-rock trick above. It never fails.
Safety notes
- Do not handle bees, wasps, hornets, spiders, centipedes, or fire ants. Teach “point, don’t touch” for anything unfamiliar.
- Never touch fuzzy or spiny caterpillars. Puss caterpillar and io moth caterpillar stings are severe enough to need medical attention. Fuzzy reads as friendly to a child, so say it out loud.
- Don’t reach where you can’t see. No blind hands into holes, woodpiles, or under debris. If you live where black widows or brown recluses are common, learn what they look like and teach it.
- Know whether anyone in the group has a sting allergy, and where the epinephrine is, before you start turning over rocks.
- Wash hands afterward, before food, every time.
- Tick check if you were in leaf litter or long grass.
Science Concepts
- Insect anatomy. Head, thorax, abdomen, six legs, antennae. Counting legs to separate insects from spiders is the first real classification most kids do.
- Habitat specificity. Pill bugs need damp. Ants tolerate dry. That’s why you find different things two feet apart.
- Biodiversity. A square foot of damp soil holds more species than most kids would guess, and counting them makes the point better than any statistic.
12. Bee Hotel: Creating a Habitat for Bees Using a Glass Jar
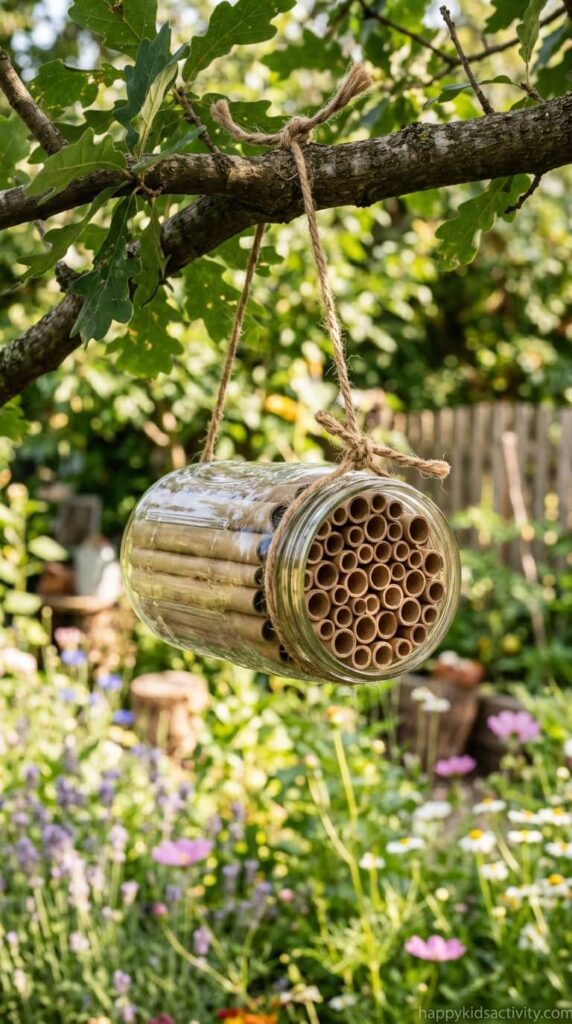
Best for: ages 5 to 12. Tube-rolling is fiddly, so 8 and up do it better Time: 45 min to build, then a check every couple of weeks Mess level: 1 out of 5 Supervision: check in, adult picks the hanging spot
Description
Say this to your kid on day one: we might get zero bees this year. Solitary bees are picky about where they nest, and most mason bee activity happens in spring, so a jar hung up in July or August may sit completely empty until next March.
If you skip that conversation, an empty jar reads as failure and the whole project sours. If you have it, you’ve built something for next spring and the waiting becomes part of it. Framing this as a next-year project is completely legitimate and probably the most accurate way to pitch it.
Materials Needed
- A clean wide-mouth glass jar. Free, out of the recycling. A mason jar works.
- Brown kraft paper or unbleached parchment paper for the tubes. Free swap: a cut-up paper grocery bag, which is exactly the right weight. Paper straws work too and save you the rolling.
- A pencil to roll the tubes around. Rolling around a pencil gives you roughly a quarter-inch bore, which is what mason bees and leafcutter bees want.
- Free swap for the whole tube situation: cut hollow bamboo garden stakes into 5-inch lengths. A bundle of stakes is a few dollars at any garden center and gives you dozens of tubes with better durability.
- String or wire for hanging.
Steps
- Roll your tubes around a pencil, then slide the pencil out. Make them just slightly shorter than the jar is deep, so no tube sticks out past the rim.
- Vary the diameters. Roll most around a pencil for a quarter inch, and a few around a marker for a bit wider. Different species want different sizes, and variety is what gets you occupancy.
- Check both ends are open and clean. A crushed end is an unusable tube.
- Pack the tubes in tight, all parallel, all open ends facing out the jar mouth. Tight enough that nothing shifts if you tip it or the wind hits it.
- Tie string around the jar’s threaded neck for a hanging loop.
- Hang it horizontally, opening tilted slightly downward, under an eave or the overhang of a shed. Downward tilt keeps rain out.
- Put it in morning sun and afternoon shade. This matters more than anything else: glass in full afternoon sun bakes the larvae inside. Shade in the hot part of the day is not optional.
- Check every couple of weeks from a few feet away. Tubes capped with mud or chewed leaf mean a bee laid eggs in there. That’s the win.
- Replace all the tubes with fresh ones each spring. Old tubes accumulate mold, mites, and parasites, and a hotel that never gets cleaned does more harm than good.
Tip: Paper tubes in a glass jar hold humidity, and damp tubes grow mold. If you live somewhere humid, use the bamboo version instead and tilt the jar more steeply downward so nothing collects inside.
What goes wrong the first time
Two things. It gets hung in full sun, which kills whatever moves in. And it never gets cleaned out, which turns a conservation project into a mite farm by year two. Put a reminder in your phone for next March right now, while you’re thinking about it.
Safety notes
- Solitary bees like mason bees are extremely docile and rarely sting. That said, if any child in the house has a known bee sting allergy, they should not be the one checking the jar, and you should think hard about whether to hang it at all.
- Wasps will move into an unmaintained hotel, and wasps do sting. Another reason for the annual clean-out.
- Hang it away from doorways, patios, and play areas. Ten feet up and out of the way.
- An adult hangs it. No kids on ladders.
Science Concepts
- Not all bees live in hives. Most bee species are solitary. This surprises adults as often as kids.
- Pollination. A large share of what’s on a dinner plate depends on pollinators moving pollen between flowers. Watching one bee visit a tomato flower makes that concrete.
- Habitat loss and what you can do about it. Tidy yards remove the dead wood and hollow stems that solitary bees nest in. The jar is a small replacement for something that got cleaned away.
13. Firefly Lantern Jar
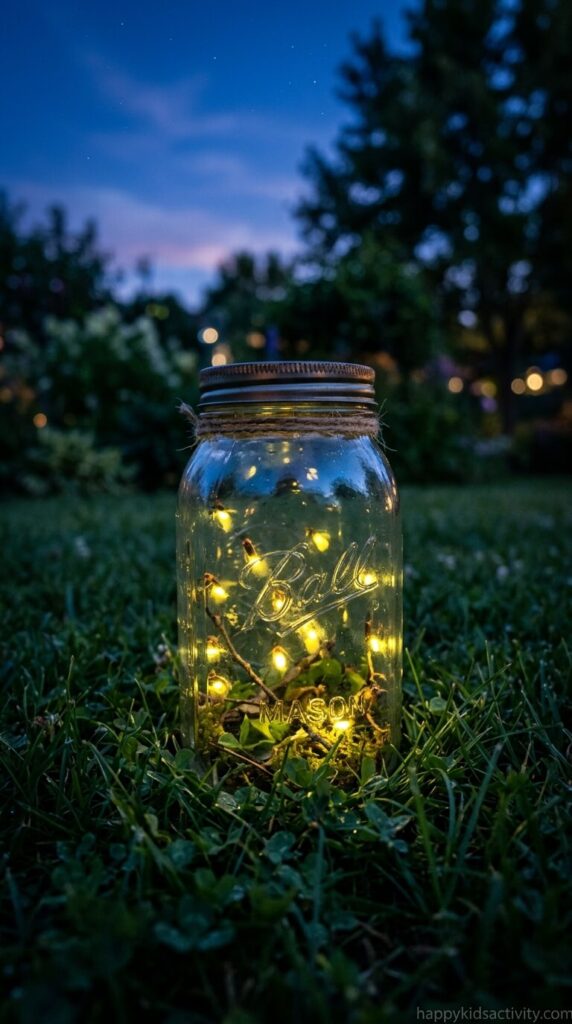
Best for: ages 3 and up to chase, 5 and up to catch gently Time: 30 to 45 min, dusk only Mess level: 0 out of 5 Supervision: hands-on. It’s dark and there’s glass involved
Description
Timing note for right now: peak firefly season across most of the US runs from about June into early July, with some species active into August. If you’re reading this in late summer or early fall, the fireflies in your yard are most likely done for the year. Bookmark this one for next June rather than sending a kid out to be disappointed.
When the timing is right, this is the most memorable thing on the list. It’s also the one where I’d push you toward a gentler version than the classic jar.
Practical note: Firefly numbers are declining in a lot of areas, mostly from habitat loss and light pollution, and a jar is a stressful place for a soft-bodied insect. My actual recommendation: skip the jar and take a small flashlight into the yard instead. Male fireflies flash in a species-specific pattern, and if you watch one flash and then flash back at it with the same timing, one will often fly right to you. It’s a better experience than the jar, it costs the firefly nothing, and my kids preferred it once they’d tried both.
Materials Needed
- A clear jar with a metal lid, if you do the jar version. Free swap: a clear plastic peanut butter jar, which won’t shatter when a 5-year-old drops it in the dark. That’s a real consideration, not a hypothetical one.
- A nail and hammer for air holes. Adult only.
- A small piece of damp paper towel for the bottom. Easier than soil and it does the same job of keeping humidity up.
- A small flashlight or headlamp. A headlamp for you, a small one for the kid.
- Insect repellent appropriate for your kid’s age.
Steps
- Walk the yard before dark and move the hose, the sprinkler, and anything else that’s a trip hazard. Do this in daylight.
- An adult punches air holes in the lid with a nail, from the inside out so the sharp burrs point away from the insects and away from small fingers.
- Put a scrap of damp paper towel in the bottom.
- Go out right at dusk. The window is short, roughly 20 to 40 minutes as the light fades. Show up fifteen minutes late and you’ve missed the show entirely.
- Look low, over unmowed grass and along tree lines, not over a freshly cut lawn. They stay near cover.
- Cup gently with two hands, never swat or pinch. Or better, try the flashlight response trick above.
- Watch for ten minutes, with all flashlights off, and count the seconds between flashes. Different species have different rhythms.
- Release them where you caught them, well before bedtime. Ten to fifteen minutes is plenty. Never overnight.
Tip: Have your kid count the pause between one firefly’s flashes. Then find a different one with a different rhythm. Once they realize the flashing is a language with dialects, they’ll never look at a summer yard the same way.
What goes wrong the first time
You go out at 9:30 and there’s nothing. It’s not your yard, it’s the clock. Go out as the sky is still going from orange to blue, not after full dark.
Second: kids run with a glass jar in a dark yard. Use plastic and make walking the rule.
Safety notes
- Dark yard, real trip hazards. Walk it in daylight first and keep a headlamp on yourself.
- Plastic over glass, especially with kids under 7.
- No running. Sounds obvious. Say it anyway.
- Mosquito protection, and check the age guidance on whatever repellent you use. DEET is not recommended for infants under 2 months, and oil of lemon eucalyptus is not for children under 3.
- Never keep fireflies overnight, and don’t screw down a lid without holes even for a minute.
- Release before full dark ends their mating window, which is the whole reason they’re flashing.
Science Concepts
- Bioluminescence. Luciferin and luciferase react with oxygen to produce light with almost no heat. Close to 100 percent of the energy comes out as light, which is far more efficient than any bulb in your house.
- Animal communication. The flashes are males signaling and females replying. It’s a conversation, and your kid can eavesdrop on it.
- Conservation ethics. Handling a living thing carefully and putting it back is a skill, and it’s the part of this activity that actually sticks.
Common Mistakes to Avoid the First Time
These are the specific ways I’ve watched summer science activities for kids fall apart, mine included.
- Doing three activities in one day. One is plenty. The conversation afterward is where the learning actually happens, and you can’t have that conversation if you’re already setting up the next thing. Doing three on Monday also means you’ve got nothing left for Thursday.
- Calling it an experiment. Some kids hear “science experiment” in July and immediately smell homework. “Want to see something weird?” gets a completely different reaction than “let’s do a science activity.” Same activity, different door.
- Doing the steps for them because they’re slow or doing it wrong. The wrong way is the data. A kid who overwaters the seeds and watches them rot has learned something no worksheet can teach. Sit on your hands.
- Skipping the prediction question. Before you start, ask “what do you think will happen?” It takes twenty seconds and it’s the entire difference between a craft and a science activity. Being wrong out loud, then finding out why, is the whole skill.
- Not testing the fiddly bit first. The anemometer that won’t spin, the stopper that won’t hold, the balloon rocket on a slack line. All discoverable in five minutes alone, all miserable to discover with a kid watching.
- Setting up on carpet or a bare wood table. Old towel, plastic tablecloth, or outside. Dollar Tree sells plastic tablecloths for $1.25 and they’ve saved me more than that in one afternoon.
- Buying a kit. A $30 science kit does the interesting part for you. The pantry version teaches more, precisely because things go wrong.
- Promising a result you can’t deliver. Toasted s’mores from a cardboard box. A rainbow from a spinach leaf. Bees in the hotel by next week. Undersell every single one of these and you’ll never have a disappointed kid.
FAQs
Is this safe for a 3 year old?Some of them, with you right there. The scavenger hunt, balloon rockets (watching the latex closely), popsicles, insect observation, and planting seeds all work at 3 with hands-on supervision. Skip leaf chromatography (rubbing alcohol), the water bottle rocket (pressurized), the solar oven build (box cutter), and the weather station (pushpins and cut plastic) entirely at that age. A 3-year-old can watch the bottle rocket from behind you with goggles on, and that’s the best part for them anyway.
How do I get popsicle or fruit juice stains out of carpet and clothes?Blot, don’t rub, and get cold water on it fast. For carpet, mix a teaspoon of dish soap and a tablespoon of white vinegar into two cups of cool water, dab it on with a cloth, blot dry, repeat. For clothes, rinse from the back of the fabric with cold water, then let it sit in an oxygen-based stain remover like OxiClean before washing. Never use hot water on a fruit stain first, heat sets the sugar and the pigment.
We live in an apartment with no yard. Which of these still work?Seven of the thirteen work entirely indoors: popsicles, ice cream in a bag, balloon rockets, leaf chromatography, seed germination, nature journaling (on a balcony or at a window), and the bee hotel build (hang it at a community garden or a relative’s yard). The solar oven works on any balcony or windowsill that gets direct midday sun. For the scavenger hunt and insect observation, a city park or a community garden works just as well as a backyard, and often better because there’s more variety.
Do I need to buy anything expensive?
No. Eleven of these thirteen cost under $5 using what’s in most kitchens: soda bottles, jars, Ziploc bags, foil, a pizza box, dried beans from the pantry. The two purchases worth considering are freezer-grade Ziploc bags for the ice cream (cheap bags leak and ruin the batch) and a bicycle floor pump with a gauge for the bottle rocket, where the gauge is the safety feature. Everything else has a free swap listed in its supply list above.
What if my kid gets bored halfway through?Stop. Seriously. A half-finished activity that ended on a decent note is better than a completed one that ended in a standoff, because they’ll say yes to the next one. Before you stop, try changing one variable to hand control back to them: more water in the rocket, a different balloon shape, a harder item on the hunt list. Boredom is usually a signal they’ve stopped being the one making decisions.
Is it cruel to catch fireflies?Catching a couple for ten minutes and releasing them where you found them is unlikely to harm a healthy firefly, but populations are declining in many areas and a jar is a stressful place for them. The version I’d recommend is the flashlight one: watch a male’s flash pattern, flash it back at him, and he’ll often fly to you. Same wonder, no captivity, and it works better as a lesson in how the flashing actually functions.
Read Next
If today’s activity worked and you want to keep the momentum, these two are the natural follow-ons.
Fun Backyard Water Party Ideas for Kids This Summer pairs well with the bottle rocket, since everyone’s already soaked and you’ve got the yard set up. Read it before you plan the launch day and you can turn one activity into a whole afternoon.
Ice Cube Painting DIY Activities for Kids uses the same freezer and the same freezing science as the popsicles, so if your kid latched onto the states-of-matter part, that’s where to go next. It’s also a solid indoor option for the week the heat index makes the yard unusable.
Conclusion
Pick one. Right now, before you close this tab. If it’s hot and you need a win in twenty minutes, make the ice cream in a bag. Double-bag it, put gloves on, rotate the shaking every thirty seconds. If it’s late afternoon and everyone’s fried, take a notebook outside and ask what they see, what they hear, and one thing they don’t understand. If you’ve got a clear sky and two hours, cut the pizza box. Ask what they think will happen before you start. Let them get it wrong. That twenty-second question is the only part of this that’s actually about science, and it’s the part that’ll still be working in October.