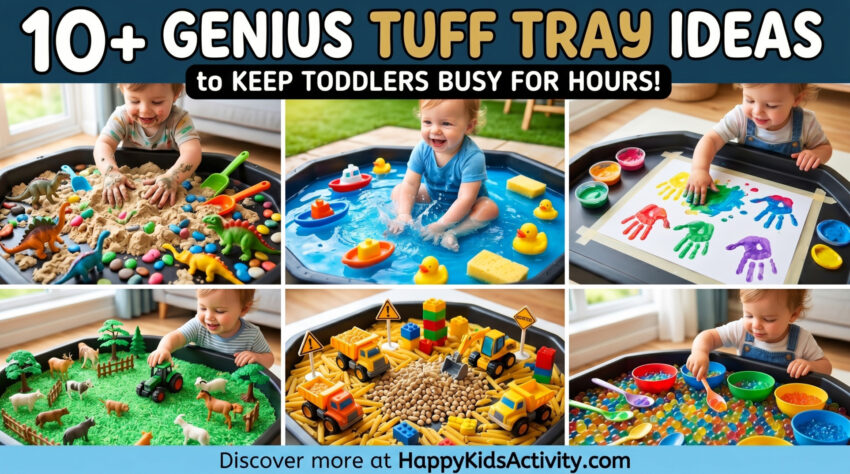
Sensory play is a foundational pillar of early childhood education and neuro development. During the first few years of life, a child’s brain forms millions of new neural connections every second. Engaging infants and toddlers in open-ended sensory experiences directly stimulates these pathways, enhancing cognitive growth, language acquisition, fine motor skills, and spatial awareness.
A Tuff tray originally designed as a heavy-duty plastic mortar-mixing tray serves as an ideal, self-contained environment for these vital developmental activities. Its wide, shallow profile allows multiple children to access the space simultaneously while effectively containing spills, liquids, and messy materials.
This comprehensive guide delivers 11 meticulously structured, evidence-based Tuff tray activities designed to maximize engagement, support motor milestones, and ensure safety during early developmental play.
Best Tuff Tray Ideas For Babies
1. Water Play Wonderland
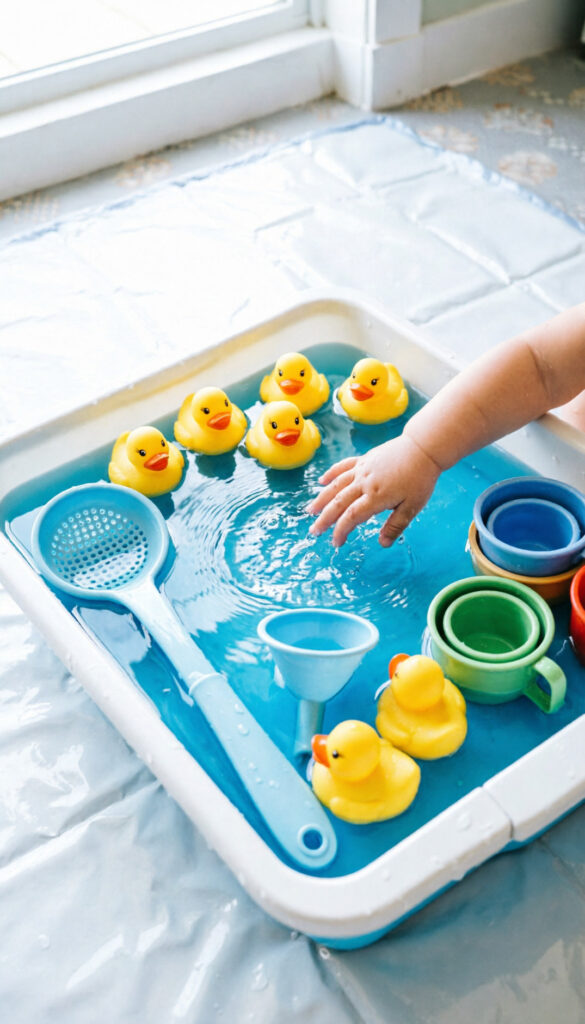
Water play introduces infants to fundamental concepts of physics, volume, and fluid dynamics through direct manipulation. The tactile sensation of water offers unique proprioceptive feedback, calming the nervous system while encouraging active exploration.
Materials and Equipment
To set up this activity, gather a Tuff tray, lukewarm water, graduated measuring cups, various sizes of natural sea sponges, floating rubber ducks, plastic funnels, slotted kitchen spoons, and premium, non-toxic liquid food coloring.
Step-by-Step Setup Guide
-
Positioning: Place the Tuff tray on a flat, stable surface, preferably over a waterproof mat or outdoors.
-
Water Depth: Pour a shallow layer of lukewarm water into the tray, ensuring the depth does not exceed one to two inches to maintain absolute safety.
-
Color Integration: Infuse a single drop of blue or green organic food coloring into the water, stirring thoroughly to create an appealing aquatic visual landscape.
-
Item Distribution: Scatter the cups, sponges, and utensils across the tray, ensuring items are spaced to encourage reaching and grasping.
Developmental Benefits and Learning Outcomes
This activity specifically targets bilateral coordination as children use one hand to hold a funnel and the other to pour water. Squeezing saturated sponges strengthens the intrinsic muscles of the hand, which are critical for later pen-grip development. Furthermore, early mathematical vocabulary such as “full,” “empty,” “heavy,” and “light” can be introduced naturally during play.
Safety, Clean-Up, and Practical Pro-Tips
Always maintain uncompromised, active supervision during any liquid-based play. To streamline clean-up, keep a stack of highly absorbent microfiber towels nearby. If you choose to dye the water, opt for heavily diluted vegetable-based dyes rather than standard synthetic food colorings to prevent temporary skin staining.
2. Sensory Bin Bonanza
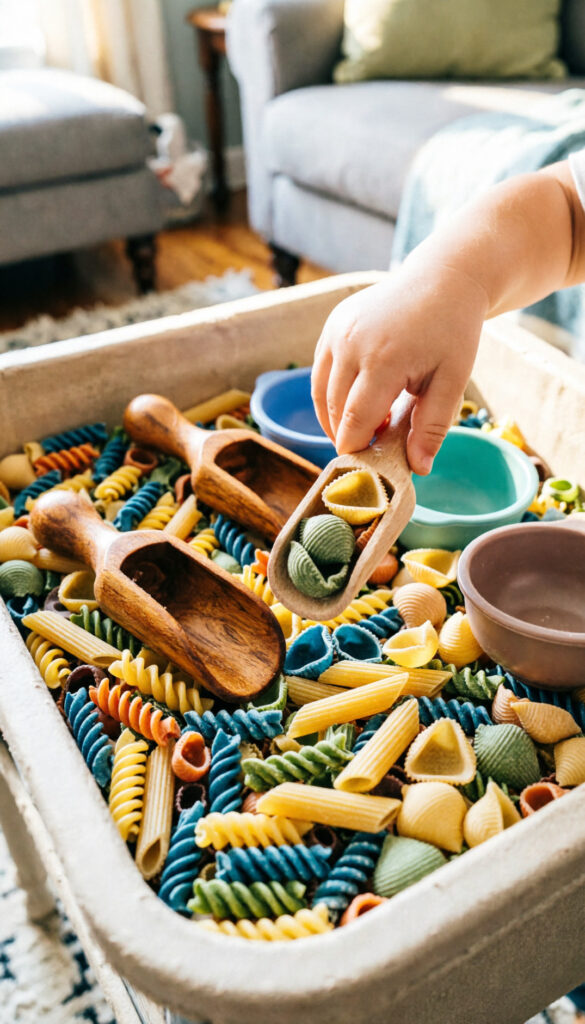
Dry sensory bases provide a predictable, high-texture environment where children can practice refined motor actions without the resistance of liquids or the stickiness of gels. Utilizing dried culinary ingredients introduces auditory elements into tactile play.
Materials and Equipment
You will require a clean Tuff tray, three to four kilograms of dried pasta shapes (such as penne, fusilli, and conchiglie) or long-grain white rice, wooden scoops, small silicone bowls, nesting cups, and durable plastic animal figurines.
Step-by-Step Setup Guide
-
Preparation: Ensure the Tuff tray is completely dry before introducing materials, as moisture will cause dry components to spoil.
-
Base Layer: Distribute the dried pasta or rice evenly across the base of the tray to a uniform depth of roughly one inch.
-
Tool Integration: Place scoops, bowls, and containers in the center of the tray to act as structural focal points.
-
Thematic Elements: Hide the plastic animal figurines beneath the dry base layer to encourage exploratory searching behavior.
Developmental Benefits and Learning Outcomes
Manipulating dry grains or pasta encourages the development of the pincer grasp the coordination of the index finger and thumb. When children scoop and transfer rice from one vessel to another, they are practicing visual-spatial processing and estimating volume, laid out within an unstructured problem-solving environment.
Safety, Clean-Up, and Practical Pro-Tips
Dry bases can scatter easily. Placing a large fitted sheet or tarpaulin beneath the Tuff tray legs allows you to quickly gather and reclaim spilled pasta or rice at the conclusion of the session. Ensure all dry food materials are stored in airtight containers after use to preserve hygiene for future play sessions. Dried elements should be checked regularly to ensure they remain free of dust or debris.
3. Edible Mud Kitchen
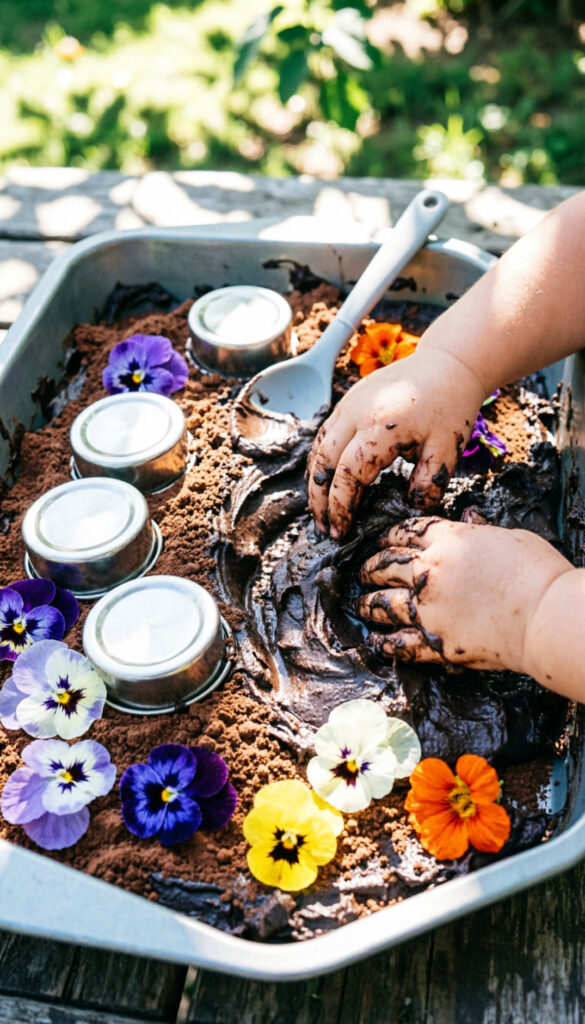
The oral-fixation stage is a natural part of infant development. Creating a sensory experience that mimics the rich, messy texture of outdoor dirt using 100% taste-safe culinary ingredients allows for stress-free exploration.
Materials and Equipment
Gather two packets of plain, sugar-free digestive biscuits, 50 grams of high-quality organic cocoa powder, lukewarm water, baby-safe silicone spoons, small metal baking tins, and certified pesticide-free edible flowers (such as pansies or marigolds).
Step-by-Step Setup Guide
-
Texture Processing: Crush the digestive biscuits into a fine, sandy texture using a food processor or a rolling pin inside a sealed bag.
-
Mixing: Blend the crushed biscuits with the cocoa powder directly inside the Tuff tray. Slowly add small increments of water, mixing continuously until a thick, mud-like consistency is achieved.
-
Garnishing: Scatter the safe edible flowers across the surface to simulate a realistic, vibrant garden landscape.
-
Utensil Placement: Insert spoons and small baking tins into the mixture to invite digging and molding.
Developmental Benefits and Learning Outcomes
This activity provides intensive olfactory and gustatory stimulation. The rich aroma of cocoa combined with the gritty texture of crushed biscuits assists in sensory integration, which can be highly beneficial for children exhibiting sensory sensitivities to unfamiliar textures. It also introduces basic concepts of chemistry, demonstrating how dry solids transform into moldable mixtures upon hydration.
Safety, Clean-Up, and Practical Pro-Tips
While this mixture is completely non-toxic and taste-safe, it should not be treated as a meal replacement; discourage large-scale consumption to prevent digestive discomfort. Because of the dark pigment of cocoa, dress children in older clothing or simple, washable garments. Clean the tray immediately after use with warm, soapy water to prevent the mixture from drying into a hardened crust.
4. Baby-Safe Paint Party
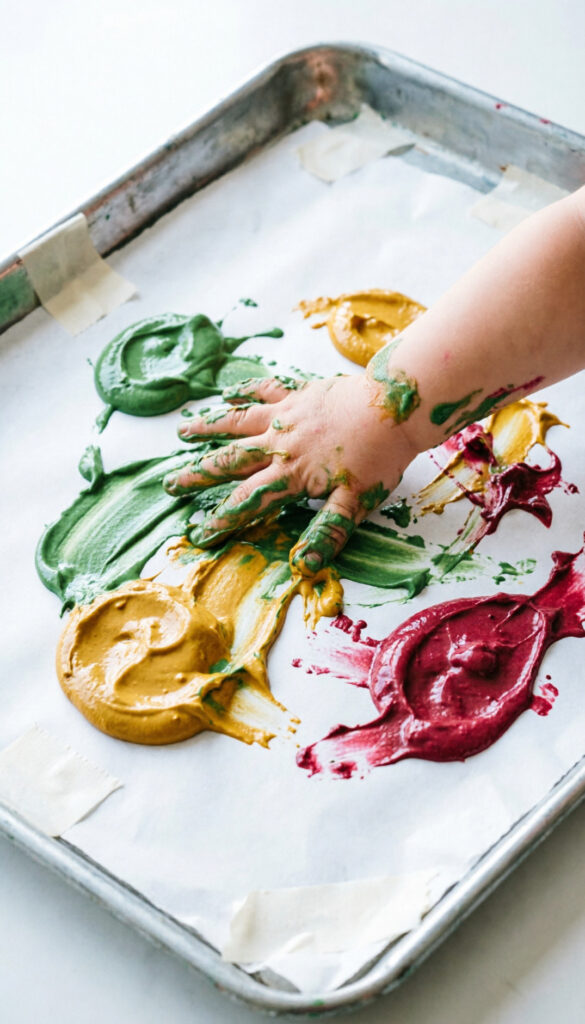
Traditional artistic mediums often contain binders and pigments unsuited for very young children. This adaptation leverages nutrient-dense, smooth bases mixed with natural dyes to provide an uninhibited introduction to art and color theory.
Materials and Equipment
Prepare three to four tubs of plain, unsweetened Greek yogurt (or smooth organic pear puree if dairy-sensitive), natural vegetable-derived food colorings (spinach juice for green, beetroot juice for red, turmeric for yellow), heavy-weight sugar paper, and low-tack painter’s tape.
Step-by-Step Setup Guide
-
Color Formulation: Divide the yogurt into separate bowls and stir in the natural juices until vibrant, uniform pastel shades are achieved.
-
Paper Security: Lay large sheets of heavy-weight sugar paper across the Tuff tray floor and secure all edges firmly using low-tack painter’s tape to prevent slipping.
-
Paint Placement: Deposit small, distinct dollops of the colored yogurt directly onto the paper, spacing them apart to allow for clear color-mixing opportunities.
Developmental Benefits and Learning Outcomes
Finger painting directly fosters early mark-making, the precursor to formal handwriting. As children slide their hands through the yogurt paint, they observe cause-and-effect relationships firsthand. Blending yellow and red yogurt to form orange introduces early visual science principles in a purely tactile format.
Safety, Clean-Up, and Practical Pro-Tips
Ensure the child has no known dairy or food allergies before using yogurt or specific fruit purees. For an incredibly streamlined clean-up process, perform this activity with the infant wearing only a washable swim nappy. Once the session is complete, simply remove the child directly to a warm bath and wipe down the smooth plastic Tuff tray with a damp cloth.
5. Sticky Wall Fun
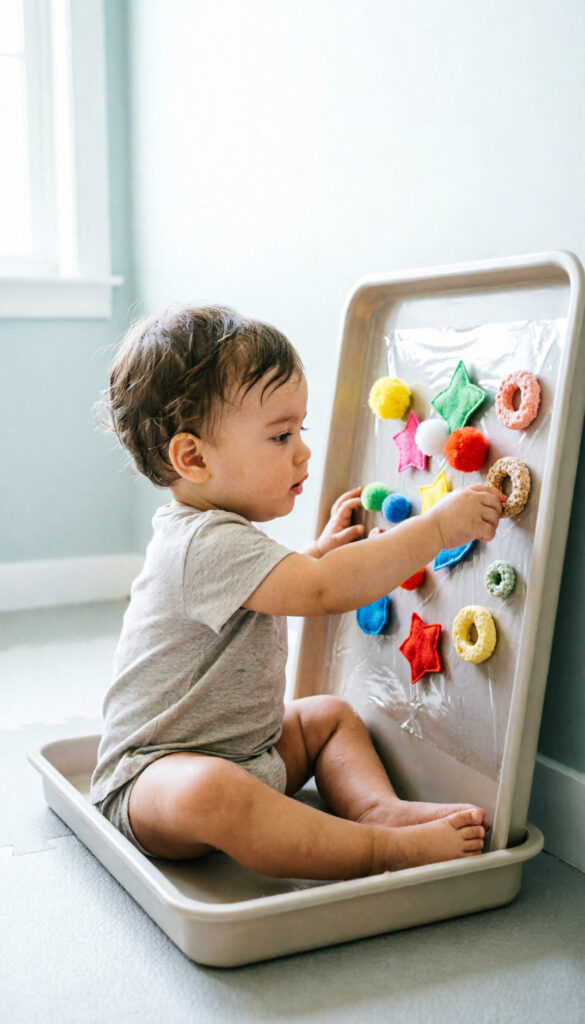
Introducing a vertical or inclined axis to play changes how a child engages their musculoskeletal system. This activity shifts focus from a downward gaze to an upward, reaching posture, strengthening different muscle groups.
Materials and Equipment
You will need a roll of wide, clear contact paper (adhesive sticky shelving liner), heavy-duty masking tape, large lightweight pompoms, clean dried autumn leaves, scraps of textured felt fabric, and large, ring-shaped whole-grain cereal loops.
Step-by-Step Setup Guide
-
Cutting: Cut a substantial segment of contact paper matching the inner diameter or side wall of your Tuff tray environment.
-
Mounting: Peel away the protective backing and secure the contact paper to a nearby wall or the propped-up surface of the Tuff tray, ensuring the sticky, adhesive side faces outward.
-
Tape Reinforcement: Secure all perimeter edges with heavy-duty masking tape to prevent the sheet from pulling away under structural strain.
-
Accessory Presentation: Place a shallow basket filled with the lightweight items (pompoms, leaves, felt pieces) directly on the tray floor beneath the sticky surface.
Developmental Benefits and Learning Outcomes
Working on a vertical plane encourages shoulder girdle stability, extended wrist extension, and core strength adjustment. Children who are learning to cruise or stand independently will find this setup highly reinforcing, as it encourages upward reaching and weight-shifting across their feet. It also teaches tactile discrimination as they feel the sticky adhesive versus the soft pompoms.
Safety, Clean-Up, and Practical Pro-Tips
Monitor children closely to ensure that smaller items, such as the cereal loops, are not choking hazards for infants under the age of twelve months. The contact paper can be peeled down effortlessly at the end of the session, leaving zero sticky residue on the tray or walls, making it an exceptionally clean option for indoor play.
6. Bubble Extravaganza
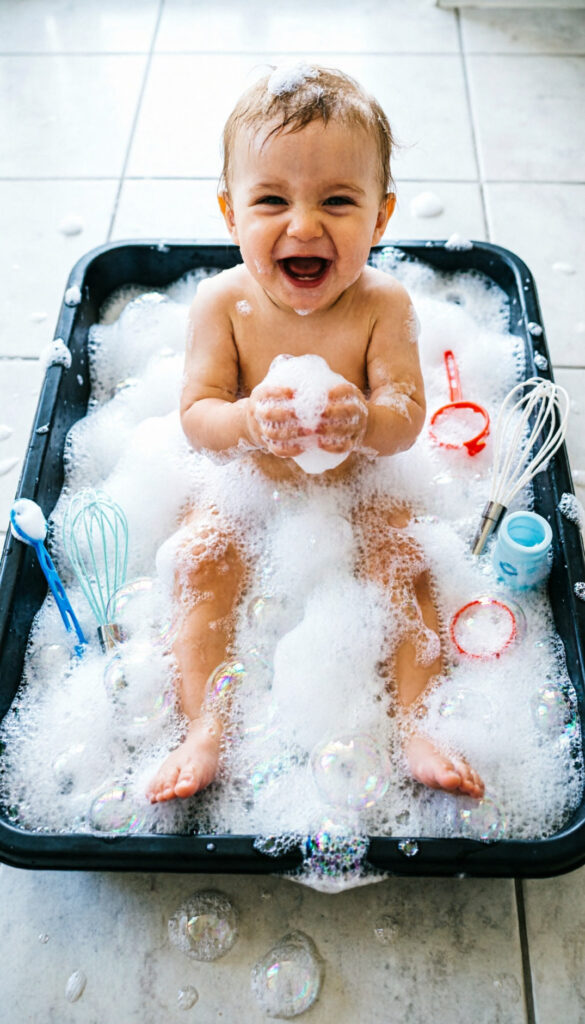
Bubbles offer a mesmerizing combination of visual tracking opportunities and short-lived tactile feedback. The iridescent surfaces capture attention, making this an exceptional tool for extending a child’s independent playtime focus.
Materials and Equipment
Gather tear-free baby wash or premium organic liquid soap, warm water, a stainless steel hand whisk, shallow dipping trays, large plastic bubble wands, and various open-ended slotted spoons.
Step-by-Step Setup Guide
-
Solution Base: Fill the shallow base of the Tuff tray with warm water.
-
Agitation: Add a generous amount of tear-free baby soap. Use the manual hand whisk vigorously to generate a thick, dense layer of stable foam and micro-bubbles across the entire surface area.
-
Tool Array: Place wands and whisks inside the foam, showing children how to manipulate the tools to create additional bubble structures.
Developmental Benefits and Learning Outcomes
Visual tracking is enhanced as infants observe individual bubbles floating upward and settling onto the tray surface. The physical act of reaching out to pop a bubble precisely coordinates visual inputs with motor outputs, directly strengthening hand-eye synchronization.
Safety, Clean-Up, and Practical Pro-Tips
While tear-free soap minimizes ocular irritation, have a clean, dry cloth on standby to quickly wipe away foam from a child’s eyes or face. If conducted indoors, ensure non-slip mats are placed entirely around the perimeter of the tray to prevent accidents from escaping suds.
7. Animal Farm Adventure
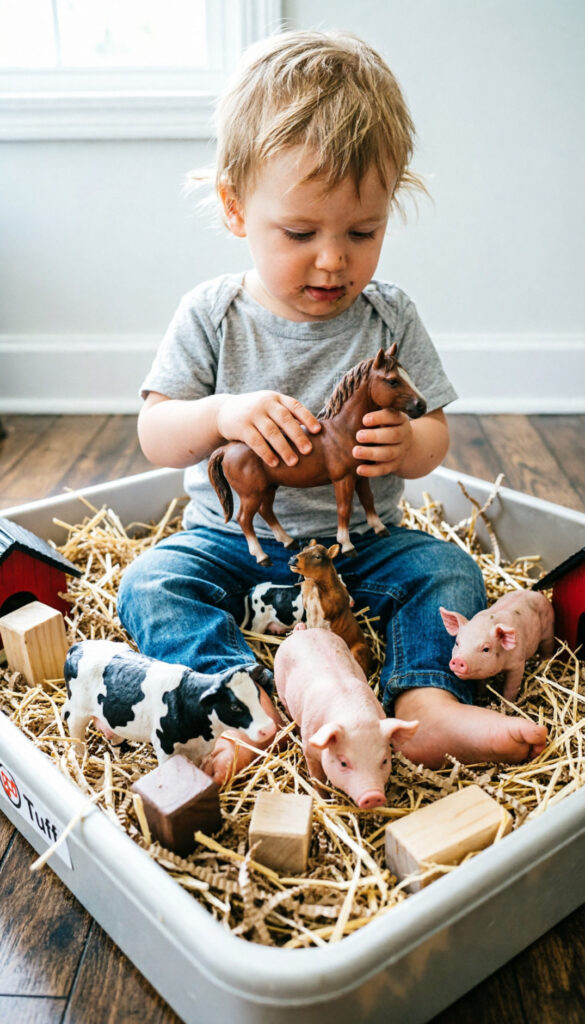
Imaginative small-world play allows children to process real-world observations, develop early language structures, and categorize objects within a bounded narrative environment.
Materials and Equipment
Prepare chunky, solid plastic farm animal figurines (cows, pigs, sheep, horses), natural shredded kraft paper to act as dry hay, a small secondary basin of water to function as a duck pond, and large wooden building blocks to construct corrals.
Step-by-Step Setup Guide
-
Zoning: Divide the Tuff tray into distinct thematic quadrant zones.
-
Zone 1 (Pasture): Populate one quadrant with the shredded kraft paper to serve as grazing pastures.
-
Zone 2 (Pond): Nest a shallow, water-filled dish into another quadrant to represent a farm pond.
-
Zone 3 (Shelter): Use the wooden building blocks to erect simple, open structures resembling barns or stables.
-
Distribution: Set the animal figurines within their respective zones, modeling simple play sequences for the children to observe.
Developmental Benefits and Learning Outcomes
This setup is a powerful catalyst for language development. Parents and educators can introduce targeted phonetic sounds (“moo,” “baaa”) alongside directional vocabulary (“inside the barn,” “over the fence”). Sorting the animals by color, size, or species also introduces foundational early classification and sorting concepts.
Safety, Clean-Up, and Practical Pro-Tips
Ensure all toy animals are solid with no hollow bases that could trap water and harbor mold. The shredded paper can be gathered and recycled easily, provided it remains dry. If it encounters water from the pond zone, simply discard those sections immediately to maintain optimal hygiene.
8. Nature’s Treasures
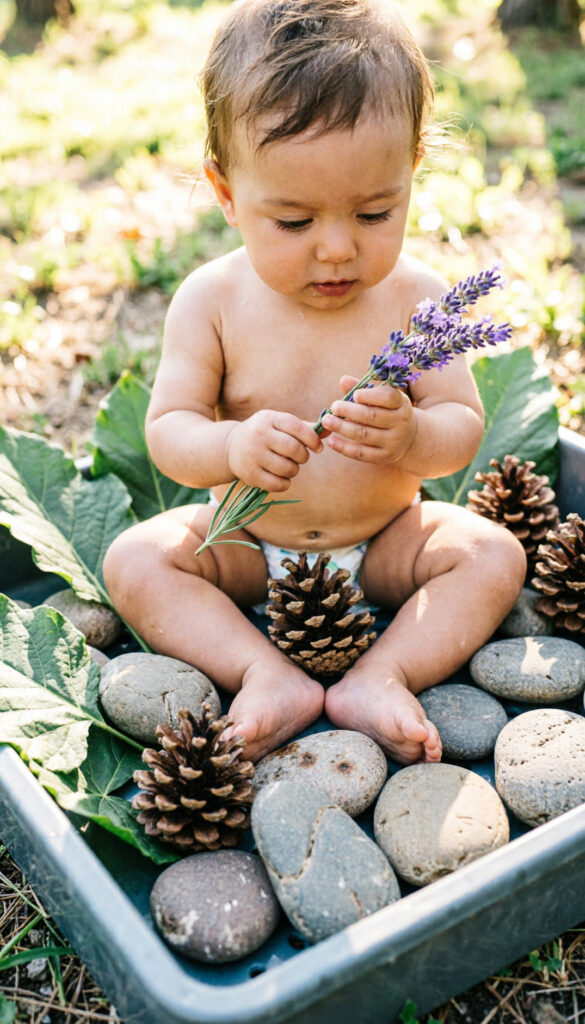
Biophilic design principles suggest that direct contact with natural elements grounds a child’s sensory system, providing nuanced textures, earthen scents, and irregular shapes that synthetic toys cannot replicate.
Materials and Equipment
Collect large, sturdy green leaves (such as monstera or oak), oversized pinecones, smooth river stones (minimum three inches in diameter to eliminate choking risks), large dried seed pods, and fresh sprigs of aromatic rosemary or lavender.
Step-by-Step Setup Guide
-
Sanitization: Thoroughly wash all foraged items under clean running water and dry completely to remove dirt and microscopic organisms.
-
Structural Layout: Arrange the natural elements in distinct, tactile clusters around the Tuff tray perimeter, creating a clear contrast between rough pinecones, smooth stones, and soft leaves.
-
Olfactory Focal Point: Crush a few leaves of the rosemary or lavender slightly to release the natural essential oils, placing them centrally to enhance the olfactory profile of the tray.
Developmental Benefits and Learning Outcomes
Children develop profound tactile discrimination as they contrast the cool, hard density of river stones with the dry, fibrous texture of a pinecone. The inclusion of aromatic herbs engages the olfactory cortex, enriching sensory memory mapping and expanding environmental vocabulary through terms like “rough,” “smooth,” “fragrant,” and “crisp.”
Safety, Clean-Up, and Practical Pro-Tips
Critical Safety Check: Verify that every single plant and botanical element introduced is certified non-toxic to infants. Avoid small acorns or tiny pebbles that could easily fit inside a standard choking-hazard testing cylinder. Discard any brittle leaves that fracture into sharp points under structural pressure.
9. Shaving Cream Cloud Play
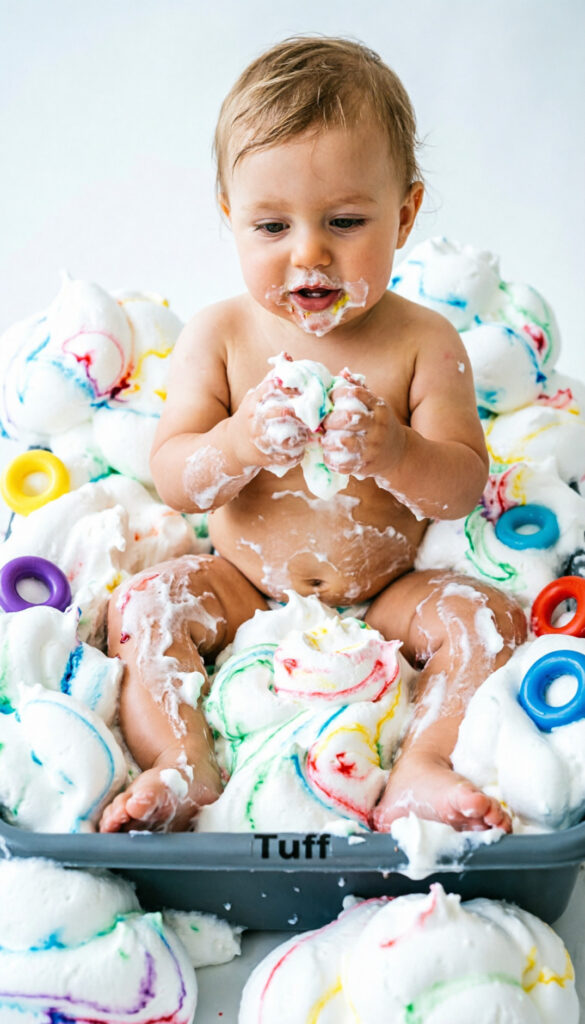
The airy, whipped consistency of foaming creams offers minimal mechanical resistance, allowing infants to experience deep sensory immersion through sweeping, uninhibited upper-limb movements.
Materials and Equipment
Use four cans of hypoallergenic, fragrance-free sensitive shaving foam, or equivalent amounts of whipped dairy cream for an entirely taste-safe option. Gather plastic toy vehicles, large geometric sorting rings, and liquid food dyes.
Step-by-Step Setup Guide
-
Dispensing: Discharge the contents of the foam cans directly into the center of the Tuff tray, forming a series of large, billowy mounds.
-
Color Accents: Drop minimal quantities of food coloring onto distinct peaks, allowing the color to remain concentrated on the surface for the child to blend manually.
-
Toy Imbedding: Press toy cars or plastic animals deep into the foam clouds so they are partially or completely obscured from view.
Developmental Benefits and Learning Outcomes
This activity focuses heavily on the concept of object permanence. Finding a toy car hidden beneath a mountain of white foam reinforces to the child that objects continue to exist even when out of direct sight. The fluid resistance of the foam also provides excellent proprioceptive input to the arm joints.
Safety, Clean-Up, and Practical Pro-Tips
For infants under twelve months who consistently explore objects using their mouths, whipped cream or a safe aquafaba foam alternative must be used instead of commercial shaving soaps. Shaving foam can dry out sensitive infant skin; wash hands thoroughly with fresh water immediately following play and apply a mild moisturizer if necessary.
10. Jelly Wiggle World
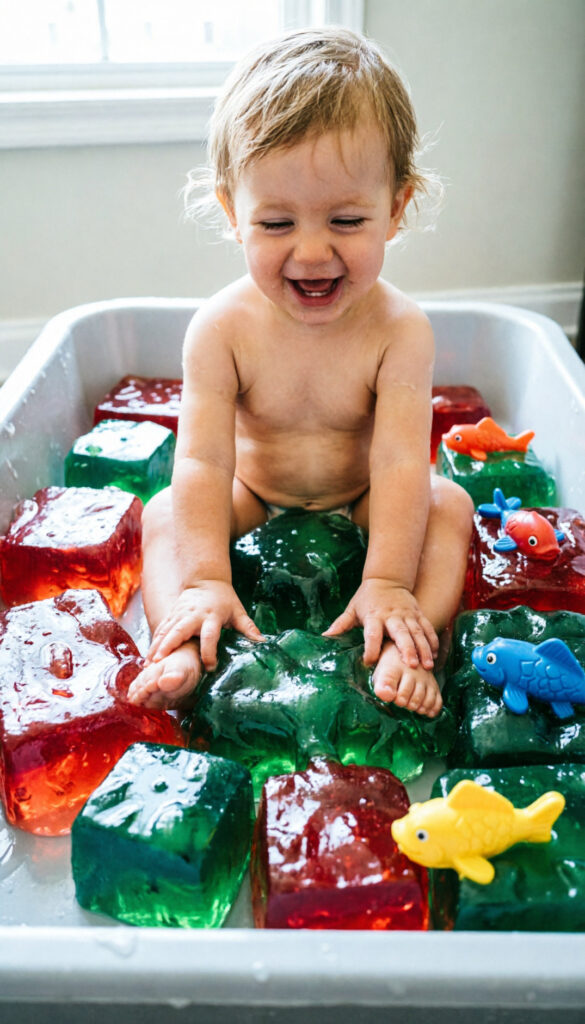
Gelatinous mediums introduce structural instability into sensory play. The cool temperature, slippery surface, and elastic bounce of gelatin challenge fine motor control in a unique way.
Materials and Equipment
Purchase four to five packets of sugar-free fruit gelatin mix (varying colors such as strawberry red and lime green), large clean mixing bowls, a refrigerator, clean plastic kitchen tools, and large, solid plastic marine animals.
Step-by-Step Setup Guide
-
Batch Preparation: Prepare the gelatin batches according to package directions, utilizing slightly less water than called for to create a firmer, more resilient play structure.
-
Embedding Toys: Pour the liquid gelatin into shallow baking trays, submerge the plastic marine animals into the liquid, and refrigerate overnight until firmly set.
-
Tray Assembly: Invert the set gelatin blocks onto the Tuff tray surface, allowing them to slide out as large, wobbly, translucent geometric masses.
Developmental Benefits and Learning Outcomes
The high level of elasticity inherent in gelatin requires precise finger pressure calibration. If an infant squeezes too firmly, the medium breaks; if too loosely, it slips away. This feedback refines the grading of muscle force in the fingers and hands. The thermal contrast of the chilled gelatin also stimulates thermal receptors in the skin.
Safety, Clean-Up, and Practical Pro-Tips
Use sugar-free alternatives to prevent excessive, unmanageable stickiness on the skin and tray surface. This activity should be executed on a easily cleanable floor surface. Warm water dissolves gelatin effortlessly, so use a warm, damp microfiber cloth to clean the tray and toys instantly without scrubbing.
11. Pompom Plunge
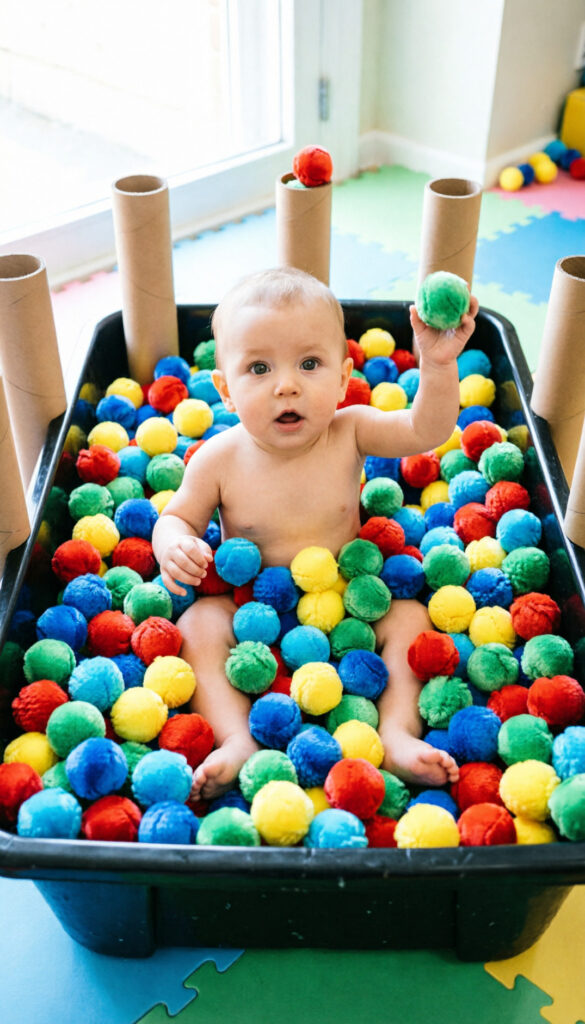
Dry, lightweight components allow for structured sorting, color recognition, and structural posting exercises. This activity is entirely mess-free, making it perfect for quick indoor implementation.
Materials and Equipment
Gather 200 to 300 multi-colored acrylic pompoms (ranging from one to three inches in diameter), various sizes of clean, recycled cardboard postal tubes, strong masking tape, kitchen tongs, and multi-compartment muffin tins.
Step-by-Step Setup Guide
-
Tube Integration: Tape the cardboard postal tubes vertically to the inside walls or legs of the Tuff tray setup, creating channels that empty onto the tray floor.
-
Base Loading: Empty the entire collection of colorful pompoms onto the floor of the Tuff tray.
-
Receptacle Setup: Place the multi-compartment muffin tins adjacent to the tubes to act as sorting drop zones.
Developmental Benefits and Learning Outcomes
Dropping pompoms through the vertical tubes introduces early lessons in gravitational acceleration and spatial routing. Utilizing kitchen tongs to pick up individual pompoms transitions the child from a basic palmar grasp to a mature digital grasp, directly preparing the hand architecture for future tasks like using scissors and writing instruments.
Safety, Clean-Up, and Practical Pro-Tips
Ensure that the smallest pompoms used exceed two inches in diameter if the participating children are prone to placing non-food items in their mouths. This activity features an incredibly rapid clean-up loop: simply gather the dry pompoms into a mesh laundry bag for storage. If they ever become soiled, they can be laundered inside the same mesh bag on a gentle machine cycle.
Comparative Planning Framework for Educators and Parents
To help optimize your planning schedule, the following table summarizes the preparation time, mess factor, and primary developmental focus of each activity outlined above.
| Activity Name | Prep Time (Mins) | Mess Index (1-5) | Primary Developmental Focus Area | Taste-Safe Status |
| Water Play Wonderland | 5 | 2 | Bilateral Coordination & Basic Physics | Yes (with pure water) |
| Sensory Bin Bonanza | 5 | 2 | Pincer Grasp Development & Volume Estimation | Yes (raw, but choking risk) |
| Edible Mud Kitchen | 15 | 5 | Olfactory Integration & Taste Exploration | Fully Certified Safe |
| Baby-Safe Paint Party | 10 | 4 | Early Mark-Making & Fine Motor Manipulation | Fully Certified Safe |
| Sticky Wall Fun | 10 | 1 | Shoulder Girdle Stability & Standing Support | No |
| Bubble Extravaganza | 5 | 3 | Visual Tracking & Hand-Eye Coordination | No |
| Animal Farm Adventure | 10 | 2 | Language Acquisition & Creative Small-World Play | No |
| Nature’s Treasures | 15 | 1 | Tactile Discrimination & Biophilic Grounding | Dependent on botanicals |
| Shaving Cream Cloud | 5 | 4 | Object Permanence & Spatial Exploration | Only if using whipped cream |
| Jelly Wiggle World | 120 (Chill) | 4 | Muscle Force Calibration & Thermal Sensation | Fully Certified Safe |
| Pompom Plunge | 5 | 1 | Gravitational Mapping & Tool Manipulation | No |
Frequently Asked Questions
What is the ideal age to introduce a Tuff tray to a baby?
A Tuff tray can be safely introduced as soon as an infant can sit independently with stability, typically around six to eight months of age. At this stage, ensure that all activities rely exclusively on large, taste-safe materials, as oral exploration is the primary method of sensory processing for this demographic.
How do I thoroughly clean and sanitize a Tuff tray after messy play?
For standard clean-up, wipe down the high-density plastic surface with warm water and a mild, eco-friendly dish soap. To sanitize the tray after exposure to food items like yogurt, gelatin, or crushed biscuits, spray the surface uniformly with a child-safe, non-toxic sanitizing solution, let it sit for two minutes, and wipe it dry with a fresh microfiber cloth.
My child dislikes getting their hands messy. How can I encourage them?
Sensory aversion is a common developmental phase. If a child hesitates to touch wet or sticky mediums like mud or shaving cream, do not force direct hand contact. Instead, introduce intermediate tools such as long-handled wooden spoons, plastic spatulas, or even place the messy medium inside a sealed zip-top bag taped to the tray surface. This allows them to explore the texture with a comfortable boundary.
How can I prevent the food items from attracting pests if playing outdoors?
When hosting sensory sessions outdoors, ensure the activities are timed away from peak insect hours (typically late afternoon). Keep the mixtures covered until the moment play begins. Immediately upon the conclusion of the activity, bag the organic waste, rinse the Tuff tray thoroughly with a garden hose, and dry it completely to eliminate any lingering sugary or protein-based residues.
Conclusion
Tuff tray activities provide structured spaces for essential sensory exploration, supporting physical and cognitive milestones. By altering variables such as viscosity, orientation, temperature, and tool design, parents and early childhood educators can tailor these environments to match a child’s evolving developmental needs. Embracing the structured mess of sensory play ensures that children are given the freedom to discover, experiment, and map the physical world, building a strong foundation for future learning.